Sony XAV-7W Operating Instructions Manual
Media center/receiver
Hide thumbs
Also See for XAV-7W:
- Operating instructions manual (262 pages) ,
- Installation/connections manual (82 pages) ,
- Service manual (80 pages)

Related Manuals for Sony XAV-7W


Summary of Contents for Sony XAV-7W
- Page 1 3-243-055-22(1) Media Center/ Receiver Operating Instructions For installation and connections, see the supplied Installation/Connections manual. XAV-7W © 2002 Sony Corporation...
-
Page 3: Table Of Contents
Table of Contents Features ........................4 Precautions ....................... 5 Getting Started Preparations ......................6 Location of Controls ....................8 Basic Operation Listening to Radio or CD/MD/”MG Memory Stick” ..........10 Watching TV/Other Video Components ..............12 Setting a Security Code ..................14 Setting the Clock .................... -
Page 4: Features
Built-in amp with 45 watts × 4 In spite of its compact size, the XAV-7W has 4 powerful amplifier channels delivering 45 watts each, for effortless music reproduction. DSO creates a virtual soundstage The DSO (Dynamic Soundstage Organizer) developed by Sony improves the listening experience by creating a soundstage with “virtual speakers”. -
Page 5: Precautions
“Installation/Connections” manual If you have any questions or problems concerning and read it carefully. Make sure to install this your unit, please consult your nearest Sony dealer. unit properly. – Improper installation may cause battery drain or a short circuit. -
Page 6: Getting Started
Getting Started Preparations Resetting the unit Before operating the unit for the first time, or after Notes replacing the car battery or changing the connections, you • When the Reset button is pushed, the must reset the unit. time and all stored settings are lost and will have to be reprogrammed. -
Page 7: Closing The Monitor
Adjusting the monitor angle Note Do not move the monitor by hand. You can adjust the angle of the monitor for best viewing. Press ANGLE –/+ repeatedly. The buttons adjust monitor position in discrete steps. ANGLE –/+ – + button: Monitor is tilted backward. –... -
Page 8: Location Of Controls
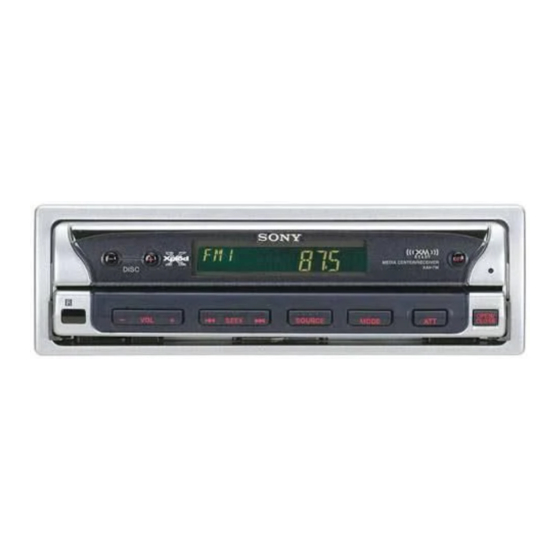
Location of Controls Main unit Monitor closed 1 DISC –/+ buttons 6 Display window 7 OFF (Standby/Power off) button* 2 Reset button 3 Sensor for card remote commander 8 OPEN/CLOSE button 4 VOL (volume adjust) –/+ buttons 9 ATT button 5 SEEK/AMS –/+ buttons 0 MODE button qa SOURCE (Power on/Radio/CD/MD/VIDEO or TV) - Page 9 Card remote commander The unit can be operated with the card remote commander. For safety, stop the car before using the card remote commander, or have a passenger operate it. 1 DSPL (display mode change) button 9 VOL (volume adjust) +/– buttons 2 Number buttons 0 EQ7 button 3 DSO button...
-
Page 10: Basic Operation
Basic Operation Listening to Radio or CD/MD/”MG Memory Stick” Note Listening to the radio Listening to radio or CD/MD/”MG Memory Stick” is possible regardless of the monitor setting (opened or closed). 1 Select tuner. With each press of SOURCE, the selection is switched in the order: FM/AM t CD* t MD*/MS* t TV*. - Page 11 Preparation: To listen CDs, MDs, or “MG Memory Listening to CD/MD/”MG Sticks” on this unit, an optional Sony CD/MD changer Memory Stick” and/or MG Memory Stick system-up player must be connected to the connection box. 1 Select CD, MD, or MS.
-
Page 12: Watching Tv/Other Video Components
Watching TV/Other Video Components Watching TV Preparation: To view TV programs on this unit, an optional Sony TV tuner unit XT-63V (NTSC system) must be connected to the connection box. 1 Open up the monitor (page 6). D IS C... - Page 13 Watching other video Preparation: To view other video sources on this unit, optional video components must be connected to the components connection box. 1 Open up the monitor (page 6). D IS C V O L S E E > O FF S O U R C E...
-
Page 14: Setting A Security Code
Setting a Security Code By setting a security code (password consisting of a 4-digit number), you can prevent use of the unit by persons other than the owner. MENU To set a security code Follow the steps below with the card remote commander while the monitor is open. - Page 15 To delete the security code In step 2, select “Code Delete” and then proceed the remaining steps until step 7. Entering the security code When a security code is set, an indication requesting input of the security code appears on the display window when the unit is connected to the battery after having been disconnected from the battery for a long period of time (see “Note”...
-
Page 16: Setting The Clock
Setting the Clock This unit uses 12-hour time indication. To set the clock, use the card remote commander while the monitor is open. Press MENU. MENU Press V or v to select “Clock”. C l o c k Press ENTER. C l o c k ENTER 1 : 0 0... -
Page 17: Advanced Operation
Advanced Operation FM/AM Reception Reading the monitor and display window Standby mode Information on the selected source is shown on the monitor When the unit is in standby mode with or display window (when monitor is closed). only the clock indication shown, pressing SOURCE shows the selected source on Monitor indication during radio reception the monitor or the display window. - Page 18 FM/AM Reception Display window indication during radio reception Notes The following information is not shown on the display window: • List display • Menu display 1 Source type and frequency band 2 Preset number 3 Frequency/clock/ATT status/station name When “Dual Information” is set to “on”, the time is shown here (page 41).
-
Page 19: Storing Stations Automatically
Storing stations automatically — Best Tuning Memory (BTM) MODE You can have the unit automatically select stations with the strongest signals in the selected band and store these in the order of their frequency. 6 stations each can be stored in the FM1, FM2, FM3, AM1, and AM2 bands, resulting in a total MENU of 18 FM stations and 12 AM stations. - Page 20 FM/AM Reception To listen to stored stations When there is noise during stereo reception In radio reception, press the number buttons or V and v to select the desired station. Selecting mono reception as follows may improve the sound. When you cannot receive stored Follow the steps below with the card remote stations, such as when driving in a commander while the monitor is open.
-
Page 21: Storing Stations Manually
Storing stations manually You can also store manually desired stations in memory. Press SOURCE to switch to radio reception. Press MODE to select the frequency band in which you want to store stations. With each press of the button, the unit cycles through the bands in the following order: FM1 t FM2 t FM3 tAM1 t AM2 SOURCE... -
Page 22: Assigning A Name To A Station
FM/AM Reception Assigning a name to a station (Station Memo) When you have assigned a name to a broadcast station, the name will be shown while the station is being received. Up to 62 station names can be stored, and each name can be up to 8 characters long. - Page 23 Deleting a name Press MENU in tuner mode. Press V or v to select “Name Delete”. N a m e D e l e t e Press ENTER. Press V or v to select the station name to delete. N a m e D e l e t e B B C R 1 Press and hold ENTER for more than 2 seconds.
-
Page 24: Searching For A Station By Name (List)
FM/AM Reception Searching for a station by name (List) When names have been assigned to broadcast stations, you can search for them by name. For information on how to assign names, see page 22. To activate list display, follow the steps below with the card remote commander while the monitor is open. -
Page 25: Cd/Md/"Mg Memory Stick" Playback
Preparation: To listen CDs, MDs, or “MG Reading the monitor and display Memory Sticks” on this unit, an optional window Sony CD/MD changer and/or MG Memory Stick system-up player must be Information on the selected source is shown on the monitor connected to the connection box. - Page 26 CD/MD/”MG Memory Stick” Playback Notes Display window indication during CD playback The following information is not shown in the display window: • List display • Menu display 1 Source type and changer number 2 Disc number 3 Track number* 4 Play time* When “Dual Information”...
-
Page 27: Repeat Playback
Repeat playback You can repeatedly play back the current track, or all tracks on the current album/disc. REPEAT TRACK: Repeat of current track •• REPEAT ALBUM: Repeat of current album (during playback of •• MP3 files) REPEAT DISC: Repeat of current disc ••... -
Page 28: Shuffle Playback
CD/MD/”MG Memory Stick” Playback Shuffle playback You can play back all tracks on the current album/disc or SHUF all discs in the changer in random order. SHUFFLE ALBUM: Shuffle playback of current album (during •• playback of MP3 files) SHUFFLE DISC: Shuffle playback of current disc ••... -
Page 29: Labeling A Cd - Disc Memo
MENU it every time the disc is played. When you use an optional Sony CD changer compatible with the Custom File feature, each CD can have a name of up to 8 characters, and you can use the Disc Memo and List functions. - Page 30 CD/MD/”MG Memory Stick” Playback Deleting a name Press MENU while selecting CD unit with CUSTOM FILE function. Press V or v to select “Name Delete”. N a m e D e l e t e Press ENTER. Press V or v to select the disc name to delete. N a m e D e l e t e B A C H...
-
Page 31: Locating A Disc By Name (List)
Locating a disc by name (List) In the following cases, you can select a disc by name. • CDs using Disc Memo (page 29) • MDs • CDs using CD TEXT information, when you play CD TEXT disc on a CD unit with CD TEXT function. LIST To activate list display, follow the steps below with the card remote commander while the monitor is open. -
Page 32: Tv/Other Video Components
TV/Other Video Components Preparation: To view TV programs on Storing channels this unit, an optional Sony TV tuner unit XT-63V (NTSC system) must be Follow the steps below with the card remote commander connected to the connection box. while the monitor is open. -
Page 33: Selecting The Screen Mode
Selecting the screen mode Besides the normal mode (4:3), the screen can also be set to full mode, zoom mode, or widezoom mode. The screen mode can be selected using the card remote commander, after opening up the monitor. MENU Select TV or VIDEO, then press MENU. -
Page 34: Sound Settings
Sound Settings Dynamic Soundstage Organizer (DSO) If your speakers are installed into the lower part of the doors, the sound will come from below and may not be clear. The DSO (Dynamic Soundstage Organizer) function is designed to improve the listening experience by creating a soundstage with “virtual speakers”. -
Page 35: Using The Equalizer (Eq7)
Using the equalizer (EQ7) This unit incorporates 7 preset equalizer curves for various types of music. In addition, you can also alter the curves and store your own settings. You can store different equalizer settings for each source. MENU Selecting the equalizer curve Select the source (CD, MD, radio, etc.) for which you want to use the equalizer. -
Page 36: Equalizer Curve
Sound Settings Storing a personalized equalizer curve Follow the steps below with the card remote commander while the monitor is open. Select the source (CD, MD, radio, etc.) for which you want to use the equalizer. Press MENU. Pressing EQ7 for more than 2 seconds displays the EQ7 tune setting instead of executing steps 2 - 4. -
Page 37: Adjusting The Sound Characteristics (Bas/Tre/Bal/Fad/Sub)
Adjusting the sound characteristics (BAS/TRE/BAL/FAD/SUB) In addition to the functions described in the preceding sections, this unit allows adjusting the following items. BAS (Bass): Bass level TRE (Treble): Treble level BAL (Balance): Left/right speaker balance (output in opposite channel is attenuated) FAD (Fader): Front/rear speaker balance (output in opposite channel is attenuated) SOUND... -
Page 38: Setting The Low-Pass Filter (Lpf)
Sound Settings Setting the low-pass filter (LPF) This setting lets you control the frequency response of a subwoofer connected to the subwoofer audio output. By choosing the appropriate low-pass filter cutoff frequency, you can ensure that the subwoofer provides solid bass without drawing attention to itself. -
Page 39: Setting The High-Pass Filter (Hpf)
Setting the high-pass filter (HPF) This setting lets you control the frequency response to fit the characteristics of installed speakers. By choosing the appropriate high-pass filter cutoff frequency, you can ensure that the speakers produce crisp mid/high-range sound. For example, if the 78 Hz setting is selected, only MENU signal components above 78 Hz are sent to the speakers. -
Page 40: Setting The Sound Level For Connected Aux Components
Sound Settings Setting the sound level for connected AUX components The sound output level of external video components can be adjusted when they are connected to the INPUT1 and MENU INPUT2 of the supplied connection box. Selecting the source Press SOURCE to select “VIDEO1, VIDEO2”. SOURCE ENTER Adjusting the output level... -
Page 41: Other Functions
Other Functions • Rear Monitor Out Sound and display settings To select the source output to a rear monitor. Outline Video1 If the setting applies only to a particular Video2 source, the menu item does not appear while Front: Selected source is output to a rear that source is not selected. -
Page 42: Edit Menu
• Name Delete (when FM, AM, CD, TV* is auto: OSD is automatically turned off when a selected) Sony bus compatible video CD player is To delete names assigned to CDs. (See page connected and a video CD is detected. - Page 43 Changing a setting Settings can be changed using the card remote commander, after opening up the monitor. MENU ENTER Press MENU. Press V or v to select the desired item. Press B or b to select the desired setting (for example “on” or “off”). Press ENTER or MENU.
-
Page 44: Using The Rotary Commander
In tuner mode: FM1 t FM2 t FM3 t AM1 t AM2 In CD mode*: CD1 t CD2 t CD3 t ... The XAV-7W can be controlled with the In MD mode*: MD1 t MD2 t MD3 t ... optional rotary commander RM-X4S. - Page 45 To change stations or discs, you need to push in and rotate the knob every time. After several seconds, the regular display appears again. * When an optional Sony CD/MD changer, MG Memory Stick System-up Player or TV tuner unit is connected.
-
Page 46: Replacing The Lithium Battery
Other Features Additional Information segments are defective and may not light up Card remote commander properly. However, these segments will not precautions interfere with your viewing. • Do not leave the card remote commander on the dashboard, on the steering wheel, or Replacing the lithium battery in other locations exposed to direct sunlight. -
Page 47: Dismounting The Unit
If movement of the monitor Dismounting the unit has been impeded during the monitor setting Press and hold OFF for more than 2 seconds to turn off the unit. If movement of the monitor during opening or closing has been impeded by the gear shift lever or another obstacle, follow the steps Insert the supplied tool between below to set again. - Page 48 Additional Information Insert a flathead screwdriver between the bracket and mounting spring. Gently pry the spring toward the unit while pulling the unit out a little. Repeat on the opposite side and remove the unit. 4 mm...
-
Page 49: Troubleshooting
In such a case, contact the Technical are erased. Information Center, your dealer, or the , The fuse has blown. nearest Sony service center. Makes noise when the ignition key is in the ON, ACC, or OFF position. General , The leads are not matched correctly with the car's accessory power connector. - Page 50 Troubleshooting Cannot receive. Only noise is CD/MD heard. , Connect the power antenna control lead A disc cannot be loaded. (blue) or accessory power supply lead (red) to the power supply lead of the car’s , The CD/MD is forcibly inserted upside antenna booster (for cars with imprinted down or in the wrong way.
- Page 51 CD/MD error displays/Messages When there is a problem related to a CD or MD changer connected to the unit, an alarm tone is heard and a flashing error indication is shown for 5 seconds. Error displays Cause Remedy BLANK MD is not recorded. Insert other MD.
- Page 52 530 - 1,602 kHz (at 9 kHz step) Connection box 530 - 1,710 kHz (at 10 kHz step) Intermediate frequency Inputs Video/audio 10.7 MHz/450 kHz (Sony bus compatible, 1) Usable sensitivity BUS control input connector (1) 30 µV Video/audio (2) Outputs Video/audio (1)
- Page 56 ×...
- Page 57 • • – • – • – • • – • • • • • – – – • –...
- Page 58 • • • DISC OPEN/ SOURCE MODE CLOSE SEEK > • • OPEN/CLOSE...
- Page 59 ANGLE –/+ – • • OPEN/CLOSE • • •...
- Page 61 qd V v 6 B b...
- Page 63 • •...
- Page 64 D IS C V O L S E E > O FF S O U R C E A T T O P E C LO...
- Page 65 D IS C V O L S E E > O FF S O U R C E A T T O P E C LO...
- Page 66 MENU C o d e E d i t ENTER C o d e E d i t C o d e : C o d e E d i t Y e s : N o...
- Page 68 MENU C l o c k C l o c k ENTER 1 : 0 0...
- Page 69 9 7 7 MH z I ON L OU D D S O E Q 7 N e w A g e 1 0 : 3 0 • • ••••••••...
- Page 70 • •...
- Page 71 MODE MENU SOURCE ENTER • • B T M...
- Page 73 SOURCE ENTER • 9 7 7 MH z M e m •...
- Page 74 MENU N a m e E d i t ENTER N a m e E d i t • N a m e E d i t • • • < •...
- Page 75 N a m e D e l e t e N a m e D e l e t e B B C R 1...
- Page 76 LIST 9 7 7 MH z ENTER C R 1 L OU D L I S T 1 B B C R 1 2 B B C R 2 A B C : 3 0 • •...
- Page 77 C D 1 D I S C T A C K 2 5 . 4 D i s c N a m e R E P L OU D D S O E Q 7 N e w A g e 1 0 : 3 0 •...
- Page 78 • • • •...
- Page 79 •• •• •• REPEAT TRACK REPEAT ALBUM •• •• REPEAT REPEAT DISC •• •• ••...
- Page 80 SHUF •• •• •• •• SHUFFLE ALBUM SHUFFLE DISC •• •• SHUFFLE SHUFFLE SHUFFLE CHANGER •• •• •• •• • • •• • ••...
- Page 81 MENU ENTER N a m e E d i t • N a m e E d i t • • • • N a m e E d i t...
- Page 82 N a m e D e l e t e N a m e D e l e t e B A C H...
- Page 83 • • • LIST ENTER D S C T A C K 2 5 4 a t a R E P L OU D L I S T T o c • • ········ : 3 0 •...
- Page 84 MODE MENU SOURCE ENTER A u t o M e m o r y • • • •...
- Page 85 MENU ENTER <...
- Page 86 ·· ·· ·· ·· • • DSO··1 DSO··2 DSO··3 DSO··off ··...
- Page 87 MENU ENTER EQ7··Vocal EQ7··Club EQ7··Jazz EQ7··New Age EQ7··Xplod EQ7··off EQ7··Custom EQ7··Rock ··...
- Page 88 E Q 7 T u n e • •• • E Q 7 T u n e V o c a l 62 Hz 157 Hz 396 Hz 1.0 kHz 16 kHz 6.3 kHz 2.5 kHz...
- Page 89 SOUND B A L •• ••...
- Page 90 MENU L P F 7 8 H z...
- Page 91 MENU H P F 7 8 H z...
- Page 92 MENU SOURCE ENTER A u x S o u n d L e v e l A u x S o u n d L e v e l 1 d B...
- Page 93 • • • Brightness Color • • • • • • • Full Zoom WideZoom Normal • •...
- Page 94 • • • • • • • • • • • • •...
- Page 95 MENU ENTER...
- Page 96 SO U N D D S P L M O D E M O D E D SP L S O U N D...
- Page 98 • • • • • — — • • • • • •...
- Page 104 × × × × µ × × × × × Sony Corporation Printed in Japan Printed on recycled paper...
Need help?
Do you have a question about the XAV-7W and is the answer not in the manual?
Questions and answers