Table of Contents
Advertisement
Quick Links
Download this manual
See also:
Instruction Manual
SERVICE MANUAL
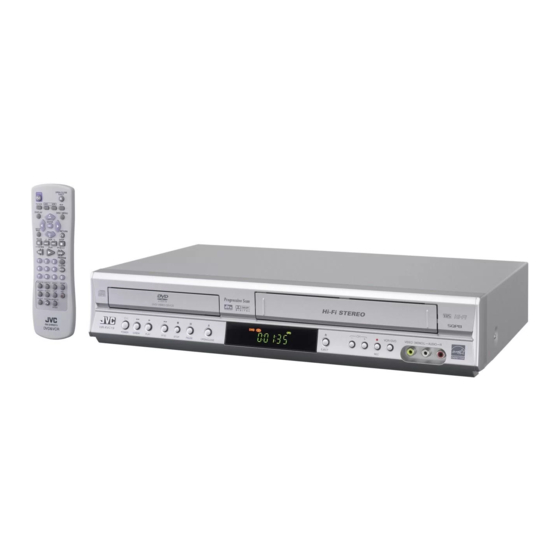
DVD PLAYER & VIDEO CASSETTE RECORDER
5
YD068
2005
HR-XV28SEF,HR-XV28SEK,
HR-XV28SER,HR-XV28SEU,
HR-XV28SEY,HR-XV28SEZ
HR-XV28SEF,HR-XV28SEK,HR-XV28SER,HR-XV28SEU,HR-XV28SEY,HR-XV28SEZ [D5PV0]
1
PRECAUTION. . . . . . . . . . . . . . . . . . . . . . . . . . . . . . . . . . . . . . . . . . . . . . . . . . . . . . . . . . . . . . . . . . . . . . . . . 1-3
2
SPECIFIC SERVICE INSTRUCTIONS . . . . . . . . . . . . . . . . . . . . . . . . . . . . . . . . . . . . . . . . . . . . . . . . . . . . . . 1-6
3
DISASSEMBLY . . . . . . . . . . . . . . . . . . . . . . . . . . . . . . . . . . . . . . . . . . . . . . . . . . . . . . . . . . . . . . . . . . . . . . . 1-9
4
ADJUSTMENT . . . . . . . . . . . . . . . . . . . . . . . . . . . . . . . . . . . . . . . . . . . . . . . . . . . . . . . . . . . . . . . . . . . . . . . 1-10
5
TROUBLESHOOTING . . . . . . . . . . . . . . . . . . . . . . . . . . . . . . . . . . . . . . . . . . . . . . . . . . . . . . . . . . . . . . . . . 1-37
TABLE OF CONTENTS
COPYRIGHT © 2005 Victor Company of Japan, Limited
(EK model)
(EU, EY, EZ models)
(EF, ER models)
(EF model)
No.YD068
2005/5
Advertisement
Chapters
Table of Contents

Subscribe to Our Youtube Channel
Related Manuals for JVC HR-XV28SEF


Summary of Contents for JVC HR-XV28SEF
-
Page 1: Table Of Contents
(EF, ER models) (EF model) HR-XV28SEF,HR-XV28SEK,HR-XV28SER,HR-XV28SEU,HR-XV28SEY,HR-XV28SEZ [D5PV0] TABLE OF CONTENTS PRECAUTION............... . . 1-3 SPECIFIC SERVICE INSTRUCTIONS . - Page 2 SPECIFICATION HR-XV28SEF HR-XV28SEK HR-XV28SER/SEU/SEY/SEZ General Power requirement AC 200V - 240V, 50 Hz Power consumption 17 W 430 × 78.5 × 265 mm (w/h/d) Dimensions (approx.) Mass (approx.) 4.2 kg Operating temperature 5°C to 35°C (41°F to 95°F) Operating humidity...
-
Page 3: Precaution
SECTION 1 PRECAUTION SAFTY PRECAUTIONS Prior to shipment from the factory, JVC products are strictly in- Consequently, when servicing these products, replace the spected to conform with the recognized product safety and elec- cathode ray tubes and other parts with only the specified trical codes of the countries in which they are to be parts. - Page 4 1.1.2 Safety Check after Servicing Examine the area surrounding the repaired location for damage (4) Leakage current test or deterioration. Observe that screws, parts and wires have been Confirm specified or lower leakage current between earth returned to original positions, Afterwards, perform the following ground/power cord plug prongs and externally exposed ac- tests and confirm the specified values in order to verify compli- cessible parts (RF terminals, antenna terminals, video and...
- Page 5 Preventing static electricity Electrostatic discharge (ESD), which occurs when static electricity stored in the body, fabric, etc. is discharged, can destroy the laser diode in the traverse unit (optical pickup). Take care to prevent this when performing repairs. 1.2.1 Grounding to prevent damage by static electricity Static electricity in the work area can destroy the optical pickup (laser diode) in devices such as DVD players.
-
Page 6: Specific Service Instructions
SECTION 2 SPECIFIC SERVICE INSTRUCTIONS DIFFERENT TABLE OF FEATURE The following table indicates main different points between models HR-XV28SEF, HR-XV28SEK, HR-XV28SER, HR-XV28SEU and HR-XV28SEY/EZ. MODEL NAME HR-XV28SEF HR-XV28SEK HR-XV28SER ← SCART CABLE PROVIDED OPTIONAL ← BROADCASTING SYSTEM PAL B/G, SECAM L... - Page 7 - Option code is displayed in TV OPT5 00000000 - First byte of OPTO is changed whenever front HR-XV28SEY OPT0 00000000 eject key + open/close key. OPT1 00000000 - JVC remote conroller No.0. OPT2 00000000 OPT3 00000000 OPT4 00000000 OPT5 00000000 HR-XV28SER...
- Page 8 SERVICE INFORMATION FOR EEPROM (DVD) POWER ON DETECT NEW EEPROM (OPTION EDIT SCREEN) DVD LOGO Status (NO Disk status) MODEL HR-XV28SEU HR-XV28SEK HR-XV28SEZ HR-XV28SEY HR-XV28SER HR-XV28SEF NAME HEX Remote control OPT 1 44 Pause key 2 in order. OPT 2 45...
-
Page 9: Disassembly
SECTION 3 DISASSEMBLY This service manual does not describe DISASSEMBLY. (No.YD068)1-9... -
Page 10: Adjustment
SECTION 4 ADJUSTMENT POSITION DRAWING OF DECK MECHANISM PARTS (VCR) Top View Order Of Dis- Ref. Posi assembled Part Fixing Type Draw- Parts firstly tion ings Disassembled Drum Assembly 3 screws Plate Top 2 hooks Holder Assembly CST 6 chasses Gear Assembly Rack F/L 1 hook 2,3,4... - Page 11 DISASSEMBLY AND ASSEMBLY OF DECK MECHANISM (VCR) Drum Assembly Cable Flat (S1) (S1) (S1) Cap, FPC Holder FPC Fig. A-1 1. Disassembly of Drum Assembly Cautions in assembly of FPC (Figure A-1) 1) Separate cable flat from the Drum FPC and the Capstan Motor.
- Page 12 Plate Top (Fig. A-2-1) (B') Holder Assembly CST (Fig. A-2-2) Arm Assembly F/L (Fig. A-2-5) Lever Assembly S/W (Fig. A-2-6) (H4) Opener Door (Fig. A-2-4) (H3) Gear Assembly Rack F/L (Fig. A-2-3) Fig. A-2 1-12 (No.YD068)
-
Page 13: Fig. A-
2. Disassembly of Plate Top (Fig. A-2-1) 4. Disassembly of Gear Assembly Rack F/L (Fig. A-2-3) 1) Separate the right part while leaning back the (B) part of the plate top toward the arrow direction. 1) Separate the hook (H3) while leaning ahead the hook (3) 2) Separate the left part while leaning back the (B f) part of after moving the gear assembly rack F/L toward the arrow the plate top toward the arrow direction. -
Page 14: Fig. A-
Arm Assembly Cleaner (Fig. A-3-3) (H5) Gear Wheel (Fig. A-3-2) Base Assembly A/C Head Motor Assembly L/D (S5) (Fig. A-3-5) (Fig. A-3-1) Head F/E (C1) (Fig. A-3-4) (S4) Fig. A-3 8. Motor Assembly L/D (Fig. A-3-1) 10. Arm Assembly Cleaner (Fig. A-3-3) 1) Take the connector (C1) connected to the Capstan motor 1) Separate the (A) part of Fig. -
Page 15: Fig. A-
Arm Assembly Tension (Fig. A-4-2) (H7) Reel T (Fig. A-4-3) Reel S (Fig. A-4-3) Spring Tension Brake Assembly T Spring Tension (Fig. A-4-1) (H8) (H6) Fig. A-4 13. Brake Assembly T (Fig. A-4-1) 15. Reel S/Reel T (Fig. A-4-3) 1) Release the spring tension from the lever spring hook 1) Disassemble the reel S/ reel T while holding it up (compa- (H6). - Page 16 Opener Lid (Fig. A-5-2) Arm Assembly Pinch (Fig. A-5-3) Base Assembly P4 (Fig. A-5-1) (H9) Arm T/up (Fig. A-5-4) Chassis Fig. A-5 16. Base Assembly P4 (Fig. A-5-1) 18. Arm Assembly Pinch (Fig. A-5-3) 1) Release the (A) part of the base assembly P4 from the 1) Hold the arm assembly pinch up.
- Page 17 Suppoter Capstan (Fig. A-6-1) Belt Capstan (Fig. A-6-2) Motor Capstan (Fig. A-6-3) Washer(W1) Clutch Assembly D37 (Fig. A-6-5) (L1) (L1) Lever F/R (Fig. A-6-4) Chassis (S6) Fig. A-6 20. Supporter, Capstan (Fig. A-6-1) 22. Lever F/R (Fig. A-6-4) 1) Turn the supporter and Capstan by 90 deg. clockwise 1) Release the locking tab (L1) and then disassemble it with a driver for disassembly.
- Page 18 (H10) (H11) Gear Sector Gear Cam (Fig. A-7-3) (Fig. A-7-2) (W2) Washer (W2) Brake Assembly Capstan Gear Cam Hole(B) Plate Slider (Fig. A-7-4) (L2) Gear Drive (Fig. A-7-5) (Fig. A-7-1) Gear Drive Hole(A) Lever Tension (Fig. A-7-6) Lever Brack Lever spring (Fig.
- Page 19 Gear assembly P2 Hole Gear assembly P3 Hole Gear Assembly P3 (Fig. A-8-2) Gear Assembly P2 (Fig. A-8-1) (H13) (H12) Gear sector (A) Lever Tension Boss Plate slider Hole(B) (H14) Base Loading (Fig. A-8-5) Chassis Base Assembly P3 (Fig. A-8-4) Base Assembly P2 (Fig.
- Page 20 Base Tension (Fig. A-9-1) Arm Assembly Idler Jog (Fig. A-9-2) Chassis Fig. A-9 34. Base Tension (Fig. A-9-1) 35. Arm assembly Idler Jog (Fig. A-9-2) 1) Release the (A) part of the base tension from the 1) Push both (B), (C) parts in Fig. A-9-2 toward the arrow embossing of chassis.
- Page 21 DECK MECHANISM ADJUSTMENT (VCR) 4.3.1 Tools and Fixfures for Service 1. Cassette Torque Meter 2. Alignment Tape 3. Torque Gauge PUJ42881 NTSC: MHP PUJ48075-2 PAL: MHPE 5. Post Height Adjusting Driver (Roller driver) PTU94002 (No.YD068)1-21...
- Page 22 4.3.2 Mechanism Assembly Mode Check Purpose of adjustment : To make tools normally operate by positioning tools accurately. Fixtures and tools used VCR (VCP) status Checking Position Eject Mode Blank Tape (empty tape) Mechanism and Mode Switch (with cassette withdrawn) 1) Turn the VCR on and take the tape out by pressing the 4) Undo the screw fixing the deck and the main frame, and eject button.
- Page 23 4.3.3 Previous Preparation for Deck Adjustment (Preparation to load the VCR (VCP) with cassette tape not inserted) (1) Take the power cord from the consent. If doing so, proceeding to the stop mode is done. In this status, (2) Separate the top cover and the plate assembly top. input signals of all modes can be received.
- Page 24 4.3.5 Guide Roller Height Adjustment Purpose of adjustment : To ensure that the bottom surface of the tape can travel along with the tape lead line of the lower drum by constantly and adjusting and maintaining the height of the tape. 4.3.5.1 Prior Adjustment Fixtures and tools used...
- Page 25 4.3.6 Audio/Control (A/C) Head Adjustment Purpose of adjustment : To ensure that audio and control signals can be recorded and played according to the contract tract by constantly maintaining distance between tape and head, and tape tension between the P3 post and the P4 post.
- Page 26 4.3.6.2 Tape Path Check between Pinch Roller and Take up Guide (Check in the Rev Mode) 1) Check the tape pass status between the pinch roller and the 2) Check there is folding of the tape at the bottom or top of the take-up guide.(Check there is crumpling of the tape pass and take-up guide in cutting-off the REV mode folding of the take-up guide.)
- Page 27 4.3.8 Adjustment after Drum Assembly (Video Heads) Purpose of adjustment : To adjust and stabilize the height change, X-distance change, etc depending on the guide roller after assembling the drum. Fixtures and tools used Connection position VCR (VCP) status Adjustment position CH-1: PB RF Envelope Play the blank tape.
- Page 28 PROTECTION, MAINTENANCE AND CHECK OF VIDEO FUNCTION (VCR) 4.4.1 Checking Points prior to Repair Following abnormal phenomena may be repaired by removal of Determine that necessity of checking and repair the set exists af- foreign materials and oil supply. Check oiling is required at the ter checking the using period of the set together with the user.
- Page 29 4.4.2 Essential Check and Repair 4.4.4 Tools for Check and Repair Recording density of the video is far higher than the audio. (1) Grease: Floil G-3114 (KANTO) or equivalent grease Therefore video parts are very precise so as to allow only error (Green) of 1/1000mm or so in order to maintain compatibility with other (2) Grease: Kanto G-754, PL-433 (Yellow)
- Page 30 4.4.5.2 Grease Applications (2) Regular Grease Application (1) Grease Application Method Apply grease to the designated application position every Apply grease by using a cloth swab or brush. Care must be 500 hour. exercised so that excess quantity should not be used. If the NOTE: POSITION OF GREASE APPLICATION excessive quantity is applied, wipe it with the gauze soaked in alcohol (Isopropyl Alcohol).
- Page 31 Lever, F/R, Base, Tension GEAR AY, P2 & P3 PL-433 LEVER, F/R BASE, TENSION Clutch Contact Part (PL-433, Yellow) Tension Arm Party Hinge Part (PL-433, Yellow) (No.YD068)1-31...
- Page 32 ELECTRICAL ADJUSTMENT PROCEDURES (VCR) 4.5.1 Servo Adjustment 1) PG Adjustment Test Equipment a) OSCILLOSCOPE b) Alignment tape (SP, stairstep) Adjustment And Specification MODE MEASUREMENT POINT ADJUSTMENT POINT SPECIFICATION V.Out PLAY R/C TRK JIG KEY 0.5H H/SW(TP) Adjustment Procedure a) Insert the Alignment Tape and play. Note - Adjust the distance of X, pressing the Tracking(+) or Tracking(-) when the "ATR"...
- Page 33 DECK MECHANISM PARTS LOCATION (DVD) Procedure Disass Fig- Parts Fixing Type embly Starting No. Main Base Clamp Assembly Disc 1, 2 Plate Clamp 1, 2, 3 Magnet Clamp 1, 2, 3, 4 Clamp Upper Tray Disc 1, 6 Base Assembly Sled 4 Screws, 1, 2, 6 Gear Feed...
- Page 34 MAIN BASE TRAY DISC DISC CLAMP ASSEMBLY PLATE CLAMP MAGNET CLAMP CLAMP UPPER (Fig. A) BASE MAIN HOLDER LEVER BASE MAIN BASE MAIN BOTTOM SIDE VIEW Fig. 5-1 Fig. 5-2 1.Main Base (Fig. 5-1) 2. Tray Disc (Fig. 5-2) 1-1. Clamp Assembly Disc 1) Insert and push a Driver in the emergency eject 1) Place the Clamp Assembly Disc as Fig.
- Page 35 SCREW INSERTION TORGUE CONTROL (800gf DOWN) PINION GEAR (S3) RUBBER DAMPER Distinguish upper and lower sides (Assemble with care) MIDDLE GEAR GEAR RACK RUBBER DAMPER Distinguish upper and lower sides (Assemble with care) RUBBER DAMPER BASE PU (S2) (S2) RUBBER DAMPER GENERAL PICK UP ASSEMBLY GEAR RACK SPINDLE MOTOR ASSEMBLY...
- Page 36 GUIDE UP/DOWN GEAR LOADING (L3) (L6) GEAR PULLEY (L6) SCREW INSERTION TORGUE CONTROL (800gf DOWN) (L4) BASE MAIN BELT LOADING (H1) (C2) PWB ASSEMBLY LOADING (S5) (S4) BASE MAIN UP/DOWN FRAME ASSEMBLY (L5) GUIDE UP/DOWN FIG. (A) FIG. (B) GUIDE UP/DOWN GUIDE UP/DOWN FIG.
-
Page 37: Troubleshooting
SECTION 5 TROUBLESHOOTING ELECTRICAL TROUBLESHOOTING GUIDE (VCR PART) 5.1.1 Power(SMPS) CIRCUIT (1) No 5.3VA No 5.3VA Is the FR101 Replace the FR101 Normal? (Use the same ICW) Is the BD101 Replace the Normal? BD101 Is the R101 Replace the R101 Normal? Is Vcc (9V - 18V) sup- Is the D102... - Page 38 (2) No 5.0V_D (3) No 5.0V_T No 5.0V_D No 5.0V_T Is the Vcc(5.3V) sup- Check or Replace Is the Vcc(5.3V) sup- Check or Replace plied to Q165 Emittor? the D125 plied to Q163 Emittor? the D125 Is the Q162 Base Check the PWR CTL Is the Q162 Base Check the PWR CTL...
- Page 39 (6) No Motor_Vcc (To Cap, Drum Motor ) (7) No REG 12V No Motor_Vcc No REG 12V Is the Vcc(14V) Check or Replace Is the Vcc(14V) supplied Check or Replace supplied to C134? the D124 to Q165 Collector? the D124 Check or Replace Is the Vcc(14V) sup- Check the PWR CTL...
- Page 40 5.1.2 SYSTEM/KEY CIRCUIT (1) AUTO STOP Auto Stop Does the SW25 waveform Check the Drum Motor appear at the IC501 signal. Pin23? Do T/UP Reel Pulses Do the T-UP Reel Pulses Does 5.0V appear at the appear at the Q514 Base appear at the IC501 Pin3? RS501? terminal?
- Page 41 5.1.3 SERVO CIRCUIT (1) Unstable Video in PB MODE Unstable Video in PB Mode. Does the Noise level of the screen change periodically? Does the CFG waveform appear at the IC501 Pin67? On tracking do the CTL Replace the IC501. pulses move? Does the Video Envelope Refer to "When the Y signal...
- Page 42 (3) When the Capstan Motor doesn't run, When the Capstan Motor doesn't run, Refer to "SMPS(CAPSTAN/12Volt) Does 12VA appear at the PMC01? Trouble Shooting". Does 2.8V appear at the PMC01? Check the PMC01 and the Capstan Does the PWM signal appear at the Motor Ass'y.
- Page 43 5.1.4 Y/C CIRCUIT (1) No Video in EE Mode, No Video in EE Mode Does the Video signal Check the 19Pin of Tuner. appear at the IC301 Pin48? Is 5V applied to the IC301 Check the 5.0VT, 5.3VA Pins18, 24, 42, 55, 72, 91? Line.
- Page 44 (2) When the Y(Luminance) signal doesn't appear on the screen in PB Mode, Is 5.0VT, 5.3VA applied to the Check the line of the 5.0VT, IC301 Pins24, 42, 55, 72, 91? 5.3VA Line. (Power Circuit) Is the I2C Bus siganl applied Refer to 'SYSTEM I C BUS to the IC301 Pins68, 69 ?
- Page 45 (3) When the C(Color) signal doesn't appear on the screen in PB Mode, Is 5.0VT/5.3VA applied to the Check the line of the 5.0VT/ IC301 Pins24, 42, 55, 72, 91. 5.3VA Line. (Power Circuit) Is the Color Rotary signal Check the Color Rotary applied to the IC301 Circuit.
- Page 46 (4) When the Video signal doesn't appear on the screen in REC Mode, Is the EE signal normal? Check EE Mode. Check the line of the 5.0VT/ Is 5.0VT/5.3VA applied to the 5.3VA Line.(Power Circuit) IC301 Pins24,42,55,72,91? Does PB Mdoe operate Check PB Mode.
- Page 47 5.1.5 Hi-Fi CIRCUIT (A) No Sound(EE Mode) No Sound. Check the TU Audio of IC801 Check the IC751 Pins30, 31. Pins2, 3. Check the DVD Audio of IC801 Check the DVD Audio OUT. Pins4, 5. (JK902 DVD_A_L_L/R). Check the AV1 Audio of IC801 Check the Scart1 Jack.
- Page 48 (B) Hi-Fi Playback PB mode No Sound. Check the Vcc of IC801 Check Power 5.0V, 12VT. (Pins34, 40) Check the Hi-Fi Selection switch. Check IC501 Pin26 (A.H/SW) (IC801 Pin41) and the Tape quality. Is the RF Envelope at IC801 Pin44 over 2Vp-p? Check IC801 Pin42(Data), Check the parts of -COM...
- Page 49 Hi-Fi REC. It can't be recorded Hi-Fi Audio signal. Check Vcc of IC801.(Pins34, 40) Check Power 5V, 12V. Check ports of -COM. Check IC801 Pin42(Data), Pin43(CLOCK). (IC501 pins 17, 18) Check Audio input signal of IC801 Do Audio signals appear at IC801 Pins2, 3(TU.A.), 4, 5(DVD.A.), Pins16, 17? 6, 7(AVI.A.), 8, 9(AV2.A.), 10, 11(AV3.A.).
- Page 50 5.1.6 Tuner/IF CIRCUIT (A) No Picture on the TV screen No picture on the TV screen Does the Video signal at Is 33VT applied to TU701 Hi-Fi REC. the TU701 Pin19. Pin17? Is 5VT applied to TU701 Check 5V line. Pin4? Does the Clock signal Check the lIC Clock Signal...
- Page 51 (B) No Sound No Sound. Check the Vcc of IC751 Pins1, 11, 19, Check 5.0V Line. 22, 33. Check the Tuner SiF signal at IC751 Check the Tuner SIF of TU701 Pin22. Pin2. Check the oscillator of IC751 Pins5, 6. Replace X751 Check the IIC Clock and Data at IC751 Check the Audio of IC751 Pins30, 31.
- Page 52 MECHANISM TROUBLESHOOTING GUIDE (VCR PART) 5.2.1 Deck Mechanism No Auto Rewind operates. Is output of the end sensor “H”? “H”: 3.5V or less “L”: 0.7V –1V or less Is the end sensor Vcc applied at Check the Syscon power supply. Replace the end sensor.
- Page 53 Auto Stop operates. (PLAY/CUE/REV) Check the assembly mode. Check the spring pinch. Does the pinch roller attached to Is output of the DFG, DPG the Capstan shaft turn in operati- Replace the drum motor. normal? on of the Play/Cue/Rev. Does the T/UP or the supply Check the Servo, Syscon.
- Page 54 No tape winding is done in play. Is the pinch roller attached to the Check the assembly mode? Capstan shaft in operation of play? Does the T/up reel operate? Is the Capstan belt hung? Hang the Capstan belt. Check the clutch and the idler Does the Capstan motor turn? assembly.
- Page 55 5.2.2 Front Loading Mechanism No cassette insert is done. Does the lever assembly Is the lever assembly switch Add or replace the lever switch operate? spring normal? assembly switches spring. Does the CST IN switch Replace the F/L switch. operate normally? Is the Vcc of the main P.C.B assembly? Check the Syscon circuit.
- Page 56 No safe adherence of tape is done. Is cassette insert done? Does the opener lid operate? Replace the opener lid. Does the gear rack F/L operate? Replace the gear rack F/L. Does the opener door operate? Check the assembly status of the Does the arm assembly F/L operate? opener door.
- Page 57 ELECTRICAL TROUBLESHOOTING GUIDE (DVD PART) 5.3.1 System operation flow Power On 1. 8032 initializes SERVO, DSP & RISC registers 2. Write RISC code to SDRAM 3. Reset RISC Show LOGO Tray Closed? Tray Close to Closed position SLED at Inner Side? SLED Moves to Inner Position 1.
- Page 58 5.3.2 SYSTEM Test flow TEST Check the AC Voltage Replace power PCBA or AC transformer. Power PCBA(110V or 220V) Switch on the Power PCBA Is the DC Voltage Repair or Replace Power PCBA outputs OK? (5V,1.8V,3.3V,8V,12V) Make sure the main PCBA don't short on VCCs and switch it on.
- Page 59 RESET or Power On. Check connection lines between FLASH Flash Memory operates & ZR36868 and the FLASH access time Show LOGO? properly? whether is suitable or not. Check connection lines between SDRAM SDRAM works properly? & ZR36868 and the SDRAM is damaged. ZR36868 VIDEO outputs Check the related circuit of ZR36868 properly?
- Page 60 Does the SLED move Motor Driver STBY Check the connection line of to inner side when it is at Pin is High? STBY signal. outter position? Is SLED_S Check the related circuit of DC Level higher SLED_S. than 1.4V? SLED+ and Check the amp circuit on motor SEDL- outpup driver.
- Page 61 Check the laser power circuit Laser turns on when DVD_LD or CD_LD output on ZR36868 and connecting to reading disc? properly? power transistor. Collector voltage of Check the related circuit on power transistor is OK? laser power transistor Check cable connection between transistor ouput and pick-up head.
- Page 62 Proper signals on Check connections between Focus ON OK? A,B,C,D of ZR36868 ZR36868 and Pick-up head. Check FOCUS_S signal on ZR36868 Properly Check the TRACK_S TRACK_S signal connection on ZR36868 Track On OK? on ZR36868? and motor dirver. Check the tracking control TACT+ &...
- Page 63 Check connection between Normal Audio output Audio DAC received ZR36868 & Audio DAC. when disc playback? correct data stream? Check the related Normal Audio DAC circuit of Audio DAC. out? Check Audio filter,amplify,mute circuit. Communications between Normal IR.VFD & Front Check communication lines on IR.VFD Front pannel key &...
- Page 64 DETAILS AND WAVEFORMS ON SYSTEM TEST AND DEBUGGING 5.4.1 SYSTEM 27MHz CLOCK, RESET, FLASH R/W SIGNAL 1) ZR36868 main clock is at 27MHz(X501) 1.0V, 27MHz FIG 1-1 2) ZR36868 reset is low active 5.3VA PWR_CTL_H M_RESET(FRONT) FIG 1-2 1-64 (No.YD068)
- Page 65 3) CN601 waveform during procedure(Downloading) DUPTDO DUPRDO FIG 1-3 4) Flash R/W enable signal during download(Downloading) FIG 1-4 (No.YD068)1-65...
- Page 66 5.4.2 SDRAM CLOCK DCLK = 135MHz, Vp-p=2.2, Vmax=2.7V FIG 2-1 5.4.3 TRAY OPEN/CLOSE SIGNAL 1) Tray open/close waveform OPEN CLOSE FIG 3-1 1-66 (No.YD068)
- Page 67 5.4.4 SLED CONTROL RELATED SIGNAL (NO DISC CONDITION) SLED_S(2.0V/1.4V/1.0V) SLED+(4.7V/4.0V/2.6V) SLED-(5.3V/4.0V/3.0V) FIG 4-1 5.4.5 LENS CONTROL RELATED SIGNAL(NO DISC CONDITION) FOCUS_S(1.5V/1.4V/1.3V) FACT+(4.0V/3.6V/3.2V) FACT-(4.0V/3.6V/3.2V) FIG 5-1 (No.YD068)1-67...
- Page 68 5.4.6 LASER POWER CONTROL RELATED SIGNAL(NO DISC CONDITION) MD_CD(0V/180mV) MD_LD(5.0V//3.5V) DVD_LD(5.0V/3.6V) FIG 6-1 5.4.7 DISC TYPE JUDGEMENT WAVEFORM FIG 7-1 (DVD) 1-68 (No.YD068)
- Page 69 FIG 7-2 (DVD) FIG 7-3 (CD) (No.YD068)1-69...
- Page 70 FIG 7-4 (CD) 5.4.8 FOCUS ON WAVEFORM FOCUS_S FACT+ FACT- FIG 8-1 (DVD) 1-70 (No.YD068)
- Page 71 FOCUS_S FACT+ FACT- FIG 8-2 (CD) 5.4.9 SPINDLE CONTROL WAVEFORM (NO DISC CONDITION) SPINDLE_S MOT_SPDL-(3.6V/2.4V) MOT_SPDL+(3.6V/4.8V) FIG 9-1 (No.YD068)1-71...
- Page 72 5.4.10 TRACKING CONTROL RELATED SIGNAL(System checking) TRACK_S TACT- TACT+ FIG 10-1(DVD) TRACK_S TACT- TACT+ FIG 10-2(CD) 1-72 (No.YD068)
- Page 73 5.4.11 ZR36868 AUDIO OPTICAL AND COAXIAL OUTPUT(SPDIF) FIG 11-1 5.4.12 ZR36868 VIDEO OUTPUT WAVEFORM 1) 100% FIG 12-1 (No.YD068)1-73...
- Page 74 2) COMPOSITE VIDEO SIGNAL FIG 12-2 5.4.13 ZR36868 AUDIO OUTPUT TO AUDIO DAC FIG 13-1 1-74 (No.YD068)
- Page 75 5.4.14 AUDIO OUTPUT FROM AUDIO DAC FIG 14-1 (No.YD068)1-75...
- Page 76 Victor Company of Japan, Limited AV & MULTIMEDIA COMPANY DIGITAL VIDEO STORAGE CATEGORY 12, 3-chome, Moriya-cho, kanagawa-ku, Yokohama, kanagawa-prefecture, 221-8528, Japan (No.YD068) Printed in Japan...
- Page 77 SCHEMATIC DIAGRAMS DVD PLAYER & VIDEO CASSETTE RECORDER HR-XV28SEF,HR-XV28SEK, HR-XV28SER,HR-XV28SEU, HR-XV28SEY,HR-XV28SEZ CD-ROM No.SML200505 (EK model) (EU, EY, EZ models) (EF, ER models) (EF model) HR-XV28SEF,HR-XV28SEK,HR-XV28SER,HR-XV28SEU,HR-XV28SEY,HR-XV28SEZ [D5PV0] COPYRIGHT © 2005 Victor Company of Japan, Limited. No.YD068SCH 2005/5...
- Page 79 CIRCUIT BOARD NOTES CHARTS AND DIAGRAMS 1. Foil and Component sides 4. Voltage measurement NOTES OF SCHEMATIC DIAGRAM 1) Foil side (B side) : Parts on the foil side seen from foil face (pattern face) 1) Regulator (DC/DC CONV) circuits Safety precautions are indicated.
- Page 80 OVERALL WIRING DIAGRAM POWER (SMPS) DECK BOARD POWER(SMPS) Page2-5 SHEET 1 Page2-7 SHEET 2 VCR MAIN SYSTEM Page2-9 SHEET 3 TUNER/IF Page2-11 SHEET 4 K-RTN2 HiFi AUDIO Page2-13 SHEET 5 BOARD SCART(JACK) Page2-15 SHEET 6 BOARD DVD SERVO Page2-17 SHEET 7 DVD AV/JACK Page2-19 SHEET 8 DVD SYSTEM...
- Page 81 2. Voltages are DC-measured with a digital voltmeter MODIFIED OR ALTERED WITHOUT PERMISSION IMPLEMENTATION OF THE LATEST SAFETY AND during Play mode. FROM THE JVC ELECTRONICS CORPORATION. ALL PERFORMANCE IMPROVEMENT CHANGES INTO COMPONENTS SHOULD BE REPLACED ONLY WITH THE SET IS NOT DELAYED UNTIL THE NEW SERVICE TYPES IDENTICAL TO THOSE IN THE ORIGINAL CIR- LITERATURE IS PRINTED.
- Page 82 A/V CIRCUIT DIAGRAM IC301 Pin 69, 68 are defective. IC301 Pin70 is defective. PB and Recording is failed. Q305 is defective. PB COLOR Signal disappear. (IC301 doesn t operate.) EE, PB Screen doesn t appear. D301or IC301 Pin 80 REC is defective. IC301 Pin 84 is defective.
- Page 83 SYSTEM CIRCUIT DIAGRAM Deck will not operate. R575, R576, R577, R578 are defective. µ-COM is unstable. VCR will not operate. Q501, Q503 are defective. IC505 is defective. Auto Rew will not working. Auto stop occures. ES501, ES502, LD501 are RS501,RS502 are CLOCK SETTING will defective.
- Page 84 TUNER/IF CIRCUIT DIAGRAM EE MODE(VIDEO) TU MODE (AUDIO) SHEET 4 2-11 2-12...
- Page 85 Hi-Fi AUDIO CIRCUIT DIAGRAM IC801 Pins42, 43 aredefective. All Audio is not appear. 44 Pin is defective. Hi-Fi Audio is not appear. SHEET 5 2-13 2-14...
- Page 86 SCART(JACK) CIRCUIT DIAGRAM SHEET 6 2-15 2-16...
- Page 87 DVD SERVO CIRCUIT DIAGRAM SHEET 7 2-17 2-18...
- Page 88 DVD AV/JACK CIRCUIT DIAGRAM SHEET 8 2-19 2-20...
- Page 89 DVD SYSTEM CIRCUIT DIAGRAM SHEET 9 2-21 2-22...
- Page 90 PRINTED CIRCUIT DIAGRAMS VCR MAIN BOARD -TOP SIDE- 2-23 2-24...
- Page 91 VCR MAIN BOARD -BOTTOM SIDE- 2-25 2-26...
- Page 92 COMPONENT PARTS LOCATION GUIDE <VCR MAIN> 2-27 2-28...
- Page 93 POWER BOARD LOCATION GUIDE KEY BOARD LOCATION GUIDE 2-29 2-30...
- Page 94 OVERALL BLOCK DIAGRAM DV33 DV33 DISC IC604 IC602 KARAOKE OPTION MX26LV800T M12L16161A FLASH ROM SDRAM MIIC_DET PICK SPINDLE MOTOR MEMAD[00:18 MEMDA[0:14] IC607 MIC_IN KARAOKE ] FLASHCS- CS5331A MEMRD- MEMWR- RAMADD[00:10] SLED RAMBA LOADING (FEEDING) PCLK MOTOR MOTOR RSMCS0 AMCLK CN601 CN602 RAMRAS# AB CLK...
- Page 95 POWER(SMPS) BLOCK DIAGRAM T101 TRANS BD101 RECTIFIER & SNUBBER MOTOR VCC SMOOTING BLOCK C103 BLOCK 14VA (D124,C124,C134, (D101,C105 R121,L124,C121) C106,R104) 12V REG BLOCK (Q166,ZD151,C160, REG12V R166,C159) DRIVE & S/W BLOCK (IC101, D102, R105, NOISE FILTER C104, C108 , C109, BLOCK C107,ZD102) RECTIFIER &...
- Page 96 Y/C BLOCK DIAGRAM (PB Mode) (REC Mode) REC'H' V.H.SW V.H.SW C.ROTARY DATA C.ROTARY DATA CLOCK CLOCK C.SYNC C SYNC V.OUT MICOM V.OUT (MICOM) V.IN4 FRONT S2 V.OUT V.IN3 S1 V.OUT 2-35 2-36...
- Page 97 SYSTEM BLOCK DIAGRAM LD(+) LD(-) R522, C568 MN101D10X L/M CONTROL R525, R526 Q504, 505 R506, 507, 508, L503, C507, C509 509, 511 2fsc C504, 511 L504, C505, C506 L505, Q506, R537, 539, 584, 585, C553, 554 2-37 2-38...
- Page 98 TUNER/IF, NICAM & A2 BLOCK DIAGRAM VPS BLOCK DIAGRAM VPS_VIDEO IIC DATA IIC CLK TU_SE_VL_H TU_SECAM_H MOD_VIDEO MOD_AUDIO 5.4VA 2-39 2-40...
- Page 99 Hi-Fi AUDIO BLOCK DIAGRAM VIDEO INPUT BLOCK Hi-Fi/ AUDIO INPUT 36 35 BLOCK Tu A.IN 'L' DVD_FR_VIDEO Tu A.IN 'R' A.OUT 'L' DVD A.IN 'L' A.OUT DVD A.IN 'R' IC802 To JACK A.OUT 'R' IC801 EU1 A.IN 'L' EU1 A.IN 'R' EU2.A.OUT.L EU2 A.IN 'L' EU2 A.IN 'R'...
- Page 100 IC BLOCK IC503_24WC16P IC101_ICE3B0565 IC102_LTV-817B IC501_MN101D10X IC504_KIA7031P IC131_78R33 IC141_78R08 IC3S1_LA70100M IC505_KIA7042 IC301_LA71750EM IC5F1_PT6955 IC751_MSP3417/3407 2-43 2-44...
- Page 101 IC BLOCK IC7V1_SDA5650X IC802_NM1232 IC801_§ DA9605H IC803_LD1117A IC903_BH78968FS 2-45 2-46...
- Page 102 DVD SERVO BLOCK DIAGRAM X601 27MHz X-TAL DISC DVD_LD, CD_LD , VR_CD , VR_DVD MEMDA[0:15] IC203 BA4558 MD_CD CD_MD, DVD_MD FLASH MEMAD[0:19] PICKSEL DVD: A,B,C,D, RF FLASHCS- CD: A,B,C,D, E, F,RF MEMRD- MEMWR- IC601 HOMESW,INSW,OUTSW ZR36868 MPEG / DSP/RF CLOSE,DRVSB EEPROM SCL, SDA FACT +/-, TACT +/-...
- Page 103 DVD VIDEO & AUDIO BLOCK DIAGRAM OPTICAL IC605 EEPROM IC801 HI-FI IC601 MPEG AMCLK IC401 IC402 AB CLK 2DAC OP-AMP AOUTO ALRCK DVD_A_L COAXIAL AUDIO_MUTE DVD_A_R ASPDIF DVD_A_L DVD_A_R Pr / R Pb / B Y / G A_OUT_L V.OUT A_OUT_R A.OUT_R A.OUT_L...
- Page 104 DVD IC BLOCK IC201_BA5954 IC203_LM358L IC604 IC606_74HCT244 IC401_PCM1753 IC602_M12L16161A-7T IC602_ZR36868ELC IC402_NJM4580D IC605_KS24C021CS 2-51 2-52...
- Page 105 VOLTAGE CHARTS MODE MODE MODE MODE MODE MODE MODE MODE MODE PIN NO. PIN NO. PIN NO. PIN NO. PIN NO. PIN NO. PIN NO. PIN NO. PIN NO. I C 2 0 1 I C 4 0 2 I C 3 0 1 0.01 0.02 3.38...
- Page 106 VOLTAGE CHARTS WAVEFORMS STOP PLAY Tran- * IC301 Oscilloscope Waveform sistor Base Emitter Collector Base Emitter Collector Q201 3.28 0.009 2.28 3.05 2.34 Q202 3.14 3.28 0.01 3.25 Q203 0.01 4.86 4.85 Q204 0.04 4.86 4.86 Q205 0.003 0.002 0.003 0.003 IC301 Pin 75 IC301 Pins 48, 50,...
- Page 108 Victor Company of Japan, Limited AV & MULTIMEDIA COMPANY DIGITAL VIDEO STORAGE CATEGORY 12, 3-chome, Moriya-cho, kanagawa-ku, Yokohama, kanagawa-prefecture, 221-8528, Japan (No.YD068) Printed in Japan...
-
Page 109: Parts List
* BEWARE OF BOGUS PARTS Parts that do not meet specifications may cause trouble in regard to safety and performance. We recommend that genuine JVC parts be used. * (x_) in a description column shows the number of the used part. -
Page 110: Exploded View Of General Assembly And Parts List
Exploded view of general assembly and parts list Block No. M1MM Deck/mecha assembly Power board assembly <01> DVD unit Key board main assembly <02> board assembly <03> 3-2(No.YD068) - Page 111 CCD 05 NEW SILICON OTHER 2T (3(x4) LG-4930R-0384A HOLDER POWER CORD LG-3300R-V075A PLATE ONE BOARD SLIM PRESS A/V JACK LG-3580R-V145A DOOR VCR VJ90 MOLD CST JVC COMBI LG-442-681A SPRING DOOR LG-3580R-T192A DOOR VCR VJ90 MOLD TRAY JVC COMBI LG-4970R-0146A SPRING...
-
Page 112: Vhs Mechanism Assembly And Parts List
VHS mechanism assembly and parts list Block No. M2MM Not used 054A 3-4(No.YD068) - Page 113 BACK SIDE 052A (No.YD068)3-5...
- Page 114 MODEL MARK MODEL MARK MODEL MARK HR-XV28SEF HR-XV28SER HR-XV28SEY HR-XV28SEK HR-XV28SEU HR-XV28SEZ VHS mechanism Block No. [M][2][M][M] Symbol No. Part No. Part Name Description Local LG-4930R-0449A HOLDER DECK/MECHA FPCB(6CH) - D37C MO LG-5006R-0045A DECK/MECHA FPCB - D37C MOLD LG-6850R-HG18Y CABLE/FLAT P=1.25 FFC UL2896(0.05X0.8) 7...
-
Page 115: Dvd Mechanism Assembly And Parts List
DVD mechanism assembly and parts list Block No. M3MM 015B 012A 035A (No.YD068)3-7... - Page 116 MODEL MARK MODEL MARK MODEL MARK HR-XV28SEF HR-XV28SER HR-XV28SEY HR-XV28SEK HR-XV28SEU HR-XV28SEZ DVD mechanism Block No. [M][3][M][M] Symbol No. Part No. Part Name Description Local LG-6850R-JW23Z CABLE/FLAT P=1.0 FFC UL2896(0.035X0.7) 23 LG-5040R-0083A RUBBER DVD DP-6/ DP-8 FRONT RIGHT 20(x2)
-
Page 117: Electrical Parts List
MODEL MARK MODEL MARK MODEL MARK HR-XV28SEF HR-XV28SER HR-XV28SEY HR-XV28SEK HR-XV28SEU HR-XV28SEZ Electrical parts list Power board Symbol No. Part No. Part Name Description Local UZ-10BSB 26MM TP ZD152 DIODE/ZENERS Block No. [0][1] 0DZ102609BB PYUNG CHANG D or LG-... - Page 118 Description Local IC201 IC/LINEAR 0ILNRRH039A 28PIN/HSOP R/TP LG-6871R- PWB(PCB) 05 COMBI PAL MAIN LM358L UTC 8PIN/SOP 7960D ASSEMBLY/TOTAL KEY TOOL JVC IC202 IC/LINEAR 0ILNRUC003A R/TP OPAMP LG-6871R- PWB(PCB) 05 COMBI PAL MAIN LA71750EM SANYO 7960D ASSEMBLY/TOTAL KEY TOOL JVC IC301...
- Page 119 MODEL MARK MODEL MARK MODEL MARK HR-XV28SEF HR-XV28SER HR-XV28SEY HR-XV28SEK HR-XV28SEU HR-XV28SEZ Symbol No. Part No. Part Name Description Local Symbol No. Part No. Part Name Description Local MM1231XF MITSUMI KRA103S-T1(PC)22-22 IC802 MM1231XF-X IC/PERIPHERALS Q806 TRANSISTOR 16PIN SOP ST...
- Page 120 MODEL MARK MODEL MARK MODEL MARK HR-XV28SEF HR-XV28SER HR-XV28SEY HR-XV28SEK HR-XV28SEU HR-XV28SEZ Symbol No. Part No. Part Name Description Local Symbol No. Part No. Part Name Description Local 100PF 50V 5% NP0 CAPACITOR/FIXED 0.1UF 50V 10% B(5YP) C216...
- Page 121 MODEL MARK MODEL MARK MODEL MARK HR-XV28SEF HR-XV28SER HR-XV28SEY HR-XV28SEK HR-XV28SEU HR-XV28SEZ Symbol No. Part No. Part Name Description Local Symbol No. Part No. Part Name Description Local CAPACITOR/FIXED 0.01UF 50V 10% X7R(X) CAPACITOR/FIXED 4.7UF SRA/SS 50V 20%...
- Page 122 MODEL MARK MODEL MARK MODEL MARK HR-XV28SEF HR-XV28SER HR-XV28SEY HR-XV28SEK HR-XV28SEU HR-XV28SEZ Symbol No. Part No. Part Name Description Local Symbol No. Part No. Part Name Description Local CAPACITOR/ 220M SRA 6.3V M FM5 CAPACITOR/FIXED 1PF 50V O.25 PF NP0...
- Page 123 MODEL MARK MODEL MARK MODEL MARK HR-XV28SEF HR-XV28SER HR-XV28SEY HR-XV28SEK HR-XV28SEU HR-XV28SEZ Symbol No. Part No. Part Name Description Local Symbol No. Part No. Part Name Description Local CAPACITOR/FIXED 0.1UF 50V 80%/-20% CAPACITOR/FIXED 0.1UF 50V 80%/-20% C802 C891 0CH1104K942 CERAMIC(TEMP.C...
- Page 124 MODEL MARK MODEL MARK MODEL MARK HR-XV28SEF HR-XV28SER HR-XV28SEY HR-XV28SEK HR-XV28SEU HR-XV28SEZ Symbol No. Part No. Part Name Description Local Symbol No. Part No. Part Name Description Local 6.8K OHM 1 / 16 W 1608 1.2K OHM 1 / 16 W 1608...
- Page 125 MODEL MARK MODEL MARK MODEL MARK HR-XV28SEF HR-XV28SER HR-XV28SEY HR-XV28SEK HR-XV28SEU HR-XV28SEZ Symbol No. Part No. Part Name Description Local Symbol No. Part No. Part Name Description Local 4.7K OHM 1 / 16 W 1608 2.2K OHM 1 / 16 W 1608...
- Page 126 MODEL MARK MODEL MARK MODEL MARK HR-XV28SEF HR-XV28SER HR-XV28SEY HR-XV28SEK HR-XV28SEU HR-XV28SEZ Symbol No. Part No. Part Name Description Local Symbol No. Part No. Part Name Description Local 1K OHM 1 / 16 W 1608 RESISTOR/METAL 2K OHM 1 / 16 W 1608...
- Page 127 MODEL MARK MODEL MARK MODEL MARK HR-XV28SEF HR-XV28SER HR-XV28SEY HR-XV28SEK HR-XV28SEU HR-XV28SEZ Symbol No. Part No. Part Name Description Local Symbol No. Part No. Part Name Description Local 10K OHM 1 / 16 W 1608 560 OHM 1 / 16 W 1608...
- Page 128 MODEL MARK MODEL MARK MODEL MARK HR-XV28SEF HR-XV28SER HR-XV28SEY HR-XV28SEK HR-XV28SEU HR-XV28SEZ Symbol No. Part No. Part Name Description Local Symbol No. Part No. Part Name Description Local INDUCTOR AXIAL FI-C2012-103KJT L5F1 100M K 2.3X3.4 L5 TP L918...
- Page 129 MODEL MARK MODEL MARK MODEL MARK HR-XV28SEF HR-XV28SER HR-XV28SEY HR-XV28SEK HR-XV28SEU HR-XV28SEZ Symbol No. Part No. Part Name Description Local CONNECTOR(CIRC) P3D03 LG-561-251B GB201-2P-TS-B(LGC) /DRAWING CONNECTOR (CIRC)/ JE612-A2T-12A JAE PMC01 6630BK01612 BOARD TO BOAR EUN 12P 2.0M SC901 JACK/SCART...
-
Page 130: Packing Materials And Accessories Parts List
Packing materials and accessories parts list The instruction manual to be provided with this product will differ according to the destination. Block No. M4MM OPTIONAL PARTS 806 COAXIAL CABLE 810 CABLE ASS'Y COAXIAL CABLE PLUG ASS'Y 1WAY BATTERY PLUG ASS'Y 2WAY REMOTE CONTROLLER ASSEMBLY INSTRUCTION ASSEMBLY... - Page 131 PAL RF 1.2M FREE OF CD_PB_HG H C,D,E,F LG-6850R-PAA2F CABLE/COAXIAL 1 WAY COAXIAL DT_HY_HIT_SEIL C,D,E,F LG-6850R-PBA2H CABLE/COAXIAL SCART TO SCART 21 PIN DT_HY_HI C,D,E,F LG-6850R-SUA2F CABLE/COAXIAL SCART TO SCART 21 PIN DT_HY_HI LG-6711R1P081F REMOTE CONTROLLER ASSEMBLY N6 VJ9033P1Z NA3GJJ JVC W/SHOW (No.YD068)3-23...
Need help?
Do you have a question about the HR-XV28SEF and is the answer not in the manual?
Questions and answers