Table of Contents
Advertisement
Quick Links
Advertisement
Table of Contents

Related Manuals for Kathrein UFD 560


Summary of Contents for Kathrein UFD 560
- Page 1 Operation Manual DVB-C Receiver UFD 560/560S with Common Interface...
-
Page 3: Preface
We wish you a great reception and much enjoyment with your new DVB-C Receiver. Your KATHREIN Team Important Notes If you have any unexpected problems with your receiver, please contact your specialist supplier, or call our hotline: Tel.: +49 (80 31) 18 47 00... -
Page 4: Table Of Contents
Contents Contents Preface................................3 Contents ................................4 Operating elements, connections and displays ....................6 View of the front side ............................ 6 View of the rear side............................. 6 Remote control ............................. 7 Instruction set of the remote control ......................8 Safety instructions ............................9 Mains lead ..............................9 Cleaning .............................. - Page 5 Contents Electronic Program Guide ..........................34 EPG (Electronic Program Guide) ....................... 34 EPG timer programing..........................35 Unit password ..............................36 Factory settings ............................36 Entering the password..........................36 Parental control ............................38 Operating from the front panel........................39 Operating without the RC ........................... 39 Setting the system parameters ........................40 System parameters ............................
-
Page 6: Operating Elements, Connections And Displays
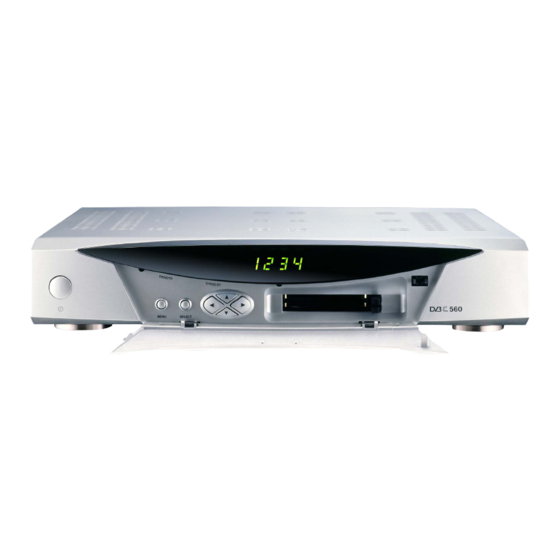
Operating elements, connections and displays Operating elements, connections and displays This section contains a short description of the front and rear sides of the receiver. View of the front side (Cover closed) View of the rear side Operating elements and displays on the Operating elements and displays on the front side rear side... -
Page 7: Remote Control
Operating elements, connections and displays Remote control Power on - Switch to remote standby control A / B Calls up the main menu/ Calls up the four inserts a new channel programs last viewed Overview of programs Last program EPG (Electronic... -
Page 8: Instruction Set Of The Remote Control
Operating elements, connections and displays Insert the batteries into the remote control Remove the cover from the front of the remote control and insert the two batteries delivered with the unit. Observe the correct polarity of the batteries, as shown on the base of the battery compartment. Push the lid back into the housing until it clicks into place. -
Page 9: Safety Instructions
Safety instructions Safety instructions Important notes regarding operation The following section contains important relating to the operation, place of installation and connection of the receiver. Read these notes carefully before putting the unit into operation. Mains lead Danger of electric shock! Make certain that the mains lead (power supply lead) is undamaged. -
Page 10: Mains Supply
Safety instructions Mains supply Caution! Caution! Operate the receiver only with a mains voltage of 230 V/50 Hz. First connect the antenna and the television set, before connecting the receiver to the mains power supply and switching it on. Extended absence/ thunderstorms Notice! Always switch the unit off via its mains switch located on the left on... -
Page 11: Smartcard
Connection the receiver The following section has been specially written for the dealer. You only need to observe the instructions listed here if you are carrying out the installation yourself. A sample configuration is shown in the “Example of Connections” sections. -
Page 12: Putting Into Operation
Putting into operation Putting into operation First measures Connect the unit to the power supply and switch the receiver on unsung the power switch at the front. “- - - - ” appears in the LED display and the LED for the operation indicator lights up red;... -
Page 13: Factory Settings Of The Receiver
Putting into operation If “Bad or No signal” appears on the display and the last received program is shown then you should check the antenna cable and/or the settings of the receiver. If this only effect individual programs then this may be caused by an interruption of the signal from the trans- mitter or a fault in the cable system. -
Page 14: Notes On Operation
Notes on operation Notes on operation Menu concept The menu concept has been constructed according to logical sequences The selected menus, submenus and positions as well as the para- meters to be set are each color-coded and are mostly self-explanatory. Observe the strip at the lower border of the screen with the instructions regarding... -
Page 15: Alphanumeric Inputs
Notes on operation Function switchover button (cancel by re-pressing) Note: Most of the buttons have additional functions within the menus; you can see these by pressing the -button in the respective menu. Alphanumeric inputs Use the numerical buttons to enter program names. You can enter numbers and letters in the name fields of the corresponding menu. -
Page 16: Screen Displays/Osd On Screen Display
Screen displays/OSD On Screen Display Screen displays/OSD On Screen Display Important screen displays The receiver's functions are controlled by a microprocessor and exten- sive software. The following explanations are intended to explain all procedures and to help in narrowing the search in case of a fault. You receive the following messages after switching on the unit: depending on whether there is a CA module with smartcard slotted into the CI module. -
Page 17: Channel Messages
Screen displays/OSD On Screen Display received program by once more pressing on the -button. Channel messages Channel message TV/Radio The channel message is displayed for a few seconds every time a program is switched or displayed continually by pressing the ... -
Page 18: Channel List - Radio/Tv
Screen displays/OSD On Screen Display Channel list - RADIO/TV You can reach the channel lists by pressing the -button. At the top left there is an “ ” for the entire list; the column below this contains information regarding the channel, the program provider and whether the program is currently being transmitted with encryption (scrambled). -
Page 19: Videotext/Subtitle - Program Selection
Videotext/Subtitle - program selection Videotext/Subtitle - program selection As soon as symbols for videotext or subtitles appear on the screen this means that the receiver is preparing these additionally transmitted signals (videotext also even in case of encrypted signals) to be shown on the screen. -
Page 20: Switching Over To A Radio Program
Videotext/Subtitle - program selection You can only receive these channels using a CA module and a smartcard. If there is a CA module in the CI slot that is not correct for this channel then you will also receive a similar message, depending on the res- pective module. -
Page 21: Common Interface
Common Interface Common Interface Note: Observe the operating instructions of your program provider. You alone are responsible for the use of a smart card! The Common Interface for slotting in up to two CA modules is behind the front cover. The smartcards and CA modules are issued by the provider of the respective program(s) and contain the subscriber data and data Please observe the instructions... - Page 22 Common Interface You can find out which smartcard is inserted into the CA module (or whether one is inserted) via the “Common Interface” menu in the installation menu. Example: There is a SkyCrypt CA module with a smartcard (BBC Prime) in Slot 1. ...
-
Page 23: Timer And Sound Settings
Timer and sound settings Timer and sound settings To record a program with a videorecorder at the correct time, you can use the timer. There are 14 timers and these can be set to various program start and end times. You can access the timer program via the main menu with the ... -
Page 24: Vps Signal
Timer and sound settings If you select a pay-TV program that you have subscribed to then you will be automatically requested to enter the PIN code that you recei- ved with your subscription documents and that you must now enter ... - Page 25 Timer and sound settings AC 3 The receiver has an audio output for AC 3 (Dolby Digital). This allows you to have cinema sound in your own living room. Only connect the digital sound output to a system suitably equipped for this! Observe the instructions delivered with your Dolby Digital system.
-
Page 26: Channel List
Channel list Channel list The programs and channel settings made at the factory can be changed in the “Channel List” menu. The menu is selected with -button, the -buttons and with for TV or RADIO . If a password has been stored then this must also be entered. - Page 27 Channel list Using the favorites list, every user can store his or her own favorite programs and call them up at any time. The programs can be pro- tected from unauthorized access by means of a password (refer to chapter “Password”). Each list selected is highlighted by a color bar. The selected program appears in the picture in the top corner of the screen.
- Page 28 Channel list -button moves you to the channel list and the -button displays the favorite list. You can select a favorite here using the -buttons. It is highlighted by a color bar. Write-mode is accessed by pressing the -button.
-
Page 29: Search For A Program Alphabetically
Channel list Using the -buttons, first select the line with the “apple symbol” and then select the required list by pressing the -buttons. Press the -button and the required favorite list appears on the screen. Select your required program by pressing the -buttons;... -
Page 30: Sorting Your Programs
Channel list Confirm the letter by pressing the -button. All programs beginning with this letter are then displayed. Using the -buttons, you can select the required transmitter. This is then highlighted by a color bar and is displayed in the top-right corner of the screen. - Page 31 Channel list “Hold” the program to be moved by pressing on the -button. The program is now highlighted with another color and you can now move it to the required position using the and the -buttons and place it on the corresponding program location using The changed storage position is confirmed and appears for a few seconds on the screen.
-
Page 32: Deleting Programs
Channel list Deleting programs You delete programs in the same way that you sort them. Access the “channel list” by pressing the -button. Select the position of the program you want to delete by pressing - and the -buttons. -
Page 33: Adding A Program Manually
Channel list Adding a program manually Access the channel list by pressing the menu button. On pressing the -button, the screen now displays the menu for adding a program. You can now make the entries required for a new program here. The first line in the list is highlighted by a color bar. -
Page 34: Electronic Program Guide
Electronic Program Guide Electronic Program Guide EPG (Electronic Program Guide) The EPG-button provides you with a survey of all currently available programs together with times and duration (see display at top of screen) if these are transmitted with the Electronic Program Guide (EPG), such as, e.g. -
Page 35: Epg Timer Programing
Electronic Program Guide EPG timer programing You can then move the colored bars within the list using the -buttons and select a program for timer programing. The timer is selected with Here, you can select various timer settings using the - or -buttons, e.g. -
Page 36: Unit Password
Unit password Unit password You can lock your DVB-C receiver to protect it from third-party access or unauthorized access. The receiver is thereby protected against changes to the receiver settings by unauthorized persons. Simultaneously, you can also activate a child lock (parental control) to lock various programs. - Page 37 The factory setting is “UFD 560”. You have now made all settings to secure and to identify your DVB-C receiver. If you forget the password then you must contact your dealer to have...
-
Page 38: Parental Control
Unit password Parental control In the same way as you identify the favorite programs using the “Apple symbol”, you can also set the parental control (child lock) to prevent unauthorized access by children. The programs are marked by the “padlock” symbol in the program lists “TV” or “Radio”. ... -
Page 39: Operating From The Front Panel
Operating from the front panel Operating from the front panel If you have misplaced your remote control or the batteries are empty then you can operate the receiver from the front panel. Operating without the RC There are six buttons on the front panel. The On/Off, Menu, Select buttons as well as the Cursor buttons with horizontal and vertical arrows. -
Page 40: Setting The System Parameters
Setting the system parameters Setting the system parameters System parameters You should not change the following settings without a reason as these are factory settings or operational settings. The “System Parameters” menu can be selected with the menu ... -
Page 41: Parental Control
Setting the system parameters Parental Control The basic settings that can be made here are described in the settings for parental control in the “Password” chapter. System Information The “System Information” position contains factory settings that can not be changed and that are only intended for servicing. ... -
Page 42: Tv Type
Setting the system parameters TV Type Here, you can set the type of TV connected to the receiver using the buttons. Possible types of TV are: • PAL, • Multinorm or • NTSC unit Confirm by pressing twice. Aspect Ratio Here you can select the type of picture format (aspect ratio) that ... -
Page 43: Installation Menu
Installation menu Installation menu You should not change the following settings without a reason as these are factory settings or operational settings. The “Installation” menu can be selected with the menu button- -buttons in the main menu and with . -
Page 44: Network Scan (Cable Network Program Search)
Installation menu Network Scan (cable network program search) In “Scan Mode” you can select whether you want to search for “Only Free” or “Free + Scrambled” programs (using the -buttons). The program information of all programs can be loaded using the NIT program scan;... -
Page 45: Software Download
Installation menu Software Download Thanks to digital technology, the software and the channel list of your receiver can also be updated via the cable network. You can find out whether a new software or a new channel list is available via the “Software Download”... -
Page 46: Automatic Software Recognition
Installation menu Using the bright cursor bar , you can decide which position you want to deactivate (No). Positions that have already been deactivated can not be changed. If you only want to update the software but want to leave the channel lists as they are then deactivate the “Channel List”... -
Page 47: Connecting A Videorecorder
Observe all screen messages! You have to reset the time after a software update! You can also call up the updates from the Internet. The URL is: www.esc-kathrein.de/download/ufd/ Instructions on how to proceed are also located here. Connecting a videorecorder... -
Page 48: Technical Appendix
Technical appendix Technical appendix Technical specifications Reception of digital TV and radio programs Common Interface for two CA modules Suitable for software update via HF signal and RS 232- interface Electrical audio output for Dolby Digital (AC 3) EPG (ELECTRONIC PROGRAM GUIDE) 14 timers 2,000 storage locations each for TV and Radio 5 favorite program lists... -
Page 49: Technical Data
Technical appendix Technical data HF range Frequency range (HF) [MHz] 47-862 Input level range [dBµV] 40-90 Reception threshold (EB/NO) at QAM 64 [dB] < 16 Digital TV system Modulation, FEC, demultiplexer DVB-C standard; 16, 32, 64, 128, 256 QAM Video resolution CCIR 601 (720 x 576) Input data rate [MS/s] 1,5-7... -
Page 50: Connection Example
Technical appendix Connection example... -
Page 51: Small Technical Lexicon / Glossary
Small technical lexicon / glossary Small technical lexicon / glossary DVB-C DVB is the short-form for Digital Video Broadcasting. DVB-C indicates the mode of transmission (C = Cable). EB/NO ratio. This ratio indicates the signal-to-noise ratio of the digital signal. Reception is generally not possible at EB/NO values under 5 dB. -
Page 52: Service
Tel.: +49 (080 31) 18 47 00 Fax: +49 (080 31) 18 46 76 internet: http://www.kathrein.de KATHREIN-Werke KG Anton-Kathrein-Straße 1-3 PO Box 10 04 44 D-83004 Rosenheim, Germany Tel.: +49 80 31 1 84-0 Fax +49 80 31 1 84-3 06...
Need help?
Do you have a question about the UFD 560 and is the answer not in the manual?
Questions and answers