Chapters
Table of Contents

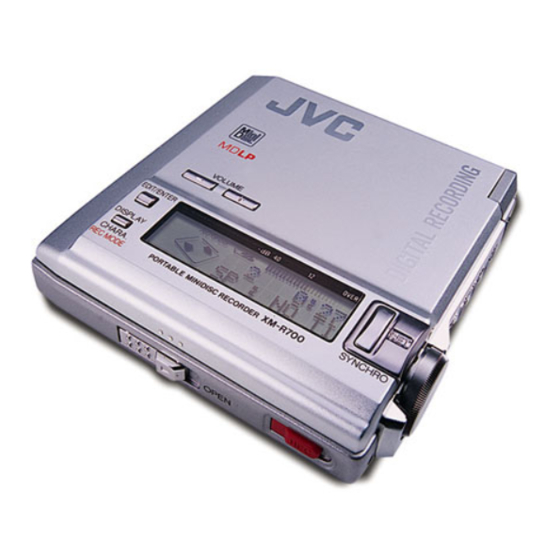
Related Manuals for JVC XM-R700SL


Summary of Contents for JVC XM-R700SL
-
Page 1: Table Of Contents
XM-R700SL SERVICE MANUAL PORTABLE MINIDISC RECORDER XM-R700SL Area Suffix Singapore Contents Safety Precautions Important for laser products Attention when MD pick up is exchanged Disassembly method 1-15 Adjustment method Maintenance of laser pickup 1-17 Replacement of laser pickup 1-17 Description of major ICs 1-18~37 No.20911... - Page 2 XM-R700SL 1. This design of this product contains special hardware and many circuits and components specially for safety purposes. For continued protection, no changes should be made to the original design unless authorized in writing by the manufacturer. Replacement parts must be identical to those used in the original circuits.
-
Page 3: Important For Laser Products
XM-R700SL Important for laser products 5.CAUTION : If safety switches malfunction, the laser is able 1.CLASS 1 LASER PRODUCT to function. 2.DANGER : Invisible laser radiation when open and inter 6.CAUTION : Use of controls, adjustments or performance of lock failed or defeated. Avoid direct exposure to beam. - Page 4 XM-R700SL Attention when MD pick up is exchanged 1. About the static electricity protection measures The laser diode in the traverse unit (optical pick up) is easy to be destroyed by clothes and the human body to the electrified static electricity.
-
Page 5: Attention When
XM-R700SL Disassembly method Bottom cover <Main body> Hole knobs b Removing the MD door assembly and the bottom cover (See Fig. 1 to 6) Turn over the body and remove the six screws A attaching the bottom cover. Release the joint a outside and remove the bottom cover. - Page 6 XM-R700SL Unhook the joint tab c on the left side, then the right side of the MD door. Left Remove the MD door assembly from the body while pulling out the flexible wires another end of which has already disconnected as shown in Fig.7.
- Page 7 XM-R700SL Remove the two screws D and the one screw E Main board CN300 attaching the main board. Move the battery lead on the side of the body in the direction of the arrow and removethe screw F attaching the main board and the cabinet assembly.
- Page 8 XM-R700SL Removing the jog assembly (See Fig.7 and 11) Joints f Jog assembly Prior to performing the following procedures, remove the MD door assembly and the bottom cover. Disconnect the flexible wire from connector CN--- on the main board (See Fig.7).
- Page 9 XM-R700SL < Removal of the MD mechanism > Magnetic head board Removing the Magnetic head board Slit a Magnetic head (See Fig.1 and 2) flexible harness Holder assembly Disconnect the magnetic head flexible harness from the connector of the magnetic head board on the holder assembly.
- Page 10 XM-R700SL CAUTION: When reassembling the magnetic head Lift up assembly, reverse the order of the removing procedure. Right side of the Convex part (b) head protector Attach the magnetic head assembly by cramping the MD mechanism assembly. Then, fix the...
- Page 11 XM-R700SL Removing the Pickup unit (See Fig.7 and 8) Main shaft Prior to performing the following procedure, remove the magnetic head assembly. Remove the two D screws fixing the main shaft of the pickup unit on the underside of the chassis assembly.
- Page 12 XM-R700SL Flexible harness Removing the Flexible harness assembly and the Protective/reflective switch assembly (See Sig.9 to 11) Peel the double-sided tape attaching the flexible Peel off harness on the feed motor on the underside of the Double-sided tape chassis assembly.
- Page 13 XM-R700SL Part k Lift motor bracket Removing the Lift motor (See Fig.12 and 13) Unsolder the part j of the flexible harness connected to the lift motor on the underside of the chassis assembly. Remove the two G screws attaching the lift motor bracket.
- Page 14 XM-R700SL Removing the Feed motor Flexible harness (See Fig.15 and 16) Prior to performing the following procedure, remove the magnetic head assembly and the pickup unit. Peel off Peel the double-sided tape attaching the flexible Double-sided tape harness on the feed motor on the underside of the chassis assembly.
-
Page 15: Adjustment Method
XM-R700SL Adjustment method (Adjustment should done when change the PICKUP, mechanism, Printed circuit board.) Open the bottom cover Adjustment DISC Pre mastered(PRE DISC):TGYS 1 Recordable (MO DISC):AU-1 or full recorded normality set 80min tracking off set adjust:SONY 80min DISC Joint the AC adaptor to main body... - Page 16 XM-R700SL From the previous page Insert the laser power Adjust the laser power by F.SKIP, B.SKIP meter sensor then fix by STOP key Adjust to less than 6.32mW or same as 6.32mW Adjust less than 6.32mW and more cross this...
-
Page 17: Maintenance Of Laser Pickup
XM-R700SL Maintenance of laser pickup Replacement of laser pickup (1) Cleaning the pick up lens Before you replace the pick up, please try to Turn off the power switch and,disconnect the clean the lens with a alcohol soaked cotton power cord from the ac outlet. -
Page 18: Description Of Major Ics
XM-R700SL Description of major ICs CXA2523AR (IC300) : MD servo 1.Block diagram ADIP Amp TE/SE Amp PEAK 3TADJ FE Amp RFAGC 22 EQADJ AGCI 21 VREF COMPO 20 F0CNT COMPP 19 XSTBY ADDC 18 XLAT 17 SCLK Command I/F 16 SWDT... - Page 19 XM-R700SL Symbol Function Pin No. Reference voltage output. VREF Equalizer center frequency setting pin. EQADJ BPF3T center frequency setting pin. 3TADJ Power supply. BPF22 center frequency setting pin. WBLADJ Tracking error signal output. Connects the sled error signal LPF capacitor.
- Page 20 XM-R700SL CXA8059Q (IC450) : Motor driver 1. Pin layout 2. Block diagram 1-20...
- Page 21 XM-R700SL 3.Pin function Symbol Function PGND The GND to guard the power stage. The terminal to detect the voltage. The terminal to supply the voltage for the power stage. CPOUT The terminal to connect the capacitor in the final charge pump.
- Page 22 XM-R700SL CXD2672GA(IC351):DSP 1.Pin layout AVS1 ASYI DVSS1 LDDR DTRF VSI02 ADFG ADRB AVS2 ADI0 PEAK FILI ABCD CLTV APCR CKRF FOCN ADRT BIAS ASYO XWE TST6 AVD2 AUX1 BOTH FILO XLRF VDI02 DCHG AVD1 MVCI TFDR TRDR DVDD1 FRDR FFDR VDC4...
- Page 23 XM-R700SL 2.Pin function(2) Symbol Function Pin No. XLAT Micon serial bus latch input SRDT Micon serial bus data read out output SENS Internal output of micon serial bus address VSC0 Internal logic GND SQSY PTGR=0 ADIPsink output / PTGR=1 DISC SUB-Q sink output...
- Page 24 XM-R700SL 2.Pin function (3) Symbol Function Pin No. VSIO1 2.5V I/O sel Vss External DRAM address output ADIO1 2.5V I/O sel VDD U-10 External DRAM address output T-10 External DRAM address output R-10 External DRAM address output U-11 IXOE Open...
- Page 25 XM-R700SL 2.Pin function (4) Symbol Function Pin No. E-17 VSIO2 2.5V I/O Vss E-16 F0CN Filter cutoff control output E-15 VDIO2 2.5V I/O VDD D-17 DTRF Controller data output D-16 CKRF Controller clock output D-15 XLRF Controller latch output A-17...
- Page 26 XM-R700SL MPC17A139MTB-X (IC400) : 4ch bridge driver 1. Pin layout AGND PGND PGND PGND PGND 2. Pin function Clock detector OSC.circuit Auto Synchronization Stop Driver PS , OE INPUT OUTPUT 1~4 X:Don't care Z:High impedance 1-26...
- Page 27 XM-R700SL 3.Block diagram MPC17A139MTB-X DC/DC CLOCK Converter Detector AGND 1-27...
- Page 28 XM-R700SL AK4562VN-W (IC801) : A/D, D/A comverter 1. Pin layout 2. Block diagram VREF LIN1 LIN2 AGND RIN1 RIN2 DGND OPGAL LRCK Audio I/F BCLK LOUT2 Controller SDTO SDTI OPGAR Control Register I/F Clock Divider ROUT2 ROUT1 LOUT1 CCLK CDTI...
- Page 29 XM-R700SL JCV8002-W (IC851) : Head phone amp 1. Pin layout 2. Block diagram Vref BEEP BEEP Vref Vref IN B BST1 IN A BEEP BST2 OUT B BEEP OUT A CUT A 3. Pin function Symbol FUNCTION (+B) in power amplifier output steps...
- Page 30 XM-R700SL AK93C55BH-W (IC502) : EEPROM 1. Pin layout 2.Pin function Pin name Fnction Chip select Serial data clock Serial data input Serial data output Program enable Ground Power supply Not connected 3. Block diagram DATA REGISTER R/W AMPS AUTO ERASE...
- Page 31 XM-R700SL HD6433048SV67X (IC501) : CPU 100 ~ 76 1. Pin layout 26 ~ 50 2. Pin function Symbol I/O Pin function Symbol Pin function Power supply terminal DATA Data output for Debag/Test mode XRST2 RF reset Clock output for Debag/Test mode...
- Page 32 XM-R700SL IC-PST3424U-X (IC504) : Reset 1. Pin layout VOUT 2. Block diagram VOUT Vref 3. Pin function Pin Name Function Vout Reset Signal Output PIN VDD PIN / Voltage Detect PIN Non connect VSS PIN 1-32...
- Page 33 XM-R700SL MB3817PFV-X (IC911) : Switching regurator controller 1. Pin layout 2. Block diagram Error Amp. Cotp. current setting (0.5V) Soft Start Comp. Comp. (0.9V) 1.5V -1.4V bias bias -1.0V Power UVLO Latch (1.5V) ON/OFF CT RT CSCP VREF 3. Pin function...
- Page 34 XM-R700SL NJM2115V-W (IC821) : Regulator 1. Pin layout 8. V + 1. A OUTPUT 2. A -INPUT 7. B OUTPUT 3. A +INPUT 6. B -INPUT 4. V - 5. B +INPUT 2. Block diagram -INPUT OUTPUT +INPUT 1-34...
- Page 35 XM-R700SL S-8321AAMPDNA-W (IC931) : Switching 2. Block diagram 1. Pin layout CONT VOUT Protect circuit VREF Control circuit 3. Pin function ON/OFF Pin Name Function ON/OFF Power off terminal VOUT Voltage output terminal (N.C.) Terminal CONT Ext indnctor Connection terminal TK1125BMC-X (IC802) : Regulator 1.
- Page 36 XM-R700SL TK1124BMC-X (IC341) : Regulator 1. Pin layout 2. Block diagram VOUT THERMAL SENSOR CONT BANDGAP REFERENC 1-36...
- Page 37 XM-R700SL XC6366B102M-X (IC921) : Regulator 1. Pin layout 2. Block diagram Phase Compensation Error Amp. Conparator Buffer, EXT/ Driver Vref with Ramp Wave PWM/PFM Soft Start, Generator, Contoroler 3. Pin function Pin Name Function EXT/ EXT transistor connect Power supply...
- Page 38 XM-R700SL VICTOR COMPANY OF JAPAN, LIMITED AUDIO & COMMUNICATION BUSINESS DIVISION PERSONAL & MOBILE NETWORK BUSINESS UNIT. 10-1,1chome,Ohwatari-machi,Maebashi-city,371-8543,Japan Printed in Japan (No.20991) 200101(O)
-
Page 39: Block Diagram
XM-R700SL Block diagram J802 J801 J851 CN300 CN401 CN701 CN601... - Page 40 XM-R700SL < M E M O >...
- Page 41 XM-R700SL Standard schematic diagrams MD servo & main amp section MD servo & main amp section R121 Q821 Q822 4.7k 2SA2018-X 2SC4617/R/-X C823 IC821 R822 R221 C358 R827 4.7k NJM2115V-W C821 R821 100k C822 R229 C225 10/6.3 100k C223 R381...
- Page 42 XM-R700SL XM-R700SL Magnetic head amp section C603 C601 C602 Q601 Q602 2SK2315-W 10/10 2SK2315-W R606 R601 220k FS05J10-X R602 220k CN601 D601 QGF0513F1-05X IC601 100p/100 D602 R607 C604 FS05J10-X SN74AHCT540PW-X R603 220k R608 R604 220k 220k R605 CN602 Q604 Q603...
- Page 43 XM-R700SL Power supply section SVCC C952 0.033 R951 R952 D951 TC7W00FU-X 1SS355-X IC951 R953 R955 470k 470k 2SC4617/R/-X C951 Q953 D954 RPLY 0.01 1SS388-X R954 470k R956 TP951 270k C957 Q954 0.01 2SC4617/R/-X R957 KEYON 100k D953 D957 RB717F-X 1SS388-X...
- Page 44 XM-R700SL XM-R700SL Printed circuit boards Printed circuit boards S503 Min board (Forward side) Min board (Reverse side) R572 D951 R571 IC951 D957 CN701 Q905 C957 R908 Q903 R901 D954 D955 C572 Q911 R907 R959 C571 L912 L911 C953 C956 C910...
- Page 45 XM-R700SL PARTS LIST [ XM-R700SL ] * All printed circuit boards and its assemblies are not available as service parts. Area suffix US --------------------- Singapore - Contents - Exploded view of general assembly and parts list 3- 3 MD mechanism assembly and parts list...
- Page 46 XM-R700SL < M E M O >...
-
Page 47: Exploded View Of General Assembly And Parts List
XM-R700SL Exploded view of general assembly and parts list Block No. Magnetic head board Main board... - Page 48 XM-R700SL Parts list (General assembly) Block No. M1MM Item Parts number Parts name Q'ty Description Area QYSPSPU1411M SCREW LV30225-037A SPACER FOR MECHA LV10231-203A CABINET LV31193-003A EJECT ASSY LV41215-005A MINI SCREW FOR EJECT ASSY LV30225-034A SPACER FOR EJECT ASSY LV31189-003A EJECT KNOB...
- Page 49 XM-R700SL Parts list (General assembly) Block No. M1MM Item Parts number Parts name Q'ty Description Area LV20433-006A BOTTOM COVER FOR JES PRODUCT LV41043-001A INSULATOR FOR BOTTOM COVE LV31191-001A H.P.JACK COVER LV31192-001A DC JACK COVER LV31187-001A SLIDE KNOB QUQ605-0506AA FFC WIRE...
-
Page 50: Md Mechanism Assembly And Parts List
XM-R700SL MD mechanism assembly and parts list Block No. FLM-SRM2 Grease CFD4007HYZ FG-87HS MOBIL-1 0.45 0.1mm... - Page 51 XM-R700SL Parts list (MD mechanism) Block No. M2MM Item Parts number Parts name Q'ty Description Area LV20359-001A CHASSIS ASS'Y LV31098-002A FEED UNIT LV40501-001A SPECIAL SCREW M1.4X1.6 LV40928-001A P.U. GUIDE LV40500-001A SPECIAL SCREW M1.4X3.0 QAL0170-001 PICK UP LV40926-001A LEAD SPRING VKZ4616-008 SCREW M1.4X1.5...
-
Page 52: Electrical Parts List
XM-R700SL Electrical parts list (Main board) Block No. 01 Item Remarks Item Remarks Parts number Parts name Area Parts number Parts name Area C 101 NCS31HJ-101X C CAPACITOR C 365 NCB31CK-104X C CAPACITOR C 106 NCB21CK-105X C CAPACITOR C 366... - Page 53 XM-R700SL Electrical parts list (Main board) Block No. 01 Item Remarks Item Remarks Parts number Parts name Area Parts number Parts name Area C 911 NCB11AK-475X C CAPACITOR IC823 UMW2N-W TRANSISTOR C 912 NBG40GM-226X E CAPACITOR IC824 UMW1N-W TRANSISTOR C 913...
- Page 54 XM-R700SL Electrical parts list (Main board) Block No. 01 Item Remarks Item Remarks Parts number Parts name Area Parts number Parts name Area R 124 NRSA63J-102X MG RESISTOR R 357 NRSA63J-102X MG RESISTOR R 125 NRSA63J-153X MG RESISTOR R 358...
- Page 55 XM-R700SL Electrical parts list (Main board) Block No. 01 Item Remarks Item Remarks Parts number Parts name Area Parts number Parts name Area R 529 NRSA63J-102X MG RESISTOR R 954 NRSA63J-474X MG RESISTOR R 530 NRSA63J-102X MG RESISTOR R 955...
-
Page 56: Packing Materials And Accessories Parts List
XM-R700SL Packing materials and accessories parts list Block No. Block No. 3-12... -
Page 57: Parts List
XM-R700SL Parts list (Packing) Block No. M3MM Item Parts number Parts name Q'ty Description Area QPA01202505 POLY BAG LV30245-003A POLY BAG AIR-CAP BAG LV32599-001A PAPER CUSHION LV32290-003A CARTON Parts list (Accessories) Block No. M4MM Item Parts number Parts name Q'ty...
Need help?
Do you have a question about the XM-R700SL and is the answer not in the manual?
Questions and answers