Advertisement
Electric Fireplace Insert with Heater
OWNER'S MANUAL
Model No. FP404R-Q
PLEASE SAVE THESE INSTRUCTIONS
WARNING: READ THIS OWNER'S MANUAL CAREFULLY BEFORE USE.
PET OWNERS WARNING:
The health of some small pets including birds are extremely sensitive to the
fumes produced during the first-time use of many appliances. These fumes are
not harmful to humans but we recommended that you do not use your heater
around birds and small pets during its initial use until the manufacturing
corrosion coatings burn off.
Advertisement
Table of Contents

Related Manuals for RD WORKS FP404R-Q


Summary of Contents for RD WORKS FP404R-Q
- Page 1 Electric Fireplace Insert with Heater OWNER’S MANUAL Model No. FP404R-Q PLEASE SAVE THESE INSTRUCTIONS WARNING: READ THIS OWNER’S MANUAL CAREFULLY BEFORE USE. PET OWNERS WARNING: The health of some small pets including birds are extremely sensitive to the fumes produced during the first-time use of many appliances. These fumes are...
-
Page 2: Important Instructions
Thank you for choosing our Electric Fireplace. This owner’s manual will provide you with valuable information necessary for the proper care and maintenance of your new product. Please take a few moments to thoroughly read the instructions and familiarize yourself with all the operational aspects of your new heater. IMPORTANT INSTRUCTIONS When using this electric unit, basic safety precautions should always be followed to reduce the risk of fire, electric shock, and injury to persons, including the following:... -
Page 3: Specifications
14. To avoid fire or shock hazard, plug the unit directly into a 120 V AC electrical outlet. 15. To disconnect heater, turn controls to OFF, then remove plug from outlet. Pull firmly on the plug, DO NOT unplug by pulling on the cord. 16. - Page 4 WARNING: It is normal for the power cord to feel warm to the touch; however, a loose fit between the outlet and the plug may cause overheating of the plug. If this occurs, try inserting the plug into a different outlet. Contact a qualified electrician to inspect the original outlet for damage.
-
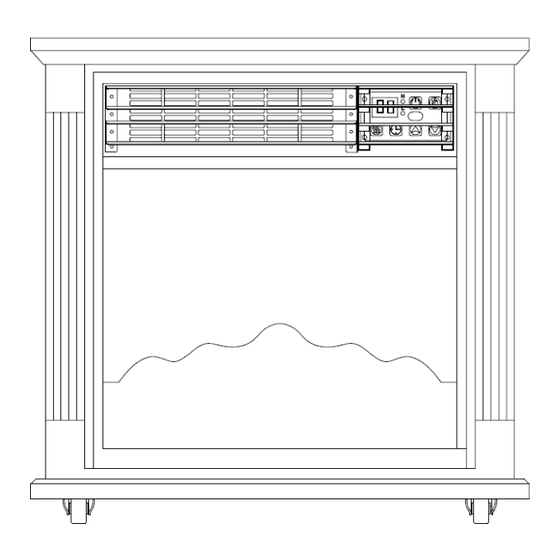
Page 5: Product Diagram
PRODUCT DIAGRAM Mantel Air oulet Control panel Remote panel Ember bed... -
Page 6: Control Panel
Control panel 1、Digital display: Indicate set room temperature or time value according to the timer or High and low heating mode display. The power is in standby mode and the display is “OF”. 2、High range mode lights: High range mode indicator lights up for high-grade heat. 3、Power button: Powers the display on and off. -
Page 7: Operating Your Heater
Remote Control Power button: Powers the display on and off. Up button: For setting temperature or time upward Down button:For setting temperature or time downward Flame light button: Adjust the brightness of the flame Heater button: Set up the heater mode and turn off Timer button: User setting timing boot or shutdown PREPARATION... - Page 8 Main switch 1、Start and select working mode Turn the heater on by pressing the ON/OFF button on the control panel or by pressing the Power button on the supplied remote control. Once power is off, heating element will stop working at first.
- Page 9 Adjust the thermostat by pressing the arrows on the control panel or remote control. Set temperature indication varies from 59℉ to 95℉. Once you have chosen the desired temperature, the heater will remain on until the room temperature increases to the temperature on the digital display.
-
Page 10: Maintenance
5、Setting electro lock Function of electro lock can avoid operation from children. Locking can be set in both power-on and power-off modes. Press Temp Up and Temp Down buttons once for 3 seconds. Locking is fulfilled when a buzzer rings. When locked, control panel and remote control failed to function. -
Page 11: Troubleshooting
TROUBLE SHOOTING If the heater will not operate, please check the following before seeking repair of service: 1. Check if the power cord is plugged into an electrical outlet, if not, plug in. 2. Check if electricity to the outlet is working. 3.
Need help?
Do you have a question about the FP404R-Q and is the answer not in the manual?
Questions and answers
The unit will beep several times and then the thermostat automatically increases to 95 degrees. Shutting it off resets it but it has now done this several times.