
Related Manuals for Co2meter 77597


Summary of Contents for Co2meter 77597
- Page 1 OPERATION MANUAL PORTABLE IAQ METER CO2Meter.com 131 Business Center Drive Ormond Beach, FL 32174 USA Support: (386) 256-4910 Email: Support@CO2Meter.com...
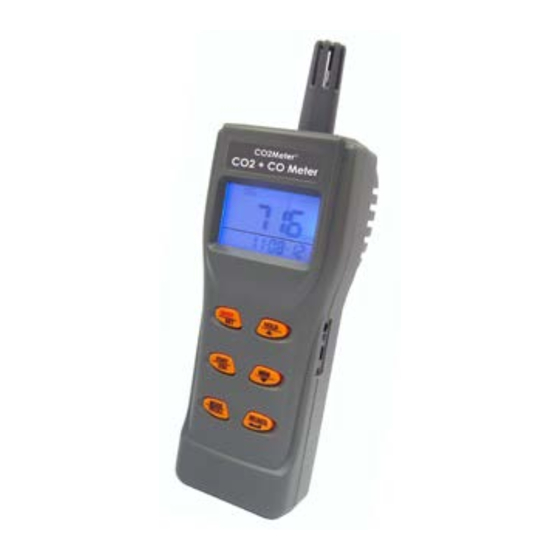
- Page 2 INTRODUCTION Thank you for purchasing this portable Indoor Air Quality ( IAQ) me ter. The meter measures the carbon dioxide (CO 2) level, carbon monoxide (CO) level, air temperature, dew point, wet bulb temperature and humidity, and is an ideal portable instrument for IAQ diagnosis.
-
Page 3: Material Supplied
Features: • Big LCD display with blue backlight to use in dark area • One touch to display CO /Dew Point temperature/Wet bulb temperature/ • Air temperature/Humidity/CO in turns. Designed with NDIR (non- dispersive infrared) Waveguide technology CO sensor • Programmable warning CO level •... -
Page 4: Power Supply
POWER SUPPLY The meter is powered by either 4 AA batteries or a DC adaptor (9V/1A output). Install the batteries into the battery compartment on the rear and make sure they are in correct polarity and good contact. When an adaptor is used, it will cut off the power supply from batteries. -
Page 5: Lcd Display
LCD DISPLAY HOLD CO TADPWBT STEL Re call Symbols UpperLCD CO2/CO/Temp/RH display LowerLCD Clock/timer display Carbon dioxide reading Carbon monoxide reading Readings are frozen unchanged HOLD Minimum/Maximum readings MIN/MAX Short-term exposure limit (15 STEL minutes weighted average) Time weighted average (8 hours) Low battery indicator Dew point temperature Dry air temperature... -
Page 6: Operation
Freezes the current readings. HOLD Selects unit or increases value in setup. Cancels data hold function. Press to manually record the reading. Selects unit or decreases value in setup. Activates MIN, MAX, TWA, TEL /AVG function. Saves and finishes settings. OPERATION POWER ON/OFF Press... - Page 7 CO2 (Carbon Dioxide) Press MODE to switch the mode to CO2. RECALL You can view the CO2 reading in ppm on the main display (Fig.4). The lower display shows the real time clock. Fig.4 Fig.5 CO (Carbon Monoxide) Press MODE to switch the mode to CO.
- Page 8 DATA HOLD HOLD In normal display mode, press freeze the readings, "HOLD” icon is flashed on the left top of LCD(Fig.9). All current readings are kept unchanged. Press HOLD again to cancel the hold function. HOLD Fig.9 BACKLIGHT The backlight will be activated for 10 seconds by pressing any key.
- Page 9 The meter also allows you to check the min/max/STEL/TWA values calculated since power on. Under normal mode press to see min/max/STEL/TWA and real time sequence. Each press of displays the sequence in turn, then returns to the current mode (Fig.10~13). STEL and TWA are calculated for CO2 only.
-
Page 10: Recording Data
RECORDING DATA The meter features a 99 point memory. In normal or hold mode, Press to record. icon and main display flash for about 3 seconds. The main display shows the memory serial number up to 99 points ( ( Fig. 15). Each memory contains all parameters (CO2, CO, TA..%RH), not only the parameter you choose to see on the main... -
Page 11: Data Logging
Press key to switch the display MODE RECALL parameter (Fig.18). Fig.18 Rec al l The time displayed in memory recall mode is the recording time of this memory. To leave the memory recall mode, START press key to exit and return to the normal display. -
Page 12: Auto Power Off
Fig.19 To terminate data logging, press for 2 seconds, icon stops flashing. The meter will only record one session at a time. Once record mode is activated all previous data is erased. Download logged data on a PC prior to recording another data log. -
Page 13: P10 Clear Memory
CLEAR MEMORY When entering setup mode, P10 and “CLr” (Fig.21) are displayed on the LCD. Press to go into P11 and decide to /AVG clear or keep all the manual records. The current set will be blinking on LCD (Fig.22). HOLD Press to choose NO or YES... - Page 14 P30 TEMPERATURE UNITS When entering setup mode, P30 and “unit” (Fig.25) are displayed on the LCD. Press to go into P31 and select the /AVG temperature units in C or The current set will display on LCD (Fig.26). HOLD Press to pick C or and press...
- Page 15 P50 PRESSURE COMPENSATION When entering setup mode, P50 and “PrES” (Fig.29) are displayed on the LCD. Press to set pressure compensation /AVG value for CO2 measurement. The current set will flash on LCD (Fig.30).The barometric pressure unit is kpa. Press to adjust the pressure HOLD value and press...
- Page 16 You should manually calibrate regularly to maintain good accuracy. NOTE: When accuracy becomes a concern after long use, you can return the meter to CO2Meter, Inc. for standard calibration. IMPORTANT: Do not calibrate the meter in air with an unknown CO concentration.
- Page 17 CAUTION: Do not calibrate the humidity without the default calibration salt. Otherwise, it will cause permanent damage. Contact CO2Meter, Inc. for calibration salt or services. 33% calibration Plug the sensor probe into 33% salt bottle. First press...
- Page 18 “CAL” and calibrating value (75.3% if at C) are blinking on the LCD. Meter is now calibrating, and will finish in about 60 minutes when “CAL” and humidity stop blinking. To abort calibration press at any time. Fig.35 CO CALIBRATION When the accuracy becomes a concern after a long time usage, return to dealers for standard calibration.
-
Page 19: Troubleshooting
Fig.37 Fig.36 NOTE: 400ppm calibration gas can vary from 385~415ppm (400+15ppm) TROUBLESHOOTING ? Cannot power on -Press for more than 3 seconds ON/OFF and try again. -Check whether batteries are in good contact and correct polarity, or the adaptor is plugged in correctly. -You may also take out the batteries for 10 mins and then put them back in again. - Page 20 PC CONNECTION Connect the logger to PC, users can do logging setting and data transmission with the included software. Plug the USB cable into the socket at the right side of the meter and the other port to PC. Then install the software in your PC with the following procedure.
- Page 21 Software Operation Auto-Connect Start the software and it will detect logger connection automatically and indicate the COM Port information at the bottom of the main screen as well as the COMPort setting column. Logger Settings To set up logging plan, click “Setting” icon and select “Logger”.
- Page 22 Data Transmission To transmit auto recorded data from the meter, click “Download” icon on the left top side of the main screen. All auto- recorded data in the logger will be transmitted. The raw data with time stamp will display at the lower part of the screen and the graph in the middle.
- Page 23 Zoom window: Hold down “Ctrl” key and drag click the left button of the mouse to select an area on the Graph and the selected area will be enlarged. Zoom X-axis: Hold down “Ctrl” key and drag click the left button of the mouse to select an area on the Graph and the X-axis of the selected area will be enlarged.
-
Page 24: Specifications
“Load” and select a desired file and it will be loaded in the main screen with the file details at the left top side. SPECIFICATIONS 77597 Measuring r ange 0~9999 p pm, (5001~9999 p pm o ut o f s cale r ange) -
Page 25: Co 2 Levels And Guidelines
LEVELS AND GUIDELINES Non-Enforced Reference levels NIOSH recommendations 400 ppm: normal outdoor ambient air CO2 concentrations 600 ppm: normal indoor air quality 1,000+ ppm: indicates inadequate ventilation; complaints such as headaches, fatigue, and eye/throat irritation will be more widespread. 1000 ppm should be used as an upper limit for indoor levels. -
Page 26: Co Levels And Guidelines
CO LEVELS AND GUIDELINES Symptoms and applicable standard Normal background levels Maximum indoor air quality level: Maximum allowable concentration per ASHRAE Residential standards 62-1989 for living area. Maximum limit 8 hrs of continuous exposure per California OSHA workplace standards. Maximum 8 hrs average exposure level per US OSHA workplace standards. -
Page 27: Warranty
The meter comes with a one (1) year warranty starting from the date the meter was shipped to the buyer. During this period of time, CO2Meter warrants our products to be free from defects in materials and workmanship when used for their intended purpose,... -
Page 28: Return Authorization
RETURN AUTHORIZATION If the product fails under normal use during the warranty period an RMA (Return Material Authorization) number must be obtained from CO2Meter.com. After the item is received, CO2Meter.com will repair or replace the item at our discretion. To obtain an RMA number, call us at (386) 256-4910 or email us at support@co2meter.com.
Need help?
Do you have a question about the 77597 and is the answer not in the manual?
Questions and answers