
Related Manuals for Nilfisk-Advance SC530 53 BD GO


Summary of Contents for Nilfisk-Advance SC530 53 BD GO
- Page 1 SC530 53 BD GO / SC530 53 B GO INSTRUCTION FOR USE Model: 50000335 / 50000336 VS13009 Rev A 18 Apr. 2016...
- Page 2 Conformity certificate Declaração de conformidade Osvědčení o shodě Πιστοποιητικό συµµόρφωσης Deklaracja zgodności Certificat Konformitätserklärung Megfelel sségi nyilatkozat de conformitate Overensstemmelsescertifikat Dichiarazione di conformità Declaración de conformidad Atitikties deklaracija Atbilstības Överensstämmelsecertifikat Vastavussertifikaat Déclaration de deklarācija Certifikát súladu conformité Yhdenmukaisuustodistus Konformitetssertifisering Certifikat o ustreznosti Uyumluluk Conformiteitsverklaring sertifikası...
-
Page 3: Table Of Contents
MANUAL CONTENT AND PURPOSE ........................2 HOW TO KEEP THIS MANUAL ..........................2 DECLARATION OF CONFORMITY ...........................2 ACCESSORIES AND MAINTENANCE ........................2 CHANGE AND IMPROVEMENT ..........................2 SCOPE OF APPLICATION ............................2 MACHINE IDENTIFICATION DATA .........................2 TRANSPORT AND UNPACKING ..........................3 VISIBLE SYMBOLS ON THE MACHINE ........................3 SYMBOLS THAT APPEAR ON THE INSTRUCTION FOR USE MANUAL ............3 GENERAL SAFETY INSTRUCTION ...........................4 MACHINE STRUCTURE ..............................6... -
Page 4: Declaration Of Conformity
The purpose of this Instruction for Use Manual is to provide the operator with necessary information to use the machine properly and safely. It contains information about technical data, safety, operation, storage, maintenance, spare parts and how to scrap it. Before performing any procedure on the machine, no matter the operators and qualified technicians must read this Manual carefully. - Page 5 When the carrier delivers the machine, make sure the packaging and machine are both whole and undamaged. If any damaged, make the carrier know the damage and before accepting the goods, reserve the right in compensation of the damage. Follow the instructions on packing strictly when unpacking the machine. Check the package to ensure following items are included: 1.
- Page 6 • • • • • • • • • • • • • • • • • • • • • • • • • • •...
- Page 7 • • • • • • • • • •...
-
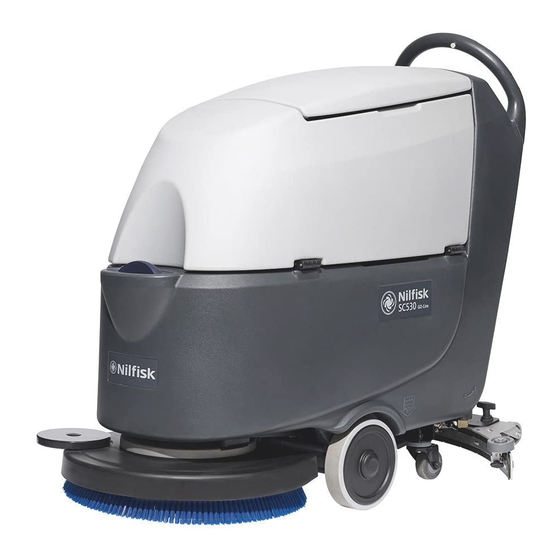
Page 8: Control Panel
Recovery tank lid 20. Brush/pad-holder Can holder 21. Brush/pad-holder deck Handlebar 22. Recovery water drain hose Control panel 23. Solution tank Squeegee lifting/lowering lever 24. Hinge Garden coupling 25. Recovery tank Power supply cable holder 26. Filter support Power cable 27. - Page 9 36. Machine backward switch (B) 53. Charged battery warning light (green) 37. Tank safety cable 54. Ignition key (0 - I) 38. Battery connector (red). 55. Detergent flow control knob (**) 39. Detergent tank filler plug (**) 56. Speed adjuster (B) 40.
- Page 10 Packing dimensions (Lx W x H) 1370x600x1300 Machine height 1080 Machine length 1260 Machine width (without squeegee) Machine weight with empty tanks (without batteries) Gross vehicle weight (GVW) Shipping weight Solution tank capacity Liter Recovery tank capacity Liter Vacuum motor power Watt Vacuum capacity 1200...
- Page 11 RD-BK RD-BK BN-BK BU-BK 24V BATTERIES RED/6AWG VS10204 BATTERY CHARGER RED/10AWG VS13201 CONTROL PANEL BOARD RED/20AWG 9095127000 ELECTROMAGNETIC SWITCH 24V (BRUSH MOTOR) BLACK/6AWG VS10201 RELAY 24V (VACUUM MOTOR) BLACK/10AWG VS13208 LOW POWER CIRCUIT FUSE BLACK/12AWG ZD48320 CIRCUIT BREAKER (BRUSH MOTOR) BLACK/20AWG VS13209 BRUSH RELEASE FUSE...
- Page 12 24V BATTERIES RED/6AWG VS10204 BATTERY CHARGER RED/10AWG VS13201 CONTROL PANEL BOARD RED/20AWG VS10209 ELECTRONIC BOARD (TRACTION SYSTEM) BLACK/6AWG 9095127000 ELECTROMAGNETIC SWITCH 24V (BRUSH MOTOR) BLACK/10AWG VS10201 RELAY 24V (VACUUM MOTOR) BLACK/12AWG VS10201 RELAY 24V (TRACTION SYSTEM) BLACK/14AWG VS13208 LOW POWER CIRCUIT FUSE BLACK/20AWG ZD48320 CIRCUIT BREAKER (BRUSH MOTOR)
- Page 13 1. Check that the batteries are connected to the machine with the connector (38). 2. Insert the ignition key (54) and turn it to "I". If the green warning light (53) turns on, the batteries are fully charged. If the yellow (52) or red warning light (51) turns on, the batteries must be charged (see the procedure in Maintenance chapter).
- Page 14 According to the type of batteries (WET or GEL/AGM), set the machine and electronic board of the battery charger as follows: GEL/AGM 1. Turn the ignition key (54) to “I” and in the very first seconds of machine operation pay attention to the following: •...
- Page 15 1. Insert the ignition key (54) and turn it to "O". 2. Lift the deck by pressing the pedal (10). 3. If equipped, turn the speed adjuster (56) to idle by turning it counter-clockwise. 4. Place the brushes (A, Figure. 5) or the pad-holder (B) under the deck (21).
- Page 16 1. Open the filler neck (B, Figure.7). 2. (For machines without Chemical Mixing System) Use the front filler neck (B) and the rear filler neck (H) to fill the tank (D) with a solution suitable for the work to be performed.
- Page 17 1. Prepare the machine as shown in the previous paragraph. 2. Insert the ignition key (A, Figure. 9) and turn it to "I". Check that the green warning light (B) turns on (charged battery). If the yellow (C) or red warning light (D) turns on, turn the ignition key back to “0”...
- Page 18 1. Start the machine as shown in previous paragraphs. 2. While keeping both hands on the handlebar press the safety switch (F, Figure. 9), then maneuver the machine and start scrubbing/drying the floor. 3. If necessary, stop the machine then adjust squeegee according to section “Adjusting balance of squeegee”. 1.
- Page 19 Until the green warning light (A, Figure. 12) stays on, the batteries allow the machine to work normally. When the green warning light (A) turns off, and the yellow warning light (B) turns on, it is advisable to charge the batteries, because the remaining charge will last for a few minutes (depending on battery characteristics and work to be performed).
-
Page 20: After Using The Machine
6. Perform steps 1 to 4. 7. Empty the solution tank with the hose (A, Figure. 15). After working, rinse the tank with clean water. After working, before leaving the machine: 1. Remove the brushes/pad-holders. 2. Empty the tanks (B and C, Figure. 15) as shown in the previous paragraph. -
Page 21: Battery Charging
All scheduled or extraordinary maintenance procedures must be performed by qualified personnel or an authorized Service Center. This manual only describes the general and common maintenance procedures. For other maintenance procedures that are not in below maintenance schedule table, please refer to the Service Manual that can be consulted at any our company Service Center. - Page 22 1. Open the cover (A, Figure. 16) and check that the recovery water tank (B) is empty, otherwise empty it with the drain hose (C). 2. Drive the machine on a level floor. 3. Turn the ignition key (F) to "0". 4.
- Page 23 7. Connect the battery charger cable (A, Figure. 17) to the electrical mains (G) (the electrical mains voltage and frequency must be compatible with the battery charger values shown on the machine serial number plate (F). When the battery charger is connected to the electrical mains, all machine functions are automatically cut off.
- Page 24 1. Drive the machine on a level floor. 2. Turn the ignition key (A, Figure. 19) to "0". 3. Lower the squeegee (B) with the lever (C). 4. Loosen the knobs (D) and remove the squeegee (B). 5. Disconnect the vacuum hose (E) from the squeegee. 6.
- Page 25 1. Clean the steel or the aluminum squeegee, as shown in the previous paragraph. 2. Check that the edges (E, Figure. 22) of the front blade (C) and the edges (F) of the rear blade (D) lay down on the same level, along their length;...
- Page 26 1. Drive the machine on a level floor. 2. Ensure that the machine is off and the ignition key (54) has been removed. 3. Turn the recovery tank lid (A, Figure23) 90 degree position where it can be took off from the tank, and then take down the float ball filter (P) from the tank.
- Page 27 (For machines with Chemical Mixing System) Clean the detergent tank (G, Figure. 24) as shown below: 1. Drive the machine on a level floor. 2. Turn the ignition key (A) to "0". 3. Open the cover (B) and check that the recovery water tank (C) is empty;...
- Page 28 1. Turn the ignition key (A, Figure. 26) to "0". 2. Disconnect the power supply cable (C, Figure. 26) from the electrical mains. 3. Remove the screws (C .Figure27) on control panel (D), then turn over the PCB to find the fuse (A, B, Figure 27). 4.
-
Page 29: Accessories/Options
In addition to the standard components, the machine can be equipped with the following accessories/options, according to the machine specific use: For further information concerning the above-mentioned optional accessories, contact an authorized Retailer. See “Parts List” section 1. WET or GEL/AGM batteries 2. - Page 30 Nilfisk A/S Kornmarksvej 1 DK-2605 Brøndby Denmark Tel:+45 43 23 81 00 Fax:+45 43 43 77 00 www.nilfisk.com...
Need help?
Do you have a question about the SC530 53 BD GO and is the answer not in the manual?
Questions and answers
MY VACUUM HOSE HAS BECOME UNCONNECTED UNDER THE MACHINE HOW DO I GET IT BACK ON