Tait TM8000 Service Manual
Hide thumbs
Also See for TM8000:
- Service manual (244 pages) ,
- Applications manual (136 pages) ,
- Accessories manual (82 pages)

Related Manuals for Tait TM8000


Summary of Contents for Tait TM8000
- Page 1 TM8000 mobiles TM8100 Mobile Radio Service Manual MM8100-02-00-812 Version 1.01 October 2003 © Tait Electronics Limited...
-
Page 2: Contact Information
Tait Radio Communications http://www.taitworld.com Corporate Head Office Tait North Asia New Zealand Regional Head Office: Hong Kong Tait Electronics Ltd Tait Mobile Radio (Hong Kong) Ltd P.O. Box 1645 E-mail: hongkong@taitworld.com Christchurch Beijing New Zealand Tait Mobile Radio (Hong Kong) Ltd E-mail: info@taitworld.com... -
Page 3: Limited Warranty
COPY THE SOFTWARE OR FIRMWARE INTO ANY AUTOMATICALLY AND WITHOUT NOTICE FROM MACHINE READABLE OR PRINTED FORM FOR TAIT IN THE EVENT THAT THE LICENSEE FAILS TO BACKUP PURPOSES IN SUPPORT OF YOUR USE OF COMPLY WITH ANY TERM OR CONDITION OF THIS... - Page 4 EXCLUSIVE REMEDY SHALL BE THE FOLLOWING THIS AGREEMENT UNDERSTANDS IT AND AGREES TO BE BOUND BY ITS TERMS AND CONDITIONS IN NO CIRCUMSTANCES SHALL TAIT BE UNDER LICENSEE FURTHER AGREES THAT SUBJECT ONLY ANY LIABILITY TO THE LICENSEE OR ANY OTHER...
-
Page 5: Table Of Contents
3.5 Re-assembly and Attachment of Control Head ......61 TM8100 Mobile Radio Service Manual October 2003 © Tait Electronics Limited... -
Page 6: Preface
The third section provides information regarding the level-1 repair procedures. The information is mainly limited to the procedures for disassembling and re-assembling the radio. Only a brief outline is given of the overall repair procedures themselves. TM8100 Mobile Radio Service Manual October 2003 © Tait Electronics Limited... -
Page 7: Notes For Readers
Technical Support (support@taitworld.com) or to the Technical Support Manager, Tait Electronics Limited, PO Box 1645, Christchurch, New Zealand. Orders for this manual can be placed with your Tait Dealer. -
Page 8: Typographical Conventions
This alert notice is used to warn about the risk of equipment damage or malfunction. Note This alert notice is used to highlight information that is required to ensure that procedures are performed correctly. TM8100 Mobile Radio Service Manual October 2003 © Tait Electronics Limited... -
Page 9: Associated Documents
The following manuals are mainly of concern to third-party developers. 3DK manuals The manuals are supplied in soft-copy form on a 3DK resource CD. MMAA30-00-00-807 TM8000 3DK hardware developer’s kit — Application manual MMAA30-02-00-429 TM8000 3DK application board — Software programmer’s manual MMAA30-02-00-812 TM8000 3DK application board —... -
Page 10: Amendment Record
Amendment Record Version Publication date Amended sections and pages 1.00 September 2003 First release 1.01 October 2003 Alert notice added in Section 3 Figures 3.5 to 3.8 updated TM8100 Mobile Radio Service Manual October 2003 © Tait Electronics Limited... -
Page 11: List Of Acronyms
Phase-locked Loop Radio Frequency RSSI Received Signal Strength Indication Surface-mount Technology TCXO Temperature-compensated Crystal Oscillator Tait Electronics Limited Ultra-high Frequency Voltage-controlled Oscillator VCXO Voltage-controlled Crystal Oscillator Very High Frequency TM8100 Mobile Radio Service Manual October 2003 © Tait Electronics Limited... - Page 12 TM8100 Mobile Radio Service Manual October 2003 © Tait Electronics Limited...
-
Page 13: Introduction
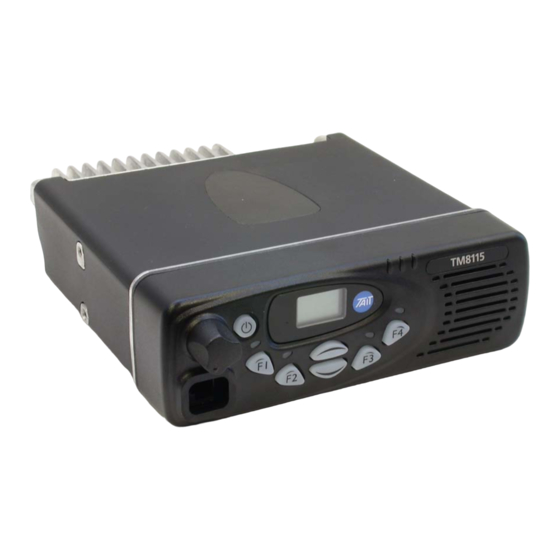
Specifications for system be found instead on the TaitWorld website in the area reserved for TM8000 products. This ensures that the latest specification data will always be available to service technicians. The radio body contains the transmitter, receiver and microprocessor Radio body circuitry. - Page 14 Figure 1.1 Illustrations of the TM8115 mobile radio showing both the front and rear Introduction TM8100 Mobile Radio Service Manual October 2003 © Tait Electronics Limited...
- Page 15 Various external devices may also be connected. The user’s guide and accessories manual describe the audio accessories. TM8100 Mobile Radio Service Manual Introduction October 2003 © Tait Electronics Limited...
- Page 16 Figure 1.3 Block diagram of an example installation of the TM8115 mobile radio in a vehicle Introduction TM8100 Mobile Radio Service Manual October 2003 © Tait Electronics Limited...
- Page 17 Figure 1.4 Block diagram of an example desktop installation of the TM8115 mobile radio TM8100 Mobile Radio Service Manual Introduction October 2003 © Tait Electronics Limited...
- Page 18 Figure 1.5 Block diagram of an example installation of the TM8105 mobile radio in a vehicle Introduction TM8100 Mobile Radio Service Manual October 2003 © Tait Electronics Limited...
-
Page 19: Radio Body
The main board, digital board, and heat-transfer block constitute a separate unit called the main-board assembly. Either Tait-designed or custom internal options boards may be fitted in Internal options boards the radio body. - Page 20 Figure 1.6 Block diagram of the radio body and control head of the TM8115 mobile radio Introduction TM8100 Mobile Radio Service Manual October 2003 © Tait Electronics Limited...
-
Page 21: Control Head
Full details of the optional microphones and circuit board are given in the accessories manual. TM8100 Mobile Radio Service Manual Introduction October 2003 © Tait Electronics Limited... -
Page 22: Repair Levels
Customers with appropriate facilities may also carry out level-1 repairs, but are strongly advised not to attempt level-2 repairs. Contact Technical Support for details of the process by which service centres may achieve accreditation. Introduction TM8100 Mobile Radio Service Manual October 2003 © Tait Electronics Limited... -
Page 23: Product Codes
The purpose is solely to enable service technicians to identify the radio body and control head of a radio that has been delivered for repair. TM8100 Mobile Radio Service Manual Introduction October 2003 © Tait Electronics Limited... - Page 24 The characters ee are applicable to the radio body only and identify different options. The product code scheme is summarised in Figure 1.7. Introduction TM8100 Mobile Radio Service Manual October 2003 © Tait Electronics Limited...
- Page 25 AA to ZZ are used. The digits and letters identifying the universal and custom options are assigned sequentially. Figure 1.8 illustrates the product codes in use at the time of publication. TM8100 Mobile Radio Service Manual Introduction October 2003 © Tait Electronics Limited...
- Page 26 0 when no options are added. Both letters and digits may be used for cc. The default for cc is 0T; on the two-digit-display control head the Tait logo is then displayed next to the LCD screen, and the product model code TM8115 is displayed above the speaker grill.
-
Page 27: General Description
Subsection 2.3 to Subsection 2.5. The different internal options boards are discussed in the accessories manual and the 3DK manuals. TM8100 Mobile Radio Service Manual General Description October 2003 © Tait Electronics Limited... - Page 28 Figure 2.1 Block diagram of the main board of the radio body General Description TM8100 Mobile Radio Service Manual October 2003 © Tait Electronics Limited...
-
Page 29: Operation Of Control-Head Circuitry
The microphone connector may also be used for the connection of a handset or programming lead. If required, a concealed microphone may be fitted inside the control head. TM8100 Mobile Radio Service Manual General Description October 2003 © Tait Electronics Limited... - Page 30 Figure 2.2 Architecture of the TM8100 transceiver General Description TM8100 Mobile Radio Service Manual October 2003 © Tait Electronics Limited...
-
Page 31: Operation In Receive Mode
ADCs with high dynamic range where it is oversampled at 256 kHz and fed to the custom logic device. TM8100 Mobile Radio Service Manual General Description October 2003 © Tait Electronics Limited... - Page 32 If an out-of- lock condition occurs during run-time, then an audible indication will be given and recovery repeatedly attempted. General Description TM8100 Mobile Radio Service Manual October 2003 © Tait Electronics Limited...
- Page 33 The volume control is logarithmic, with steps of 1.5 dB. Here, a side-tone from an options board can be summed in with the receive audio. TM8100 Mobile Radio Service Manual General Description October 2003 © Tait Electronics Limited...
-
Page 34: Operation In Transmit Mode
■ The timing between these two stages is critical to achieving the correct overall wave shape in order to meet the specification for transient ACP. General Description TM8100 Mobile Radio Service Manual October 2003 © Tait Electronics Limited... - Page 35 ■ power supply voltage outside correct operating range ■ software inhibit present ■ The last-named signal would normally initiate the start of ramp-up. TM8100 Mobile Radio Service Manual General Description October 2003 © Tait Electronics Limited...
- Page 36 (and hence the deviation) to match the RF channel bandwidth and compensate for subaudible signalling if added. The signal is then passed to the frequency synthesizer where it is used as the modulation source. General Description TM8100 Mobile Radio Service Manual October 2003 © Tait Electronics Limited...
-
Page 37: Operation Of Frequency Synthesizer
FCL and RF PLL is able to occur concurrently with minimal loop interaction owing to the very large difference in frequency step size between the loops. TM8100 Mobile Radio Service Manual General Description October 2003 © Tait Electronics Limited... - Page 38 FCL nominal frequency; the TCXO frequency itself is not adjusted. The items Kvco and Kvcxo are the control sensitivities of the RF VCO (in MHz/V) and VCXO (in kHz/V) respectively. The latter has temperature compensation. General Description TM8100 Mobile Radio Service Manual October 2003 © Tait Electronics Limited...
-
Page 39: Disassembly And Re-Assembly Of Radio
Subsection 3.2. If there is no obvious damage, replace the control-head board. In either case, re-assemble the radio as described in Subsection 3.5, and subject the radio to a final test. TM8100 Mobile Radio Service Manual Disassembly and Re-assembly of Radio October 2003 © Tait Electronics Limited... - Page 40 Subsection 3.4 and re-attach the control head. If necessary, recalibrate the radio. Finally, reprogram and test the radio. Disassembly and Re-assembly of Radio TM8100 Mobile Radio Service Manual October 2003 © Tait Electronics Limited...
-
Page 41: Detachment Of Control Head
After detaching the control head, disconnect the control-head loom at the connector on the radio body. Refer to Figure 3.2. Inspect the control head and loom as described below. TM8100 Mobile Radio Service Manual Disassembly and Re-assembly of Radio October 2003 © Tait Electronics Limited... - Page 42 CONTROL HEAD FRONT FACE OF RADIO BODY DETAILS OF CONTROL-HEAD SEAL df-cm-dwls Figure 3.2 Details of the seal between the radio body and control head Disassembly and Re-assembly of Radio TM8100 Mobile Radio Service Manual October 2003 © Tait Electronics Limited...
- Page 43 If there is damage in a blank control head, replace the complete control head; for the relevant product code refer to Subsection 1.5. TM8100 Mobile Radio Service Manual Disassembly and Re-assembly of Radio October 2003 © Tait Electronics Limited...
- Page 44 Figure 3.3 Plan view of the control head showing the control-head board Disassembly and Re-assembly of Radio TM8100 Mobile Radio Service Manual October 2003 © Tait Electronics Limited...
-
Page 45: Disassembly Of Control Head
If there is damage, continue with the disassembly of the control head and rectify the damage as described below. TM8100 Mobile Radio Service Manual Disassembly and Re-assembly of Radio October 2003 © Tait Electronics Limited... - Page 46 The characters xx in an IPN stand for the issue number. Items in the spares kit will always be the latest issue at the time the spares kit is produced. Disassembly and Re-assembly of Radio TM8100 Mobile Radio Service Manual October 2003 © Tait Electronics Limited...
- Page 47 Continue with the repair of the radio. Later in the repair procedure the control-head board will be fitted to the new front-panel assembly and the complete control head will be assembled. TM8100 Mobile Radio Service Manual Disassembly and Re-assembly of Radio October 2003 © Tait Electronics Limited...
- Page 48 Figure 3.4 Plan view of the control head with the control-head board removed Disassembly and Re-assembly of Radio TM8100 Mobile Radio Service Manual October 2003 © Tait Electronics Limited...
- Page 49 LED light pipes are moulded into the panel. If any part of the front panel is damaged, including the membrane, lens and light pipes, replace the complete panel. TM8100 Mobile Radio Service Manual Disassembly and Re-assembly of Radio October 2003 © Tait Electronics Limited...
- Page 50 UPPER SCREW BOSS LEVER POINT LOWER SCREW BOSS DETAILS OF LEVER POINT Figure 3.5 Lever points for removing the cover of the radio body Disassembly and Re-assembly of Radio TM8100 Mobile Radio Service Manual October 2003 © Tait Electronics Limited...
-
Page 51: Disassembly Of Radio Body
RF connector, and for loss of the bungs for the auxiliary and external options connectors. Replace any lost or damaged part with a spare part from Spares kit 2. TM8100 Mobile Radio Service Manual Disassembly and Re-assembly of Radio October 2003 © Tait Electronics Limited... - Page 52 Figure 3.6 The four screws that secure the lid to the chassis of the radio body Disassembly and Re-assembly of Radio TM8100 Mobile Radio Service Manual October 2003 © Tait Electronics Limited...
- Page 53 Figure 3.7 Illustration of the lid removed from the chassis of the radio body, with an options board installed in the lid TM8100 Mobile Radio Service Manual Disassembly and Re-assembly of Radio October 2003 © Tait Electronics Limited...
-
Page 54: Rear View
SEAL FOR AUXILIARY CONNECTOR SCREW 6 SCREW 7 RF CONNECTOR bb-dwls Figure 3.8 Illustration of the chassis showing the screws that secure the main-board assembly Disassembly and Re-assembly of Radio TM8100 Mobile Radio Service Manual October 2003 © Tait Electronics Limited... - Page 55 Grip the edge of the board and pull out the assembly, but avoid the thermal paste on the heat-transfer block. The area coated with thermal paste is shown in Figure 3.9. TM8100 Mobile Radio Service Manual Disassembly and Re-assembly of Radio October 2003 © Tait Electronics Limited...
- Page 56 DIGITAL BOARD INTERNAL OPTIONS CONNECTOR AUXILIARY CONNECTOR AND SEAL MAIN BOARD POWER CONNECTOR AND SEAL THERMAL PASTE RF CONNECTOR bb-dwls Figure 3.9 The main-board assembly Disassembly and Re-assembly of Radio TM8100 Mobile Radio Service Manual October 2003 © Tait Electronics Limited...
- Page 57 The characters xx in an IPN stand for the issue number. Items in the spares kit will always be the latest issue at the time the spares kit is produced. TM8100 Mobile Radio Service Manual Disassembly and Re-assembly of Radio October 2003 © Tait Electronics Limited...
-
Page 58: Re-Assembly Of Radio Body
Torx T10 0.56 Screws for lid of radio body Torx T20 External screws for main-board assembly Torx T20 Internal screws for main-board assembly Torx T10 Disassembly and Re-assembly of Radio TM8100 Mobile Radio Service Manual October 2003 © Tait Electronics Limited... - Page 59 In fitting the bung, ensure that it is not upside down and that it is properly seated. TM8100 Mobile Radio Service Manual Disassembly and Re-assembly of Radio October 2003 © Tait Electronics Limited...
- Page 60 Then use a Torx T20 torque-driver to tighten the screws to 2.5 N m (22 lbf in). Fit the cover of the radio body. Disassembly and Re-assembly of Radio TM8100 Mobile Radio Service Manual October 2003 © Tait Electronics Limited...
-
Page 61: Re-Assembly And Attachment Of Control Head
Wipe the strips with a soft lens-cleaning cloth. If necessary, clean the strips using isopropyl alcohol. Insert the two elastomeric strips in their slots in the space-frame. TM8100 Mobile Radio Service Manual Disassembly and Re-assembly of Radio October 2003 © Tait Electronics Limited... - Page 62 Press the control head against the radio body until it clips into position. Ensure that the seal is not damaged in the process. Continue with the servicing procedure. Disassembly and Re-assembly of Radio TM8100 Mobile Radio Service Manual October 2003 © Tait Electronics Limited...
Need help?
Do you have a question about the TM8000 and is the answer not in the manual?
Questions and answers