Table of Contents
Advertisement
1
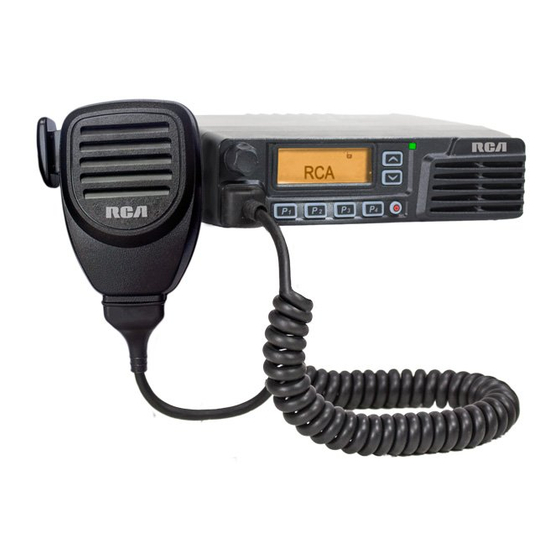
BRM300D
Professional Digital Two-Way Mobile Radio Instruction Manual
TM
Congratulations on selecting the BRM300D
from
TM
RCA Communications Systems - The most trusted name in radios!
The BRM300D digital professional communications products are based on DMR technology and
establish a benchmark in premium digital two-way radio equipment. These radios are made to
perform flawlessly under the most demanding commercial conditions and feature cutting edge
design, high-end professional grade materials and components, simple operation and superior
assembly quality. BRM300D mobiles and base stations are covered by a three-year "Warranty
Protection Program," one of the most comprehensive warranties in the communications industry.
To ensure you achieve maximum performance from your BRM300D radio, please be sure to carefully
read this manual.
MODELS COVERED IN THIS MANUAL:
• BRM300DV - VHF Two-Way Radio
• BRM300DU - UHF Two-Way Radio
Copyright © 2015 RCA Communications Systems
Advertisement
Table of Contents

Subscribe to Our Youtube Channel
Related Manuals for RCA BRM300DV


Summary of Contents for RCA BRM300DV
- Page 1 Congratulations on selecting the BRM300D from RCA Communications Systems - The most trusted name in radios! The BRM300D digital professional communications products are based on DMR technology and establish a benchmark in premium digital two-way radio equipment. These radios are made to...
-
Page 2: Table Of Contents
Setting Squelch Level .......18 - 19 Public Address ..........27 Switching Between Analog/Digital Mode ..19 Radio Check ..........27 Programmable Buttons ......19 - 20 Sending a Radio Check ........27 Accessing Programmed Function/Menu ...21 Remote Monitor ..........28 Keypad Mic (Optional)* ........21 Copyright © 2015 RCA Communications Systems... - Page 3 Responding to a Scan........45 Deleting/Restoring A Nuisance Channel..45-46 Viewing Inbox Text Messages ......35 Writing/Sending Text Message ......36 Sending a Quick Text Message......36 Managing Fail-to-Send Text Messages.....37 * = MM300DK Only Resend a Text Message........37 Copyright © 2015 RCA Communications Systems...
-
Page 4: Technical Specifications
46 x 160 x 175mm RF Exposure Compliance/Control Guidelines ..56 Warranty Statement ........57 IP Standards IP56 Contact Information ........60 Digital Protocol ETSI TS 102 361-1,-2,-3 Vocoder AMBE+2 Audio Distortion <3% * = MM300DK Only Copyright © 2015 RCA Communications Systems... - Page 5 Nonactive slot power -57dBm Conducted Spurious -57 dBm <1GHz, -47 dBm>1GHz 12.5KHz Data: 7K60FXD 4FSK Digital Mode Emission ETS300 086 12.5KHz Data/Voice: 7K60FXE 4FSK Modulation 5%@77°F, Accuracy 10% @ extreme temperature Audio Response +1~-3dB (300-3,000Hz) Copyright © 2015 RCA Communications Systems...
-
Page 6: Safety And General Information
RCA dealer. • This equipment is to be serviced only by authorized RCA Communications Systems For a complete list of RCA approved antennas and technicians. Any service performed by audio accessories, visit: unauthorized technicians will void the warranty. -
Page 7: Product Inspection
Radio Mounting Bracket DC Power Cord Self-Tapping Screws SEMS Screws (screw/washer) Spring Washers / Flat Washers 4 / 4 MM300D Palm Microphone Fuse DC Power Cord (w/2 fuses) User Manual Mounting Bracket with screws Copyright © 2015 RCA Communications Systems... -
Page 8: Transceiver Preparation
Use the 3 screw positions on the side of the vehicle is in motion. Consider installing the unit so Mounting Bracket Self-tapping screw (5mm x 16mm) Spring washer Flat washer Figure 2 Figure 1 Copyright © 2015 RCA Communications Systems... -
Page 9: Dc Power Cable Connection
If the current to the terminal before connecting the transceiver. transceiver Is insufficient, the display may darken 4. Confirm the correct polarity of the connections, during transmission, or transmit output power Copyright © 2015 RCA Communications Systems... -
Page 10: Mobile Installation
Fuse an AC outlet. holder • Use the supplied DC power cable to connect the transceiver to a regulated Figure 5 power supply. Do not substitute a cable with smaller gauge wires. (Figure 6) Copyright © 2015 RCA Communications Systems... -
Page 11: Replacing Fuses
(See Figure 7.) If newly installed fuses tab clicks. (See Figure 5) continue to blow, disconnect the power cable and contact your authorized RCA Dealer for assistance. NOTE: • For your transceiver to perform properly, we Fuse Location... -
Page 12: Antenna Connection
Always connect the antenna to the transceiver before antenna transmitting. Feed line connector • All fixed stations should be equipped with Before operating the radio, install an efficient, Copyright © 2015 RCA Communications Systems... -
Page 13: External Speaker
Attach the supplied microphone hanger using Figure 9 included screws in an easy to access location that will not interfere with vehicle operation. External (Figure 11) Speaker Figure 11 Connection Microphone hanger screws - 3mm x 10mm Copyright © 2015 RCA Communications Systems... -
Page 14: Transceiver Features
Due to the For Programmable Button information, please nature of the digital protocol, this activity may or see below. may not affect the radio’s programmed channel. 4. LED Indicator - LED Indicator identifies radio status. Copyright © 2015 RCA Communications Systems... -
Page 15: Operational Status Indicators
1 second to turn off the radio. (RSSI) - The number of bars displayed 8. Internal Speaker represents the radio signal strength and is only displayed while the radio is in receiving mode. Monitor - Selected channel is being monitored. Copyright © 2015 RCA Communications Systems... - Page 16 Emergency - Radio is in Emergency mode. Sent Item Icons The following icons appear at the top right Privacy - The Privacy feature is enabled. corner of the radio’s display in the Sent Items folder. Copyright © 2015 RCA Communications Systems...
-
Page 17: Making And Receiving Calls
Receiving a Call If CTCSS/CDCSS, 2-Tone, MDC1200 is set on Send Failed - The text message cannot the current channel by your RCA dealer, you be sent. can only receive calls with matched signaling. If CTCSS/CDCSS, 2-Tone, MDC1200 is not set, you In-Progress - The text message to a group alias or ID is pending transmission. -
Page 18: Select A Channel
During a call, if the Channel Free Indication normal background noise. feature is enabled on your radio (programmed by your RCA Communications Systems Dealer), Settings: Normal is the default level. Tight you will hear a short alert tone the moment the... -
Page 19: Switching Between Analog/Digital Mode
• Lone Worker On/Off - Toggles Lone Worker PROGRAMMABLE BUTTONS feature On or Off, on per channel basis. Your RCA Communications Systems Dealer can • Manual Dial For Private - Enables user to program the P1, P2, P3, P4, ▲, ▼ and the volume manually enter a radio ID for a private call. - Page 20 • RF Power Switch - Toggles between low and hi power. • Scan On/Off - Toggles scan on or off. • Squelch Level - Toggles between tight, normal and open. • Squelch Switch - Toggles squelch on or off. Copyright © 2015 RCA Communications Systems...
-
Page 21: Accessing Programmed Function/Menu
IDs, and text messages. a character. Note: Some characters require that you press # or Space NOTE: Press during text entry to # ˽ a button multiple times. The table shows the insert a space. Copyright © 2015 RCA Communications Systems... -
Page 22: Using Menu/Programmed Functions
250 zones with a maximum of 16 channels call, your radio must have the same Privacy Key, per zone. OR ID (programmed by your RCA dealer), as the Press the pre-programmed zone button and transmitting radio (the radio you are receiving the proceed to step 2 OR follow the procedure below. -
Page 23: Receiving/Responding To A Private Call
Function is enabled, wait for the Talk Permit Use the Monitor feature to make sure a channel Tone to finish and then speak clearly into the is clear before transmitting by listening for activity Copyright © 2015 RCA Communications Systems... -
Page 24: Making A Radio Call
Only target radios with the same to the screen you were on prior to initiating Privacy Key OR the same Key Value and Key the call. ID as your radio will be able to unscramble the transmission. Copyright © 2015 RCA Communications Systems... -
Page 25: Making A Private Call
1. Press the programmed One Touch Call This feature allows you to transmit to all users on a button to make a Group or Private Call to channel. Your radio must be programmed to allow Copyright © 2015 RCA Communications Systems... -
Page 26: Emergency Operation
An Emergency Alarm is used to indicate a respond to the call. critical situation. You can initiate an Emergency at any time on any screen regardless of any activity on the current channel. Your radio supports 3 Emergency Alarms: Copyright © 2015 RCA Communications Systems... -
Page 27: Initiating/Responding To Emergency Alarm
[PTT] to initiate the broadcast. The LCD will indications. Press [PTT] button to initiate a call display PA ON. You can adjust the PA volume with the emergency initiating radio. via the volume control knob. Copyright © 2015 RCA Communications Systems... -
Page 28: Advanced Features
[VK] to select. Wait for acknowledgement. or receive. Optional PA accessories and external 5. The display shows Radio Check: <Subscriber speaker must be installed by your RCA dealer. Alias or ID>, indicating that Radio Check is in Radio Check progress. The LED lights up red. -
Page 29: Remote Monitor
OR - Shows Remote Monitor Failed. Note: Your radio must be programmed by your 7. If successful, the radio will start receiving audio RCA Communications Systems dealer to allow from the monitored radio for a programmed you to use the Remote Monitor feature. -
Page 30: Group Call From Contacts
4. Press the [PTT] to make the call. The first Group Call icon, the group alias or ID, and line displays the subscriber alias or ID and the Group Call icon. the second line displays Private Call and the Copyright © 2015 RCA Communications Systems... -
Page 31: Call Tones For Text Messages
3. Press [▲] or [▼] to Radio Settings and press [VK] to select. [VK] to select. 4. Press [▲] or [▼] to Tone/Alerts and press [VK] 4. Press [▲] or [▼] to Tone/Alerts and press [VK] to select. Copyright © 2015 RCA Communications Systems... -
Page 32: Assigning Tone Alerts
Private Calls. Use the or a Text Message from a particular contact. call log feature to view and manage recent 1. Press [VK] to access the main menu. calls. You can Store an ID from the Call Copyright © 2015 RCA Communications Systems... -
Page 33: Accessing The Call Log
Call List radio user to call you back when they are able 1. While viewing an entry from the Call Log list to do so. This feature is applicable for subscriber press [VK] to select. Copyright © 2015 RCA Communications Systems... -
Page 34: Receiving & Responding To Call Alert
The maximum text alias or ID and press [VK] to select. OR - Press message length is 138 characters. [▲] or [▼] to the Manual Dial option and press [VK]. Copyright © 2015 RCA Communications Systems... -
Page 35: Navigate To Message
Viewing a Text Message from the Inbox [VK] to return to Home Screen or press 1. Press [▲] or [▼] to navigate to Messages and [▲] or [▼] to Read Later or Delete option press [VK] to select. Copyright © 2015 RCA Communications Systems... -
Page 36: Writing/Sending Text Message
Press [▲] to move one Your radio stores a maximum of 10 Quick space to the left. Press [▼] or [#] to move Text messages as programmed by your RCA one space to the right. Press [*] to delete Communications Systems dealer. While Quick unwanted characters. -
Page 37: Managing Fail-To-Send Text Messages
4. Press [▲] or [▼] to find the desired Quick Text radio returns you to the Resend option screen. and press [VK] to select. Note: Your RCA Communications Systems dealer 5. A blinking cursor appears. Use the keypad can program a One Touch Access button to send to edit the message, if needed. -
Page 38: Forwarding A Text Message
5. If the message is sent, a tone sounds and You can select one of the following options the display shows Message Sent. OR - If the while viewing a sent text message: message is not sent, a low tone sounds and Copyright © 2015 RCA Communications Systems... -
Page 39: Deleting All Sent Messages From Sent Items
3. Press [▲] or [▼] to navigate to Inbox and radio returns to the Resend option screen. press [VK] to select. Press [VK] to resend the message to the 4. Press [VK] to select current message, and same subscriber/group alias or ID. Copyright © 2015 RCA Communications Systems... -
Page 40: Deleting A Text Message From Inbox
6. Press [▲] or [▼] to navigate to Delete and is being sent. press [VK] to select. 9. If the message is sent successfully, a tone 7. At Delete Message?, press [▲] or [▼] to sounds and the display shows Message Sent. Copyright © 2015 RCA Communications Systems... -
Page 41: Privacy
2. Press [▲] or [▼] to navigate to Radio Settings • Enhanced Privacy and press [VK] to select. Only ONE privacy type above can be assigned to 3. Press [▲] or [▼] to navigate to Privacy and your radio. press [VK] to select. Copyright © 2015 RCA Communications Systems... -
Page 42: Dual Tone Multi Frequency (Dtmf)
DTMF based Disable/Enable feature requires your radio to have systems. DTMF Codes can be programmed into this function enabled. Check with your RCA dealer the radio by your RCA Communications Systems or system administrator for more information. -
Page 43: Radio Enable
BRM300D Professional Digital Two-Way Mobile Radio Instruction Manual Communications Systems dealer. Active code set by your RCA Communications 1. Press [VK] to access the main menu. Systems dealer. OR - Radio Enable can be 2. Press [▲] or [▼] to navigate to Contacts and initiated through the Menu of your radio. -
Page 44: Scan Lists
• Manual Scan: Initiate scan manually using the programmed Scan ON/OFF side button by your 3. Press [▲] or [▼] to navigate to Scan and press RCA Communications Systems dealer. OR - By [VK] to select. menu function. 4. Press [▲] or [▼] to navigate to View List and •... -
Page 45: Starting And Stopping Scan
Scan is enabled. The LED turns channel from the scan list. off and the Scan icon disappears when Scan Note: This capability does not apply to the Copyright © 2015 RCA Communications Systems... -
Page 46: Deleting/Restoring A Nuisance Channel
2. Press [▲] or [▼] to navigate to Utilities and You can lock your radio’s keypad to avoid an press [VK] to select. inadvertent key entry. 3. Press [▲] or [▼] to navigate to Radio Settings Copyright © 2015 RCA Communications Systems... -
Page 47: Setting The Power Level
OR - Follow the procedure below to adjust Note: This feature must be programmed by the Power Level through the Menu. your RCA dealer to use this function. 1. Press [VK] to access the main menu. 2. Press [▲] or [▼] to navigate to Utilities and To begin using VOX: Press the programmed press [VK] to select. -
Page 48: Controlling The Display Backlight
Note: The display backlight and keypad backlight Controlling the Display Backlight are automatically turned off if the LED indicator You can enable or disable the radio’s display is disabled. backlight. The setting also affects the Menu Talkaround Copyright © 2015 RCA Communications Systems... -
Page 49: Turning Radio Tones/Alerts On Or Off
6. Press or wait the presetting time to exit the shows All Tones On. If the display shows Turn menu. Off press [VK] to disable all tones and alerts and 7. The Talkaround setting is retained even after Copyright © 2015 RCA Communications Systems... -
Page 50: Turning The Led Indicator On Or Off
All LEDs On. If the display shows Turn Introduction Screen and the display shows Off, press [VK] to disable the LED Indicator and the display shows All LEDs Off. Note: The display backlight, buttons and keypad backlight are automatically turned off Copyright © 2015 RCA Communications Systems... -
Page 51: Accessing General Radio Information/Checking Radio Id
4. Press [▲] or [▼] to navigate to My Number, or • Make sure the radio is completely dry before Firmware Vr., or CP Vr. and press [VK]button. use. 5. The display shows radio ID, the current firmware or the codeplug version. Copyright © 2015 RCA Communications Systems... -
Page 52: Troubleshooting
CTCSS/CDCSS settings as your group members. Transmissions from non- Analog: Change CTCSS/DCS tone and make sure all other group members are heard radios in your group are using the same CTCSS/DCS tone Copyright © 2015 RCA Communications Systems... - Page 53 3. The radio has been killed remotely 1. Check squelch level Noise is too loud 2. Beyond efficient communication range Buttons will not work Restart the radio Radio cannot lock out Restart the radio No display Restart the radio Copyright © 2015 RCA Communications Systems...
-
Page 54: Optional Accessories
BRM300D Professional Digital Two-Way Mobile Radio Instruction Manual Optional Accessories Note: Only the use of Genuine RCA accessories will guarantee compatibility and maximum performance of your radios. Speaker/Microphone - For voice communication. Includes 15’ cord. MM300D Keypad Speaker/Microphone - For voice and text communication. -
Page 55: Optional Accessories
DMM1250 Base Station Conversion Kit - Converts mobile unit into a base station. Includes housing and power supply. BSC300D PKG Copyright © 2015 RCA Communications Systems... -
Page 56: Fcc Caution
However, there is no guarantee that interference Guidelines: Do not remove the RF Exposure Label will not occur in a particular installation. If this from the device. Copyright © 2015 RCA Communications Systems... -
Page 57: Warranty Statement
Hold the the antenna. radio in a vertical position in front of face with Use only RCA Communications Systems approved, the microphone (and the other parts of the radio, supplied or replacement antennas, batteries, and including the antenna) at least one inch (2.5 cm) accessories. - Page 58 RCA Communications Systems is shipping service. not responsible for any ancillary equipment which is attached to or used in conjunction with RCA RCA Communications Systems shall have no Communications Systems products. obligation to repair or replace the product, if there...
- Page 59 WITH THE WARRANTY SPECIFIED, THE SOLE electronic or mechanical, for any purpose without REMEDY WILL BE REPAIR OR REPLACEMENT. IN NO the expressed, written permission from RCA EVENT WILL RCA COMMUNICATIONS SYSTEMS Communications Systems. BE LIABLE TO THE BUYER OR ITS CUSTOMERS...
-
Page 60: Contact Information
For Sales, Warranty and Customer Support please contact: Discount Two-Way Radio Corporation – North American Distributor 555 W Victoria Street Rancho Dominguez, CA 90220 Phone: 310-224-5100 / Fax: 310-224-5101 www.DiscountTwo-WayRadio.com Communications Systems www.RCACommunicationsSystems.com © 2015 RCA Communications Systems. All rights reserved. Copyright © 2015 RCA Communications Systems...
Need help?
Do you have a question about the BRM300DV and is the answer not in the manual?
Questions and answers