
Subscribe to Our Youtube Channel
Related Manuals for Comelit 1456B


Summary of Contents for Comelit 1456B
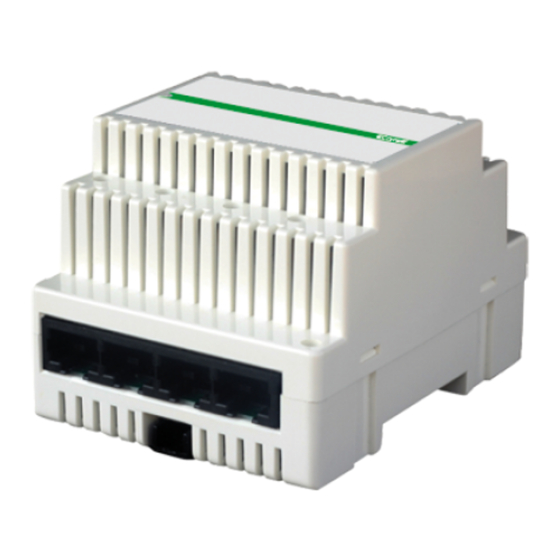
- Page 1 TECHNICAL MANUAL 40-56 Vdc Art 1456B SOLO CON CAVO ROSSO COMELIT 2E7T000500 ONLY WITH COMELIT RED CABLE 2E7T000500 FIXED POE SETTABLE POE N0 POE Multi-apartment Gateway 1456B...
-
Page 2: Table Of Contents
• any purpose other than the intended use • failure to observe the indications and warnings contained in this Manual / Instruction sheet. Comelit Group S.p.A. reserves the right to change the information provided in this Manual / Instruction sheet at any time and without prior notice Table of contents Warning .................... -
Page 3: Description
(default: “Static IP address” 192.168.1.200, netmask 255.255.255.0). With port “POE” DO NOT use standard Ethernet to connect to the router or to the PC; use only the red Comelit cable Art.2E7T000500 to connect to the router or to the PC. -
Page 4: Settable Poe
DO NOT USE STANDARD ETHERNET DO NOT USE STANDARD ETHERNET Only connect to the router or Only connect to the router or PC using the red Comelit cable PC using the red Comelit cable 2E7T000500 2E7T000500 With the device powered by Art. 1440 via port B, there will be sufficient PoE power available to operate a maximum of 1 door as “POE”... -
Page 5: Technical Characteristics
Technical characteristics MAIN FEATURES Compatible system SYSTEM DIN rail mounted Yes DIN modules (no.) 4 Power supply voltage 48Vdc - 56Vdc Min/max power consumption (mA) 50mA Operating temperature (°C) +5°C to +40°C Operating relative humidity 25% / 75% IP protection rating IP30 GENERAL DATA Product height (mm) 62 Product width (mm) 70... -
Page 6: Configuration Of Art.1456B
ViP NETWORK + INTERNET CONNECTION NETWORK ViP SYSTEM INTERFACE B 40-56 Vdc IP ADDRESS AUTOIP Art 1456B INTERFACE A ONLY WITH COMELIT RED CABLE 2E7T000500 ONLY WITH COMELIT RED CABLE 2E7T000500 FIXED POE SETTABLE POE NON POE STATIC IP ADDRESS 192.168.1.200 (default) -
Page 7: System With Single Network
SYSTEM WITH SINGLE NETWORK Art.1441 Art.1441B 40-56 Vdc Art 1456B INTERFACE A ONLY WITH COMELIT RED CABLE 2E7T000500 ONLY WITH COMELIT RED CABLE 2E7T000500 FIXED POE SETTABLE POE NON POE STATIC IP ADDRESS 192.168.1.200 (default) ViP SYSTEM ROUTER INTERNET with active... -
Page 8: Vip Manager Addressing
2) ViP Manager addressing CASE 1: default address of the device (192.168.1.200) belonging to the same router network (e.g.: 192.168.1.1) Art.1456B INTERFACE A ONLY WITH COMELIT RED CABLE 2E7T000500 ONLY WITH COMELIT RED CABLE 2E7T000500 FIXED POE SETTABLE POE NON POE STATIC IP ADDRESS 192.168.1.200 (default) - Page 9 3. Select the device 1456 B [f], select Addressing/ViP address [g], assign an unequivocal ViP address to the device [h] and press Write page [i] to save the current settings. In the case of a system with 2 1456B devices, it will be necessary to assign to interface A of one of the two devices a new “Static IP address”...
-
Page 10: Case 2: Default Address Of The Device (192.168.1.200) Not Belonging To The Same Router Network (E.g.: 192.168.0.1)
192.168.1.2)* that belongs to the same network as the IP address of interface A (default=192.168.1.200)and confirm [d]. * the last value must be within the range of 2 to 253 excluding: 200 (assigned to the gateway Art. 1456B) and the values already assigned to other devices connected to the network. - Page 11 1456B will appear in the device list [f] 4. In Addressing/ IP address [g] assign device 1456B a static IP address [h] and an IP netmask [i] compatible with the system, for example IP: 192.168.0.5, netmask: 255.255.255.0 (warning: the IP address must not already be in use).
- Page 12 PERFORM A DHCP SYSTEM SCAN AND ASSIGN A ViP ADDRESS Follow the procedure below to perform a system scan in “DHCP”, to locate all the devices connected to interfaces A and B: • an IP address will be automatically assigned to the devices in addressing mode “Autoip”...
-
Page 13: Licence Activation
√ An active internet connection is required to complete the license activation procedure. √ A license is needed for each apartment that wishes to make use of the functions described above. 1. Select device 1456B [a]. 2. Press Add license [b]. -
Page 14: Licenses Available For Purchase
Master door entry monitor not required (already integrated in the 1456B) • Up to 15 slaves devices can be added for each apartment, including: Smartphone / Tablet + Comelit App, PSTN / GSM Telephone, Door entry phone (configured as Slave) -
Page 15: Dyndns Configuration For Remote Connection
DNS”) allows a DNS name to be permanently associated with the IP address of the same host, even if that address subsequently changes. A DynDNS must be registered in order to make the 1456B accessible from a remote web page and to allow operation of the Big App application. -
Page 16: Port Forwarding Setting For Remote Connection
This procedure enables an external user (mobile phone) to access a device on a local network (1456B). The procedure for opening router ports for device 1456B is required in order to allow remote access to the system via a web page (port TCP 8080) and via an App (port TCP 64100*, port UDP 64100*) or via Vip Manager (port TCP 64199). -
Page 17: Sip Settings
SIP server used to make telephone calls; the user settings and password are to be entered in the “SIP phone lines” screen. 1. Select the device 1456B and select Main Settings/SIP settings [a]. 2. Enter the IP address/hostname of the SIP service provider (for example: sip.messagenet.it) and the UDP port of the server supplied by the service provider (for example: 5061) [b]. -
Page 18: Sip Phone Lines Configuration
5 rows. A maximum of 15 SIP phone lines may be enabled. The lines are shared by all the system users connected to the device 1456B and are managed according to the rule “First come, first served”. -
Page 19: Apartments Configuration
√ An apartment can be enabled for each available license. 1. Select device 1456B and select Main Settings/DynDNS [a]. 2. Configure the individual apartments (max 200) [b]: •... -
Page 20: Users Configuration (Devices)
Internal unit: Comelit ViP internal unit; App: Comelit App for Android or Apple devices (consult the relative manual for further details); Telephone: virtual ViP device controlled by the 1456B and used to make phone calls to a landline or mobile phone. •... -
Page 21: App Directories Configuration
Directory creation 1. Select the device 1456B and select App Directories/Directories list [a]. 2. Complete the description field to add a new directory [b] 3. From the pull-down menu, choose Deny/Allow [c] to disable/enable editing of the copy of the directory saved in the applications. - Page 22 Intercoms f Configure the call to an entire apartment or to an individual device within the apartment, by completing the following fields: Description Enter the description. ViP address Enter the ViP address From the pull-down menu, choose whether to configure a call to the entire apartment or only to the Master/Slave master monitor or to a slave monitor, as required.
-
Page 23: Message Server Configuration
10) that you wish to control 11) Message server configuration The following procedure describes how to specify on the art. 1456B the IP or ViP address of the art. 1952 device to be used as a message server (if present) 1. -
Page 24: Enabling Remote Configuration
The following procedure describes how to enable remote configuration via ViP Manager 1. Open port 64199 on the router for the address of device 1456B, as shown in the following example: 2. In ViP Manager, select device 1456B and select Services/Remote configuration [a] 3. -
Page 25: Special Configurations
• change the maximum number of video connections on the network (max. 16) or on the App (max. 4). 1. Select the device 1456B and select Main Settings/App connection settings [a]. 2. Edit the values you wish to personalise. App connection settings •... -
Page 26: Connection To The Configuration Web Pages
1B. Enter the IP address of interface A as in the following example, and press enter. http:// interface A IP address :8080 default = 192.168.1.200 2) Login 1. Press Login [a] 2. Enter the installer password (default= comelit) and confirm by pressing Login [b]... -
Page 27: Backup And Restore
Backup and restore The backup function allows you to save the current configuration, which can then be subsequently called up at any using the restore function. The backup and restore functions are only available from the configuration web pages (to access the web pages, see Connection to the configuration web pages) -
Page 28: Reboot With Predetermined Network Settings
Reboot with predetermined network settings The function reboot with predetermined network settings allows you restart the device with the default network parameter settings (interface A= 192.168.1.200), while keeping the other settings unchanged. √ With the dip switches in the default positions (OFF). 1. -
Page 29: Restoring Licenses
Restoring licenses The following procedure allows you to restore licenses lost during the full reset procedure: 1. From ViP Manager, look for the device 1456B as described in the ViP Manager addressing procedure. (see: 2) ViP Manager addressing) 2. Select the device 1456B [a]. -
Page 30: Wiring Diagrams
6203W APT. 3: SLAVE LICENSE 1440 PSTN APT. 2: MASTER LICENSE PSTN APT. 1: PHONE LICENSE PROVIDER INTERNET ROUTER 192.168.1.1 1456B INTERFACE B INTERFACE A 1441 1440 AUTO IP IP: 192.168.1.X 100-240 V ORANGE WIRE TX - ORANGE WIRE TX -... -
Page 31: System With Single Network
System with single network PSTN APT. 2: MASTER LICENSE PSTN APT. 1: PHONE LICENSE PROVIDER INTERNET ROUTER 192.168.1.1 INTERFACE A IP: 192.168.1.X 1441 1456B 1441 1440 100-240 V 100-240 V ORANGE WIRE TX - ORANGE WIRE TX - 1595 WHITE/ORANGE WIRE TX +... -
Page 32: Glossary
Glossary* • Autoip: Automatic Private IP Addressing (known as APIPA or Auto IP), is a method for automatically assigning IP addresses to the devices connected to the network. • Dynamic DNS: Dynamic DNS is a technology that allows a DNS name to be permanently associated with the IP address of the same host, even if that address subsequently changes.
Need help?
Do you have a question about the 1456B and is the answer not in the manual?
Questions and answers