Table of Contents
Advertisement
Quick Links
Service
Manual
GB
Service Manual
Induction hob manual
1 ISSUE MAR. 2008
INDUCTION HOBS
Platform 2008
Model.
Covered
KIA 641 C
KIC 641 X
KIC 642 C
KIC 644 X
KIC 644 DD Z
TIP 642 DD B
TIP 642 DD L
TIP 644 DD L
TIP 744 DD L
Edition
2008.03.01
Comm.
Code
52918
52923
52924
52925
52951
53100
53101
53102
53103
Language
English
Advertisement
Table of Contents

Subscribe to Our Youtube Channel
Related Manuals for Indesit KIA 641 C


Summary of Contents for Indesit KIA 641 C
- Page 1 1 ISSUE MAR. 2008 INDUCTION HOBS Platform 2008 Model. Comm. Covered Code KIA 641 C 52918 KIC 641 X 52923 KIC 642 C 52924 KIC 644 X 52925 KIC 644 DD Z 52951 TIP 642 DD B 53100 TIP 642 DD L...
-
Page 2: Table Of Contents
CONTENTS Chapter 01: Specifi cations Product label Legend Chapter 02: Control pane Classic control panel Confort control panel Premium control panel Installing and fi tting the appliance Available functions Operative features Chapter 03: Components 9-11 Wiring Diagram Chapter 04: Technical Assistance 12-15 Demo Mode Autotest procedure... -
Page 3: Product Label
(if there is T: Scholtès I: Induction 7: 70-75 cm D: double D: double 1: 1 Booster frame or V: Indesit E: Mixed C: Classic 8: 80 cm T: triple T: triple Z: Experience 2: 2 Boosters Profi le profi... -
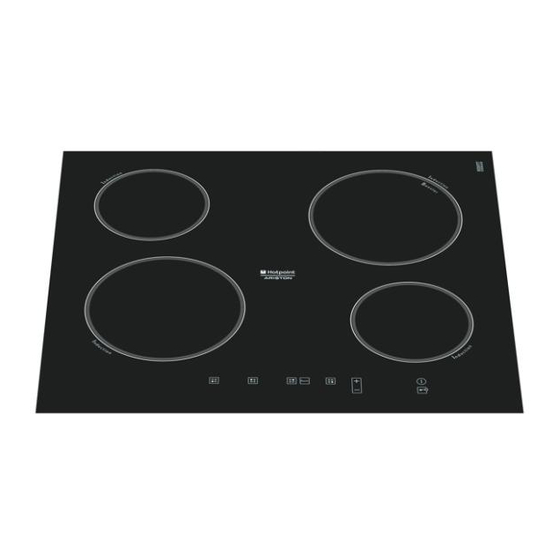
Page 4: Control Pane
CHAPTER 2: CONTROL PANEL 2.1: CLASSIC CONTROL PANEL: Booster Function buttons 1 POWER and RESIDUAL HEAT indicator displays 10 ON/OFF indicator light indicates if the appliance the level of heat reached is on/off. 2 COOKING ZONE indicator light indicates that the 11 CONTROL LOCK indicator light indicates that corresponding cooking zone has been selected controls has been locked. -
Page 5: Confort Control Panel
2.2: CONFORT CONTROL PANEL: edium edium edium edium edium edium edium edium edium edium edium edium ooster o o ost oster er ooster o o ost oster er ooster o o ost oster er ooster o o ost oster er Function buttons 1 POWER and RESIDUAL HEAT indicator displays 10 CONTROL LOCK button prevents fortuitous mo-... -
Page 6: Premium Control Panel
2.3: PREMIUM CONTROL PANEL: edium edium edium edium edium edium edium edium edium edium edium edium ooster o o ost oster er ooster o o ost oster er ooster o o ost oster er ooster o o ost oster er Function buttons 1 COOKING ZONE indicator light indicates that the 10 ON/OFF button turns on/off the appliance. -
Page 7: Installing And Fi Tting The Appliance
2.4: INSTALLING AND FITTING THE APPLIANCE For all the instructions about product fi tting, ventilation, product fi xing to the cabinet, electrical connection, ect., refer to the handbook inside of the product packaging. 2.5: AVAILABLE FUNCTIONS Power On It allows the user to turn the hob on/off; if the hob has been turned on and, after 3 minutes, no inductor has been programmed, the hob will turn off automatically. -
Page 8: Operative Features
2.6: OPERATIVE FEATURES 2.6.1: Operative voltage: Voltage values assuring the correct operation of the appliance are the following ones listed below: Minimum Voltage: 160 Volt 50 Hz Maximum Voltage: 250 Volt 50 Hz 2.6.2: Operative Features of the Booster: After having selected the inductor and the cooking power, it is possible to set off the Booster. The inductor will work at the maximum power for 4 minutes, then the cooking setting will be the one set by the user. - Page 9 16 levels i = P / V 2200/3000W 1400/2000W 3000 2000 i = 3000 Watt / 230 Volt 2200 1400 i = 13,0435 amp 2000 1200 2000 1200 1800 1000 1600 Range (no Booster) used in the 1600 1400 factory: +10% / -15% 1200 1000 Power levels are measured ac-...
- Page 10 The Touch board, located in the upper part, detects user instructions. These instructions are displayed by the Visual board, located under the Touch board, in order to give a feedback of the setting selected to the user. It also allows displaying any possible bad functioning of the hob, for example, the faults Cooling fan The fan function consists in cooling the heat sinks of the power board while the appliance is working.
-
Page 11: Wiring Diagram
Residual Heat indicator The Residual Heat indicator light is controlled by a NTC sensor located on the centre of inductors. According to the power chosen by the user and the time in which the inductor has been turned on, the temperature will change and the Residual Heat will be displayed: •... -
Page 12: Technical Assistance
CHAPTER 4: TECHNICAL ASSISTANCE 4.1: DEMO MODE: Getting ready to use Demo Mode: 1. the hob is on 2. all the inductors are off To select DEMO function, press and hold for 6 seconds TIMER “+” and “-” buttons simultaneously; then POWER ON and BUTTON LOCK LED will fl... -
Page 13: Fault Table
4.3: FAULT TABLE: FAULT SUBCODE DESCRIPTION CHECK ACTIONS Visual board NTC SC • Replace the Display board Visual board NTC OC • Replace the Display board Comunication VISUAL <--> cookeye/ Fault Not available • clipsoeye MODULE 1. Check the correct installation of the Touch-Visual communication Flat 2. - Page 14 FAULT SUBCODE DESCRIPTION CHECK ACTIONS 1. Check the inductor, verifying that the contacts are well connected and clean. ISI UART 1 (CN 03): small induction 2. Check NTC ohmic values (it must not be SC or OC) hotplate not connected 3.
- Page 15 FAULT SUBCODE DESCRIPTION CHECK ACTIONS ISI UART 1 (CN 03): Too high tempe- 3. Verify that heat-sink NTC is calibrated. 4. Replace the corresponding generator board. rature of the heat-sink 1. Verify that the fan is correctly wired and that the wiring is intact. ISI UART 2 (CN 04): Too high tempe- 2.
- Page 16 CHAPTER 5: DISASSEMBLY Glass top disassembly: 1 Remove the screws around the hob. 2 Lift up the glass top Disassembly: 1 Remove connectors UART1 (CN 03) and UART2 (CN 04) 2 Lift it up, paying attention to the springs Inductor disassembly: 1 Every inductor is fastened with 2 screws.
- Page 17 CHAPTER 6: APPENDIX 6.1: SENSOR TABLE: 6.1.1: Temperature sensor table of inductor NTC: Temperature Resistance Temperature Resistance (degC) (Ohms) (degC) (Ohms) 2211,23 783039,98 1977,13 585061,26 1772,45 441915,60 1592,96 337239,69 1435,14 259871,59 1296,01 202104,55 1173,03 158555,93 1064,06 125424,99 967,27 100000,00 881,10 80326,96 804,20 64984,54...
- Page 18 6.1.2: Temperature sensor table of power board NTC (heat-sink): Temperature Resistance Temperature Resistance (degC) (Ohms) (degC) (Ohms) 30381,60 3776,19 28947,84 3648,69 27591,44 3526,24 3408,62 26307,74 25092,39 3295,59 23941,33 3186,97 22850,75 3082,55 21817,11 2982,16 2885,61 20837,09 19907,58 2792,74 19025,66 2703,38 18188,61 2617,39 17393,88 2534,63...
- Page 19 Service Manual Edition Language Induction hob manual 2008.03.01 English...
Need help?
Do you have a question about the KIA 641 C and is the answer not in the manual?
Questions and answers