Table of Contents
Advertisement
Available languages
Available languages
Quick Links
GB
English
Instructions for use
HOB
Contents
Cleaning 11
IT
Italiano
Istruzioni per l'uso
PIANO COTTURA
Sommario
FR
Français
Mode d'emploi
TABLE DE CUISSON
Sommaire
Table des puissances 24
Installation 25
Nettoyage 28
NL
KOOKPLAAT
Inhoud
Milieutips 31
Installatie 33
Reinigen 37
PT
Português
Instruções para a utilização
PLANO
Índice
Instalação 42
L impeza 46
Advertisement
Table of Contents

Related Manuals for Indesit Aria VID 641 B C


Summary of Contents for Indesit Aria VID 641 B C
-
Page 1: Table Of Contents
English Instructions for use Gebruiksaanwijzing KOOKPLAAT Contents Inhoud Important safety instructions 5 Belangrijke veiligheidsinstructies 30 Safeguarding the environment 6 Milieutips 31 Declaration of conformity 6 verklaring van overeenstemming 31 Before use 6 Vvoordat u de kookplaat in gebruik neemt 31 Existing pots and pans 6 Rreeds aanwezige pannen 31 Recommended pot bottom widths 6... - Page 2 145 mm 180 mm 210 mm 180 mm 210 mm 210 mm 180 mm 210 mm 180 mm 145 mm 145 mm 145 mm 210 mm 280 mm 280 mm 180 mm 210 mm 210 mm 145 mm 145 mm 145 mm 210 mm 240 mm...
- Page 3 R = Min. 6,5 mm Max. 8 mm Min. 50 mm 580mm 650mm 700mm R = 11,5 mm 483 mm 490 mm 560 mm R = 11,5 mm 6 mm R = Min. 6,5 mm Max. 8 mm R = Min. 6,5 mm Max.
- Page 4 Min. 40 cm Min. 10 cm Min. 5 cm...
-
Page 5: Important Safety Instructions
IMPORTANT SAFETY INSTRUCTIONS These instructions shall also be available on website: www.hotpoint.eu YOUR SAFETY AND THAT OF OTHERS IS VERY IMPORTANT This manual and the appliance itself provide important safety messages, to be read and always observed. This is the danger symbol, regarding safety, warning of potential risks to users and others. All safety messages will be preceded by the danger symbol and the following words: DANGER Indicates a hazardous situation which, if not avoided, will result in serious injury. -
Page 6: Safeguarding The Environment
SAFEGUARDING THE ENVIRONMENT Disposal of packing The packing material is 100% recyclable and marked with the recycling symbol ( ). The various parts of the packing must not be dispersed in the environment, but disposed of in compliance with local regulations. Disposal This appliance is marked in conformity with European Directive 2012/19/EU on Waste Electrical and Electronic Equipment (WEEE). -
Page 7: Power Level Table
RECOMMENDED POT POSITION For best performance, when you use two pots simultaneously, put them according to the pictures below: POWER LEVEL TABLE Power level Type of cooking Level use (indicating cooking experience and habits) Ideal for rapidly increasing the temperature of food to fast boiling in the case of water or rapidly heating Boost Fast heating cooking liquids... -
Page 8: Electrical Connection
ELECTRICAL CONNECTION Disconnect the appliance from the power supply. WARNING Installation must be carried out by qualified personnel who know the current safety and installation regulations. The manufacturer declines all liability for injury to persons or animals and for damage to property resulting from failure to observe the regulations provided in this chapter. -
Page 9: Instructions For Use
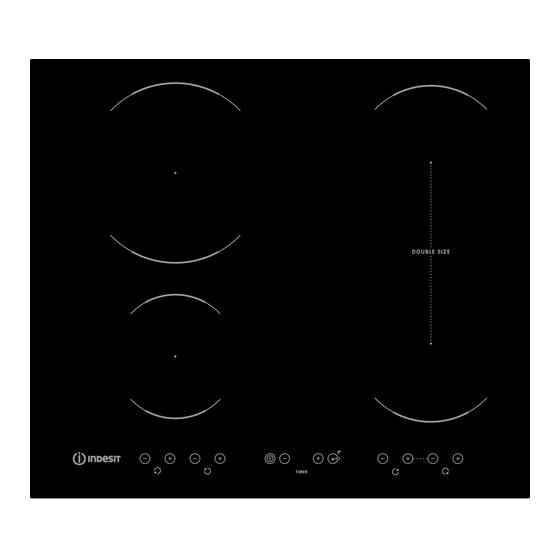
INSTRUCTIONS FOR USE Control Panel Description Control panel Power management step 1 Power management step 1 On/Off Timer Control panel lock/Special function/ Power management step 2 and 4 Cooking zone controls and corresponding display Power management step 1 On/Off Timer Control panel lock/Special function/ Power management step 1 Power management step 2 and 4... - Page 10 sounds and the cooking zone switches off automatically. To deactivate the timer, keep the Timer button pressed for at least 3 seconds. To set the timer for another zone, repeat the above steps. The timer display always shows the timer for the selected zone or the shortest timer. To modify or deactivate the timer, press the cooking zone selection button for the timer in question.
-
Page 11: Cleaning
Activation/deactivation of the acoustic signal After switching the hob on, press and hold the “+” button and the outermost button on the right simultaneously for at least three seconds (“control panel lock”). 5 Sec CLEANING Do not use steam cleaners. WARNING Before cleaning, make sure the cooking zones are switched off and that the residual heat indicator (“H”) is not displayed. -
Page 12: After-Sales Service
AFTER-SALES SERVICE Before contacting the After-sales Service: 1. See if you can solve the problem yourself with the help of the “Troubleshooting guide”. 2. Switch the appliance off and then on again it to see if the problem has been eliminated. If the problem persists after the above checks, contact the nearest After-Sales Service. -
Page 13: Istruzioni Importanti Per La Sicurezza
ISTRUZIONI IMPORTANTI PER LA SICUREZZA www.hotpoint.eu Queste istruzioni sono disponibili anche sul sito web: LA SICUREZZA VOSTRA E DEGLI ALTRI È MOLTO IMPORTANTE Il presente manuale e l’apparecchio stesso sono corredati da importanti messaggi relativi alla sicurezza, da leggere ed osservare sempre. Questo è... -
Page 14: Consigli Per La Salvaguardia Dell'ambiente
- Se la superficie è incrinata, spegnere l’apparecchio per evitare la possibilità di scossa elettrica (solo per apparecchi con superficie in vetro). - L’apparecchio non è destinato ad essere messo in funzione per mezzo di un temporizzatore esterno oppure di un sistema di comando a distanza separato. -
Page 15: Diametri Fondo Pentola Consigliati
DIAMETRI FONDO PENTOLA CONSIGLIATI Prima di accendere il piano di cottura, posizionare la pentola sulla zona di cottura desiderata. Per un risultato ottimale, il diametro della base della pentola dovrebbe corrispondere alla misura della piastra. Diametro (cm) Max (cm) Min (cm) Diametro (cm) Max (cm) Min (cm) -
Page 16: Installazione
NOTA: Quando si cuociono cibi a cottura rapida che richiedono una perfetta distribuzione del calore (ad es. i pancake) sulla zona di cottura doppia di 28 cm (dove presente), utilizzare pentole di diametro non superiore a 24 cm. Per una cottura delicata (ad esempio, sciogliere cioccolato o burro) utilizzare le zone singole con diametro inferiore. INSTALLAZIONE Dopo avere disimballato il prodotto, controllare se vi sono danni procurati durante il trasporto. -
Page 17: Istruzioni Per L'uso
Per ogni collegamento alla rete, il piano di cottura esegue un controllo automatico per alcuni secondi. Collegamento all'alimentazone di rete 230V 2 fase 2N Australia e Regno Unito SOLO PER IL BELGIO SOLO PER I PAESI BASSI nero nero nero marrone nero marrone... - Page 18 Attivazione e regolazione zone di cottura Display dell'indicatore di potenza Indicazione della zona di cottura selezionata Posizionamento della zona di cottura Posizionare la pentola sulla zona di cottura accendendo il piano di cottura, quindi attivare la zona di cottura richiesta premendo il tasto “+”; sul display viene visualizzato “0”.
- Page 19 FLEXI /RACCORDO Questa funzione è utile per le pentole di grandi dimensioni che superano l'area di una singola zona, ad esempio le pesciere o le grandi casseruole per la carne. Per attivare la zona FLEXI/ RACCORDO, premere simultaneamente i tasti + e - come illustrato nella figura qui sotto. “Power management”...
-
Page 20: Operazioni Di Pulizia
OPERAZIONI DI PULIZIA Non utilizzare pulitrici a vapore. AVVERTENZA Prima di procedere alle operazioni di pulizia, assicurarsi che le zone di cottura siano spente e che l’indicazione di calore residuo (“H”) sia scomparsa. Se sul vetro è presente il logo iXelium , il piano di cottura è... -
Page 21: Servizio Assistenza
SERVIZIO ASSISTENZA Prima di chiamare il Servizio Assistenza: 1. Verificare se non sia possibile eliminare da soli i guasti (vedere “Guida ricerca guasti”). 2. Spegnere e riaccendere l'apparecchio per assicurarsi che l'inconveniente sia stato eliminato. Se dopo i suddetti controlli il problema persiste, contattare il Servizio Assistenza più vicino. Indicare sempre: •... -
Page 22: Consignes De Securite Importantes
FRANÇAISInstallationPage2Mode d’emploi Page CONSIGNES DE SECURITE IMPORTANTES www.hotpoint.eu Ces instructions sont également disponibles sur le site Web : VOTRE SECURITE ET CELLE DE VOTRE ENTOURAGE MERITENT TOUTE VOTRE ATTENTION Le présent manuel contient des messages de sécurité importants qui figurent également sur l’appareil. Nous vous invitons à... -
Page 23: Conseils Pour La Protection De L'environnement
- Si la surface est fissurée, éteignez l’appareil pour éviter tout risque de choc électrique (uniquement pour les appareils avec surface en verre). - L’appareil n’ e st pas conçu pour être utilisé à l’aide d’une minuterie externe ou d’un dispositif de commande à distance séparé. -
Page 24: Diamètre Conseille Pour Le Fond Des Casseroles
DIAMÈTRE CONSEILLE POUR LE FOND DES CASSEROLES Placez le plat de cuisson sur la zone de cuisson requise avant d'allumer la table de cuisson. Pour une bonne cuisson, le diamètre de la base du plat de cuisson devrait être le même que celui de la plaque chauffante. Diamètre (cm) Max (cm) Min (cm) -
Page 25: Installation
INSTALLATION Après avoir déballé l’appareil, vérifiez qu’il n’a pas été endommagé pendant le transport. En cas de problème, contactez le revendeur ou le Service Après-Vente. Concernant les dimensions de l’encastrement et les consignes d’installation, référez-vous aux images de la page 2. PREPARATION DU MEUBLE POUR UNE INSTALLATION ENCASTREE AVERTISSEMENT Installez une cloison de séparation... -
Page 26: Mode D'emploi
230 V 2 phases 2N AU et RU POUR LA BELGIQUE UNIQUEMENT POUR LES PAYS-BAS UNIQUEMENT noir noir noir brun noir brun brun brun jaune/vert jaune/vert bleu bleu bleu (gris) bleu (gris) bleu bleu jaune/vert jaune/vert bleu (gris) bleu (gris) MODE D’EMPLOI Description du bandeau de commande Bandeau de commandes... - Page 27 Placez une casserole sur la zone de cuisson, allumez la table de cuisson, puis activez la zone de cuisson requise en appuyant sur la touche « + » correspondante ; « 0 » apparaît à l’écran. Il est possible de sélectionner le niveau de puissance requis, de 0 min. à 9 max., ou le booster « P » si disponible. Pour augmenter le niveau de puissance, appuyez sur la touche «...
-
Page 28: Nettoyage
4 niveaux de puissance maximale sont disponibles et apparaissent sur l’affichage : 2,5 – 4,0 – 6,0 – 7,2 kW (7,2 kW est considéré comme la puissance max. de la table de cuisson). Au moment de l’achat, la table est réglée sur la puissance maximale. Après avoir branché... -
Page 29: Diagnostic Des Pannes
DIAGNOSTIC DES PANNES • Lisez et suivez les instructions de la section « Mode d’emploi ». • Vérifiez qu’il n’y a pas de coupure de courant. • Essuyez soigneusement la table de cuisson après l’avoir nettoyée. • Si des codes alphanumériques s’affichent quand vous allumez la table de cuisson, suivez les indications du tableau ci-dessous. •... -
Page 30: Gebruiksaanwijzing
Pagina BELANGRIJKE VEILIGHEIDSINSTRUCTIES Deze instructies vindt u tevens op de volgende website: www.indesit.com UW VEILIGHEID EN DIE VAN ANDEREN IS ERG BELANGRIJK Deze handleiding en het apparaat zelf zijn voorzien van belangrijke veiligheidsinformatie, die te allen tijde gelezen en opgevolgd moet worden. -
Page 31: Milieutips
- Wanneer het oppervlak is gebarsten, schakel dan het apparaat uit om het risico op een elektrische schok te voorkomen (uitsluitend voor toestellen met een glazen oppervlak). - Het apparaat mag niet gebruikt worden met een externe timer of een afzonderlijk afstandsbedieningssysteem. - Onbewaakt koken op een kookvuur met vet of olie kan gevaarlijk zijn en kan brand veroorzaken. -
Page 32: Aanbevolen Diameter Panbodem
AANBEVOLEN DIAMETER PANBODEM Plaats de pan op de gewenste kookzone voordat de kookplaat wordt ingeschakeld. Voor een g oede bereiding moet de diameter van de bodem van de pan overeenkomen met de grootte van de kookplaat. Diameter (cm) Max (cm) Min (cm) Diameter (cm) Max (cm) -
Page 33: Installatie
OPMERKING: In geval van kortdurende bereidingen waarbij een perfecte verdeling van warmte noodzakelijk is (bijvoorbeeld pannenkoeken) op de dubbele zone met een doorsnede van 28 cm (indien aanwezig) wordt geadviseerd pannen te gebruiken met een doorsnede van niet meer dan 24 cm. Voor behoedzame bereidingen (bijvoorbeeld chocolade of boter smelten) wordt geadviseerd de enkele zones met een kleinere doorsnede te gebruiken. -
Page 34: Gebruiksaanwijzing
Bij elke aansluiting op het netwerk voert de kookplaat automatisch enkele seconden een controle uit. Aansluiting op elektriciteitsnet 230 V 2-fase 2N AU en VK ALLEEN VOOR BELGIË ALLEEN VOOR NEDERLAND zwart zwart zwart bruin zwart bruin bruin bruin geel/groen geel/groen blauw blauw... - Page 35 Inschakeling en instelling kookzones Display vermogensindicatie Indicatie geselecteerde kookzone Plaatsing kookzone Plaats de pan op de kookzone, schakel de kookplaat in, activeer de gewenste kookzone door op de betreffende toets “+” te drukken. Er wordt “0” op het display weergegeven. Het is mogelijk het gewenste vermogensniveau, van min. 0 tot max. 9, of de booster “P” indien beschikbaar, te selecteren. Om het vermogensniveau te verhogen, drukt u op de “+”...
- Page 36 FLEXI /VERBINDING Deze functie wordt gebruikt bij grote pannen, waaraan de enkele zone niet kan voldoen, bv. bij vis, grote vleespan. Voor het inschakelen van de FLEXI /VERBINDING moet u tegelijkertijd de + en - knoppen indrukken, zoals aangegeven in de onderstaande afbeelding. “Power management”...
-
Page 37: Reinigen
REINIGEN Gebruik nooit een stoomreiniger. WAARSCHUWING Controleer voordat u gaat schoonmaken of de kookzones uitgeschakeld zijn en dat de restwarmte- indicator (“H”) niet wordt weergegeven. Als uw glas is voorzien van het iXelium logo wordt uw kookplaat uitgerust met iXelium behandeling. -
Page 38: Klantenservice
NEDERLANDS Installatie Pagina Gebruiksaanwijzing Pagina KLANTENSERVICE Voordat u contact opneemt met de Klantenservice 1. Controleer of het mogelijk is het probleem zelf op te lossen aan de hand van punten die beschreven worden in “Het opsporen van storingen”. 2. Schakel de kookplaat uit en weer aan, om te controleren of het probleem verdwenen is. Als na het uitvoeren van deze controles de storing nog steeds aanwezig is, contact opnemen met de dichtstbijzijnde Klantenservice. -
Page 39: Instruções De Segurança Importantes
INSTRUÇÕES DE SEGURANÇA IMPORTANTES www.hotpoint.eu Estas instruções estão também disponíveis no website: A SUA SEGURANÇA E A DE TERCEIROS É MUITO IMPORTANTE Este manual e o próprio aparelho possuem mensagens importantes relativas à segurança, que deve ler e respeitar sempre. Este é... -
Page 40: Conselhos Para A Protecção Do Ambiente
- Se a superfície partir, desligue o aparelho para evitar a ocorrência de eventuais choques eléctricos (apenas para aparelhos com superfície em vidro). - O aparelho não deve ser activado através de um temporizador externo ou de um sistema de comando à distância separado. -
Page 41: Diâmetros Aconselhados Do Fundo Das Panelas
DIÂMETROS ACONSELHADOS DO FUNDO DAS PANELAS Coloque a panela na zona de cozedura desejada antes de ligar a placa. Para obter bons resultados de cozedura, o diâmetro da base da panela deverá corresponder ao diâmetro da placa do fogão. Diâmetro (cm) Máx. -
Page 42: Instalação
NOTA: No caso de preparações rápidas e que requerem uma perfeita distribuição do calor (por exemplo, panquecas) na zona dupla de 28 cm de diâmetro (se presente), recomenda-se utilizar acessórios não superiores a 24 cm de diâmetro. Para tipos de cozedura delicadas (por exemplo, derreter chocolate ou manteiga), recomenda-se utilizar as zonas únicas de diâmetro inferior. -
Page 43: Instruções De Utilização
A placa verifica automaticamente durante alguns segundos cada ligação à rede elétrica. Ligação à fonte de alimentação 230V 2 fase 2N AU e Reino Unido APENAS PARA A BÉLGICA APENAS PARA NL preto preto preto castanho preto castanho castanho castanho amarelo/verde amarelo/verde azul... - Page 44 Activação e regulação das zonas de cozedura Visor de indicação de potência Indicação da zona de cozedura selecionada Posicionamento da zona de cozedura Coloque o recipiente na área de cozedura, ligue a placa, active a área de cozedura pretendida premindo o botão correspondente "+", aparece "0" no visor. É possível selecionar o nível de potência desejado desde o mínimo 0 até...
- Page 45 FLEXI /ZONA DE LIGAÇÃO Esta função é utilizada caso pretenda utilizar panelas de grandes dimensões que a zona de cozedura única não pode acomodar, p.ex., cozedura de peixe, grandes panelas para a cozedura de carne. Para ativar a funçã o de FLEXI /ZONA DE LIGA ÇÃO, prima os botões on + e - em simultâneo, tal como ilustrado pela imagem abaixo. ção, quando disponível) "Power management"...
-
Page 46: Limpeza
LIMPEZA Nunca utilize máquinas de limpeza a vapor. AVISO Antes de proceder às operações de limpeza, certifique-se de que as zonas de cozedura estão desligadas e que a indicação de calor residual ("H") desapareceu. Caso o vidro do seu aparelho contenha o símbolo iXelium , significa que a sua placa está... -
Page 47: Serviço Pós-Venda
SERVIÇO PÓS-VENDA Antes de contactar o Serviço Pós-Venda 1. Tente solucionar o problema consultando o "Guia de resolução de problemas". 2. Desligue e volte a ligar a placa para verificar se o problema foi resolvido. Se após efectuar as verificações, o problema persistir, contacte o Serviço Pós-Venda mais próximo. Comunique: •... - Page 48 Whirlpool EMEA S.p.A. Via Carlo Pisacane n.1 20016 Pero (MI), Italy VAT number: IT00693740425 www.indesit.com 06/15 19513658100...
Need help?
Do you have a question about the Aria VID 641 B C and is the answer not in the manual?
Questions and answers