Fronius TransSteel 3500 Syn Operating Instructions Manual
Mig/mag power source
Hide thumbs
Also See for TransSteel 3500 Syn:
- Quick manuals (2 pages) ,
- Operating instructions manual (144 pages)
Table of Contents
Advertisement
Quick Links
Advertisement
Table of Contents
Troubleshooting

Subscribe to Our Youtube Channel
Related Manuals for Fronius TransSteel 3500 Syn


Summary of Contents for Fronius TransSteel 3500 Syn
- Page 1 / Perfect Charging / Perfect Welding / Solar Energy Operating Instructions TransSteel 3500 Syn TransSteel 5000 Syn MIG/MAG Power source VR 5000 Remote 42,0426,0258,EN 004-03042017 Fronius prints on elemental chlorine free paper (ECF) sourced from certified sustainable forests (FSC).
- Page 3 Thank you for the trust you have placed in our company and congratulations on buying this high-quality Fronius product. These instructions will help you familiarise yourself with the product. Reading the instructions carefully will enable you to learn about the many different features it has to offer.
-
Page 5: Table Of Contents
Contents Safety rules ..............................General ..............................Proper use ............................Environmental conditions........................Obligations of the operator........................Obligations of personnel ........................Mains connection ..........................Protecting yourself and others ......................Danger from toxic gases and vapours ....................Danger from flying sparks ........................Risks from mains current and welding current..................Meandering welding currents........................ - Page 6 TSt 3500/5000 Syn power source......................VR 5000 Remote - front of wirefeeder ....................Rear of wirefeeder ..........................Side of wirefeeder ..........................Wire-feed unit underside........................Installation and commissioning Minimum equipment needed for welding task.................... General ..............................Gas-cooled MIG/MAG welding ......................MIG/MAG welding, water-cooled ......................MMA welding ............................
- Page 7 MIG/MAG standard manual welding ......................General ..............................Available parameters ..........................MIG/MAG standard manual welding ..................... Corrections during welding ........................Spot and stitch welding ..........................General ..............................Spot welding ............................Stitch welding............................Saving and retrieving operating points....................... General ..............................Saving operating points ........................Retrieving operating points ........................
- Page 8 VR 5000 Remote ..........................114 Welding program tables ..........................115 TransSteel 3500 Syn - Euro welding program tables ................115 TransSteel 5000 Syn - Euro welding program tables ................117 TransSteel 3500 Syn - US welding program tables ................119 TransSteel 5000 Syn - US welding program tables ................
-
Page 9: Safety Rules
Safety rules General The device is manufactured using state-of-the-art technology and according to recognised safety standards. If used incorrectly or misused, however, it can cause: injury or death to the operator or a third party, damage to the device and other material assets belonging to the operat- ing company, inefficient operation of the device. -
Page 10: Environmental Conditions
Environmental Operation or storage of the device outside the stipulated area will be deemed conditions as not in accordance with the intended purpose. The manufacturer shall not be held liable for any damage arising from such usage. Ambient temperature range: during operation: -10 °C to + 40 °C (14 °F to 104 °F) during transport and storage: -20 °C to +55 °C (-4 °F to 131 °F) Relative humidity:... -
Page 11: Protecting Yourself And Others
Protecting your- Persons involved with welding expose themselves to numerous risks, e.g.: self and others flying sparks and hot pieces of metal arc radiation, which can damage eyes and skin hazardous electromagnetic fields, which can endanger the lives of those using cardiac pacemakers risk of electrocution from mains current and welding current greater noise pollution... -
Page 12: Danger From Flying Sparks
Otherwise, a protective mask with an air supply must be worn. Close the shielding gas cylinder valve or main gas supply if no welding is tak- ing place. If there is any doubt about whether the extraction capacity is sufficient, the measured toxic emission values should be compared with the permissible limit values. -
Page 13: Meandering Welding Currents
All cables and leads must be secured, undamaged, insulated and adequately dimensioned. Replace loose connections and scorched, damaged or inade- quately dimensioned cables and leads immediately. Use the handle to ensure the power connections are tight before every use. In the case of power cables with a bayonet connector, rotate the power cable around the longitudinal axis by at least 180°... -
Page 14: Emc Device Classifications
EMC Device Clas- Devices in emission class A: sifications Are only designed for use in industrial settings Can cause line-bound and radiated interference in other areas Devices in emission class B: Satisfy the emissions criteria for residential and industrial areas. This is also true for residential areas in which the energy is sup- plied from the public low-voltage mains. -
Page 15: Specific Hazards
Specific hazards Keep hands, hair, clothing and tools away from moving parts. For example: Fans Cogs Rollers Shafts Wirespools and welding wires Do not reach into the rotating cogs of the wire drive or into rotating drive com- ponents. Covers and side panels may only be opened/removed while maintenance or repair work is being carried out. -
Page 16: Factors Affecting Welding Results
If the device has a carrying strap or handle, this is intended solely for carrying by hand. The carrying strap is not to be used if transporting with a crane, coun- terbalanced lift truck or other mechanical hoist. All lifting accessories (straps, handles, chains, etc.) used in connection with the device or its components must be tested regularly (e.g. -
Page 17: Safety Measures At The Installation Location And During Transport
Safety measures A device toppling over could easily kill someone. Place the device on a solid, at the installation level surface such that it remains stable location and dur- The maximum permissible tilt angle is 10°. ing transport Special regulations apply in rooms at risk of fire or explosion Observe relevant national and international regulations. -
Page 18: Commissioning, Maintenance And Repair
Used coolant must be disposed of properly in accordance with the relevant na- tional and international regulations. The coolant safety data sheet may be ob- tained from your service centre or downloaded from the manufacturer's website. Check the coolant level before starting to weld and while the system is still cool. -
Page 19: Safety Symbols
(e.g. relevant product standards of the EN 60 974 series). Fronius International GmbH hereby declares that the device is compliant with Directive 2014/53/EU. The full text on the EU Declaration of Conformity can be found at the following address: http://www.fronius.com Devices marked with the CSA test mark satisfy the requirements of the rele- vant standards for Canada and the USA. -
Page 21: General Information
General information... -
Page 23: General
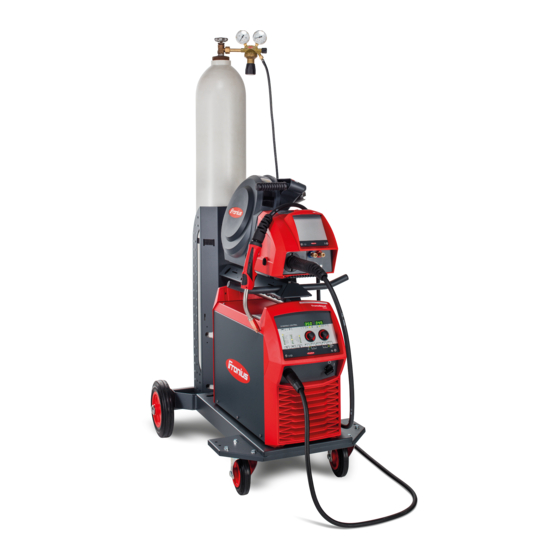
General Device concept The TransSteel (TSt) 3500 Syn and TSt 5000 Syn power sources are fully digitised, microprocessor-controlled inverter power sources. The modular design and potential for sys- tem add-ons ensure a high degree of flexi- bility. The devices are designed for the welding of steel and the following welding processes: MAG welding MMA welding... -
Page 24: Warning Notices On The Device
The TSt 3500 / 5000 Syn power sources are designed for: Machine and equipment construction Steelwork Plant and container construction Shipyards and the offshore industry Metal and gantry construction Rail vehicle construction Warning notices Warning notices and safety symbols are affixed to the power source and the wirefeeder. on the device These warning notices and safety symbols must not be removed or painted over. - Page 25 Model No. Part No. A-4600 Wels www.fronius.com Ser. No. IEC 60 974-5/-10 Cl.A IP 23 24 V 4.0 A 24 V 2.0 A 1.0-25 m/min 360A/100% 450A/60% 500A/40% 40,0006,3035 Warning notices affixed to the wirefeeder Welding is dangerous. The following...
-
Page 26: Welding Processes, Processes And Welding Characteristics
Welding processes, processes and welding charac- teristics General Power sources offer a selection of welding processes, procedures and welding character- istics that enable a wide range of materials to be processed in the most effective way. Welding charac- When selecting the filler metal, various process-optimised welding characteristics are teristics available depending on the welding process and shielding gas combination. -
Page 27: System Components
System components General The power sources can be operated with various system components and options. This makes it possible to optimise procedures and to simplify machine handling and operation, as necessitated by the particular field of application in which the power source is to be used. -
Page 28: Options
Options General The options listed below are available with all power source variants. Machine interface The machine interface connects the power source to the machine control. The following signals can be transmitted across the machine interface: Signal input: Start of welding / end of welding Signal input for a floating contact (sensor, relay, etc.) between pin X1:1 and pin X1:2 The machine control signal input is processed by the power source in the same way as a welding torch signal input. -
Page 29: Vrd: Safety Function
Keylock activated: "CLO | SEd" appears on the display Keylock deactivated: "OP | En" appears on the display VRD: safety func- A Voltage Reduction Device (VRD) is an optional safety device for reducing the voltage. It tion is recommended for environments in which the risk of an electric shock or electrical acci- dent is increased considerably during arc welding: Due to a low human body resistance of the welder If the welder is exposed to a clear risk of touching the workpiece or other parts of the... -
Page 30: Wirefeeder Options
In MMA welding mode: Within 0.3 seconds of end of welding: VRD is active again The output voltage is limited to 35 V once more Wirefeeder op- The following options are available for the VR 5000 Remote wirefeeder: tions Synergic control panel Wire threading/gas-test button I-kit water cooling system I-kit remote control socket... -
Page 31: Control Elements And Connections
Control elements and connections... -
Page 33: Synergic Control Panel
Synergic control panel General The functions on the control panel are all arranged in a logical way. The various welding parameters can easily be selected using buttons and can just as easily be altered using buttons or the adjusting dial displayed on the digital display during welding The synergic function ensures that all other welding parameters are adjusted whenever an individual parameter is changed. -
Page 34: Synergic Control Panel
Synergic control panel (13) (14) (15) (16) (12) (11) (10) Function "Parameter selection" button (right) a) for selecting the following welding parameters Arc length correction For correcting the arc length Welding voltage in V *) Before the start of welding, the device automatically displays a standard value based on the programmed parameters. - Page 35 "Parameter selection" button (left) a) for selecting the following welding parameters Sheet thickness Sheet thickness in mm or in. If the welding current to be selected is not known, it is sufficient to enter the sheet thickness. The required welding current and any other parameters marked with *) will then be adjusted automatically.
-
Page 36: Service Parameters
(10) "Material" button for selecting the filler metal to be used. The SP parameter is reserved for additional filler metals. When a material is selected, the LED behind the relevant filler metal lights up. (11) "Wire threading" button Press and hold the button: gasless wire threading into the torch hosepack While the button is being held, the wire drive operates at feeder inching speed. -
Page 37: Keylock
Press and hold the "Parameter selection" button (left) Press the "Parameter selection" button (right) Release the "Parameter selection" buttons The first parameter ("Firmware version") is displayed, e.g. "1.00 | 4.21" Selecting parameters Select the required setup parameter using the "Mode" and "Pro- cess"... - Page 38 Keylock deactivated: The message "OP | En" appears on the displays. The keylock can be activated and deactivated using the keylock switch option.
-
Page 39: Connections, Switches And Mechanical Components
Connections, switches and mechanical components TSt 3500/5000 Syn power source Function (-) - current socket with bayonet latch used for connecting the grounding cable during MIG/MAG welding connecting the electrode cable or grounding cable during MMA welding (depend- ing on the type of electrode used) Mains switch for switching the power source on and off (+) - current socket with bayonet latch... -
Page 40: Vr 5000 Remote - Front Of Wirefeeder
VR 5000 Remote - Welding torch connection front of wirefeed- for connecting the welding torch Coolant flow connection (blue) - option when the optional water connection is installed, otherwise blanking co- Coolant return connection (red) - option when the optional water connection is installed, otherwise blanking co- Dummy panel for Synergic control panel option... -
Page 41: Side Of Wirefeeder
Side of wirefeeder Function Wirespool holder with brake for holding standard wirespools with a max. diameter of 300 mm (11.81 in.) and a max. weight of up to 19 kg (41.89 lbs.) Program selector (optional) 4-roller drive Optional "Wire threading / Gas-test" button Push button downwards: For threading the wire electrode into the torch hosepack with no accompanying flow of gas or current. -
Page 42: Wire-Feed Unit Underside
Wire-feed unit un- Function derside Socket for swivel pin for placing the wire-feed unit on the swivel pin in the swivel pin holder... -
Page 43: Installation And Commissioning
Installation and commissioning... -
Page 45: Minimum Equipment Needed For Welding Task
Minimum equipment needed for welding task General Depending on which welding process you intend to use, a certain minimum equipment lev- el will be needed in order to work with the power source. The welding processes and the minimum equipment levels required for the welding task are then described. -
Page 46: Before Installation And Commissioning
Before installation and commissioning Safety WARNING! Operating the equipment incorrectly can cause serious injury and damage. Do not use the functions described until you have thoroughly read and understood the following documents: these operating instructions all the operating instructions for the system components, especially the safe- ty rules WARNING! An electric shock can be fatal. - Page 47 NOTE! Inadequately dimensioned electrical installations can cause serious dam- age. The incoming mains lead and its fuse must be dimensioned to suit the local power supply. The technical data shown on the rating plate applies.
-
Page 48: Connecting The Mains Cable
Connecting the mains cable General If no mains cable is connected, a mains cable that is suitable for the connection voltage must be fitted before commissioning. A strain-relief device for the following cable cross-sections is fitted to the power source: Power source Cable cross-section fitted strain-relief device for... -
Page 49: Fitting The Europe Strain-Relief Device
Fit ferrules to the PE conductor and phase conductors Connect the PE conductor and phase conductors to the block terminal Use the strain-relief device to secure the mains cable Fir the side panel of the device Fitting the Europe strain-relief de- vice 1,2 Nm IMPORTANT! Tie the phase conductors... -
Page 50: Fitting The Canada/Us Strain-Relief Device
Fitting the Cana- da/US strain-relief device 3,5 Nm IMPORTANT! Tie the phase conductors near the block terminals using cable ties. -
Page 51: Generator-Powered Operation
Generator-powered operation Generator-pow- The power source is generator-compatible. ered operation The maximum apparent power S of the power source must be known in order to select 1max the correct generator output. The maximum apparent power S of the power source is calculated as follows: 1max 3-phase devices: Single-phase devices:... -
Page 52: Start-Up
Start-up General Commissioning a power source is described by reference to a manual water-cooled MIG/ MAG application. Information on The steps and activities described below include references to various system compo- system compo- nents, including: nents trolley upright console cooling units wire-feed units interconnecting hosepacks welding torches, etc. -
Page 53: Placing Wire-Feed Unit On Power Source
Placing wire-feed CAUTION! Danger from falling wire-feed unit. Make sure that the wire-feed unit unit on power is located securely on the swivel pin and that the devices, upright consoles and source trolleys are stable. -
Page 54: Fitting The Interconnecting Hosepack Strain-Relief Device
Fitting the inter- connecting hose- pack strain-relief device Fitting the strain-relief device to the trolley Fitting the strain-relief device to the wirefeeder IMPORTANT! To prevent wear and tear, leave some slack when connecting the cables. A strain-relief device is not provided in the case of 1.2 m (3 ft. 11.24 in.) interconnecting hose- packs. -
Page 55: Connecting The Gas Cylinder
Connecting the WARNING! There is a high risk of very serious injury and damage if a gas cylin- gas cylinder der falls over. When using gas cylinders place them on a solid, level surface in such a way that they remain stable secure the gas cylinders to prevent them from falling over fit the VR holder option Follow the gas cylinder manufacturer's safety rules. -
Page 56: Establishing A Ground Earth Connection
Establishing a ground earth con- nection Connecting a MIG/MAG welding * when the optional water connection and torch the water-cooled welding torch are fitted Inserting/replac- CAUTION! Risk of injury if the feed roller holders fly upwards. When unlocking ing feed rollers the clamping lever, keep fingers away from the area to the left and right of the le- ver. -
Page 57: Inserting The Wirespool
CAUTION! Risk of crushing by exposed feed rollers. Always fit the protective cov- er of the 4-roller drive after inserting or changing a feed roller. Inserting the wire- CAUTION! Risk of injury due to springiness of spooled wire electrode. While in- spool serting the wirespool, hold the end of the wire electrode firmly to avoid injuries caused by the wire springing back. -
Page 58: Inserting The Basket-Type Spool
Inserting the bas- CAUTION! Risk of injury due to springiness of spooled wire electrode. When in- ket-type spool serting the basket-type spool, hold the end of the wire electrode firmly to avoid injuries caused by the wire springing back. CAUTION! Risk of injury from falling basket-type spool. Make sure that the bas- ket-type spool and basket-type spool adapter are fitted securely to the wirespool holder. -
Page 59: Feed In The Wire Electrode
Feed in the wire CAUTION! Risk of injury due to springiness of spooled wire electrode. When in- electrode serting the wire electrode into the 4 roller drive, hold the end of the wire electrode firmly to avoid injuries caused by the wire springing back. CAUTION! Risk of damage to the welding torch from sharp end of wire electrode. - Page 60 Hold the button for up to one second ... the wire speed stays at 1 m/min or 39.37 ipm for the first second. Hold the button for up to 2.5 seconds (m/min, ipm) ... after one second has elapsed, the wire speed increases at a uniform rate over the next 1.5 seconds.
-
Page 61: Setting The Contact Pressure
Setting the con- NOTE! Set the contact pressure in such a way that the wire electrode is not de- tact pressure formed but nevertheless ensures proper wirefeeding. Contact pressure U-groove roll- standard values Steel 4 - 5 CrNi 4 - 5 Tubular cored electrodes 2 - 3 Adjusting the NOTE! After releasing the "Wire threading"... -
Page 62: Design Of The Brake
STOP Design of the WARNING! Fitting the equipment brake incorrectly can cause serious inju- ry and damage. Do not dismantle the brake. Maintenance and servicing of brakes is to be carried out by trained, qualified personnel only. The brake is only available as a complete unit. -
Page 63: Welding
Welding... -
Page 65: Power Limitation
Power limitation Safety function "Power limitation" is a safety function for MIG/MAG welding. This means that the power source can be operated at the power limit whilst maintaining process safety. Wire feed speed is a determining parameter for welding power. If it is too high, the arc gets smaller and smaller and may be extinguished. -
Page 66: Mig/Mag Modes
MIG/MAG modes General WARNING! Operating the equipment incorrectly can cause serious injury and damage. Do not use the functions described until you have thoroughly read and understood the following documents: these operating instructions all the operating instructions for the system components, especially the safe- ty rules For details of the meaning, settings, setting range and units of the available welding pa- rameters (e.g. -
Page 67: 2-Step Mode
2-step mode "2-step mode" is suitable for Tacking work Short weld seams 4-step mode "4-step mode" is suitable for longer weld seams. Special 4-step Special 4-step mode allows the starting and mode final current to be configured in addition to the advantages of 4-step mode. -
Page 68: 2-Step Stitch Welding
2-step stitch The "2-step stitch welding" mode is suitable welding for welding short weld seams on thin sheets, to prevent the weld seams from dropping through the base material. 4-step stitch The "4-step stitch welding" mode is suitable welding for welding longer weld seams on thin sheets, to prevent the weld seams from dropping through the base material. -
Page 69: Mig/Mag Welding
MIG/MAG welding Safety WARNING! Operating the equipment incorrectly can cause serious injury and damage. Do not use the functions described until you have thoroughly read and understood the following documents: these operating instructions all the operating instructions for the system components, especially the safe- ty rules WARNING! An electric shock can be fatal. -
Page 70: Mig/Mag Standard Synergic Welding
MIG/MAG standard synergic welding MIG/MAG stand- Press the "Material" button to select the filler metal to be used. ard synergic Press the "Wire diameter" button to select the diameter of the wire electrode used. welding Press the "Shielding gas" button to select the shielding gas to be used. The assignment of the SP position is in the welding program tables in the appendix. - Page 71 Press the "Parameter selection" buttons to select the parameters you wish to correct. Use the adjusting dials to set the selected welding parameters to the required values. Welding parameter values are shown in the displays located above them.
-
Page 72: Mig/Mag Standard Manual Welding
MIG/MAG standard manual welding General The MIG/MAG standard manual welding process is a MIG/MAG welding process with no synergic function. Changing one parameter does not result in any automatic adjustments to the other param- eters. All of the variable parameters must therefore be adjusted individually, as dictated by the welding process in question. -
Page 73: Corrections During Welding
Open the gas cylinder valve Setting the shielding gas flow rate: Tap the "Gas-test" button Turn the adjusting screw on the underside of the pressure regulator until the pres- sure gauge shows the required gas flow rate Tap the "Gas-test" button again CAUTION! Risk of injury and damage from electric shock and from the wire elec- trode emerging from the torch. -
Page 74: Spot And Stitch Welding
Spot and stitch welding General The spot and stitch welding modes are MIG/MAG welding processes. The spot and stitch welding modes can be activated in the Setup menu. Spot welding is used on overlapping sheets that are only accessible on one side. Stitch welding is used for light-gauge sheets. -
Page 75: Stitch Welding
Lift the torch off the workpiece Stitch welding Activating stitch welding mode: For the SPt Setup parameter (spot / stitch welding time), enter a value > OFF For the SPt Setup parameter (spot pause time), enter a value > OFF As soon as a value is entered for the SPt Setup parameter, the spot / stitch welding indi- cator (SF) lights up. -
Page 76: Saving And Retrieving Operating Points
Saving and retrieving operating points General The "Save" buttons allow up to 5 operating points to be saved. Every operating point matches the settings on the control panel. IMPORTANT! Setup parameters are not saved at this time. Saving operating Press and hold one of the "Save" buttons to save the current settings on the control points panel, e.g.: The left indicator displays "Pro"... - Page 77 Indicator on the Up/Down welding torch Operating point on the control panel...
-
Page 78: Mma Welding
MMA welding Safety WARNING! Operating the equipment incorrectly can cause serious injury and damage. Do not use the functions described until you have thoroughly read and understood the following documents: these operating instructions all the operating instructions for the system components, especially the safe- ty rules WARNING! An electric shock can be fatal. -
Page 79: Corrections During Welding
The amperage value is shown in the left-hand digital display. All welding parameter set values that have been set using the adjusting dial remain stored until the next time they are changed. This applies even if the power source is switched on and off again in the meantime. - Page 80 Electrode burn-out is prevented by activating the anti-stick function. If the rod electrode be- gins to stick, the power source immediately switches the welding current off. After the rod electrode has been detached from the workpiece, the welding process can be continued without any problems.
-
Page 81: Setup Settings
Setup settings... -
Page 83: Setup Menu
Setup menu General remarks The Setup menu provides simple access to expert knowledge in the power source and to additional functions. The Setup menu can be used to make simple adjustments of the pa- rameters to suit the various job settings. Entering/exiting Setting the setup parameters is described here with reference to the "MIG/MAG standard the Setup menu... -
Page 84: Setup Parameters For Mig/Mag Standard Manual Welding
Setup parameters "Min." and "max." are used for setting ranges that differ according to power source, welding for MIG/MAG program, etc. standard manual Gas pre-flow time welding Unit: s Setting range: 0 - 9.9 Factory setting: 0.1 Gas post-flow time Unit: s Setting range: 0 - 9.9 Factory setting: 0.5... - Page 85 Setting range: OFF, 5 - 100 (OFF, 0.2 - 3.94) Factory setting: OFF NOTE! The "Ignition time-out" function (ito) is a safety function. The length of wire that is fed before the safety cut-out trips may differ from the preset wire length, particularly when the wire is being fed at high speeds.
-
Page 86: Setup Parameters For Mig/Mag Standard Synergic Welding
Setup parameters "Min." and "max." are used for setting ranges that differ according to power source, welding for MIG/MAG program, etc. standard syner- Gas pre-flow time gic welding Unit: s Setting range: 0 - 9.9 Factory setting: 0.1 Gas post-flow time Unit: s Setting range: 0 - 9.9 Factory setting: 0.5... - Page 87 NOTE! The "Ignition time-out" function (ito) is a safety function. The length of wire that is fed before the safety cut-out trips may differ from the preset wire length, particularly when the wire is being fed at high speeds. Spot time - spot / stitch welding time Unit: s Setting range: OFF, 0.1 - 5 Factory setting: OFF...
-
Page 88: Setup Parameters For Mma Welding
Setup parameters IMPORTANT! If you reset the power source using the FAC factory setup parameter, the for MMA welding hot-current time (Hti) and HotStart current (HCU) setup parameters are also reset. HotStart current Unit: % Setting range: 100 - 200 Factory setting: 150 Hot-current time Unit: s... -
Page 89: Setup Menu - Level 2
Setup menu - Level 2 Level 2 setup Accessing the setup menu menu Press and hold the "Mode" button Press the "Process" button Release the "Mode" and "Process" buttons The control panel is now in the setup menu - the last setup parameter that was selected is displayed. -
Page 90: Parameters For Mig/Mag Welding In The Setup Menu Level 2
Exiting the setup menu Press and hold the "Mode" button Press the "Process" button Release the "Mode" and "Process" buttons Parameters for Cooling unit Control MIG/MAG welding (only with connected cooling unit) in the Setup menu level 2 Unit: - Setting range: Aut, On, OFF Factory setting: Aut Aut: The cooling unit cuts out after a 2-minute welding off-time. -
Page 91: Parameters For Manual Metal Arc (Mma) Welding In The Setup Menu Level 2
Real Energy Input – electrical energy of the arc relative to the welding speed Unit: kJ Setting range: ON / OFF Factory setting: OFF Since the full range of values (1 kJ - 99999 kJ) cannot be displayed on the three- digit display, the following display format has been selected: Value in kJ / indicator on display: 1 to 999 / 1 to 999... -
Page 92: Measuring Welding Circuit Resistance R
Measuring welding circuit resistance r General Measuring the welding circuit resistance "r" makes it possible to have a constant welding result at all times, even with hosepacks of different lengths. The welding voltage at the arc is then always precisely regulated, regardless of the length and cross-sectional area of the hosepack. -
Page 93: Retrieving The Welding Circuit Inductivity L
Retrieving the welding circuit inductivity L General Laying of the hosepacks has a significant effect on welding circuit inductivity and therefore affects the welding process. It is important to lay the hosepacks correctly in order to obtain the best possible welding result. Displaying weld- The setup parameter "L"... -
Page 95: Troubleshooting And Maintenance
Troubleshooting and maintenance... -
Page 97: Troubleshooting
Troubleshooting General The devices are equipped with an intelligent safety system. This means that to a large ex- tent it has been possible to dispense with melting-type fuses. Melting-type fuses therefore no longer need to be replaced. After a possible malfunction has been remedied, the device is ready for use again. - Page 98 Nothing happens when the torch trigger is pressed Power source mains switch is on, power source ON indication is lit up on the power source, indications on wire-feed unit are not lit up Cause: The interconnecting hosepack is faulty or not connected properly Remedy: Check interconnecting hosepack No welding current...
- Page 99 Irregular wire feed speed Cause: Braking force has been set too high Remedy: Loosen the brake Cause: Hole in the contact tip is too narrow Remedy: Use a suitable contact tip Cause: Faulty inner liner in welding torch Remedy: Check the inner liner for kinks, dirt, etc. and replace if necessary Cause: The feed rollers are not suitable for the wire electrode being used Remedy:...
-
Page 100: Displayed Service Codes
Poor weld properties Cause: Incorrect welding parameters Remedy: Check the settings Cause: Poor ground earth connection Remedy: Ensure good contact to workpiece Cause: Inadequate or no protective gas shield Remedy: Check the pressure regulator, gas hose, gas solenoid valve, torch gas con- nection, etc. - Page 101 ELn | 8 Cause: The connected wire-feed unit is not supported Remedy: Connect supported wire-feed unit ELn | 12 Cause: Different control panels for selecting materials are in the system Remedy: Connect similar control panels to select materials ELn | 13 Cause: Illegal change of welding process during welding Remedy:...
- Page 102 E-Stop Cause: "External stop" has tripped Remedy: Remedy the event that triggered the external stop -St | oP- Cause: At the robot interface the flag was not deleted by the robot Remedy: Delete the signal robot ready at the robot interface PHA | SE1 Cause: The power source is operated in single-phase mode.
- Page 103 to2 | xxx Note: xxx stands for a temperature value Cause: Overtemperature in the secondary circuit of the power source Remedy: Allow power source to cool down, check that fan is on to3 | xxx Remark: xxx stands for a temperature value Cause: Overtemperature in the wire-feed unit motor Remedy:...
- Page 104 tu3 | xxx Remark: xxx stands for a temperature value Cause: Undertemperature in the wire-feed unit motor Remedy: Place wire-feed unit in a heated room and allow to warm up tu4 | xxx Remark: xxx stands for a temperature value Cause: Undertemperature in the welding torch Remedy:...
- Page 105 EPG | 17 Cause: The welding program selected is invalid Remedy: Select valid welding program EPG | 29 Cause: The required wire-feed unit is not available for the selected characteristic Remedy: Connect correct wire-feed unit, check plug connections for the hosepack EPG | 35 Cause: RL calibration failed.
-
Page 106: Care, Maintenance And Disposal
Care, maintenance and disposal General Under normal operating conditions, the welding system requires only a minimum of care and maintenance. However, it is vital to observe some important points to ensure the weld- ing system remains in a usable condition for many years. Safety WARNING! An electric shock can be fatal. -
Page 107: Appendix
Appendix... -
Page 109: Technical Data
Technical data Special voltages For devices designed for special voltages, the technical data on the rating plate applies. For all machines with a permitted mains voltage of up to 460 V: The standard mains plug allows the user to operate with a mains voltage of up to 400 V. For mains voltages up to 460 V fit a mains plug permitted for such use or install the mains supply directly. -
Page 110: Tst 3500 Syn
TSt 3500 Syn Mains voltage (U 380 V 400 V 460 V Max. effective primary current (I 15.0 A 14.4 A 12.6 A 1eff Max. primary current (I 23.6 A 22.7 A 19.8 A 1max Mains fuse protection 35 A slow-blow Mains voltage tolerance -10 / +15% Grid frequency... -
Page 111: Tst 3500 Mv Syn
TSt 3500 MV Syn Mains voltage (U 200 V 230 V Max. effective primary current (I 24.1 A 20.8 A 1eff Max. primary current (I 38.1 A 32.9 A 1max Mains fuse protection 35 A slow-blow Mains voltage (U 400 V 460 V Max. -
Page 112: Tst 5000 Syn
TSt 5000 Syn Mains voltage (U 380 V 400 V 460 V Max. effective primary current (I 27 A 25.9 A 23.2 A 1eff Max. primary current (I 42.7 A 41.0 A 36.7 A 1max Mains fuse protection 35 A slow-blow Mains voltage tolerance -10 / +15% Grid frequency... -
Page 113: Tst 5000 Mv Syn
TSt 5000 MV Syn Mains voltage (U 200 V 230 V Max. effective primary current (I 39.5 A 36.3 A 1eff Max. primary current (I 66.7 A 57.4 A 1max Mains fuse protection 63 A slow-blow Mains voltage (U 400 V 460 V Max. -
Page 114: Vr 5000 Remote
40% D.C.* 500 A 60% D.C.* 450 A 100% D.C.* 360 A Maximum shielding gas pressure 5 bar 72.49 psi. Coolant Original Fronius Maximum coolant pressure 5 bar 72.49 psi. Gear ratio 16: 1 Wire speed 1 - 25 m/min 39.37 - 984.25 ipm. -
Page 115: Welding Program Tables
Welding program tables TransSteel 3500 Welding programs are active if Syn - Euro weld- the Setup parameter "SEt" is set to "Std" (Standard), ing program ta- bles the VR 5000 Remote wirefeeder is fitted with the Synergic Steel control panel option. Welding program database: UID 3431 Pos. - Page 116 Special assignment Material Diameter 0,8 mm 0,9 mm 1,0 mm 1,2 mm 1,4 mm 1,6 mm Pos. Pos. .030‘‘ .035‘‘ .040‘‘ .045‘‘ .052‘‘ 1/16‘‘ Stainless Steel Ar + 2,5 % CO2 2427 2402 2426 2405 Stainless Steel root Ar + 2,5 % CO2 2440 2441 2442...
-
Page 117: Transsteel 5000 Syn - Euro Welding Program Tables
TransSteel 5000 Welding programs are active if Syn - Euro weld- the Setup parameter "SEt" is set to "Std" (Standard), ing program ta- bles the VR 5000 Remote wirefeeder is fitted with the Synergic Steel control panel option. Welding program database: UID 3430 Pos. - Page 118 Special assignment Material Diameter 0,8 mm 0,9 mm 1,0 mm 1,2 mm 1,4 mm 1,6 mm Pos. Pos. .030‘‘ .035‘‘ .040‘‘ .045‘‘ .052‘‘ 1/16‘‘ Stainless Steel Ar + 2,5 % CO2 2427 2402 2426 2405 2428 Stainless Steel root Ar + 2,5 % CO2 2440 2441 2442...
-
Page 119: Transsteel 3500 Syn - Us Welding Program Tables
TransSteel 3500 Welding programs are active if Syn - US welding the Setup parameter "SEt" is set to "US" (USA), program tables the VR 5000 Remote wirefeeder is fitted with the Synergic US control panel option. Welding program database: UID 3431 Pos. - Page 120 Special assignment Material Diameter 0,8 mm 0,9 mm 1,0 mm 1,2 mm 1,4 mm 1,6 mm Pos. Pos. .030‘‘ .035‘‘ .040‘‘ .045‘‘ .052‘‘ 1/16‘‘ Stainless Steel root Ar + 2,5 % CO2 2440 2441 2442 2443 FCW Stainless Steel Ar + 18 % CO2 2423 2424 2425...
-
Page 121: Transsteel 5000 Syn - Us Welding Program Tables
TransSteel 5000 Welding programs are active if Syn - US welding the Setup parameter "SEt" is set to "US" (USA), program tables the VR 5000 Remote wirefeeder is fitted with the Synergic US control panel option. Welding program database: UID 3430 Pos. - Page 122 Special assignment Material Diameter 0,8 mm 0,9 mm 1,0 mm 1,2 mm 1,4 mm 1,6 mm Pos. Pos. .030‘‘ .035‘‘ .040‘‘ .045‘‘ .052‘‘ 1/16‘‘ Stainless Steel root Ar + 2,5 % CO2 2440 2441 2442 2443 FCW Stainless Steel Ar + 18 % CO2 2423 2424 2425...
-
Page 123: Transsteel 3500 Yard Welding Program Tables
TransSteel 3500 Welding programs are active if a VR 5000 Remote wirefeeder with the Synergic YARD Yard welding pro- control panel option is in the system. gram tables Welding program database: UID 3431 In this case, the welding program indica- tion on the power source is deactivated. -
Page 124: Transsteel 5000 Yard Welding Program Tables
TransSteel 5000 Welding programs are active if a VR 5000 Remote wirefeeder with the Synergic YARD Yard welding pro- control panel option is in the system. gram tables Welding program database: UID 3430 In this case, the welding program indica- tion on the power source is deactivated. -
Page 125: Standard Value Tables For Mig/Mag Standard Manual Welding
Standard value tables for MIG/MAG standard manual welding Settings tables Shielding gas: Argon + CO Material: G3 Si 1 Wire diameter: 0.8 mm (.03 in.) Ignition current: 400 A Sheet thickness Wire feed speed Welding voltage Dynamic 0.8 mm (.03 in.) 2.1 m/min (82.68 ipm) 13.7 V 1 mm (.04 in.) - Page 126 Shielding gas: Argon + CO Material: G3 Si 1 Wire diameter: 1.0 mm (.04 in.) Ignition current: 500 A Sheet thickness Wire feed speed Welding voltage Dynamic 0.8 mm (.03 in.) 1.6 m/min (62.99 ipm) 14.3 V 1 mm (.04 in.) 2 m/min (78.74 ipm) 14.5 V 1.3 mm (.05 in.)
- Page 127 Shielding gas: Argon + CO Material: G3 Si 1 Wire diameter: 1.4 mm (.06 in.) Ignition current: 650 A Sheet thickness Wire feed speed Welding voltage Dynamic 1 mm (.04 in.) 1.2 m/min (47.24 ipm) 13.7 V 1.5 mm (.06 in.) 1.7 m/min (66.93 ipm) 15 V 2 mm (.08 in.)
- Page 128 Shielding gas: CO Material: G3 Si 1 Wire diameter: 0.8 mm (.3 in.) Ignition current: 400 A Sheet thickness Wire feed speed Welding voltage Dynamic 0.8 mm (.03 in.) 1.5 m/min (59.06 ipm) 16 V 1 mm (.04 in.) 3 m/min (118.11 ipm) 16.8 V 1.5 mm (.06 in.) 5 m/min (196.85 ipm)
- Page 129 Shielding gas: CO Material: G3 Si 1 Wire diameter: 1.0 mm (.04 in.) Ignition current: 500 A Sheet thickness Wire feed speed Welding voltage Dynamic 0.8 mm (.03 in.) 1.6 m/min (62.99 ipm) 16.7 V 1 mm (.04 in.) 2 m/min (78.74 ipm) 17.6 V 1.3 mm (.05 in.) 2.6 m/min (102.36 ipm)
- Page 130 Shielding gas: CO Material: G3 Si 1 Wire diameter: 1.4 mm (.06 in.) Ignition current: 650 A Sheet thickness Wire feed speed Welding voltage Dynamic 1 mm (.04 in.) 1.4 m/min (55.12 ipm) 18.2 V 1.5 mm (.06 in.) 1.7 m/min (66.93 ipm) 19.1 V 2 mm (.08 in.) 2.2 m/min (86.61 ipm)
- Page 132 FRONIUS INTERNATIONAL GMBH Froniusplatz 1, A-4600 Wels, Austria Tel: +43 (0)7242 241-0, Fax: +43 (0)7242 241-3940 E-Mail: sales@fronius.com www.fronius.com www.fronius.com/addresses Under http://www.fronius.com/addresses you will find all addresses of our Sales & service partners and Locations...
Need help?
Do you have a question about the TransSteel 3500 Syn and is the answer not in the manual?
Questions and answers