Table of Contents
Advertisement
Service
Manual
This manual is to be used by qualified appliance technicians only.
Viking does not assume any responsibility for property damage
or personal injury for improper service procedures done by an
unqualified person.
Professional
and Designer
Undercounter/
Freestanding
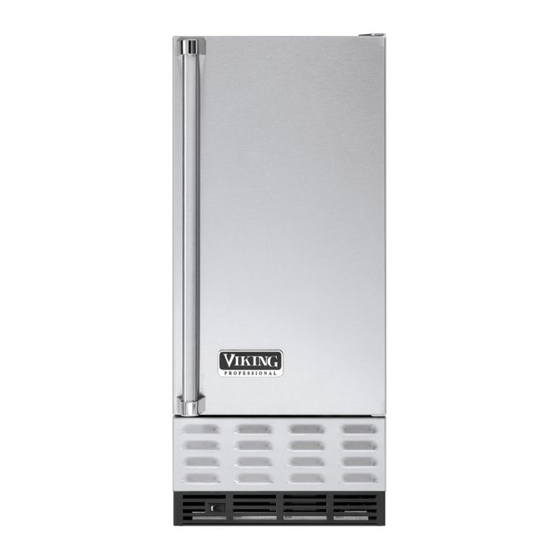
15" W. Ice Machine
Preferred Service
This manual covers general and
specific information including, but not
limited to the following models:
VUIM/DUIM150
(MFG AFTER 3/2007)
VUIM/DUIM153
SMR-0006
April 2009
Advertisement
Table of Contents

Related Manuals for Viking VUIM/DUIM150


Summary of Contents for Viking VUIM/DUIM150
- Page 1 Service Preferred Service Manual This manual is to be used by qualified appliance technicians only. Viking does not assume any responsibility for property damage or personal injury for improper service procedures done by an unqualified person. Professional and Designer This manual covers general and Undercounter/ specific information including, but not...
-
Page 2: Table Of Contents
Hot Gas Valve .............17 Evaporator ............20 Compressor ............22 Condensor ............23 Valves Drain Valve ............24 Water Valve ............26 System Components Condenser Fan ...........27 Thermistors ............28 Electronic Controller and Diagnostic LED ..31 Cutter-Grid Transformer ........31 Interior Components Cutter-Grid ............32 © 2009 Viking Preferred Service... -
Page 3: Important Information
“DANGER”, “WARNING” or “CAUTION”. These words mean: CAUTION DANGER VIKING will not be responsible for any injury or property damage from improper service Immediate hazards which WILL result in severe procedures. If performing service on your personal injury or death. -
Page 4: Warranty Information
Viking Range Corporation, warrantor, agrees to repair or replace, at its option, any part which fails or is found to be defective during the warranty period. -
Page 5: Warranty Service Information
The return of the Owner Registration Card is not a condition of warranty coverage. You should, however, return the Owner Registration Card so that Viking Range Corporation can contact you should any question of safety arise which could affect you. -
Page 6: General Information
- 5 / ( 6 8 ( 6 5 DUIM150-DL VUIM150-DL 14-3/4” 14-3/4” (37.5 cm) (37.5 cm) 22” 22” (55.9 cm) (55.9 cm) 2-1/2” 2-1/16” (6.4 cm) (5.2 cm) 37-9/16” 37-9/16” 90.0° (95.4 cm) 90.0° (95.4 cm) © 2009 Viking Preferred Service... -
Page 7: Warnings
WARNING ELECTRICAL SHOCK HAZARD Failure to follow these instructions could result in fire or electrical shock or fire. WARNING Failure to use adequate drainage system will result in surrounding water damage and/or poor ice production © 2009 Viking Preferred Service... -
Page 8: Model - Serial Number Matrix
20081122 032G above the toe grille, or on the inner door liner. The serial number will need to be given when inquiring Year of Manufacture about unit or ordering parts. Month Assembly Site Serial Number © 2009 Viking Preferred Service... -
Page 9: Before Servicing
General Information Before Servicing After Servicing • Always disconnect power to any Viking product After servicing the unit, whether at a site or service before attempting to service it. Always verify center, check the following: that power has been disconnected. -
Page 10: Electrical Requirements
As with the gravity drain, it may be necessary to can produce cloudy white cubes that may wrap drain tubing from ice machine to inlet of drain stick together. pump with wrap-type insulation. CONDENSATION CAN FORM ON DRAIN TUBING AND CAUSE SURROUNDING WATER DAMAGE. © 2009 Viking Preferred Service... -
Page 11: Operation
“harvest” cycle. The drain solenoid valve will energize for 45 seconds of operation. The grid-cutter will remain energized for 35 minutes after the initialization of the “harvest” cycle. © 2009 Viking Preferred Service... -
Page 12: Operation In "On" Position
“production” setpoint, production cycle will production cycle only (switch was previously in begin. The circulation pump, condenser fan, and “OFF” or “CLEAN” position), evaporator thermistor compressor relay will energize. When evaporator temperature will be ignored until circulation © 2009 Viking Preferred Service... -
Page 13: Operation In "Clean" Position
(this includes “OFF” position). The drain solenoid will energize for 75 seconds and then de-energize. The unit will now operate normally according to whether it is in “OFF” or “ON” position. © 2009 Viking Preferred Service... -
Page 14: Service Diagnostics And Procedures
6. Be sure to purge the system after final brazing. to be restricted, the evaporator, compressor, This will flush out any air or moisture that may condenser, and drier should all be replaced. have entered the system before being absorbed into the refrigerant oil. © 2009 Viking Preferred Service... -
Page 15: Access Valves
High side pressures corresponding voltage is 2.88V. Slight variations can range from 481 psi to 25 psi also depending at in actual measurements can occur due toinput what point measurements are taken. voltage variations. © 2009 Viking Preferred Service... -
Page 16: Re-Charging
4. Overcharged system. suction line and the capillary tube together after any repair and that it is sealed at both ends. Repair 5. Low side leak. any rips or tears as needed with vinyl tape. © 2009 Viking Preferred Service... -
Page 17: Hot Gas Valve
The solenoid coil itself can be checked by measuring resistance across the electrical terminals. A good solenoid coil will have a resistance reading of 380-390 ohms. © 2009 Viking Preferred Service... - Page 18 12. Unbraze and remove the capillary tube from the drier assembly. 13. Unbraze the drier assembly at the end of the condenser (see Figure 4). Be sure to cap off after cooling. Access cover Figure 6 © 2009 Viking Preferred Service...
- Page 19 Reassemble reversing steps 1 through 9 “Removing th Hot Gas Valve” section. Black (hot) wire #2 Contact (”Off”) Figure 9 Black w/white stripe Black w/red stripe Mechanical #3 Contact (”On”) (#1 Contact “Clean”) Figure 7 Figure 10 © 2009 Viking Preferred Service...
-
Page 20: Evaporator
16. Remove the screw that secures top of electrical bracket located in front of mechanical area (see Figure 7). 17. Remove the six screws that secure the baseplate to the cabinet on the bottom of the unit (see Figure 9). © 2009 Viking Preferred Service... - Page 21 Mount the new compressor and install the two washers and lock-nuts and tighten to 4 in-lbs. DO NOT REMOVE RUBBER PLUGS AT TUBE STUBS ON COMPRESSOR AT THIS TIME. 29. Remove the insulation tube on the evaporator tubing harness. © 2009 Viking Preferred Service...
-
Page 22: Compressor
3. Remove grille by removing the two or lock-nuts on the mounting plate of the four screws (depending on grille style) and compressor (see Figure 11). Lift compressor disconnecting the three wires to rocker switch. off of the carriage bolts. © 2009 Viking Preferred Service... -
Page 23: Condensor
(see Figure 9). 9. Install sealed system access valve(s) and recover refrigerant. After recovering, be sure to cap off access valve to prevent contamination of system. © 2009 Viking Preferred Service... -
Page 24: Drain Valve
Test the solenoid by checking the resistance. was found or determined, the evaporator should A resistance of 50-65 ohms should be found. If no also be replaced at this time. resistance is found, the drain valve will need to be replaced. © 2009 Viking Preferred Service... - Page 25 Figure 13 connections or the valve itself. Also, at this time, make certain that the drain tee-fitting flow restrictor is in place (see Figure 13). Reposition as needed or order replacement. © 2009 Viking Preferred Service...
-
Page 26: Water Valve
20 psi static pressure. If it is not, make certain the valve screen filter is filter is clean and pressure is above 20 psi, the valve is defective and will need to be replaced. © 2009 Viking Preferred Service... -
Page 27: System Components
4. Remove the drain valve (see page 25) 5. Remove the water valve (see page 26) 6. Take out the screw that secures the top of the electrical bracket located in the front of the mechanical area (see Figure 6). © 2009 Viking Preferred Service... -
Page 28: Thermistors
Table C within 4% of the value, the 5.630 thermistor is bad and will need to be replaced. 4.520 3.652 Set Points 2.970 Sensor; Mode; Temperature 2.430 • Bin Sensor; “Stop Ice”; 35.0°F / 2 C, (+/-) 2°F 2.000 © 2009 Viking Preferred Service... - Page 29 THERMISTOR MUST BE FULLY INSERTED INTO THE PLATED SENSING TUBE FOR PROPER DETECTION. 4. Disconnect bin thermistor connector at You will typically receive an assembly with the electronic controller. thermistor and plated tube already assembled. © 2009 Viking Preferred Service...
- Page 30 This mode will reset after 10 seconds bin thermistor connector, and evaporator or after exiting clean mode. thermistor connector from the electronic control. • LED flashes twice with one interval between flashes every 5 seconds: Bin sensor open or shorted. © 2009 Viking Preferred Service...
-
Page 31: Electronic Controller And Diagnostic Led
6. Remove transformer. Installing Transformer Reverse removal procedure for installation (see above). Make certain all wire connections are secure and in the correct location. Refer to unit’s wiring diagram to verify (see page 42). Figure 17 © 2009 Viking Preferred Service... -
Page 32: Interior Components
2. Unplug the cutter-grid from the receptacle on the side of the liner (see Figure 19). 3. Remove the four screws that secure the cutter- grid to the liner (see Figure 19). 4. Remove the cutter-grid. © 2009 Viking Preferred Service... -
Page 33: Reservoir
3. Tilt reservoir forward and line up screw holes in reservoir with those of liner. 4. Insert spacer to outside of reservoir and then the screw and plastic washer to inside of reservoir. Repeat for other side. Figure 22 © 2009 Viking Preferred Service... -
Page 34: Circulation Pump
Check for resistance between the terminals. If no resistance is found, replace the circulation pump. • Check for continuity between the hot and neutral terminals and the pump’s motor casing. If continuity is found, replace the circulation pump. © 2009 Viking Preferred Service... -
Page 35: Cleaning The Ice Machine
3. Reinstall drain plug after all of water has drained. 4. Add ice machine cleaning solution to ice machine’s reservoir. Switch rocker switch in grille to “CLEAN” position. 6. The clean cycle will complete in 50 minutes. © 2009 Viking Preferred Service... -
Page 36: Troubleshooting Guide
This will also dissolve and flush out foreign material in the drain valve causing it to leak. If this does not stop the drain valve from leaking, the drain valve will need to be replaced. © 2009 Viking Preferred Service... - Page 37 Check all filters to make sure they are not restricted or plugged. Leak in the sealed system. Check for any leaks. If leak found, repair, evacuate, and re-charge unit. © 2009 Viking Preferred Service...
- Page 38 Use the ice in the bin frequently. Ice will stick together if together. left in an insulated bin over long periods of time. Room temperature is too warm. Move the unit to an area where temperature is below 90 degrees F. © 2009 Viking Preferred Service...
- Page 39 The drain pump is not level. THE DRAIN PUMP MUST BE LEVEL. Check for level on the top of the drain pump case and adjust the tubing or use shims to level. © 2009 Viking Preferred Service...
-
Page 40: Short Cycle Test
2. Check for frost build-up on the copper tubing downstream Replace valve. of the hot gas valve (between valve & evaporator). If frost- occurs, liquid is bypassing the valve seat. © 2009 Viking Preferred Service... - Page 41 1. These steps conclude the short cycle test, if necessary, continue to monitor the system as it advances through another harvest cycle. 2. Please remember to turn on, or reconnect the supply water to the ice maker at the conclusion of the short cycle test. © 2009 Viking Preferred Service...
-
Page 42: Wiring Diagrams Wiring Diagram
Wiring and Schematics ® © 2009 Viking Preferred Service... -
Page 43: Wiring Diagram
Wiring and Schematics ® © 2009 Viking Preferred Service...
Need help?
Do you have a question about the VUIM/DUIM150 and is the answer not in the manual?
Questions and answers