Table of Contents
Advertisement
Advertisement
Table of Contents

Related Manuals for Viking vuim150


Summary of Contents for Viking vuim150
- Page 1 VIKING RANGE CORPORATION, P.O. DRAWER 956, GREENWOOD, MS 38930, USA...
-
Page 2: Table Of Contents
TABLE OF CONTENTS 1. INTRODUCTION Product Specifications……………………………………………………………… Serial Number Logic ……………………………………………………………….. Before Servicing……………………………………………………………………. After Servicing ……………………………………………………………………… Basic Refrigeration Tools …………………………………………………………… Installation ………………………………………………………………………….. Electrical Requirements……………………………………………………………… Water Requirements ………………………………………………………………… Gravity Drain ……………………………………………………………………….. Drain Pump…………………………………………………………………………… Operation in ON position……………………………………………………………… 9 Operation in CLEAN position………………………………………………………… 11 2. -
Page 3: Product Specifications
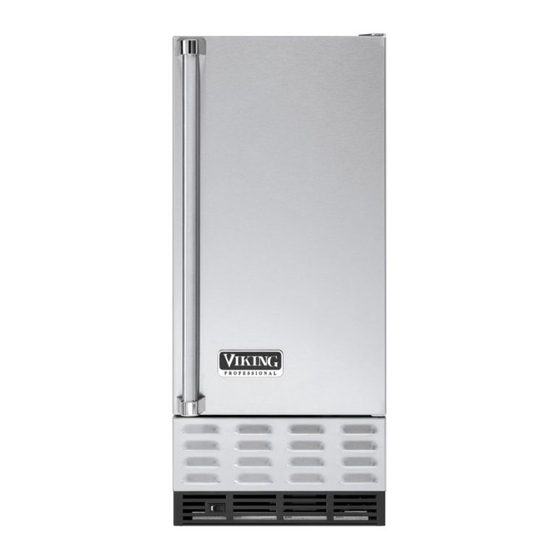
1.1 Specifications Cabinet dimensions Height 34 to 35 ¼ inches, adjustable Width 14 ¾ inches Depth 21 inches (cabinet only) 23 ½ inches (cabinet and door) Weight: 95 lbs. Shipping Weight 100 lbs. (approximate for standard models) Average ice making capacity per 24 hours: At 50°... -
Page 4: Serial Number Logic
1.2 SERIAL NAMEPLATE The serial nameplate is located on the bottom flange directly above the grille on all units. VIKING 15 INCH ICE MAKER SERIAL NUMBERS 12345 Viking Production Control Month of Year Calendar Year Week Ending Date 1.3 BEFORE SERVICING •... -
Page 5: After Servicing
1.4 After Servicing After servicing the unit, whether it is at the site or at service center, check the following: • MAKE CERTAIN THERE ARE NO LEAKS IN THE DRAIN OR WATER LINES. Check the water line, water valve, drain valve, and drain tubing for leaks. •... -
Page 6: Electrical Requirements
1.7 Electrical Requirements • 120VAC, 60Hz., single-phase power is needed. • Use outlet with a 15 amp. Delayed action fuse or circuit breaker. Do not put a fuse on the neutral or ground of the circuit. • Proper grounded outlet is required for the unit. •... -
Page 7: Gravity Drain
1.9 Gravity Drain The drain tube from the icemaker is 5/8 inch ID. This can be routed to a gravity drain in the area shown in figure #1 or to a remote gravity drain that is located below the icemaker. Be sure to check local codes. Slope any horizontal runs according to code to remote gravity drain for proper drainage. -
Page 8: Drain Pump
A drain pump can be used to drain water when gravity drain is not available. Refer to OWNER’S MANUAL for drain pump installation instructions (also supplied with drain pump). As with the gravity drain, it may be necessary to wrap the drain tubing for the icemaker to the inlet of the drain pump with wrap type insulation. - Page 9 Upon setting the switch to the “ON” position, the water solenoid will energize for 1.5 minutes and then de-energize. When the bin thermistor senses temperature at or above the “start ice” set point, and the evaporator thermistor senses temperature at or above “production”...
-
Page 10: Operation In Clean Position
2. The drier must be replaced anytime the sealed system is opened. Order correct drier replacement from Viking Service Parts. Failure to use correct part will result in repeated sealed system failure in the future. -
Page 11: Low Side Leaks
3. Limit time the system is opened. DO NOT EXPOSE OPEN SYSTEM FOR MORE THAN 15 MINUTES. This will result in sealed system failure. Leave replacement parts sealed and/or pressurized until ready to install. 4. The compressor must be replaced if there is a low side leak. Moisture has bee drawn into the system if the unit has been running extended period of time. -
Page 12: Access Valve
2.5 Access Valves A temporary access valve can be used to service or evaluate the system. The access valve can be installed on the compressor’s process tube (this will also be a low-pressure side). Be sure to cap off access valve while servicing. This will prevent contamination of the system and/or refrigerant from leaking. -
Page 13: Recharging
13.1 52.3 14.4 57.5 15.7 62.7 68.3 18.4 74.2 19.9 80.3 21.4 86.8 22.9 93.6 24.5 100.7 26.1 108.2 27.8 116.1 29.5 124.3 Table A During production cycle, low side pressures will vary from 125 psi to 3 psi, depending at what point measurements are taken. - Page 14 After recharge, check pressures. Refer to Table A for corresponding temperatures and pressures. If pressures or temperatures are incorrect, check the sealed system, recover the charge, repair, evacuate, and then recharge. NOTE: It is not uncommon to have some condensation or a slight frost on the suction line.
-
Page 15: Hot Gas Valve
3.1 Hot Gas Valve The hot gas valve is used to bypass the capillary tube and send warm gas to the evaporator when opened during the harvest cycle. The valve is actuated by a solenoid that opens the valve when energized and closes when de-energized. The valve seats using gravity so the valve must remain vertical to fully close. - Page 16 3. Remove the grille by removing two screws and disconnecting the three wires to the rocker switch. Figure 3-3 Figure 3.5 4. Remove the drain valve. 5. Remove the water valve. 6. Take out the two screws that secure the top of the electrical bracket located in the front of the mechanical area (see figure 3-4).
-
Page 17: Evaporator
9. Install system access valve(s) and recover refrigerant. After recovering, be sure to cap off the access valve to prevent contamination of the system. 10. Disconnect the wires at the solenoid, remove the solenoid-retaining clip, and remove the solenoid (see figure #3-2) 11. - Page 18 Low side tubing is found, the compressor, drier, and hot gas valve will need to be replaced. The temperature control thermistor sets on the bottom of the evaporator plate on a copper bracket. This bracket should be checked at the solder joint. Any cracks will break the proper thermal conductivity between the evaporator plate and the thermistor and result in long production cycle with thick slab on the plate.
- Page 19 25. Un-braze and remove the suction line at the compressor (see figure 3.8) 26. Un-braze the hot gas discharge line at the compressor (see figure 3.8) Figure 3.8 27. Remove the compressor be removing the two lock-nuts on the mounting plate of the compressor.
-
Page 20: Compressor
3.3 Compressor The compressor is the heart of the refrigeration system. It also, however, relies on other parts of the system to function. Make certain that the other parts of the system are correctly functioning before determining that the compressor is faulty. The compressor is protected from power interruptions with a start delay built into the control to prevent high pressure startup (see 1.11 Operation). -
Page 21: Condenser
17. Remove the compressor by removing the two lock-nuts on the mounting plate of the compressor (see figure 3.8). Lift the compressor off of the carriage bolts. Installation: Install the four rubber grommets in the bottom of the new compressor and install the two sleeves where the carriage bolts will be located. -
Page 22: Drain Valve
Remove the water valve. Take out the two screws that secure the top of the electrical bracket located in the front of the mechanical area (see figure 3.4). Remove the six screws that secure the base plate to the cabinet on the bottom of the unit (see figure 3.5). -
Page 23: Water Valve
Removal 1. Drain water in the reservoir be removing the drain plug or shutting off the water supply and allowing ice maker to cycle through ice harvest cycle. Replace the drain plug, if used, after the water has been drained. 2. -
Page 24: Condenser Fan
3. Check the flow rate of the reservoir water line. Using a stopwatch or a watch with a second hand, see what amount of time it takes to fill up a one quart container. The time should be 60 seconds to get the .25 gpm specifications of the valve. •... -
Page 25: Thermostats
Removal Disconnect power, water line, and drain line. If a drain pump is used, it will need to be disconnected and removed. Remove the access panel and rear panel (see figure 3.3) Remove the grille by removing the two screws and disconnecting the three wires to the rocker switch. - Page 26 Use a reference temperature point that is known (such as an ice bath) and measure the resistance across the wire leads. Check the recorded resistance with that in the table 5.1 below. If measured resistance falls outside the resistance given in the table 5.1 within 4% of the value, the thermistor is bad and will need to be replaced.
- Page 27 The bin thermistor is made up of a soft copper tube body and placed inside a plated copper sensing tube. This plated tube is then secured to the side of the ice maker’s bin to detect the ice bin level. The bin thermistor gives voltage input to the electronic control. This input is processed through the electronic control to switch the ice maker into stop making ice or start making ice.
-
Page 28: Grid-Cutter Transformer
Installation: Reverse the removal procedure for installation. Make certain that the thermistor’s copper tube is fully inserted into the sleeve. 5.3 Grid-Cutter Transformer The grid-cutter transformer is used to step down the voltage to the grid-cutter to 12 VAC. The transformer is on only from the start of a harvest cycle to 35 minutes from the start of the production cycle. -
Page 29: Grid Cutter
6.1 Grid-Cutter The grid-cutter is used to cut cubes from the ice slab formed on the evaporator. It uses low voltage, 12VAC, to heat the wires. Wires are warm to the touch of a hand when not under the load of a slab of ice. The grid-cutter is on only from the start of a harvest cycle to 35 minutes from the start of the production cycle (see section 1.11). -
Page 30: Reservoir
Plug the grid-cutter into the receptacle on the side of the liner. Route the plug wire between the reservoir and liner (see figure 6.1). This will keep it away from the path of the ice slab. Re-install the escutcheon panel. Adjustment to the brackets may be necessary to align the escutcheon panel. -
Page 31: Circulation Pump
Installation Slide the circulation pump into the reservoir. Insert the reservoir drain tube fitting to the drain tube in the rear of the liner Tilt the reservoir forward and line up the screw holes in the reservoir with those of the liner. - Page 32 • Check for continuity between the hot and neutral terminals and the pump’s motor casing. If continuity is found, replace the circulation pump. • Check current draw. Typical current draw will be .36 amp without pump resistance. If excessive current draw is found, check the pump’s impeller for foreign particles or severe build-up of mineral deposits.
-
Page 33: Wiring Diagram
Figure 7.1 7.1 Wiring Diagram Figure 7.1 is the wiring diagram for the ice maker. 7.2 Point to Point Wire Layout The diagram on the following page, figure 7.2, shows point-to-point termination. This diagram is also located on the back panel of the unit along with the wiring diagram. (figure 7.1). - Page 34 Figure 7.2...
Need help?
Do you have a question about the vuim150 and is the answer not in the manual?
Questions and answers