Table of Contents
Advertisement
Advertisement
Table of Contents

Related Manuals for Pyle VINTAGE PTCD4BT


Summary of Contents for Pyle VINTAGE PTCD4BT
- Page 1 Analog Tuning Radio AM/FM/PHONO/CD/AUX IN/BLUETOOTH/TAPE PTCD4BT...
-
Page 2: Table Of Contents
CONTENT IMPORTANT SAFETY INSTRUCTIONS ............... 3 PRECAUTIONS ....................5 BEFORE USE ....................6 HANDLING RECORDS ..................6 HOW TO REPLACE THE STYLUS (NEEDLE) ............7 DISCS ......................8 LOCATION OF PARTS ..................9 PREPARATION FOR USE ................. 10 BASIC OPERATION ..................10 LISTENING TO THE RADIO ................ -
Page 3: Important Safety Instructions
IMPORTANT SAFETY INSTRUCTIONS READ THOROUGHLY! When using electrical products, basic precautions should always be followed including: 1. Read Instructions - All the safety and operating instructions should be read before the product is operated. 2. Retain Instructions - The safety and operating instructions should be retained for future reference. - Page 4 13. Main plug - The main plug is used as the disconnect device, the disconnect device shall remain readily operable. 14. Lightning - For added protection for this product during a lightning storm, or when it is left unattended and unused for long periods of time, unplug it from the wall outlet and disconnect the antenna or cable system.
-
Page 5: Precautions
product is in proper operating condition. 22. Heat - The product should be situated away from heat sources such as radiators, heat registers, stoves or other products (including amplifiers) that produce heat. PRECAUTIONS Safety Information Caution: 1. Use of controls and adjustments or performance of procedures other than those specified herein may result in hazardous radiation exposure. -
Page 6: Before Use
BEFORE USE 1. Before use, please remove any additional tie downs, foam, etc that were added to make the item secure while shipping. 2. Choose unit installation location carefully. Avoid placing it in direct sunlight or close to a source of heat. Also avoid locations subject to vibrations and excessive dust, cold or moisture. -
Page 7: How To Replace The Stylus (Needle)
HOW TO REPLACE THE STYLUS (Needle) Caution: Check the stylus whether the needle is placed the middle center. (Follow third photo is right.) z Do not remove or bend the stylus. z Do not touch the needle, which should injure your hand. z Don’t let the stylus touch the turning turntable when without the disc. -
Page 8: Discs
DISCS z To move a disc from its storage case, press down on the center of the case and lift the disc out, holding it carefully by the edges. z When the disc becomes dirty, wipe the surface from the center hole outward towards the outer edge with a soft, dry cloth. -
Page 9: Location Of Parts
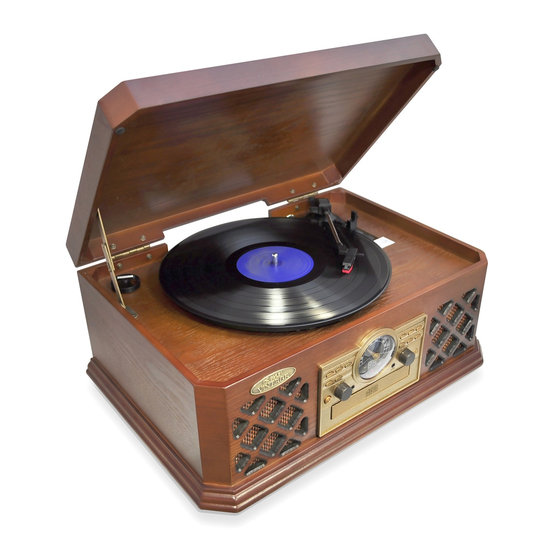
LOCATION OF PARTS 1. Speaker 2. AUX /Bluetooth Button 3. PHONO Button 4. CD Button 5. AM/FM Scale 6. Play/Pause Button 7. Stop Button 8. Repeat Button 9. AM Button 10. FM Button 11. Power Button 12. Volume Knob 13. Earphone Jack 14. -
Page 10: Preparation For Use
PREPARATION FOR USE The transit screw protects the phonograph chassis during transportation. If the speed of your phonograph seems slow or you hear a rubbing sound, adjust the screw with a coin to correct the balance of the turntable. BASIC OPERATION 1. -
Page 11: Listening To The Radio
LISTENING TO THE RADIO 1. Press POWER bu on to turn the unit on. 2. Select AM or FM using the AM or FM bu on. 3. Tune to the desired sta on. 4. Antenna mal FM r on is sure to fully extend the built-in FM antenna wire located at the lower back of the unit and move it around un l the st have tuned in is being received clearly. -
Page 12: Aux In Operation
AUX IN OPERATION An external (auxiliary) audio source (i.e., personal CD player or MP3 player) can be connected to this unit and heard through the speakers. 1. Plug one end of the AUX cable (included) into the AUX IN socket on the front of the unit. - Page 13 ENJOY MUSIC FROM AN EXTERNAL DEVICE 1. Get your external device paired. (See “Getting connected”) 2. Turn on the music player program on your external device and set it play. Normally, you can control music playback with the Play/Pause Button, Forward Button and Backward Button on the apparatus.
-
Page 14: Listening To A Record
LISTENING TO A RECORD 1. Press power button to turn the unit on. 2. Press the PHONO button to select PHONO. 3. Turn the transportation screw clockwise down. 4. Remove white protective needle cover by gently pulling towards front of unit. Please hitch the protective needle cover when you don’t use. -
Page 15: Listening To A Cd
LISTENING TO A CD 1. Press the CD button to enter to CD function. 2. Press the OPEN/CLOSE button ( ). 3. Place a disc on the tray with the printed label face up. x Never place more than one disc on the tray. x The disc must be placed in the center of the disc tray. - Page 16 NOTE: Do not push both buttons together as this may damage the unit. As the unit is tracking quickly, forward or backward you will hear your selection playing at a distorted speed. Simply release the depressed button to continue playing at normal speed at the desired position in the selected track. 8.
-
Page 17: Troubleshooting Guide "Unit
TROUBLESHOOTING GUIDE “UNIT” In case of trouble with the unit, please look through this chart and see if you can solve the problem by yourself before calling your dealer. Problem Cause Solution Power does not Connect the unit to come on when the Unit is unplugged. - Page 18 Problem Cause Solution The cassette tape The tape does not Insert the cassette is not inserted move. tape correctly. properly. Insert the CD with The CD is inserted the printed side CD stops upside down. immediately after right side up. starting, or unit The CD is dusty or pauses or stops...
-
Page 19: Specifications
SPECIFICATIONS AMPLIFIER Output Power 2W + 2W Frequency Response 60 TO 20,000 Hz TUNER FM Sec Frequency Range 88 TO 108 MHz Frequency Range 530 TO 1710 KHz CD PLAYER Frequency Response 60 TO 20,000 Hz +/- 4 dB Signal-to-Noise Ra o 55 dB (IEC-A) Bluetooth Signal-to-Noise Ra o...
Need help?
Do you have a question about the VINTAGE PTCD4BT and is the answer not in the manual?
Questions and answers