Table of Contents

Related Manuals for HPE Aruba 2930F


Summary of Contents for HPE Aruba 2930F
- Page 1 Aruba 2930F 8G PoE+ Switch Quick Setup Guide and Safety/Regulatory Information Abstract Use this guide to assist in the basic set-up of the JL258A Aruba 2930F 8G PoE+ 2SFP+ Switch. *5200-2049* Part Number: 5200-2049 Published: July 2016 Edition: 1...
- Page 2 Links to third-party websites take you outside the Hewlett Packard Enterprise website. Hewlett Packard Enterprise has no control over and is not responsible for information outside the Hewlett Packard Enterprise website. Applicable products Aruba 2930F 8G PoE+ 2SFP+ Switch JL258A...
-
Page 3: Table Of Contents
Prepare for installation..........................6 Mounting the JL258A Aruba2930F 8–port switch.................7 (Optional) Attaching the JL312A Power Adapter Shelf to the Aruba 2930F 8G switch....8 (Optional) Attaching the JL311A cable guard to the Aruba 2930F 8G switch.........8 Mounting the Aruba 2930F 8G switch without a cable guard............8 Rack mounting...........................9... -
Page 4: Aruba 2930F 8G Switch Quick Setup Guide And Safety/Regulatory Information
Avoid obstructing the ventilation holes on the top, sides, and back of the switch. Do not install the Aruba 2930F 8G switch in a confined space that does not allow a free air flow. -
Page 5: Power Supply Operation
CAUTION: Do not ship any switch in a rack without checking for restrictions in the Aruba 2930F Switches Installation and Getting Started Guide. Otherwise, you may void the switch warranty. Ensure the power source circuits are properly grounded, then use the power cord supplied with the switch to connect the AC adapter to the power source. -
Page 6: Prepare For Installation
(page 4) before beginning the installation. Power-on and verify that the self-test completes normally. An Aruba 2930F 8G switch does not contain a power on/off switch. It is turned on by connecting the power cord to the AC power adapter and to a properly-grounded AC power source, then connecting the AC adapter to the switch. -
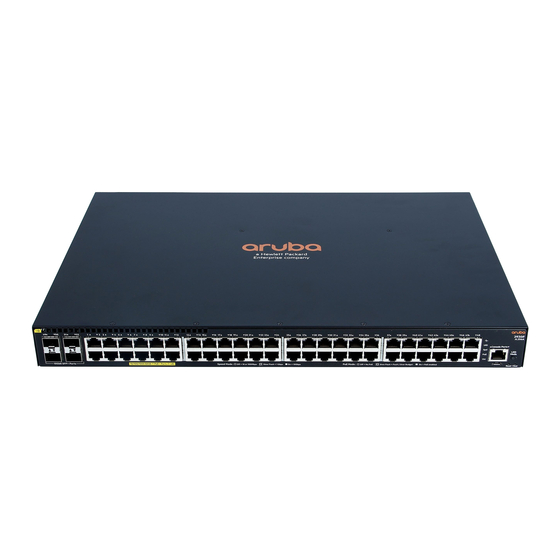
Page 7: Mounting The Jl258A Aruba2930F 8-Port Switch
Locator/Unit-Identification LED: Off after self-test. Speed Mode Selected LED: Off after self-test in default configuration. PoE Mode Selected LED (Only on Aruba 2930F models that support PoE+ operation): Off after self-test in default configuration. User Mode Selected: Off after self-test in default configuration. -
Page 8: (Optional) Attaching The Jl312A Power Adapter Shelf To The Aruba 2930F 8G Switch
ResourceCenter). Mounting the Aruba 2930F 8G switch without a cable guard Use the instructions in this section to mount the Aruba 2930F 8G switch if you do not plan to attach the optional JL311A cable guard to the switch. Aruba 2930F 8G Switch Quick Setup Guide and Safety/Regulatory Information... -
Page 9: Rack Mounting
Rack mounting Install mounting brackets (included) for use in a two-post rack. You can orient the brackets to be either flush with the switch front or offset from the switch front, as illustrated below. NOTE: If the JL312A Power Adapter Shelf is installed, then position the mounting brackets over the center set of screw holes on each side of the switch instead of the forward set on each side. -
Page 10: Wall Or Under-Table Mount
Wall or under-table mount You can mount the Aruba 2930F 8G PoE+ 2SFP+ Switch on a wall with the network ports facing up, or under a table. WARNING! For safe operation, do not install the switch with the side ventilation holes facing down. - Page 11 Secure the switch on the wall or under-table location using four 5/8–inch number 12 wood screws (not included). Mounting the JL258A Aruba2930F 8–port switch...
-
Page 12: Connecting The Switch To The Network
If both cables are connected, input is accepted only from the Micro USB connector. For more information, see the information on connecting a management console in the Aruba 2930F Switches Installation and Getting Started Guide. (Optional) Insert transceivers. Aruba 2930F 8G Switch Quick Setup Guide and Safety/Regulatory Information... - Page 13 NOTE: To ensure proper operation of your switch, use only genuine HPE Aruba SFP/SFP+ transceivers supported by your switch. For more information on using transceivers, see “SFP/SFP+ installation notes” (page 14). Connect network cables. NOTE: In the factory default configuration, the switch automatically obtains its IP network settings from a DHCP or BootP server after connecting to the network.
-
Page 14: Sfp/Sfp+ Installation Notes
HPE Networking Legacy ProCurve Product Family 10–GBE Transceiver Support Matrix Hot Swapping SFP/SFP+ transceivers Supported SFP/SFP+ transceivers that you can install in your HPE Aruba switch can be “hot swapped” – removed and installed while the switch is receiving power. However, you should disconnect the network cables from the SFP/SFP+ transceivers before hot-swapping them. -
Page 15: Power Cords
Power cords Use one of the following power cords for an Aruba 2930F switch: Argentina 8121–0729 Israel 8121–1004 Australia/New Zealand 8121-0837 Japan 8121–1143 Brazil 8121-1071 Switzerland 8121–0738 Chile 8121–0735 South Africa 8121–0737 China 8121–0943 Taiwan 8121-0964 Continental Europe/South 8121–0731 Philippines/Thailand... -
Page 16: Japan Vcci Class A Statement
Este equipamento deve ser conectado obrigatoriamente em tomada de rede de energia elétrica que possua aterramento (três pinos), conforme a Norma NBR ABNT 5410, visando a segurança dos usuários contra choques elétricos.) Japan VCCI class A statement Aruba 2930F 8G Switch Quick Setup Guide and Safety/Regulatory Information... -
Page 17: Korea Emc Class A Statement
Hewlett Packard Enterprise is committed to providing documentation that meets your needs. To help us improve the documentation, send any errors, suggestions, or comments to Documentation Feedback (docsfeedback@hpe.com). When submitting your feedback, include the document title, part number, edition, and publication date located on the front cover of the document. For online help content, include the product name, product version, help edition, and publication date located on the legal notices page.
Need help?
Do you have a question about the Aruba 2930F and is the answer not in the manual?
Questions and answers