
Related Manuals for HPE Aruba Networking CX 6200 Series


Summary of Contents for HPE Aruba Networking CX 6200 Series
- Page 1 HPE Aruba Networking CX 6200F/M Switch Series Installation and Getting Started Guide Published: June 2023 Edition: 1...
- Page 2 Copyright Information © Copyright 2023 Hewlett Packard Enterprise Development LP. Open Source Code This product includes code licensed under the GNU General Public License, the GNU Lesser General Public License, and/or certain other open source licenses. A complete machine-readable copy of the source code corresponding to such code is available upon request.
-
Page 3: Table Of Contents
SFP/SFP+ installation notes Getting started with switch configuration Recommended minimal configuration Setup for initial configuration Replacing components Replacing the fan Replacing the power supply Troubleshooting Basic troubleshooting tips HPE Aruba Networking CX 6200F/M Switch Series Installation and Getting Started Guide |... - Page 4 Diagnosing with the LEDs Proactive networking Hardware diagnostic tests Testing the switch by resetting it Checking the switch LEDs Checking console messages Testing twisted-pair cabling Testing switch-to-device network communications Testing end-to-end network communications Restoring the factory default configuration Downloading new switch software Specifications Physical and environmental Physical Information: 6200F switches...
-
Page 5: About This Document
HPE Aruba Networking CX 6200F 24G 4SFP TAA- 4SFP+ 740W Switch (JL728B) compliant Switch (S0G13A) Aruba 6200F 24G 4SFP+ Switch (JL724A) HPE Aruba Networking CX 6200F 24G Class 4 PoE 4SFP HPE Aruba Networking CX 6200F/M Switch Series Installation and Getting Started Guide |... -
Page 6: Related Publications
HPE Aruba Networking CX 6200F 48G 4SFP TAA- Switch (JL725A) compliant Switch (S0G15A) Aruba 6200F 48G Class 4 PoE 4SFP+ 370W switch HPE Aruba Networking CX 6200F 48G Class 4 PoE 4SFP (JL727A) 370W TAA-compliant Switch (S0G16A) Aruba 6200F 48G Class 4 PoE 4SFP+ 740W switch... -
Page 7: Introducing The Switches
R8V08A HPE Aruba Networking CX 6200M 24G 4SFP+ TAA Switch R8Q68A HPE Aruba Networking CX 6200M 24G Class4 PoE 4SFP+ Switch R8V09A HPE Aruba Networking CX 6200M 24G class4 PoE 4SFP+ TAA Switch HPE Aruba Networking CX 6200F/M Switch Series Installation and Getting Started Guide |... - Page 8 JL725B HPE Aruba Networking CX 6200F 24G Class 4 PoE 4SFP+ 370W Switch S0M87A HPE Aruba Networking CX 6200F 24G Class 4 PoE 4SFP+ 370W TAA-compliant Switch S0M82A HPE Aruba Networking CX 6200F 24G Class 4 PoE 4SFP 370W Switch...
- Page 9 Description S0M84A HPE Aruba Networking CX 6200F 48G Class 4 PoE 4SFP 370W Switch S0G16A HPE Aruba Networking CX 6200F 48G Class 4 PoE 4SFP 370W TAA-compliant Switch JL728A Aruba 6200F 48G Class 4 PoE 4SFP+ 740W Switch JL728B HPE Aruba Networking CX 6200F 48G Class 4 PoE 4SFP+ 740W Switch...
- Page 10 6200M 24G 4SFP+ TAA switch (R8V08A) Table 5: Network Ports for 6200F switches Switch 10/100/1000 BaseT SFP+ HPE Aruba Networking CX 6200F 24G 4SFP+ Switch (JL724B) HPE Aruba Networking CX 6200F 24G 4SFP+ TAA- compliant Switch (S0M86A) Aruba 6200F 24G 4SFP+...
- Page 11 Aruba 6200F 48G Class 4 PoE 4SFP+ 740W switch (JL728A) HPE Aruba Networking CX 6200F 24G 4SFP Switch (S0M81A) HPE Aruba Networking CX 6200F 24G 4SFP TAA- HPE Aruba Networking CX 6200F/M Switch Series Installation and Getting Started Guide |...
-
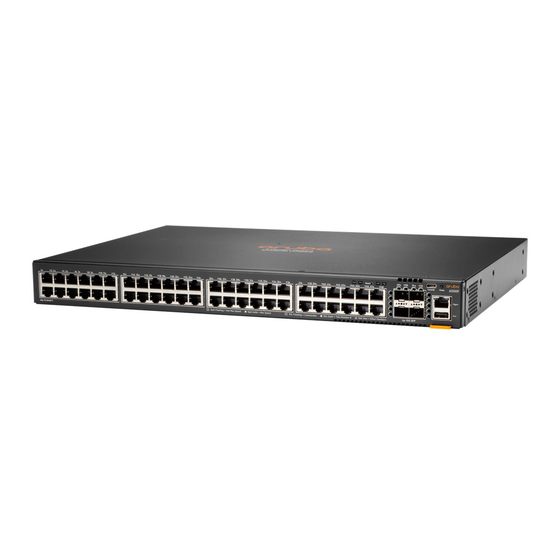
Page 12: Switch And Port Leds On Front Of The Switches
For supported transceivers, see the latest version of the Transceiver Guide on the Aruba Support Portal. Switch and port LEDs on front of the switches Figure 1 Switch and port LEDS for 6200M switches: HPE Aruba Networking CX 6200M 24G 4SFP+ switch (R8Q67A) and HPE Aruba Networking CX 6200M 24G 4SFP+ TAA switch (R8V08A) - Page 13 RJ-45 console port 10/100/1000 Mbps Out-of-Band Management port Figure 2 Switch and port LEDs for 6200M switches: HPE Aruba Networking CX 6200M 24G Class4 PoE 4SFP+ switch (R8Q68A) and HPE Aruba Networking CX 6200M 24G class4 PoE 4SFP+ TAA switch (R8V09A) HPE Aruba Networking CX 6200F/M Switch Series Installation and Getting Started Guide |...
- Page 14 RJ-45 console port 10/100/1000 Mbps Out-of-Band Management port Figure 3 Switch and port LEDs for 6200M switches: HPE Aruba Networking CX 6200M 48G 4SFP+ switch (R8Q69A) and HPE Aruba Networking CX 6200M 48G 4SFP+ TAA switch (R8V10A) Table 8: Switch and Port LEDs: Labels and Description...
- Page 15 RJ-45 console port 10/100/1000 Mbps Out-of-Band Management port Figure 4 Switch and port LEDs for 6200M switches: HPE Aruba Networking CX 6200M 48G Class4 PoE 4SFP+ switch (R8Q70A) and HPE Aruba Networking CX 6200M 48G Class4 PoE 4SFP+ TAA switch (R8V11A) Table 9: Switch and Port LEDs: Labels and Description...
- Page 16 RJ-45 console port 10/100/1000 Mbps Out-of-Band Management port Figure 6 Switch and port LEDs for 6200F switches: HPE Aruba Networking CX 6200F 24G 4SFP+ Switch (JL724B), Aruba 6200F 24G 4SFP+ Switch (JL724A), HPE Aruba Networking CX 6200F 24G 4SFP+ TAA-compliant...
- Page 17 370W Switch (JL725B), Aruba 6200F 24G Class 4 PoE 4SFP+ 370W Switch (JL725A) , HPE Aruba Networking CX 6200F 24G Class 4 PoE 4SFP+ 370W TAA-compliant Switch (S0M87A), HPE Aruba Networking CX 6200F 24G Class 4 PoE 4SFP 370W Switch (S0M82A), and HPE Aruba Networking CX 6200F 24G Class 4 PoE 4SFP 370W TAA-compliant Switch (S0G14A)
- Page 18 370W Switch (JL727B), Aruba 6200F 48G Class 4 PoE 4SFP+ 370W switch (JL727A), HPE Aruba Networking CX 6200F 48G Class 4 PoE 4SFP+ 370W TAA-compliant Switch (S0M89A), HPE Aruba Networking CX 6200F 48G Class 4 PoE 4SFP 370W Switch (S0M84A), and HPE Aruba Networking CX 6200F 48G Class 4 PoE 4SFP 370W TAA-compliant Switch (S0G16A)
- Page 19 740W Switch (JL728B), Aruba 6200F 48G Class 4 PoE 4SFP+ 740W switch (JL728A), HPE Aruba Networking CX 6200F 48G Class 4 PoE 4SFP+ 740W TAA-compliant Switch (S0M90A), HPE Aruba Networking CX 6200F 48G Class 4 PoE 4SFP 740W Switch (S0M85A), and HPE Aruba Networking CX 6200F 48G Class 4 PoE 4SFP 740W TAA-compliant Switch (S0G17A)
- Page 20 RJ-45 console port 10/100/1000 Mbps Out-of-Band Management port Figure 11 Switch and port LEDs for 6200F switches: HPE Aruba Networking CX 6200F 12G Class4 PoE 2G/2SFP+ 139W switch (R8Q72A) and HPE Aruba Networking CX 6200F 12G Class4 PoE 2G/2SFP+ 139W TAA Switch (R8V13A)
- Page 21 LED: On/Flash Global Status Overall status of the product Flash - Green Self-test in progress during Indicator LED UBOOT and SVOS On - Green Successfully booted AOS-CX HPE Aruba Networking CX 6200F/M Switch Series Installation and Getting Started Guide |...
-
Page 22: Led Mode Select Button And Indicator Leds
Switch LEDs Function State Meaning Flash - Amber Recoverable faults (e.g. fans, PSU fault) On - Amber Critical faults (e.g. exceed temperature limit) Snoring (Dim - System is in hibernation Bright periodically) OOBM Status Status of OOBM Link OOBM port is not connected, Indicator LED connectivity no link established... -
Page 23: Out-Of-Band Management Port
Table 19: Back of the 6200M Switch: Label and Description Label Description Fan trays 1 & 2 Fan Module blank Ground lug Power supply blank Figure 2 Back of the 6200F Switch HPE Aruba Networking CX 6200F/M Switch Series Installation and Getting Started Guide |... -
Page 24: Fan Requirements
6200F 12G Class4 PoE 2G/2SFP+ 139W TAA switch (R8V12A) HPE Aruba Networking CX Required Optional 6200M 48G 4SFP+ switch (R8Q69A) HPE Aruba Networking CX Required Optional 6200M 48G 4SFP+ TAA switch (R8V10A) HPE Aruba Networking CX Required Optional 6200M 24G 4SFP+ switch (R8Q67A) HPE Aruba Networking CX... - Page 25 6200M 24G class4 PoE 4SFP+ TAA switch (R8V09A) Table 2: Fan information for 6200M switches: HPE Aruba Networking CX 6200M 24G 4SFP+ switch (R8Q67A); HPE Aruba Networking CX 6200M 24G Class4 PoE 4SFP+ switch (R8Q68A); HPE Aruba Networking CX 6200M 48G 4SFP+ switch (R8Q69A); HPE Aruba Networking CX 6200M 48G Class4 PoE 4SFP+ switch (R8Q70A); and HPE Aruba Networking CX 6200M 36G 12SR5 Class6 PoE 4SFP+ switch (R8Q71A)
-
Page 26: Power Supplies
HPE Aruba Networking CX 6200M 24G Class4 PoE 4SFP+ TAA Switch (R8V09A) HPE Aruba Networking CX 6200M 48G Class4 PoE 4SFP+ Switch (R8Q70A) HPE Aruba Networking CX 6200M 48G Class4 PoE 4SFP+ TAA Switch (R8V11A) HPE Aruba Networking CX 6200M 36G 12SR5 Class6 PoE 4SFP+ Switch (R8Q71A) HPE Aruba Networking CX 6200M 36G 12SR5 Class6 PoE 4SFP+ TAA Switch (R8V12A) -
Page 27: Switch Features
Switch features The features of the 6200 F/M switches include: Combinations of fixed 10/100/1000-T, HPE Smart Rate, and SFP/SFP+ ports. Selected switch models feature HPE Smart Rate ports and provide 1 Gbps, 2.5 Gbps, and 5 Gbps connectivity. See Cabling specifications for more information. - Page 28 HPE Aruba Networking CX 6200F 48G Class 4 PoE 4SFP 740W Switch (S0M85A) HPE Aruba Networking CX 6200F 48G Class 4 PoE 4SFP 740W TAA- compliant Switch (S0G17A) HPE Aruba Networking CX 6200F 12G Class4 PoE 2G/2SFP+ 139W Switch (R8Q72A) HPE Aruba Networking CX 6200F 12G Class4 PoE 2G/2SFP+ 139W...
- Page 29 Ability to update the switch software. To download product updates, go to the Aruba Support Portal. An auxiliary port (USB Type A connector) for updating switch software. HPE Aruba Networking CX 6200F/M Switch Series Installation and Getting Started Guide |...
-
Page 30: Installing The Switch
8-mm M4 screws to attach the mounting brackets to the switch four 5/8-inch number 12-24 screws to attach the switch to a rack four rubber feet Power cord, one of the following (included with power supply unit): HPE Aruba Networking CX 6200F/M Switch Series Installation and Getting Started Guide |... -
Page 31: Installation Procedures For 6200F/M Switches
Aruba 6200M PoE Switches (with AC power supplies) North America 8121-0973 Australia 8121-0857 North America high line 8121-0941 Brazil 8121-1265 South Africa/India 8121-1483 Europe/South Korea 8120-5336 Israel 8121-1009 China 8121-1034 United Kingdom/Hong 8120-5334 Argentina 8121-1481 Kong/Singapore/Malaysia Switzerland 8120-5339 Chile 8120-8389 Danish 8120-5340 Thailand... -
Page 32: Installation Precautions And Guidelines
With the exception of HPE Aruba Networking CX 6200F 12G Class4 PoE 2G/2SFP+ 139W switch (R8Q72A) and HPE Aruba Networking CX 6200F 12G Class4 PoE 2G/2SFP+ 139W TAA Switch (R8V13A), do not mount the switch on a wall or under a table or under another horizontal surface. -
Page 33: Prepare The Installation Site
Do not ship any switch in a rack without checking for restrictions. Otherwise, you may void the switch warranty. Ensure that the power source circuits are properly grounded. Then connect the switch to the power source by using the power cord supplied with the switch. When installing the switch, ensure that the AC outlet is near the switch. - Page 34 The Aruba 6200F 12G Class4 PoE 2G/2SFP+ 139W Switch (R8Q72A) and Aruba 6200F 12G Class4 PoE 2G/2SFP+ 139W TAA Switch (R8V13A) require more front and back space when used with the optional HPE Aruba Networking CX 6200F 12-port Cable Guard. (To attach the cable guard, see the instruction included with the cable guard unit.)
-
Page 35: Install A Power Supply Or A Second Power Supply For Modular Switches
Disconnect power from the switch Disconnect the power cord from the switch and from the power source. Install a power supply or a second power supply for modular switches This section is only applicable to the 6200M switches. Switches in the 6200F family have internal, fixed power supplies. -
Page 36: Verify The Switch Boots Correctly
1-2 minutes to complete. Disconnect power from the switch Disconnect the power cord from all of the switch power supplies and from the power sources. HPE Aruba Networking CX 6200F/M Switch Series Installation and Getting Started Guide |... -
Page 37: Mount The Switch
Mount the switch After the switch passes self-test, it is ready to be mounted in a stable location. Supported mounting options for the Aruba 6200 F/M switches include: Two-post rack mount Tabletop or desktop Four-post rack mount (Requires the optional Aruba X414 1U Universal 4-post Rack Mounting Kit (J9583B) Do not mount the switch on a wall, under a table, or under another horizontal surface. -
Page 38: Mounting The Switch In A Two-Post Rack
To mount the switch in a two-post rack: 1. Attach the rack mount brackets to the switch by using a #1 Phillips (cross-head) screwdriver and the supplied eight 8-mm M4 screws. HPE Aruba Networking CX 6200F/M Switch Series Installation and Getting Started Guide |... - Page 39 For safe, reliable installation, only use screws provided in the accessory kit to attach the mounting brackets to the switch. 2. Use the four number 12-24 screws to secure the brackets to the rack. 12-port switch 1. Attach the long rack mounting brackets to the switch with the included 10-mm M4 screws. Brackets can also be oriented in two settings: 1) flush or 2) offset with the switch front panel.
- Page 40 2. Secure the rack mounting brackets to a two-post rack. Figure 3 Mounting in a two-post rack (flush orientation) Figure 4 Mounting in a two-post rack (offset orientation) HPE Aruba Networking CX 6200F/M Switch Series Installation and Getting Started Guide |...
- Page 41 The HPE Aruba Networking CX 6200F 12G Class4 PoE 2G/2SFP+ 139W Switch (R8Q72A) and the Aruba 6200F 12G Class4 PoE 2G/2SFP+ 139W TAA Switch (R8V13A) can only be mounted with ports facing left, right, or downward.
- Page 42 Figure 7 Ports facing right Figure 8 Ports facing downward HPE Aruba Networking CX 6200F/M Switch Series Installation and Getting Started Guide |...
- Page 43 Both the HPE Aruba Networking CX 6200F 12G Class4 PoE 2G/2SFP+ 139W Switch (R8Q72A) and the Aruba 6200F 12G Class4 PoE 2G/2SFP+ 139W TAA Switch (R8V13A) ship with a wall mounting bracket to support a more robust wall mount. The switch is designed to support mounting in a 12-inch (304.8 cm)-wide enclosure with a top and bottom air opening.
- Page 44 1. Attach the long (rack/table) mounting brackets to the switch. 2. Secure the rack/table mounting brackets to the underside of the table/horizontal surface. Figure 11 Securing switch to under-table surface HPE Aruba Networking CX 6200F/M Switch Series Installation and Getting Started Guide |...
-
Page 45: Mounting The Switch In A Four-Post Rack
Connect the switch to a power source 1. Plug the included power cord into the power connector on the switch and into a nearby AC power source. 2. Recheck the LEDs during self-test. Mounting the switch in a four-post rack The four-post rack mount for the switches requires the optional Aruba X414 1U Universal 4-post Rack Mounting Kit (J9583B). -
Page 46: Connect Network Cables
Connect network cables from network devices or your patch panels to the fixed RJ-45 ports and to any installed transceivers. Connect network cables to the RJ-45 data ports and to any optional transceivers installed on the switch front panel. HPE Aruba Networking CX 6200F/M Switch Series Installation and Getting Started Guide |... -
Page 47: Sfp/Sfp+ Installation Notes
Use only an approved Class 1 Laser Product SFP/SFP+ transceiver. To ensure proper operation of your switch, use only the HPE Aruba SFP/SFP+ transceivers supported by your switch. Use only supported Aruba SFP/SFP+ transceivers Non-Aruba SFP/SFP+ transceivers are not supported. - Page 48 SFP/SFP+ ports are properly configured. At a minimum, make sure the configurations match. HPE Aruba Networking CX 6200F/M Switch Series Installation and Getting Started Guide |...
-
Page 49: Getting Started With Switch Configuration
IP address, see the latest version of the Fundamentals Guide for your switch. Setup for initial configuration For initial configuration information, see the Fundamentals Guide for your switch. HPE Aruba Networking CX 6200F/M Switch Series Installation and Getting Started Guide |... -
Page 50: Replacing Components
If a fan has failed, the fan LED will flash simultaneously with the switch Fault LED. Replace the failed component as soon as possible. This section is only applicable to 6200M switches. To Remove an Existing Fan: HPE Aruba Networking CX 6200F/M Switch Series Installation and Getting Started Guide |... -
Page 51: Replacing The Power Supply
1. Loosen the T10 screws by turning counter clockwise. 2. Grasping the pull handle of the failed fan, remove the component.- replace image 3. Insert the new fan by sliding the component all the way and tighten the T10 screws by turning them clockwise. - Page 52 HPE Aruba Networking CX 6200F/M Switch Series Installation and Getting Started Guide |...
-
Page 53: Troubleshooting
Nonstandard Cables: Nonstandard and incorrectly wired cables may cause network collisions and other network problems, and can seriously impair network performance. A category 5 or greater cable tester is a recommended tool for every network installation. HPE Aruba Networking CX 6200F/M Switch Series Installation and Getting Started Guide |... -
Page 54: Diagnosing With The Leds
Check the Port Configuration: A port on your switch may not be operating as expected because it is administratively disabled in the configuration. It may also be placed into a “blocking” state by a protocol operating on the port (dynamic VLANs), or LACP (dynamic trunking). For example, the normal operation of the spanning tree, GVRP, LACP, and other features may put the port in a blocking state. - Page 55 Slow flash - Amber Fan fault UID LED User-configurable LED User define the locator LED : OFF On/Flash (30 min) - User define the blue locator LED: On/Flash HPE Aruba Networking CX 6200F/M Switch Series Installation and Getting Started Guide |...
- Page 56 Switch LEDs Function State/Mode Meaning PSU Status Status of power supply On Green Normal Indicator LED No power, PSU has invalid AC input Slow Flash - Green Power supply has faulted or warning Diagnostic Tips Problem Solution The switch is not plugged into 1.
- Page 57 For 1000Base-T connections, verify that the network cabling complies with the IEEE 802.3ab standard. Install the cable according to the ANSI/TIA/EIA-568-A-5 specifications. Ensure that cable testing complies with the stated limitations HPE Aruba Networking CX 6200F/M Switch Series Installation and Getting Started Guide |...
- Page 58 Use the appropriate feature show commands to confirm whether the port is put into a “blocking” state. For software troubleshooting tips, see the chapter “Troubleshooting” in the Management and Configuration Guide for your switch at https://www.hpe.com/networking/support. Troubleshooting...
-
Page 59: Proactive Networking
If you believe the switch is not operating correctly, you can reset the switch to test its circuitry and operating code. To reset a switch, try any of the following: HPE Aruba Networking CX 6200F/M Switch Series Installation and Getting Started Guide |... -
Page 60: Checking The Switch Leds
Unplug and plug in the power cord (power cycling). Press the Reset button on the front of the switch. Reboot the switch via the management console’s command. boot system Power cycling the switch and pressing the Reset button both cause the switch to perform its power-on self test, which almost always will resolve any temporary operational problems. -
Page 61: Restoring The Factory Default Configuration
Downloading new switch software Software updates can be downloaded to the switch through several methods. For more information, Support and Other Resources. HPE Aruba Networking CX 6200F/M Switch Series Installation and Getting Started Guide |... -
Page 62: Specifications
HPE Aruba Networking CX 6200F 24G Class 4 PoE 4SFP 370W TAA-compliant Switch (S0G14A) HPE Aruba Networking CX 6200F 48G 4.87 kg (10.74 lbs) Class 4 PoE 4SFP+ 370W Switch (JL727B) HPE Aruba Networking CX 6200F/M Switch Series Installation and Getting Started Guide |... -
Page 63: Physical Information: 6200M Switches
Switch Weight Dimensions (W x D x H) HPE Aruba Networking CX 6200F 48G Class 4 PoE 4SFP 370W Switch (S0M84A) HPE Aruba Networking CX 6200F 48G Class 4 PoE 4SFP+ 370W TAA-compliant Switch (S0M89A) HPE Aruba Networking CX 6200F 48G... -
Page 64: Environmental Information
Non-operating storage relative humidity 5% to 95% @ 149°F (65°C) non-condensing Max operating altitude 10000 feet (3.05 km) Max Max non-operating altitude 15000 feet (4.57 km) Max HPE Aruba Networking CX 6200F/M Switch Series Installation and Getting Started Guide |... -
Page 65: Electrical
Sound Power (LWAd) 4.9 Bel Sound Pressure (LpAm) (Bystander) 32.5 dB HPE Aruba Networking CX6200F 24G 4SFP+ Switch (JL724B) HPE Aruba Networking CX 6200F 24G 4SFP+ TAA- compliant Switch (S0M86A) HPE Aruba Networking CX 6200F 24G 4SFP Switch (S0M81A) HPE Aruba Networking CX 6200F 24G 4SFP TAA-... - Page 66 HPE Aruba Networking CX 6200F 48G Class 4 PoE 4SFP 740W Switch (S0M85A) HPE Aruba Networking CX 6200F 48G Class 4 PoE 4SFP 740W TAA-compliant Switch (S0G17A) HPE Aruba Networking CX 6200F/M Switch Series Installation and Getting Started Guide |...
-
Page 67: Safety
Product* Acoustics HPE Aruba Networking CX 6200M 24G 4SFP+ switch Sound Power (LWAd) 4.5 Bel (R8Q67A) Sound Pressure (LpAm) (Bystander) 29.1 dB Aruba 6200M 24G 4SFP+ TAA switch (R8V08A) Aruba 6200M 24G Class4 PoE 4SFP+ switch (R8Q68A) Sound Power (LWAd) 4.6 Bel Sound Pressure (LpAm) (Bystander) 29.8 dB... -
Page 68: Safety And Regulatory Information For 6200M Switches
IEC 60950-1:2005 + A1:2009 + A2:2013 with all known National Deviations IEC 62368-1:2014 2nd ed. with all known National Deviations IEC 62368-1:2018 3rd Ed. with all known National Deviations HPE Aruba Networking CX 6200F/M Switch Series Installation and Getting Started Guide |... -
Page 69: Connectivity Standards
10-T100- IEEE 802.3 10BASE-T TX1000- IEEE 802.3u 100BASE- T10GBASE-T IEEE 802.3ab 1000BASE-T IEEE 802.3an 10GBASE- T(with transceiver) 2.5G and 5G HPE Smart Rate IEEE Twisted-Pair 802.3bz Copper 100-FX IEEE 802.3u 100BASE- EN/IEC 60825 Class 1 Laser Product Laser Klasse 1 1000-SX IEEE 802.3z 1000BASE-... - Page 70 40-Gig eSR4 IEEE 802.3ba 40GBASE- En/IC 60825 Class 1 Laser Product Laser Klasse 1 40-Gig LR4 IEEE 802.3ae 40GBASE- EN/IC 60825 Class 1 Laser Product Laser Klasse 1 HPE Aruba Networking CX 6200F/M Switch Series Installation and Getting Started Guide |...
-
Page 71: Cabling And Technology Information
Table 27: Cabling Specifications Twisted-pair copper 10 Mbps Operation Category 3, 4 or 5, 100-ohm unshielded twisted-pair (UTP) or shielded twisted-pair (STP) cable, complying with IEEE 802.3 10BASE-T specifications. HPE Aruba Networking CX 6200F/M Switch Series Installation and Getting Started Guide |... - Page 72 The patch cables are frequently overlooked when testing cable and they must also comply with the cabling standards. Note on HPE Smart Rate 2.5 Gb/s Cable Requirements The 2.5 Gb/s Smart Rate operates on cable installations that are designed to support 1000BASE-T operation.
-
Page 73: Mode Conditioning Patch Cord
LRM transmitting device and the multimode network cable to provide the transmission conditioning. If you experience a high number of transmission errors on those ports, usually CRC or FCS errors, you HPE Aruba Networking CX 6200F/M Switch Series Installation and Getting Started Guide |... -
Page 74: Twisted-Pair Cable/Connector Pin-Outs
may need to install one of these patch cords between the fiber-optic port in your switch and your multimode fiber-optic network cabling, at both ends of the network link. The patch cord consists of a short length of single mode fiber cable coupled to graded-index multimode fiber cable on the transmit side, and only multimode cable on the receive side. -
Page 75: Crossover Twisted-Pair Cable For 10 Mbps Or 100 Mbps Network Connection
If any of these ports are given a fixed configuration, for example 100 Mbps/Full Duplex, the ports operate as MDI-X ports, and crossover cables must be then used for connections to hubs or switches or other MDI-X network devices. HPE Aruba Networking CX 6200F/M Switch Series Installation and Getting Started Guide |... -
Page 76: Straight-Through Twisted-Pair Cable For 1000 Mbps Network Connections
Figure 1 Cable Diagram Pins 1 and 2 on connector “A” must be wired as a twisted pair to pins 1 and 2 on connector “B”. Pins 3 and 6 on connector “A” must be wired as a twisted pair to pins 3 and 6 on connector “B”. Pins 4, 5, 7, and 8 are not used in this application, although they may be wired in the cable. - Page 77 Pins 7 and 8 on connector “A” must be wired as a twisted pair to pins 7 and 8 on connector “B”. For 1000Base-T operation, all four pairs of wires are used for both transmit and receive. HPE Aruba Networking CX 6200F/M Switch Series Installation and Getting Started Guide |...
-
Page 78: Support And Other Resources
Software licensing https://lms.arubanetworks.com/ End-of-Life information https://www.arubanetworks.com/support-services/end-of-life/ Aruba software and documentation https://asp.arubanetworks.com/downloads Accessing Updates You can access updates from the Aruba Support Portal or the HPE My Networking Website. HPE Aruba Networking CX 6200F/M Switch Series Installation and Getting Started Guide |... -
Page 79: Aruba Support Portal
Aruba is committed to providing documentation that meets your needs. To help us improve the documentation, send any errors, suggestions, or comments to Documentation Feedback (docsfeedback-switching@hpe.com). When submitting your feedback, include the document title, part number, edition, and publication date located on the front cover of the document. For online help content, include the product name, product version, help edition, and publication date located on the legal notices page.
Need help?
Do you have a question about the Aruba Networking CX 6200 Series and is the answer not in the manual?
Questions and answers