Table of Contents

Related Manuals for DRAKE EH24A


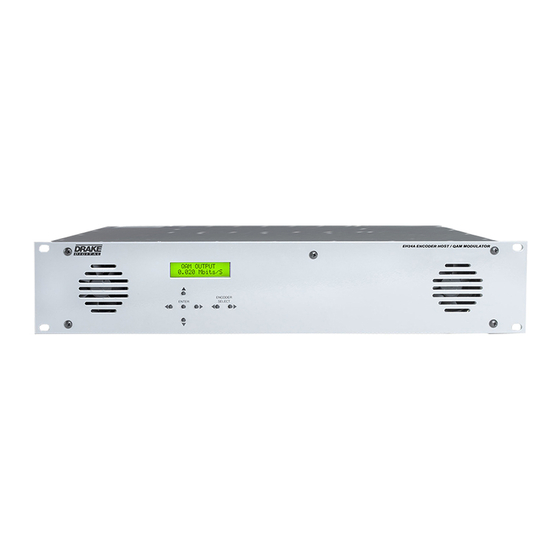
Summary of Contents for DRAKE EH24A
- Page 1 EH24A Encoder Host & SDE24 SD Dual Encoder Instruction Manual is a registered trademark of the R.L. Drake Holdings, LLC P/N: © Copyright 2012 R. L. Drake Holdings, LLC 651232200A Printed in U.S.A. Rev1: 20121220 EH24A 1002510A SDE24 1002514...
-
Page 2: Table Of Contents
Table of Contents, Caution, & Important Safety Instructions CAUTION STATEMENTS ......................................2 IMPORTANT SAFETY INSTRUCTIONS .................................2 SPECIFICATIONS ..........................................4 GENERAL DESCRIPTION ......................................6 FEATURES ............................................7 INSTALLATION AND MOUNTING / FRONT PANEL CONFIGURATION ....................8 REAR PANEL CONNECTIONS ....................................9 ETHERNET CONTROL INTERFACE CONFIGURATION ..........................10 SETUP AND PROGRAMMING .................................... - Page 3 Important Safety Instructions (continued) Accessories: Do not place this product on an unstable cart, stand, tripod, bracket, or table. The product may fall, causing serious injury to a child or adult, and serious damage to the product. Use only with a cart, stand, tripod, bracket, or table recommended by the manufacturer, or sold with the product.
-
Page 4: Specifications
(containing the SDE24EAS) and also for inputting low speed data for DTA channel mapping and codeupdating. Usage: Used in an EH24A to add DTA data or used in an EH24A, for EAS alert programming that is being sourced by a ‘master’ EH24A/SDE24EAS. - Page 5 AC Power: 90 to 264 VAC / 47 - 63 Hz, 70 W maximum Operating Temperature: 0 deg to + 50 deg C FCC Approvals: The EH24A and the encoder modules have been verified as complying with part 15 of the FCC rules. MECHANICAL EH24A: 14 1/4”...
-
Page 6: General Description
2 methods, or both. 1) By installing the SDE24EAS module in slot 6 of the EH24A. This module has only a single composite input instead of the two inputs of the standard SDE24. It’s video and audio input will be provided by an external EAS contoller providing a NTSC composite alert message. -
Page 7: Features
Features EH24A Features The EH24A encoder host platform is a 19” rack mountable chassis that is 2 RU tall and can accept up to six modules that are inserted into slots via the rear panel. SD Encoding: The SDE24 is the SD dual encoder module. Up to six of these modules could be installed in the EH24A. -
Page 8: Installation And Mounting / Front Panel Configuration
No space is needed between EH24A units themselves due to the ventilation provided by their built in fans. Connect the AC line cord to an appropriate source of 120 volt, 50/60 Hz AC power. The EH24A is always on once the AC power cord is connected to its power source.. -
Page 9: Rear Panel Connections
Rear Panel Connections REAR PANEL CONNECTIONS R1, RF OUTPUT – This type "F" connector is the high level (+45 to +61 dBmV), 54 to 1002 MHz, output from the EH24A RF output section. R2, VIDEO 1 & 2 - These two RCA type connectors color coded yellow provide two separate video inputs to the SDE24 Encoder. -
Page 10: Ethernet Control Interface Configuration
(configurable via the front panel interface) and click LOG IN. Once you are logged in to the EH24A, you will be presented with the status page (see Figure 2). Along the top edge of the page, there are five tabs listed; each tab allows you to view and configure different parts of the encoder host. The Status tab gives the overall status of the whole unit, including firmware versions, output bit-rates for all 4 outputs, output buffer usage, and links to the relevant encoder manuals. - Page 11 Ethernet Control Interface Confi guration (Continued) Figure 2: EH24A Encoders Tab The Encoders tab allows you to set each encoder's individual parameters. Select an encoder module from the drop-down menu, and the appropriate setting selections will be displayed.
- Page 12 Ethernet Control Interface Confi guration (Continued) Figure 3: EH24A Channels Tab The Channels tab provides an interface to configure the virtual channel mappings for this encoder host. If PSIP is enabled, this page will display a screen that looks like Figure 3; for each encoder output, the MPEG program number can be modified, along with the Major and Minor channel numbers.
- Page 13 Ethernet Control Interface Confi guration (Continued) Figure 4: EH24A Output Tab...
- Page 14 Ethernet Control Interface Confi guration (Continued) Figure 5: EH24A Firmware Update Tab The Firmware Update tab allows you to update all of the firmware on the unit with a single upload (see Figure 5). Once you have received a new firmware image for the unit, click on the Choose File button and select the provided firmware;...
-
Page 15: Setup And Programming
DTA/EAS CONTROL: The DTA control is used when EH24As are used to supply the QAM signals to DTA set top boxes. It allows for an ASI stream, generated by a PC to be input to the headend’s Master EH24A. This control allows for generating a transport stream that provides a virtual channel map to the DTAs (Known as SCTE 65 tables), and/or provides code updated to the DTA’s (in a format known as DSM-CC) so that they can be updated through the QAM channel transport stream. - Page 16 SDE24s. This way all MPEG programs coming out of the EH24A have the EAS video and audio on them. Note that when using this method only 1 SDE24EAS is required per headend, and is placed into the Module 6 slot of the Master EH24A.
- Page 17 ENCODER SELECT: The LEFT and RIGHT buttons allow the user to scroll through the encoder numbers for each encoder installed in the EH24A as well as the EH24A itself. Use the LEFT and RIGHT buttons to select the encoder to be programmed.
-
Page 18: Operating Instructions
3) Plug the EH24A into AC power. Allow 30 to 90 seconds for boot-up. 4) From the front panel, use the ENCODER SELECT buttons to choose among EH24A settings and settings for each encoder. Use the ENTER button to enter program mode and to save settings in memory. Use left and right arrows to select a parameter and then use the up or down arrows to change its value. - Page 19 All of these settings can be set using a PC connected via the Ethernet port or through the Ethernet connection via the DRAKE model SCTeci Control unit. Having completed EH24A settings on page 14, you are now ready to setup each individual encoder. 19) Press ENTER for 3 seconds to enter program mode. Observe flashing display.
-
Page 20: 20 Additional Information
These ASI LOOPs continue through all EH24As at the headend. There can be standard SDE24s in some or all of the remaining slots of the Master EH24A. If they are wanted to be sent out on the ASI output of the Master EH24A can be picked up from the ASI LOOP output connector of the ASII module of the last Slave unit in the chain. -
Page 21: Catv Channel Frequencies
CATV Channel Frequencies TABLE 1: CATV... -
Page 22: Broadcast Tv Channel Frequencies
Broadcast TV Channel Frequencies TABLE 2: BC TV... -
Page 23: Service / If You Need To Call For Help
Also include your daytime telephone number and a copy of your proof of purchase. The unit will be serviced under the terms of the R.L. DRAKE HOLDINGS LLC Limited Warranty and returned to you. IF YOU NEED TO CALL FOR HELP Call our Customer Service/Technical Support line at 877.312.4547 Please have the unit’s serial number available. - Page 24 If You Need To Call For Help (continued) If the unit is out of warranty, call Solid Signal at 877.312.4547 and we will help you with the best possible option. This may include replacing the unit completely.
-
Page 25: Warranty
Warranty Three Year Limited Warranty R.L. DRAKE HOLDINGS LLC warrants to the original purchaser this product shall be free from defects in material or workmanship for three (3) years from the date of original purchase. During the warranty period R.L. DRAKE HOLDINGS LLC or an authorized Drake service facility will provide, free of charge, both parts and labor necessary to correct defects in material and workmanship. - Page 26 Distrbuted by Solid Signal www.solidsignal.com 877.312.4547...
Need help?
Do you have a question about the EH24A and is the answer not in the manual?
Questions and answers