Table of Contents
Advertisement
GB
Contents
1.
Technical data _________________________________________________ 91
2.
Declaration of conformity _______________________________________ 94
3.
Basic Information (General)______________________________________ 96
3.1.
Proper use __________________________________________________ 96
3.2.
Improper Use ________________________________________________ 96
3.3.
Warranty____________________________________________________ 96
3.4.
Monitoring of Test Resources __________________________________ 97
4.
Basic Safety Precautions ________________________________________ 97
4.1.
Pay attention to the instructions in the Operation Manual ___________ 97
4.2.
Personnel training____________________________________________ 97
5.
Transport and storage __________________________________________ 97
5.1.
Testing upon acceptance ______________________________________ 97
5.2.
Packaging __________________________________________________ 97
6.
Unpacking, Setup and Commissioning ____________________________ 98
6.1.
Installation Site, Location of Use________________________________ 98
6.2.
Unpacking __________________________________________________ 98
6.3.
Scope of delivery____________________________________________ 100
6.4.
Setup _____________________________________________________ 100
6.5.
Mains connection ___________________________________________ 101
6.6.
Internal battery operation (cannot be reequipped) ________________ 101
6.7.
Terminal for external devices__________________________________ 101
6.8.
Initial Commissioning ________________________________________ 102
6.8.1.
Power display_____________________________________________ 102
6.8.2.
Bar graph display _________________________________________ 103
6.8.3.
Stability display ___________________________________________ 103
6.8.4.
Balance zero display _______________________________________ 103
6.9.
Adjustment_________________________________________________ 104
6.9.1.
Adjustment with external weight (only PES) ___________________ 104
6.9.2.
Adjustment test with external weight (only PES) ________________ 105
KERN PES/PEJ
Version 1.0 11/2005
Operating Manual
Electronic Precision balances
Advertisement
Table of Contents

Subscribe to Our Youtube Channel
Related Manuals for KERN PES


Summary of Contents for KERN PES
-
Page 1: Table Of Contents
Power display_____________________________________________ 102 6.8.2. Bar graph display _________________________________________ 103 6.8.3. Stability display ___________________________________________ 103 6.8.4. Balance zero display _______________________________________ 103 6.9. Adjustment_________________________________________________ 104 6.9.1. Adjustment with external weight (only PES) ___________________ 104 6.9.2. Adjustment test with external weight (only PES) ________________ 105... - Page 2 Basic settings for weighings with tolerance range ______________ 142 12.4. Evaluation of absolute values _______________________________ 143 12.4.1. Entering 2 limits by weighing ________________________________ 143 12.4.2. Entering 3 or 4 limits by weighing ____________________________ 146 12.4.3. Numeric entering of 2 limits _________________________________ 149 PES/PEJ-BA-defsi-0510...
-
Page 4: Technical Data
1. Technical data KERN PES 2200-2M PES 4200-2M PES 6200-2M Readability (d) 0.01g 0.01g 0.01g Weighing range (max) 2,200g 4,200g 6,200g Minimum load (Min) 0.5g 0.5g Verification value (e) 0.1g 0.1g 0.1g Accuracy class Reproducibility 0.01g 0.01g 0.01g Linearity ± 0.02g ±... - Page 5 KERN PES 8200-1M PES 15000-1M Readability (d) 0.1g 0.1g Weighing range (max) 8,200g 15,000g Minimum load (Min) Verification value (e) Accuracy class Reproducibility 0.1g Linearity ± 0.2g ± 0.2 g Stabilization time 3 sec. 3 sec. Check weight (added) 2000g (M1)
- Page 6 Dimensions of the housing 220 x 333 x 93 mm (B x D x H) Mains connection Mains adaptor 230 V, 50/60 Hz ; 12 V DC balance, 600 Rechargeable battery (op- Operating time ca. 6h. / charging time ca. 12h tional) PES/PEJ-BA-defsi-0510...
-
Page 7: Declaration Of Conformity
Balance lines: PES/PEJ Mark applied EU Directive Standards 89/336/EEC EMC EN45501 EN55022 73/23/EEC Low Voltage EN60950 Date: 20.12.2005 Signature: Gottl. KERN & Sohn GmbH Management Gottl. KERN & Sohn GmbH, Ziegelei 1, D-72336 Balingen, Tel. +49-07433/9933-0,Fax +49-074433/9933-149 PES/PEJ-BA-defsi-0510... - Page 8 Questa dichiarazione sarà valida solo se accompagnata dal certificato di conformità della parte nominale. Model: PES/PEJ EU Directive Standards EC-type-approval Issued by certificate no. 90/384/EEC EN45501 T6715 Date: 20.12.2005 Signature: Gottl. KERN & Sohn GmbH Management Gottl. KERN & Sohn GmbH, Ziegelei 1, D-72336 Balingen, Tel. +49-07433/9933-0,Fax +49-074433/9933-149 PES/PEJ-BA-defsi-0510...
-
Page 9: Basic Information (General)
The appliance may only be opened by trained service technicians according to KERN standards. Before opening, disconnect appliance from power supply! Warranty claims will be voided when appliance is opened. The PES/PEJ weighing system may not be used in explosive areas or areas with explosive substances. 3.3. Warranty... -
Page 10: Monitoring Of Test Resources
Infor- mation is available on KERN’s home page (www.kern-sohn.com) with regard to the monitoring of balance test substances and the test weights required for this. In KERN’s accredited DKD calibration laboratory test weights and balances may be... -
Page 11: Unpacking, Setup And Commissioning
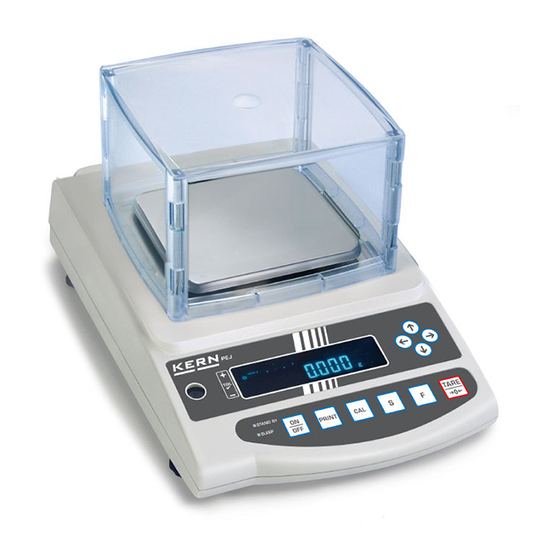
If electro-magnetic fields or static charge occur, or if the power supply is unstable major deviations on the display (incorrect weighing results) are possible. In that case, the location must be changed. 6.2. Unpacking Carefully remove the balance from the packaging, remove plastic cover and setup balance at the intended workstation. PES/PEJ-BA-defsi-0510... - Page 12 Your balance in overview: Air bubble Covering lid over 1. RS 232 inter- face 2. Printer inter- face Connection net adapter Antitheft device Covering lid over underfloor weighing device PES/PEJ-BA-defsi-0510...
-
Page 13: Scope Of Delivery
6.3. Scope of delivery Serial accessories: x Balance x Weighing plate x Mains power supply x Check weight (only PES) x Operating Manual x Protective cover 6.4. Setup Positioning of weighing plate: Levelling balance: Use the foot screws to level the... -
Page 14: Mains Connection
Power is supplied via the external mains power supply. The stated voltage value must be the same as the local voltage. Only use original KERN mains power supplies. Using other makes requires consent by KERN. In the menu you can activate the AUTO-SLEEP function >A. A.u. -
Page 15: Initial Commissioning
The balance will carry out a self-test By pressing lightly it is possible to check whether the balance display changes. 75s0 Use the -key to switch the bal- Stand-by ance off. The balance is now in „ stand-by mode again (green LED is on). PES/PEJ-BA-defsi-0510... -
Page 16: Bar Graph Display
TARE key and the balance will start resetting to zero. Your balance will be set to zero after a short standby time. In addition to this, the sign for the balance zero setting will be displayed [o0m]. PES/PEJ-BA-defsi-0510... -
Page 17: Adjustment
6.9.1. Adjustment with external weight (only PES) Adjustment is possible with the delivered check weight, but for reasons of measuring technique, not always optimal. We recommend the following adjustment weights:... -
Page 18: Adjustment Test With External Weight (Only Pes)
[- Err]; repeat adjustment process. 6.9.2. Adjustment test with external weight (only PES) During adjustment tests the balance automatically compares the saved value of the adjustment weight with the actual value. This is only a check, i.e. no values are changed. - Page 19 F.5. Ø D KFF The difference between the saved value and the measured value is displayed. Ø -z02 Take away adjustment weight. Ø Press any key; the adjustment process is cancelled and the balance returns to weighing mode. Ø PES/PEJ-BA-defsi-0510...
- Page 20 Ø Start of the automatic adjustment: AUTO CAL Ø Adjustment is carried out automatically. VAKT Ø CH. 0 Ø CH. F. 5 . The process of adjustment is completed. Ø BWSX The balance returns automatically into weighing mode. Ø PES/PEJ-BA-defsi-0510...
- Page 21 Ensure that there are no objects on the weighing plate. Operation Display CA. 2] Activate function [w w CA 2 (see chap. 7). Ø Start of the adjustment test: T. KnT Ø The test is carried out automatically. VAKT Ø T. 0 Ø PES/PEJ-BA-defsi-0510...
- Page 22 T. F. 5 . D KFF Ø The difference between the saved value and the measured value is displayed. -z02 Ø Press any key; the adjustment process is cancelled and the balance returns to weighing mode. Ø PES/PEJ-BA-defsi-0510...
-
Page 23: Verification
Balances with obligation to verify must be taken out of operation if: The weighing result of the balance is outside the error limit. Therefore, in regular intervals load balance with known test weight (ca. 1/3 of the max. load) and compare with displayed value. The reverification deadline has been exceeded. PES/PEJ-BA-defsi-0510... -
Page 24: Seals And Unlocking Switch
(see drawing). Position of unlocking switch Status Balance is unlocked for the adjustment downwards process, adjustment will be possible upwards Verification position - Adjustment locked when switching-on the balance ap- pears the display > LQm. @. PES/PEJ-BA-defsi-0510... -
Page 25: Application And Configuration Menu 1
7.1. User principle of the menu control Operation Display Switch on balance: Call up menu: Fonm Press for about 4 seconds, until [FWnm] is displayed. When releasing, the first function is dis- played [q SET1 ]. q SET 1 PES/PEJ-BA-defsi-0510... - Page 26 General information about using the arrow keys for entering: Operation via arrow keys is faster and more comfortable than via the TARE and F key. Key allocation of the arrow keys: Increase numeral value Menu step back Menu step forward Decrease numeral value PES/PEJ-BA-defsi-0510...
-
Page 27: Menu Overview
Setting for dispensing Sensitive and fast Display speed u RE. ª Insensitive but slow 0 Deactivated * 1 6-digit data format Interface v K.F. see chap. 15.4.1 2 7-digit data format (see chpt. 7.2.1) 3 extended 7-digit data not documented format PES/PEJ-BA-defsi-0510... -
Page 28: Adjustment With External Weight (Only Pej)
0 CAL-key deactivated 1 Automatic internal adjustment (only PEJ) 2 Adjustment with external weight (only PEJ) Adjustment w CA. 3 External adjustment (only PES) 4 Adjustment test with external weight (only PES) 0 Hide bar graph Bar graph x B.G. -
Page 29: Parameter Additional Functions
Display via +, OK or - Display of 2A. LG For setting 2 limits display in bar graph is possi- Results Permanent output, depending external signal 2B .R.Q.m. Relay output setting Output controlled by external signal Adding function 2C AD.N. Adding function with AUTO-TARA PES/PEJ-BA-defsi-0510... -
Page 30: Parameter For Serial Interface
Single, immediate output after fixed interval (see chpt. 14.5) Single, immediate output after fixed interval and stable weighing value (see chpt 14.5) * 1 1200 bps 2 2400 bps Baud rate 6r B.L. 3 4800 bps 4 9600 bps 5 19200 bps PES/PEJ-BA-defsi-0510... - Page 31 8 8 bits Stop Bits 1 1 bit only at setting 6u ST. v K.F. 3 * 2 2 bit * 0 Always use this setting not documented 66 W. * 1 Always use this setting not documented 6w RES. PES/PEJ-BA-defsi-0510...
-
Page 32: Configuration Menu 2
When releasing, the first function is dis- played [K. KD. O] q KD 0 Changing the function: q KD 0 Further pressing the keys will take you through the various functions of the r R. C A. 0 menu. PES/PEJ-BA-defsi-0510... -
Page 33: Menu Overview
1 ON *0 Always use this setting Not documented 2. Q.N.P. *0 Off Overwriting the adjusting weight 3. R.CA Caution: Modifications may only be carried 1 ON out by specialized personnel! *0 Always use this setting Not documented 4. N.E.HK. PES/PEJ-BA-defsi-0510... -
Page 34: Operation
"Stand-by" glows if the balance is operated with energy LED (green) from the power mains but turned off. x "Sleep" has the function of a display saver. It can be de- LED (red) activated by actuating a key or changing the load. PES/PEJ-BA-defsi-0510... -
Page 35: Overview Of Display
Output date/time Balance carries out balance function, e.g. unit count / display of stored value Display for adjustment. Signals the adjustment function. Weighing unit display Bar graph Message for battery mode (optional) see chpt. 6.6 Display last fractional digit PES/PEJ-BA-defsi-0510... -
Page 36: Weighing Mode
Switch on balance: Your balance is ready to weigh as soon as the “0.0" display appears. 75s0 Put on items to be weighed, weighed value is displayed. By repeated pressing, switching option of the displayed value into other activated functions/weighing units PES/PEJ-BA-defsi-0510... -
Page 37: Taring
Reset display to "0": The weight of the container is now saved internally; in addition the display shows the tare symbol "Net". Place the goods to be weighed into the Read the weight of the goods on the tare container. display. 153z0 PES/PEJ-BA-defsi-0510... - Page 38 Remove all items from the weighing plate in order to delete the stored tare value and subsequently press the TARE key. The taring process can be repeated any number of times. The limit is reached when the whole weighing range is exhausted. PES/PEJ-BA-defsi-0510...
-
Page 39: Net/Gross
Place the goods to be weighed into the The net weight of the goods to be tare container. weighed is displayed. 250z0 The gross weight (goods + taring con- tainer) is displayed, the display shows the gross symbol "B/G". 350z0 PES/PEJ-BA-defsi-0510... -
Page 40: Parts Counting
Weigh in the reference unit x Count the items Operation Display Activate function [q SET. 2] q SET 2 (see chapter 7). The display shows the piece counting symbol "Pcs". If you are using a weighing con- tainer PES/PEJ-BA-defsi-0510... - Page 41 By adding more pieces (up to the 3-fold quantity), you can optimise the refer- ence. At every reference optimisation, the reference weight is calculated anew. As the additional pieces increase the base for the calculation, the reference also becomes more exact. PES/PEJ-BA-defsi-0510...
- Page 42 If the error message “L-Err “ appears the smallest counting weight has not been reached. If the “Add“ error message appears, the applied number of items is too small for correct determination of the reference. For reference, place more parts on the balance. PES/PEJ-BA-defsi-0510...
-
Page 43: Percent Determination
The display shows flashing the last saved reference weight Press for about 4 seconds, until [P. SET] is displayed, then release Put on reference weight (=100 %) An acoustic signal sounds; the reference weight is saved. 10z0 Remove reference weight. PES/PEJ-BA-defsi-0510... -
Page 44: Numeric Entering Of The Reference Weight
Activate function [q SET 3] q SET 3 (see chap. 7). The display shows the %-symbol. Determine reference weight: The display shows flashing the last saved reference weight Press for about 4 seconds, until [P. SET] is displayed, then release PES/PEJ-BA-defsi-0510... - Page 45 Any time you press TARE-key or the ar- row key, you will go through the numbers 0-9, decimal dot and minus Select the number to be changed (the active position flashes): An acoustic signal sounds; the entered reference weight is saved PES/PEJ-BA-defsi-0510...
- Page 46 „g“ or %“ NOTE: x If the error message “o-Err “ is displayed, the reference weight is outside the weighing range x The 100% reference is preserved until the balance is disconnected from the mains. PES/PEJ-BA-defsi-0510...
-
Page 47: Density Determination Of Solids (Hydrostatic Weighing)
Measuring liquid of your selec- tion, density of which is known 0. 0 If you selected distilled water >1q NED. 0@ the water temperature is input (input range 0.0 to 99.9°). 15.0 Press and keep pressed until the blinking display appears PES/PEJ-BA-defsi-0510... - Page 48 >1q NED. 1@its density is input (input range 0.0001 to 9.9999 g/cm 1. 0 000 Press and keep pressed until the blinking display appears Density is input via the TARE and F key, saving via the S key (see temperature input) PES/PEJ-BA-defsi-0510...
- Page 49 Tare balance with sample holder Put-on sample 820.0 Wait till the weight display on the balance is stable The weight of the sample in air is saved 2. Sample weight in the measur- ing liquid 0. 0 Immerse and tare the sample holder PES/PEJ-BA-defsi-0510...
- Page 50 Wait till the weight display on the balance is stable The density of your sample is displayed, characterized by the X symbol right above. The weight of the sample in the measuring liquid is saved 520.0 Return to density determining mode PES/PEJ-BA-defsi-0510...
-
Page 51: Adding Of Displayed Values
The displayed value is added into the ¦ total adding memory. 85z0 The total [ ¦ ] is briefly shown 5. Remove weight. 6. Wait until the balance zero display is shown, then place weight B on bal- ance PES/PEJ-BA-defsi-0510... -
Page 52: Adding With Auto-Tara
Adding of displayed values is possible without removing the weight. Condition: Function AD.N. 2@ activated >2C. To be carried-out like the normal adding (see chap. 11). Hereby omit step 4. The balance is automatically reset to zero, without taking away the weight. PES/PEJ-BA-defsi-0510... -
Page 53: Weighing With Tolerance Range
An upper limit and a lower limit for a reference value are set. Example: Reference value Lower limit Upper limit Poured quantity 1,000.0 g 970.0 g 1,050.0 g Evaluation of absolute 1,000.0 g 970.0 g 1,050.0 g values Evaluation with differ- 1,000.0 g -30.0 g 50.0 g ence values PES/PEJ-BA-defsi-0510... -
Page 54: Display Of The Results
If two points are set as upper and limit lower limit Result No display Weight > Upper limit (high) TOL 3 (OK) Lower limit d Weight Lower limit dWeight d Upper limit Lower limit > Weight Lower limit > Weight (low) PES/PEJ-BA-defsi-0510... -
Page 55: For 3 Or 4 Limits
2q CQ. 1 The first parameter for setting the toler- Any time you press the F-key you can ance marker appears. select between the following settings, see chap. 7.2.1 3. Changing the parameter value 2q CQ. 1 2q CQ. 2 PES/PEJ-BA-defsi-0510... -
Page 56: Evaluation Of Absolute Values
Parameter selection for absolute value: more settings of your choice (see chap. 12.3) are carried out in an analogue manner 2t TXP. 1 3. Leave function menu The balance is now in tolerance weigh- ing mode; the tolerance marker ( ) ap- pears PES/PEJ-BA-defsi-0510... - Page 57 6. Save: An acoustic signal sounds, the saved lower limit is briefly displayed.* H. SET The flashing display (last saved value) prompts you to enter the upper limiting H. SET value ( PES/PEJ-BA-defsi-0510...
- Page 58 From here evaluation takes place whether the goods to be weighed are within the two tolerance limits. * If you want to set for your tolerance weighing only one limit point (parameter selection [23. P , ignore step 7 and 8. PES/PEJ-BA-defsi-0510...
-
Page 59: Entering 3 Or 4 Limits By Weighing
.1] or [24. TXP.1] is displayed; Parameter selection for 4 limiting points: more settings of your choice (see chap. 12.3) are carried out in the same way 2s P . 4 Parameter selection for absolute value: 2t TXP. 1 3. Leave function menu PES/PEJ-BA-defsi-0510... - Page 60 An acoustic signal sounds, the saved 6. Save: first limiting value is briefly displayed.* L2. SET The flashing display (last saved value) prompts you to enter the second limiting value (L2.SET) 7. Place sample for the second limiting value on the weighing plate: PES/PEJ-BA-defsi-0510...
- Page 61 From here, evaluation is carried out whether the goods to weighed are within the tolerance limits. Display of tolerance mark [L4.SET ] 4. limit point [L3.SET ] 3. limit point [L2.SET ] 2. limit point [L1.SET ] 1. limit point PES/PEJ-BA-defsi-0510...
-
Page 62: Numeric Entering Of 2 Limits
The balance is now in tolerance weigh- ing mode; the tolerance marker ( ) ap- pears 4. Entering limiting values: L. SET Press for about 4 seconds, until [L. SET] is displayed, then release The last saved limiting value is displayed flashing PES/PEJ-BA-defsi-0510... - Page 63 1 Ÿ Ÿ Ÿ Ÿ Ÿ Ÿ Any time you press the TARE-key or the arrow keys you will go through the num- bers 0-9, decimal dot and minus Select the number to be changed (the respective active position flashes) PES/PEJ-BA-defsi-0510...
- Page 64 From here evaluation takes place whether the goods to be weighed are within the two tolerance limits. To enter 3 or 4 limiting values [L1 SET] - [L3 SET] or [L4 SET], repeat steps 5 to 7 (see also chapter 12.4.2). PES/PEJ-BA-defsi-0510...
- Page 65 (see chap. 12.3) are carried out in the same way Parameter selection for difference value: 2t TXP. 2 3. Leave function menu The balance is now in tolerance weigh- ing mode; the tolerance marker ( ) ap- pears PES/PEJ-BA-defsi-0510...
- Page 66 5. Place reference weight onto weighing plate: 6. Save An acoustic signal sounds, the saved reference value is briefly displayed.* L. SET The flashing display (last saved value) prompts you to enter the lower limiting value PES/PEJ-BA-defsi-0510...
- Page 67 From here evaluation takes place whether the goods to be weighed are within the two tolerance limits. * If you want to set for your tolerance weighing only one limit point (parameter selection [23. P , the input herewith is finished. PES/PEJ-BA-defsi-0510...
- Page 68 (see chap. 12.3) are carried out in the same way Parameter selection for difference value: 2t TXP. 2 3. Leave function menu The balance is now in tolerance weigh- ing mode; the tolerance marker ( ) ap- pears PES/PEJ-BA-defsi-0510...
- Page 69 1 Ÿ Ÿ Ÿ Ÿ Ÿ Ÿ Any time you press TARE-key or the ar- row key, you will go through the numbers 0-9, decimal dot and minus Select the number to be changed (the respective active position flashes) PES/PEJ-BA-defsi-0510...
- Page 70 An acoustic signal sounds, the saved lower difference value is briefly dis- played. H. SET The flashing display (last saved value) prompts you to enter the upper differ- ence value 10. Entering upper limit Repeat steps 5 and 6 PES/PEJ-BA-defsi-0510...
-
Page 71: Setting Date And Time
To enter 3 or 4 limiting values [L1 SET] - [L3 SET] or [L4 SET], repeat steps 8 and 9 (see also chapter 12.4.2). 13. Setting date and time Display symbol [ 13.1. Time Operation Display 1. Call up menu Fonm Keep pressed until [D-SET] appears. D-SET PES/PEJ-BA-defsi-0510... - Page 72 After storing your setting, the date dis- 3. Save play will appear 7-1 - 5 4. Return to weighing mode *Notice: The display can be rounded up (from 30 s) or down (to 29 s) by pressing the TARE-key. PES/PEJ-BA-defsi-0510...
- Page 73 You can set the display of your data output under menu item (see menu overview chpt. 7.2.). Operation Display 1. Call up menu Fonm Keep pressed until [D-SET] appears. D-SET TKNE Press again 15 OO OO Last stored time appears DATE Press again 7-1 - 5 Last stored date PES/PEJ-BA-defsi-0510...
- Page 74 Time to be changed is flashing Select the number to be changed (the active position flashes): 7-1 - 5 Changing the numerical value 8-1 - 5 After storing your settings, the balance 3. Save will automatically return to weighing mode. PES/PEJ-BA-defsi-0510...
- Page 75 2. Set interval Select the number to be changed (the active position flashes): 00 1 0 : Changing the numerical value 00 2 0 : After storing your settings, the balance 3. Save: will automatically return to weighing mode. PES/PEJ-BA-defsi-0510...
- Page 76 13.3.2. Start/Stop interval output Operation Display START Start output Stop output The balance returns automatically into weighing mode. PES/PEJ-BA-defsi-0510...
- Page 77 Hold F-key while TARE –key is pressed q KD 0 until [FWnm 2] is displayed. see chapter 8. 2. Activate function q KD 1 3. Display ID nr. 000001 The last stored number appears 4. Input ID nr. 000001 Time to be changed is flashing PES/PEJ-BA-defsi-0510...
- Page 78 Select the number to be changed (the active position flashes): 000001 Changing the numerical value 000501 5. Save: Your setting will be stored and the next menu item will appear. 2.CRCA. O 6. Return to weighing mode PES/PEJ-BA-defsi-0510...
-
Page 79: Data Output
The RS 232C interface allows a bi-directional data exchange from the balance to ex- ternal devices. This data exchange is asynchronous using ASCII - Code. Pin allocation of balance output plug: Pin nr. Signal Input/Output Function Input Receive data Output Transmit data Output HIGH Signal ground PES/PEJ-BA-defsi-0510... - Page 80 14.3. Description of interface The selection of a certain operating mode allows you to set the output format, the output control, the transmission speed and the parity bit. The different options are described in chpt. 7.2.2 under "parameter for serial interface". PES/PEJ-BA-defsi-0510...
- Page 81 0 - 9 30 H – 39 H Data 0 to 9 (max. 6 characters in 6-digit format) 2 EH Decimal point, position not fixed 20 H Space character, leading cero suppressed 2 FH Slash "/" is inserted after the e-value. PES/PEJ-BA-defsi-0510...
- Page 82 Goods to be weighed within tolerance range points Goods to be weighed above tolerance limit Limit 1 Limit 2 3 or 4 end Limit 3 points Limit 4 Limit 5 Value total Weight value File Type (SP) No rating Gross PES/PEJ-BA-defsi-0510...
- Page 83 When an interval output is started or stopped, this will result in the output of a header or footer line. Header ƒ consisting of 15 words Footers ƒ Two line feeds are inserted. 14.5.4. Output time * hh: Hours (00-23), mm: Minutes (00-59) min: Seconds (00-59) s: PES/PEJ-BA-defsi-0510...
- Page 84 Output of stable weighing values after pressing PRINT key Single immediate output Single output after stabilization Single immediate output after a determined interval Single immediate output after a determined interval and a stable weighing value PES/PEJ-BA-defsi-0510...
-
Page 85: Instant Help
When cleaning please ensure that the membrane is not damaged or soiled. 15.2. Service, maintenance The appliance may only be opened by trained service technicians who are authorized by KERN. Before opening, disconnect from power supply. 15.3. Disposal Disposal of packaging and appliance must be carried out by operator according to valid national or regional law of the location where the appliance is used. - Page 86 During the adjustment there was one weight on the weighing plate Divergence from last internal adjustment > 1% 4-Err Insufficient battery capacity for adjustment 7-Err Should other error messages occur, switch balance off and then on again. If the error message remains inform manufacturer. PES/PEJ-BA-defsi-0510...
Need help?
Do you have a question about the PES and is the answer not in the manual?
Questions and answers