
Subscribe to Our Youtube Channel
Related Manuals for Nescafe C70


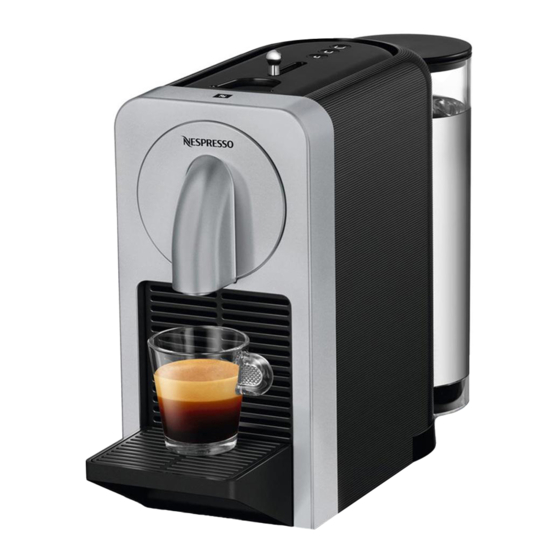
Summary of Contents for Nescafe C70
- Page 1 S E R V I C E M A N U A L C O F F E E M A C H I N E S PRODIGIO C70 / D70 PRODIGIO&MILK C75 / D75 Version 1.0 en, 12.02.2016...
-
Page 2: Table Of Contents
C O N T E N T S 1 General safety notes ..................6 2 Main components ....................7 Overview - Prodigio&milk coffee machine............7 2.1.1 Overview - milk frother (Aero 3) ..............8 Interior view of coffee machine ................9 Interior view of swivel arm................10 Fluid system ..................... - Page 3 Check list for milk frother ................. 38 Machine error code table ................. 39 7 Repairs ........................ 40 Safety instructions ................... 40 Repair and mounting tips ................. 40 Tools and accessories ..................41 General disassembly ..................42 7.4.1 Prepare coffee machine for disassembly..........42 7.4.2 Remove outlet cover................
- Page 4 8.7.3 Test sequence..................90 8.7.4 What to do if the insulation test fails ............92 9 Explosion drawings and parts lists .............93 Explosion drawings C70................... 93 Explosion drawings D70................... 96 Explosion drawings C75................... 99 Explosion drawings D75................. 102 Spare parts list....................105 10 Glossary of abbreviations ................109...
- Page 5 P R E F A C E The purpose of this service manual is to provide the service personnel with all necessary Please keep this information with regards to correct handling, maintenance and repair of the Prodigio manual together with the corresponding service coffee machines.
-
Page 6: General Safety Notes
G E N E R A L S A F E T Y N O T E S G E N E R A L S A F E T Y N O T E S The repair of these machines can only be performed by Nespresso approved after-sales centers and technicians, using suitable tools and original spare parts and taking into account the national safety regulations. -
Page 7: Main Components
M A I N C O M P O N E N T S M A I N C O M P O N E N T S Overview - Prodigio&milk coffee machine 1) Maintenance light, orange 10) Removable cup support 2) Lungo coffee button, 110 ml / 3.7 oz 11) Drip tray 3) Espresso coffee button, 40 ml / 1.35 oz... -
Page 8: Overview - Milk Frother (Aero 3)
M A I N C O M P O N E N T S 2.1.1 Overview - milk frother (Aero 3) The milk frother is part of the coffee machine Prodigio&milk. 1) Lid 5) Frothing spring (for milk froth only) 2) Seal 6) Mixer for hot milk 3) Jug... -
Page 9: Interior View Of Coffee Machine
M A I N C O M P O N E N T S Interior view of coffee machine 1) Drop stop 9) Water tank connector 2) Steam cover 10) Magnet fixing for water tank 3) Brewing unit (3 permanent magnets) 4) MMI board (Men Machine Interface) 11) Pump with reinforced silicone keypad... -
Page 10: Interior View Of Swivel Arm
M A I N C O M P O N E N T S Interior view of swivel arm Swivel arm of Prodigio&milk - view from below. Beside the special swivel arm, the two coffee machine types have the same internal design. 1) Support for milk frother 4) Cable duct for power cord 2) Otter connector for milk frother... -
Page 11: Fluid System
M A I N C O M P O N E N T S Fluid system 1) Coffee outlet 8) Pump 2) Brewing unit 9) Flowmeter 3) Thermoblock 10) Drip tray 4) High pressure connector 11) Cup support 5) Water tank 12) Used capsule container 6) Water tank valve 13) Drop stop... -
Page 12: Technical Data
T E C H N I C A L D A T A T E C H N I C A L D A T A Rating plates 3.1.1 Example of brand specific rating plate The rating plate can be found at the bot- tom of the coffee machine. -
Page 13: Rating Plate Details (Example)
T E C H N I C A L D A T A 3.1.3 Rating plate details (example) 1) Brand name 7) Serial number 2) Machine type 8) Machine name 3) Voltage and power rating 9) FCC approval 4) Place of manufacture 10) Special disposal icon 5) Sign of conformity (CE) (do not dispose with ordinary waste) -
Page 14: Technical Specifications
T E C H N I C A L D A T A Technical specifications 3.2.1 Coffee machines Mains voltage ranges Prodigio coffee machine Europe, RU, AU, CN, KR, SG, HK, ME, ZA, IL, BR, AR....220-240 V, 50/60 Hz USA, Canada ..................120 V, 50/60 Hz BR, MX ....................127 V, 50/60 Hz Japan.................... - Page 15 T E C H N I C A L D A T A Prodigio&milk coffee machine Energy efficiency class level ................A - 40% Daily energy consumption..................89 Wh Annual energy consumption ................33 kWh Pump Pump pressure - Max. permissible ..................20 bar ± 3 bar - During coffee preparation (depending on the type of coffee)......
-
Page 16: Milk Frother (Prodigio&Milk)
T E C H N I C A L D A T A 3.2.2 Milk frother (Prodigio&milk) Mains voltage EU ....................220-240 V / 50-60 Hz US/CA ..................120-127 V / 50-60 Hz AU ..................... 240-260 V / 50 Hz The milk frother If replacing a defect milk frother, check... -
Page 17: Dimensions, Weight And Size
T E C H N I C A L D A T A 3.2.3 Dimensions, weight and size Dimensions in [mm]. 218.4 119.5 Prodigio dimensions (length x width x height)......374 x 119.5 x 255.3 mm Prodigio&milk dimensions (length x width x height) ....374 x 218.4 x 255.3 mm Distance drip grid - coffee outlet: ..........88 mm (Espresso mode) Distance bottom - coffee outlet: .......... -
Page 18: Operation
O P E R A T I O N O P E R A T I O N General information For an overview of operational controls see “Main components” on page 7. For basic operation of the machine such as preparing a coffee and other related infor- mation, refer to the user manual. -
Page 19: Status Indication Of Milk Frother
O P E R A T I O N Machine status Lungo Espresso Ristretto M-light N-light Blinking, 2 Hz Software update Device identifi- — — — — Blinking, cation 5 x 0.5 sec User intervention required Notification des- — — —... -
Page 20: Machine Modes
O P E R A T I O N Machine modes 4.3.1 Machine modes of coffee machine This table also con- This table helps to understand the operating modes of the Prodigio coffee machine: tains the keying sequences for - volume programming Machine mode Enter mode Actions... - Page 21 O P E R A T I O N Machine mode Enter mode Actions Exit mode 1) Start pump 2) Heat up thermo- • When slider is open block to 105 °C press and hold the (100% power) Ristretto and Lungo 3) Stop pump when coffee buttons thermoblock tem-...
-
Page 22: Machine Modes Of Milk Frother
O P E R A T I O N 4.3.2 Machine modes of milk frother The following table helps to understand the operating modes of the milk frother: Machine mode Enter mode Actions Exit mode 1 Hot milk / milk Start button lights up red. -
Page 23: Pairing Smartphone Or Tablet With Coffee Machine
O P E R A T I O N Nespresso App Download the official Nespresso App version free of charge on your smartphone or tablet depending on the operating system: Operating system Store Apple iOS Android ® Check Bluetooth function ®... - Page 24 O P E R A T I O N Pairing procedure Nespresso App illus- trations are either symbolic or subject to change depending on the app version. 1) Switch on coffee machine by pressing 3) Hold a compatible smartphone or tab- Even better, touch coffee machine with any coffee button.
- Page 25 O P E R A T I O N Multiple devices can be connected to the Prodigio coffee machine only if using a unique Nespresso club members number (NNSA account). 8) Ensure the smartphone or tablet is 9) Pairing takes place automatically. placed next to the coffee machine dur- 10) When the pairing is completed, the ing pairing.
-
Page 26: Nespresso App - Coffee Machine Setup
O P E R A T I O N 4.4.3 Nespresso App - coffee machine setup If the water hardness test is omitted, level 5 (very hard water) is used as default setting. 1) Enter name for coffee machine. 2) Use a test strip to determine the local water hardness. -
Page 27: Nespresso App - Machine
O P E R A T I O N 4.4.4 Nespresso App - machine page overview After multiple pairing, different machine pic- tures can appear in the machine menu. 1) Machine menu with corresponding machine picture ring showing overall machine status (blue ... -
Page 28: Nespresso App - Machine Management
O P E R A T I O N 4.4.6 Nespresso App - machine management Touch machine icon at the bottom of the machine page to display this submenu: Example if machine status is ok (blue ring Example if machine status is not ok around machine picture). -
Page 29: Nespresso App - Capsule Stock Management
O P E R A T I O N Unpairing submenu Caution! In case of an unpairing, all setups and specifications will be lost and the coffee machine will be reset to factory settings. 4.4.7 Nespresso App - capsule stock management Touch capsule icon at the bottom of the machine page to display this submenu: 1) Capsule stock management with stock status... -
Page 30: Nespresso App - Water Management
O P E R A T I O N 4.4.8 Nespresso App - water management Touch water drop icon at the bottom of the machine page to display this submenu: 1) Water tank management with message if customer needs to refill the water tank no water alert 2) Descaling submenu with... -
Page 31: Empty Water System
O P E R A T I O N Empty water system After every operation, some water (max. 25 ml / 0.85 oz) remains in the coffee machine. After this procedure, Therefore the water system must be emptied the coffee machine will not be ready for approx. -
Page 32: Maintenance
M A I N T E N A N C E M A I N T E N A N C E Descaling Only use Nespresso descaler (5034) or Nespresso descaling kit – (3035/CBU-2) never use vinegar! Descaler can damage casing and surfaces. Immediately clean drops of descaling solution. - Page 33 M A I N T E N A N C E The brewing unit stays closed until the end of the descaling mode. 5) Close an open slider. 7) Refill the water tank with the used des- 6) Press any coffee button to start des- caling solution collected in the con- caling.
-
Page 34: Cleaning Procedure For Coffee Machine
M A I N T E N A N C E 5.2 Cleaning procedure for coffee machine Risk of fatal electrical shock and fire! Never clean wet or immerse plug, cord or appliance in any fluid. Unplug appliance and let it cool down to avoid burns. Risk of damage! The lenses of the light barrier and the water tank can be scratched. -
Page 35: Cleaning Procedure For Milk Frother
M A I N T E N A N C E 5) Rinse water tank and wipe dry with a 6) Clean the coffee outlet regularly with a soft cloth. damp cloth. 5.3 Cleaning procedure for milk frother Risk of damage! The inside of the jug is coated for easy cleaning. -
Page 36: Troubleshooting
T R O U B L E S H O O T I N G T R O U B L E S H O O T I N G Check list for coffee machine After an initial inspec- Measure / Further measures / Check Error symptoms... - Page 37 T R O U B L E S H O O T I N G Measure / Further measures / Check Error symptoms repair work repair work a) YES - compatible device YES - continue with Nespresso App. has Blue- NO - try again and place com- ®...
-
Page 38: Check List For Milk Frother
T R O U B L E S H O O T I N G Check list for milk frother The milk frother is part Measure / Further measures / Check Error symptoms of the Prodigio&milk repair work repair work coffee machine. -
Page 39: Machine Error Code Table
T R O U B L E S H O O T I N G Machine error code table Use the Nespresso Error code Machine error / error level Description App to get an error code for troubleshooting SPI communication error during firmware update or (see page 28). -
Page 40: Repairs
R E P A I R S R E P A I R S These repair instructions are based on exploded drawings with position numbers combined with repair and mounting tips, presuppose basic knowledge in repairing Nespresso coffee machines. Safety instructions Risk of fatal electrical shock! Mains voltage inside the coffee machine. -
Page 41: Tools And Accessories
R E P A I R S Wiring arrangement Random changes in the wiring arrangement of the wired model version during a repair can cause electromagnetic interferences, squeezed wires, insulation defects due to contact with hot parts, insulation problems if low and high voltage wires are not separated, interference with and damage to electronics. -
Page 42: General Disassembly
R E P A I R S General disassembly This subchapter shows all necessary disassembly steps to gain access to the main assembly (slider unit, brewing unit, thermoblock, pump and electronic device). 7.4.1 Prepare coffee machine for disassembly 1. Check and remove any capsule from the brewing unit. Close the slider. 2. -
Page 43: Remove Outlet Cover
R E P A I R S 7.4.2 Remove outlet cover • Press up outlet cover (8) and pull it out from front cover (64). Version 1.0 en Prodigio service manual... -
Page 44: Remove
R E P A I R S 7.4.3 Remove front cover Take care not to • Reach into circular opening and release 2 latches of front cover (encircled). scratch the surface • Swing out front cover (64) at the bottom until it touches the drop stop (7). and keep the front cover at a safe place. -
Page 45: Remove Cover
R E P A I R S 7.4.4 Remove cover • Loosen 1 screw (40, Torx screw TX10 with safety pin) at the rear side of the cover (1) - see detail. • Loosen 2 screws (15, Torx screws TX10 with safety pin) on underside of chassis (6). Version 1.0 en Prodigio service manual... - Page 46 R E P A I R S If the cover (1) is only • At the bottom of the cover (1): Push both sides away from chassis (6). pushed backwards, 2 • Then push cover to the rear and upwards. of its ribs (encircled) will break.
-
Page 47: Remove Blind
R E P A I R S 7.4.5 Remove blind Take care no to dam- 1. Release 4 latches (2 on each side) with screwdriver and remove blind (2) from print age the light guide cover (5). (57). Assembly checkpoint •... -
Page 48: Remove Drop Stop
R E P A I R S 7.4.6 Remove drop stop To dismantle the drop stop, the brewing unit must be closed. Use a a cordless drill driver connected to the motor to close the unit or, before dismantling the machine, start a coffee without a capsule and remove the power plug dur-... -
Page 49: Remove Mmi Board And Light Guides
R E P A I R S 7.4.7 Remove MMI board and light guides 54 + 3 Handle with care! 1. Remove light guide (60) from MMI board (3) and light guide rack (63). Light guide connec- 2. Remove second light guide (60) on other side of machine (not shown). tors on MMI board and 3. -
Page 50: Remove Lever And Light Barrier
R E P A I R S 7.4.8 Remove lever and light barrier • Remove spring (68). • Remove lever (67) - see upper detail: • Press latch (circled in red) against lever and turn lever clockwise. • Pull out lever. •... -
Page 51: Remove Print Cover
R E P A I R S 7.4.9 Remove print cover 1. Check position of ratchets (4) for reassembly. Handle with care! 2. Release 4 latches (2 on each side) with screwdriver and remove print cover (5) Ratchets (4) can drop from chassis (6). -
Page 52: 10Remove Pivot Bottom, Water Tank Connector And Power Cable
R E P A I R S 7.4.10 Remove pivot bottom, water tank connector and power cable • Release 5 clips on pivot bottom (19) with a screwdriver. • Remove pivot bottom from pivot top (17). • Remove water tank connector (20) from pivot bottom and pull off its hose from flow- meter (22) in electronic module. - Page 53 R E P A I R S Do not try to remove the cable bracket (18) from the underside of the coffee machine. The cable bracket will then probably be destroyed. The cable bracket is hooked at one side. Place screwdriver like shown in detail.
-
Page 54: Remove Pivot Bottom, Water Tank Connector, Power Cable And Otter Connector (Prodigio&Milk)
R E P A I R S 7.4.11 Remove pivot bottom, water tank connector, power cable and Otter connector (Prodigio&milk) • Loosen 3 screws (TX10 torx screws) from pivot bottom milk (19). • Release 5 clips on pivot bottom milk (19) with a screwdriver. Prodigio service manual Version 1.0 en... - Page 55 R E P A I R S • Remove pivot bottom milk (19) from pivot top milk (17). • Remove water tank connector (20) from pivot bottom milk and pull off its hose from flowmeter (22) in electronic module. • Remove cable bracket (18) - see procedure on page 53.
- Page 56 R E P A I R S • Remove connection cable (48): Caution - fragile • Unplug both insulated angled Faston receptacles with the help of a screwdriver insulation on Fas- or pointed pliers from electronic module (82). ton receptacles. Handle with care if con- nection cable (48) is to be re-used.
- Page 57 R E P A I R S • Remove 3 small Faston receptacles from Otter connector on pivot top milk (17). Latches will break if • Remove Otter connector by releasing 3 latches. not unlocked very carefully! Version 1.0 en Prodigio service manual...
- Page 58 R E P A I R S Assembly checkpoints • Use marked cable guide to lay wires to Otter connector. • Check wiring of Otter connector. Prodigio service manual Version 1.0 en...
-
Page 59: 12Remove Electronic Module (Main Pcb)
R E P A I R S 7.4.12 Remove electronic module (main PCB) For pump removal, • Remove isolation cover (29) from pump (30). refer to page 63. • Unplug both Faston receptacles from pump terminal (see below). • Pull off low pressure tube (32) from flowmeter (22) - see below. •... -
Page 60: 13Remove Main Board And Flowmeter
R E P A I R S Assembly checkpoints • Never re-use damaged cables. • The flat cable connector (50) is fragile. Check orientation of connector before inserting. 7.4.13 Remove main board and flowmeter Use ESD protection measures when han- dling main board (23). - Page 61 R E P A I R S • Press together flowmeter clips (see detail) and remove flowmeter (22) from main The flowmeter clips board (23). get damaged during disassembly. Assembly checkpoints • Never re-use a flowmeter (22). Always assemble a new flowmeter. •...
-
Page 62: 14Remove High Pressure Tube
R E P A I R S 7.4.14 Remove high pressure tube • Remove the high pressure tube (27) by cutting through both connector clips (26). Assembly checkpoint • Make sure that both connector clips (26) are mounted correctly. Prodigio service manual Version 1.0 en... -
Page 63: Remove Pump
R E P A I R S 7.4.15 Remove pump The first 2 disassem- • Remove isolation cover (29) from pump (30). bly steps are already • Unplug both Faston receptacles from pump terminal. done if the electronic mod- ule has been removed. •... -
Page 64: 16Remove Brewing Unit
R E P A I R S 7.4.16 Remove brewing unit Prerequisites: • Drop stop (7) is removed (see page 47). • The brewing unit is open. Front view of chassis (6). Use the illustration as The brewing unit housing (33) is fixed with 4 latches in the chassis (6). reference to locate the 4 latches in the coffee machine. - Page 65 R E P A I R S Rear view. Push thermoblock • Press thermoblock (35) upwards with one hand. upwards until both • Insert screw driver in gap beside motor. latches at the motor are released. • Swivel screwdriver to release latch with a clicking sound. •...
- Page 66 R E P A I R S • Move thermoblock (35) gently back and forth to release the upper 2 latches. If necessary use a screwdriver to release the latches. Push brewing unit to • Remove brewing unit housing (33) with thermoblock (35) from chassis (6). the backside and upwards at the same time.
-
Page 67: 17Disassemble Brewing Unit Drive
R E P A I R S 7.4.17 Disassemble brewing unit drive • Release marked clip with a screwdriver and remove steam cover (34) from brewing unit housing (33). The brewing unit must be open com- pletely i.e. the guides are at the rear and vertically posi- tioned. - Page 68 R E P A I R S • Remove bush bearings (X), gear lever left (41) and gear lever right (47) from capsule cage (38). Assembly checkpoints right side left side not ok left side ok left side not ok •...
-
Page 69: 18Remove Thermoblock From Capsule Cage
R E P A I R S 7.4.18 Remove thermoblock from capsule cage • Loosen 2 screws (39, M3 socket screw) to remove thermoblock (35) from capsule cage (38). • Remove thermoblock sleeve (36) and O-ring (37). Version 1.0 en Prodigio service manual... -
Page 70: Function Tests
F U N C T I O N T E S T S F U N C T I O N T E S T S Safety instructions Some function tests are performed with an energized, partly opened coffee machine. Danger of electrocution! Mains voltage inside the coffee machine. -
Page 71: Measure Coffee Temperature
F U N C T I O N T E S T S Measure coffee temperature 10 sec 1) Start coffee machine. 3) Preheat coffee outlet with hot water: 2) Place a measuring cup on cup sup- • Press Lungo button or close slider. port. -
Page 72: Tightness And Leakage Checks
F U N C T I O N T E S T S 8.4 Tightness and leakage checks This test must be performed: - each time a part of the water circuit has been removed or replaced - to confirm the tightness of the water circuit under pressure. Dangerous mains voltage inside the coffee machine! Do not touch any parts under voltage while checking for leakages! Dangerous hot parts under pressure inside the coffee machine! -
Page 73: Test Run
F U N C T I O N T E S T S 8.4.2 Test run Do not run the 30 sec. max pump for more than 30 sec. If machine stops dur- ing test, simply press the Lungo coffee button again. -
Page 74: Milk Frother Tests (Prodigio&Milk)
F U N C T I O N T E S T S Milk frother tests (Prodigio&milk) Prerequisite Use newly opened UHT, full fat or semi-skimmed milk at fridge temperature (+ 8 °C till The disregard of this + 10 °C) for the following tests only. specification can affect the measuring results. -
Page 75: Protective Earth (Pe) Continuity Test
F U N C T I O N T E S T S Protective earth (PE) continuity test 8.6.1 What is the protective earth continuity test about? This test is only necessary for class 1 equipment (three-wire power cord with protective earth) after a repair whenever a general disassembly was performed. -
Page 76: Test Sequence
F U N C T I O N T E S T S 8.6.3 Test sequence This test sequence is Danger of electrocution! only an example and Do not plug in the coffee machine during the protective earth continuity has to be adapted to appli- test. -
Page 77: What To Do If The Protective Earth Continuity Test Fails
F U N C T I O N T E S T S Do not damage Milk frother test (Prodigio&milk): inside coating of 1) Touch upper metallic part of milk milk frother jug frother with red test probe. with the probe tip. 2) Press "measure"... -
Page 78: Protective Insulation Test
F U N C T I O N T E S T S Protective insulation test 8.7.1 What is the protective insulation test about? Perform the protec- tive earth (PE) conti- nuity test at first, if it is man- This test is necessary datory. -
Page 79: Test Sequence
F U N C T I O N T E S T S 8.7.3 Test sequence Danger of electrical shock/short circuit! Do not plug in the coffee machine during insulation test. Danger of electrical shock! Do not touch tip of test probes. Do not touch metallic parts of coffee machine during test. - Page 80 F U N C T I O N T E S T S 7) Touch slider with red test probe. 8) Press "measure" button. 9) Read off displayed insulation resist- ance or test result. 10) Insert tip of red test probe up into cap- By looking into the sule ejection chute and touch screw capsule ejection slot...
-
Page 81: What To Do If The Insulation Test Fails
F U N C T I O N T E S T S 5) Place milk frother back on Otter con- Do not damage inside coating of nector. milk frother jug 6) Touch upper metallic part of milk with the probe tip. frother with red test probe. -
Page 82: Explosion Drawings And Parts Lists
E X P L O S I O N D R A W I N G S A N D P A R T S L I S T S Spare parts list Pos. No. Part No. Component Remark NES-46210-SP Cover NES-46223-SP Ratchet... - Page 83 E X P L O S I O N D R A W I N G S A N D P A R T S L I S T S Pos. No. Part No. Component Remark NES-29924-SP Connector Clip NES-29145-SP High Pressure Connector Assem- NES-29907-SP O-Ring 3.4 x 1.9 mm...
- Page 84 E X P L O S I O N D R A W I N G S A N D P A R T S L I S T S Pos. No. Part No. Component Remark NES-29509-8-SP Connection Cable KR compl. assembled NES-29509-9-SP Connection Cable CL compl.
- Page 85 E X P L O S I O N D R A W I N G S A N D P A R T S L I S T S Pos. No. Part No. Component Remark NES-46212-4-SP Front Cover Painted Titanium NES-46212-3-SP Front Cover Painted Aluminium...
- Page 86 G L O S S A R Y O F A B B R E V I A T I O N S G L O S S A R Y O F A B B R E V I A T I O N S Term Description Application software...
- Page 87 N O T E S 1 1 N O T E S Prodigio service manual Version 1.0 en...
- Page 88 N O T E S Version 1.0 en Prodigio service manual...
- Page 89 N O T E S Prodigio service manual Version 1.0 en...
Need help?
Do you have a question about the C70 and is the answer not in the manual?
Questions and answers