
Subscribe to Our Youtube Channel
Related Manuals for Centrometal CentroPelet ZS10


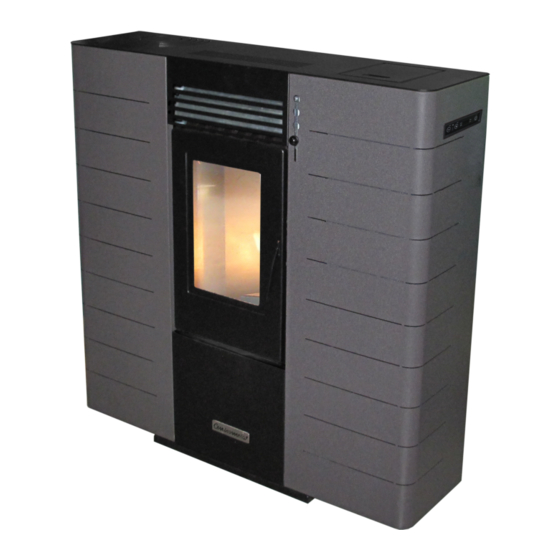
Summary of Contents for Centrometal CentroPelet ZS10
- Page 1 HEATING TECHNIQUE Centrometal d.o.o. - Glavna 12, 40306 Macinec, Croatia, tel: +385 40 372 600, fax: +385 40 372 611 TECHNICAL INSTRUCTIONS for regulation, use and maintenance of pellet stove CentroPelet ZS10 TUZS10ENG-4-2014-HR...
- Page 2 Dear Client, We thank you for having chosen one of our products, the fruit of technological experience and of continual research for a superior quality product in terms of safety, dependability, and service. In this manual you will find all the information and useful suggestions to use your product with the maximum safety and efficiency.
-
Page 3: Safety Information
1.0 Norms and declarations of conformit Our company declares that the stove conforms to the following norms for the EC European Directive labelling: • 89/336 CE and 2004/CE (EMC regulation) and following amendments; • 2006/95 CE (low tension regulation) and following amendments; •... -
Page 4: Control Board
• When the stove is operating, the surfaces, glass, handle and tubes become very hot: during operation do not touch these parts without adequate protection; • Keep/store the pellets in a cool dry place; • Keep the fuel and other inflammable materials off the stove. 2.0 Control board AL C AL F... - Page 5 6. Led AL F The led blinks in the event of a malfunction or alarm. 7. Led chrono-thermostat This means the automatic single or daily programming of the switching on or off of the stove is on. The automatic program- ming can be set only with the remote control (optional).
- Page 6 AL C AL F Please remember that the first lighting must be performed by our certified Authorized Assistance Centre (Law 37/2008) that verifies the installation and completes the guarantee. During the first lighting the environment should be well ventilated since during the first hours of operation unple- asant odours could develop due to the physical stabilizing of the paint and from the grease in the tubyère wrapping.
- Page 7 • After several minutes of ventilation the display will read “ON 1-2-3-4-5” and the room temperature, according to the power that has been programmed; • Once the programmed temperature is reached the display will read “ECO” and the room temperature; •...
- Page 8 OFF1 Please join the following procedure to set the functioning mode: Using this key you can set a single time schedu- le for the automatic switching off of the stove (program 1) Automatic Functioning Power 1 (on1) Power 2 (on2) Power 3 (on3) Using this key you can set a single time schedu- Power 4 (on4)
- Page 9 How to change the temperature You can change the temperature using the keys (2). The temperature range goes from a min. va- lue of 7°C to a max. value of 40°C. Once you have chosen the wished temperature, confirm your selection pressing temperature the key SEND (3).
- Page 10 Function turbo This function has been developed in the event you need to heat your room quickly, for example when you have just switched the stove on. When you choose this fun- ction, the stove will work at its max. power for a period of thirty minutes and the temperature will be automatically set at 30°C.
- Page 11 Function chrono-thermostat (available only through the remote control) With the function chrono-thermostat, you can schedule up to two automatic switching on and off of the stove per day. If you want to repeat the switching on and off every day, then you need to use the function AUTO too (as explained in the paragraph “Daily repeat AUTO”).
- Page 12 Automatic switching off OFF1 Press the key (1). You will see the hours and minutes and the symbol OFF1 blinking on the remote control. Use the keys OFF1 (2) and (3) to change the wished time (intervals of 10 minutes). To scroll the time faster, keep the keys (3) pressed.
- Page 13 4.1 How to replace the batteries of the remote control If you need to replace the batteries of the remote control, remove the back cover as shown in the picture. Replace the old batteries with the new ones respecting the pola- rity + and -.
- Page 14 5.1. Alarm codes COOL FIRE In the event of an even very short lack of current, the stove switches off. As soon as the power supply is back, the stove will start a cooling cycle and the display will show the words “Cool fire”.
-
Page 15: Cleaning And Maintenance
Distribution of air between front and ducting (where present) It is possible to adjust manually between the air distribution of the front panel and the distribution of the ducted air. To adjust the air leakage it is necessary to move the lever from the top-down. The more the lever is moved to the top, the more the air is directed on the front of the heater. - Page 16 6.1 Cleaning of the combustion chamber (once a month) The wiper is situated in the middle Activate 5/6 times the scraper back Remove the brazier and to clean it of the frontal grid. and forth. from any residue. For the extraction of the scraper use the appropriate fork.
- Page 17 6.2 Cleaning of the “T” fitting glass (to be carried out at least twice a year, starting at mid winter season) Raise the whole top. Unscrew the two retaining screws of the heater front. Turn the ash collection glass. Clean up the glass from the residues accumulated during the heater operation...
- Page 18 6.3 Cleaning the surfaces To clean the surfaces, use a rag dampened with water or with water and a neutral detergent. The use of aggressive detergents or thinners can damage the surfaces of the stove. Before using any detergent it is advisable to try it on a small section out of sight or contact the Authori- zed Assistance Centre for information regarding the product.
- Page 19 6.7 Daily cleaning by scraper With heater off and cold, activate 5-6 times the duct scraper of the heat exchange by stretching back and forth. Fig. 12: non-operating scraper. Fig. 11: operating scraper. 6.8 Cleaning of the flame beater Remove the flame beater from its seat and proceed with cleaning according to the following procedure: •...
- Page 20 6.9 Ash box Open the door and extract the ash box. Use a vacuum to remove all the ash deposited within. This operation must be performed more or less frequently de- pending on the quality of the pellets used (Fig. 14). 6.10 Cleaning the glass .
- Page 21 7.0 Replacing elements 7.1 Replacing the glass The stove is furnished with a 4 mm thick ceramic glass that is resistant to a thermal shock of 750°C; the glass can break only from a strong impact or from improper use. Do not slam the door or hit the glass.
- Page 22 NOTE...
- Page 23 NOTE...
- Page 24 Notes Company shall not be responsible for possible incorrect data caused by printing errors or error made in transcription and all figures and diagrams are for explanatory purposes only and relevant adjustment have to be made at the spot. In any case, it reserves the right to modify its products as deemed to be required and useful without any prior notification.
Need help?
Do you have a question about the CentroPelet ZS10 and is the answer not in the manual?
Questions and answers