
Related Manuals for MCZ stub


Summary of Contents for MCZ stub
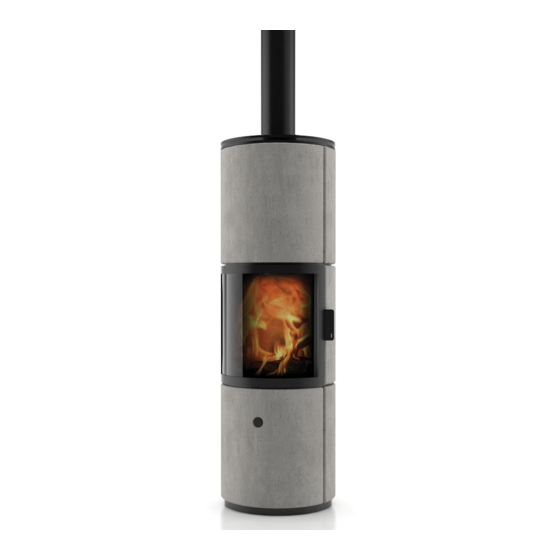
- Page 1 INSTALLATION AND USER GUIDE WOOD-BURNING STOVE STUB Translation of original instructions...
-
Page 2: Table Of Contents
2-INSTALLATION INSTRUCTIONS ............... 5 3-DIMENSIONS AND TECHNICAL CHARACTERISTICS ..........15 4-INSTALLATION AND ASSEMBLY ..............20 5-CERAMIC KIT PARTS ..................22 6-STORAGE TANK PARTS AND ASSEMBLY............26 7-STUB COATING ASSEMBLY ................28 8-STUB OVERNIGHT COATING ASSEMBLY ............32 9 - ASSEMBLING THE TOP ................36 10-OPERATION .....................39 11-MAINTENANCE AND CLEANING ..............43... -
Page 3: Introduction
No part of this manual can be translated into another language and/or altered and/or reproduced, even partially, in another form, by mechanical or electronic means, photocopied, recorded or similar, without prior written approval from MCZ Group Spa. The company reserves the right to make changes to the product at any time without prior notice. The proprietary company reserves its rights according to the law. -
Page 4: 1-Warnings And Warranty Conditions
1-WARNINGS AND WARRANTY CONDITIONS SAFETY PRECAUTIONS • Installation, functional verification and maintenance must only be performed by qualified or authorised personnel. • Install the product in accordance with Standards in force in the relative place, region or country. • This product is not intended for use by persons (including children) with reduced physical, sensory or mental capabilities, or lack of experience and knowledge, unless they have been given supervision or instruction concerning use of the appliance by a person responsible for their safety. - Page 5 1-WARNINGS AND WARRANTY CONDITIONS INFORMATION • Please contact the retailer or qualified personnel authorised by the company to resolve a problem. • Check and clean the smoke outlet pipes regularly (connection with the product). • The product is not a cooking appliance. • Keep this instruction manual in a safe place as it must accompany the product throughout its working life.
- Page 6 1-WARNINGS AND WARRANTY CONDITIONS INTERVENTION REQUEST The company declines all liability if the product and any other accessory is used incorrectly or altered without authorisation. All parts must be replaced with original spare parts. The request must be sent to the retailer who will forward it to the Technical Assistance Service. SPARE PARTS Only use original spare parts.
-
Page 7: 2-Installation Instructions
2-INSTALLATION INSTRUCTIONS The requirements stipulated in this chapter refer to the regulations of the Italian installation Standard UNI 10683. In any case, always comply with the regulations in force in the country of installation. THE OPERATING ENVIRONMENT For correct operation and even distribution of heat, the product must be placed where the air required for combustion can flow, in accordance with the installation regulations and the standards in force in the country of installation. - Page 8 2-INSTALLATION INSTRUCTIONS SAFE DISTANCES Non-flammable walls Flammable walls STUB OVERNIGHT A = 5 cm A = 5 cm B = 15 cm B = 25 cm If particularly delicate objects are present, such as furniture, curtains or sofas the distance of the product must be significantly increased.
- Page 9 2-INSTALLATION INSTRUCTIONS CONNECTING THE COMBUSTION AIR INLET PIPE The combustion air inlet does not necessarily have to be connected to the outside; this is only required if you wish to use Oyster technology. Always use pipes and fittings with appropriate seals that guarantee tightness. REAR VIEW OF THE PRODUCT.
- Page 10 2-INSTALLATION INSTRUCTIONS OUTDOOR AIR INLET Drill a hole on the outer wall close to the product with a minimum section of 100 cm² (13 cm in diameter or 12x12 cm if square, considering the protective grids), protected by a grid on the outside. The air inlet must also: • be protected with grilles, metal mesh, etc.
- Page 11 The smoke outlet pipe is designed by the company for the smoke to be expelled towards the top of the product. The smoke outlet can be moved and fitted at the back of the product. For STUB stoves, it is necessary to remove the two screws on the collar of the smoke fittings and turn it by 180°, while for STUB Overnight stoves it is necessary to purchase the rear smoke outlet fitting...
- Page 12 TOP HOLE COVER AND REAR SMOKE OUTLET FITTING (ACCESSORY) Given the option of moving the rear smoke outlet of the STUB Overnight stove, we created an accessory (available upon request) consisting of the smoke fitting and the top hole cover.
- Page 13 2-INSTALLATION INSTRUCTIONS CHIMNEY The chimney is the fundamental element for smoke expulsion and must therefore comply with the following requirements: • be waterproof and thermally insulated. • Be made of suitable materials that resist mechanical stress over time, heat, the effects of the combustion products and any possible condensation.
- Page 14 2-INSTALLATION INSTRUCTIONS EXAMPLES OF CHIMNEYS AISI 316 steel product with Refractory product with Traditional square-section clay Avoid products with an double chamber insulated insulated double chamber and product with insulating empty internal rectangular section with ceramic fibre or similar external lightweight concrete inserts.
- Page 15 2-INSTALLATION INSTRUCTIONS CHIMNEYPOT Often, if this factor is underestimated it hinders smooth "product system" operation. The draught of the chimney also depends on its chimneypot. In the case of an artisan product, it is very important for the four expulsion sections to be more than twice the internal section of the product.
- Page 16 2-INSTALLATION INSTRUCTIONS In the case of paired products, the solid combustibility or upper storey chimneypot must be at least 50 cm higher than the others in order to prevent the pressure from being transferred between the paired chimneypots. The chimneypot must not have any obstacles within a range of 10 metres, such as walls, slopes and trees. Otherwise, raise it by at least 1 m above the obstacle and in the case of other chimneypots nearby, leave a gap of at least 2 m.
-
Page 17: 3-Dimensions And Technical Characteristics
3-DIMENSIONS AND TECHNICAL CHARACTERISTICS STUFA STUB NATURAL WITH UPPER SMOKE OUTLET ø514 Technical Dept. - All rights reserved - Reproduction is prohibited... - Page 18 3-DIMENSIONS AND TECHNICAL CHARACTERISTICS STUFA STUB NATURAL WITH REAR SMOKE OUTLET AND REAR COMBUSTION AIR ø514 A = KNOCKOUT HOLE FOR 150 PIPE FOR REAR SMOKE OUTLET B = KNOCKOUT HOLE FOR 80 PIPE FOR AIR INLET...
- Page 19 3-DIMENSIONS AND TECHNICAL CHARACTERISTICS STUFA STUB OVERNIGHT WITH REAR SMOKE OUTLET AND REAR COMBUSTION AIR ø514 A = KNOCKOUT HOLE FOR 150 PIPE FOR REAR SMOKE OUTLET B = KNOCKOUT HOLE FOR 80 PIPE FOR AIR INLET Technical Dept. - All rights reserved - Reproduction is prohibited...
- Page 20 3-DIMENSIONS AND TECHNICAL CHARACTERISTICS STUFA STUB OVERNIGHT WITH UPPER SMOKE OUTLET ø514...
- Page 21 3-DIMENSIONS AND TECHNICAL CHARACTERISTICS TECHNICAL CHARACTERISTICS STUB NATURAL/OVERNIGHT Type of fuel Wood Hourly consumption 2.0 kg/h – 0.9 kg/h* Reloading/load time 45 minuti/1.5 kg* Nominal output power kW 7.2 (Kcal/h 6192) Minimum output power kW 3.5 (Kcal/h 3010) Efficiency 83,1%...
-
Page 22: 4-Installation And Assembly
Open the package and remove the boxes. Once the package is open, remove the two brackets that block the product to the pallet (Fig.4). Remove the two screws Aand the other three screws B that block the bracket to the pallet and set the product in the pre-selected place, making sure this complies with the requirements. FIG. 2 – PACKAGE CONTAINING REFRACTORY FIG. 3 – PACKAGE CONTAINING REFRACTORY FIG. 1 - STUB STRUCTURE PACKAGE PARTS AND BOX WITH SIDES, CERAMICS PARTS AND BOX WITH SIDES, CERAMICS AND TOP (STUB OVERNIGHT) AND TOP (STUB) - Page 23 4-INSTALLATION AND ASSEMBLY The product must always be handled in a vertical position and solely with a cart. Pay particular attention to the door and its glass, protecting them from mechanical knocks that would compromise their integrity. Always handle the product with care. If possible, unpack the product near the place of installation. The packaging materials are neither toxic nor harmful, and therefore no particular disposal measures are required.
-
Page 24: 5-Ceramic Kit Parts
5-CERAMIC KIT PARTS STUB VERSION WITH TOP SMOKE OUTLET BOTTOM CERAMIC PANEL FRAME FOR LEFT SIDE CERAMIC PANEL (B) SIDE CERAMIC PANEL SCREW IRON CERAMIC PANEL/FRAME CLAMP SCREWS SCREW SHOULDER RING FRAME FOR BOTTOM CERAMIC PANEL (A) TOP SUPPORT FRAME FOR RIGHT SIDE CERAMIC PANEL (B) - Page 25 5-CERAMIC KIT PARTS STUB VERSION WITH REAR COMBUSTION AIR AND/OR REAR SMOKE OUTLET BOTTOM CERAMIC PANEL FRAME FOR LEFT SIDE CERAMIC PANEL (B) SIDE CERAMIC PANEL SCREW IRON CERAMIC PANEL/FRAME CLAMP SCREWS SCREW SHOULDER RING FRAME FOR BOTTOM CERAMIC PANEL (A)
- Page 26 5-CERAMIC KIT PARTS STUB OVERNIGHT VERSION WITH TOP SMOKE OUTLET AND NON-DUCTED COMBUSTION AIR BOTTOM CERAMIC PANEL SCREW TOP CERAMIC PANEL SCREW SIDE CERAMIC PANEL IRON CERAMIC PANEL/FRAME CLAMP SCREWS SCREW SHOULDER RING FRAME FOR RIGHT SIDE CERAMIC PANEL (C)
- Page 27 5-CERAMIC KIT PARTS STUB OVERNIGHT VERSION WITH REAR DUCTED COMBUSTION AIR AND REAR SMOKE OUTLET BOTTOM CERAMIC PANEL SCREW TOP CERAMIC PANEL SCREW SIDE CERAMIC PANEL IRON CERAMIC PANEL/FRAME CLAMP SCREWS SCREW SHOULDER RING FRAME FOR RIGHT SIDE CERAMIC PANEL (C)
-
Page 28: 6-Storage Tank Parts And Assembly
6-STORAGE TANK PARTS AND ASSEMBLY The storage tank parts are provided with the ceramic kit of the STUB OVERNIGHT stove: CLADDING ASSEMBLY Now it is possible to mount the storage tank parts. The storage tank consists of: STORAGE TANK A1 PART NO. - Page 29 6-STORAGE TANK PARTS AND ASSEMBLY SIDE VIEW FRONT VIEW REAR VIEW Technical Dept. - All rights reserved - Reproduction is prohibited...
-
Page 30: 7-Stub Coating Assembly
Installation of the ceramic side panels does not present any particolar difficulties. The main warning is to install the side panels only when the product has been placed in the chosen premises. Moving the product with the sides assembled might damage the flooring. STUB VERSION WITH REAR OR UPPER AIR OUTLET Central panel assembly. - Page 31 7-STUB COATING ASSEMBLY FIG.3 CENTRAL PANEL ASSEMBLY FIG.4 CENTRAL PANEL FIXING TO METAL PROFILES IMPORTANT: If the holes used to secure the central panel “A” do not match the ones of the side profiles, try to loosen the screws to position the structure so that it is perpendicular to the base.
- Page 32 7-STUB COATING ASSEMBLY Before going ahead with the installation of the side panels, it is necessary to centre and secure the air adjustment knob. Use one hand to hold the knob in axis (at the front) and with the other hand tighten the screw at the back of the stove.
- Page 33 7-STUB COATING ASSEMBLY stove and secure them at the top with the screw “I” supplied (FIG.7) FIG.7 SIDE PANELS UPPER FIXING Rear panel assembly in the event of rear air outlet. If there is a top smoke outlet, the two side panels meet at the back and are secured (figure 11) at the top with the two screws “I”. For the rear smoke outlet, insert the panel “N”...
-
Page 34: 8-Stub Overnight Coating Assembly
8-STUB OVERNIGHT COATING ASSEMBLY STUB OVERNIGHT VERSION WITH REAR OR TOP SMOKE OUTLET. Central panel assembly. First of all take the two side profiles and fix them to the stove structure via the screws supplied (four screws on the right and five on the left) FIG.1. - Page 35 8-STUB OVERNIGHT COATING ASSEMBLY FIG.3 CENTRAL PANEL ASSEMBLY FIG.4 CENTRAL PANEL FIXING TO METAL PROFILES IMPORTANT: If the holes used to secure the central panel “A” do not match the ones of the side profiles, try to loosen the screws to position the structure so that it is perpendicular to the base.
- Page 36 8-STUB OVERNIGHT COATING ASSEMBLY Before going ahead with the installation of the side panels, it is necessary to centre and secure the air adjustment knob. Use one hand to hold the knob in axis (at the front) and with the other hand tighten the screw at the back of the stove.
- Page 37 8-STUB OVERNIGHT COATING ASSEMBLY At the top, fix the panels to the structure with the screws “I” supplied (FIG.7). FIG.7 SIDE PANELS UPPER FIXING Rear panel assembly in the event of rear air outlet. If there is a top smoke outlet, the two side panels meet at the back and are secured (figure 11) at the top with the two screws “I”. For the rear smoke outlet, insert the panel “P”...
-
Page 38: Assembling The Top
9 - ASSEMBLING THE TOP STUB STOVE WITH UPPER OR REAR AIR OUTLET Place the top support “M” on the stove, make sure the pins S underneath the top support go into the holes on the frame C of the side ceramic panels and that the spacer “K”... - Page 39 9 - ASSEMBLING THE TOP K DETAIL Technical Dept. - All rights reserved - Reproduction is prohibited...
- Page 40 9 - ASSEMBLING THE TOP STUB OVERNIGHT STOVE WITH TOP OR REAR SMOKE OUTLET Fix top support “G” to the structure via the four screws “M”. Then take top “L” and making sure that pins S placed under cover B enter the...
-
Page 41: 10-Operation
10-OPERATION START-UP PRECAUTIONS Make sure you have read and fully understood the contents of this instruction manual. Remove all components that could burn from the firebox and door (instructions and various adhesive labels). Remove the stickers from the ceramic glass otherwise the high temperature could melt them and cause irreparable damage to the glass. The product can be positioned at an angle or against the wall. - Page 42 10-OPERATION A high percentage of moisture causes condensation in the smoke duct, thereby causing an alteration to the draught and generating smoke and considerable soot deposits in the firebox, on the glass of the door and on the product, with the subsequent risk of this catching fire.
- Page 43 10-OPERATION ADJUSTING THE AIR WITH THE PUSH-PULL SYSTEM Press the air adjustment knob, which will slightly emerge from its seat thanks to a spring and it can then be turned to the left or right according to the increase or decrease in combustion air that is to enter the combustion chamber. The primary and secondary air intake is pre-set;...
- Page 44 10-OPERATION FIRST IGNITION A NOTE REGARDING PAINT EXHALATION It is recommended to air the room before the first start-up to evacuate any smells and/or fumes emitted by the paint during the drying and hardening phase due to the heat. Do not stand close to the stove and as mentioned, air the room. The smoke and smell of paint will disappear after about an hour of operation, however, remember they are not harmful in any case.
-
Page 45: 11-Maintenance And Cleaning
11-MAINTENANCE AND CLEANING All the cleaning operations of all parts must be performed with a completely cold product. CLEANING PERFORMED BY THE USER CLEANING THE GLASS The glass can be cleaned with specific products (see our price list), with a cloth soaked in a water and ammonia solution or a little white ash and a sheet of newspaper. - Page 46 11-MAINTENANCE AND CLEANING CLEANING STAINLESS STEEL AND SATIN-FINISHED SURFACES Usually these surfaces do not need any special treatment and avoiding cleaning them with abrasive materials is sufficient. For stainless and matt steel surfaces, we recommend you clean these with a paper towel or a dry, clean cloth dipped in detergent made with non ionic surfactants (<5%);...
- Page 47 Technical Dept. - All rights reserved - Reproduction is prohibited...
- Page 48 MCZ GROUP S.p.A. Via La Croce n°8 33074 Vigonovo di Fontanafredda (PN) – ITALY Telephone: 0434/599599 r.a. Fax: 0434/599598 Internet: www.mcz.it e-mail: mcz@mcz.it 8901227200 REV.1 15/01/2013...
Need help?
Do you have a question about the stub and is the answer not in the manual?
Questions and answers