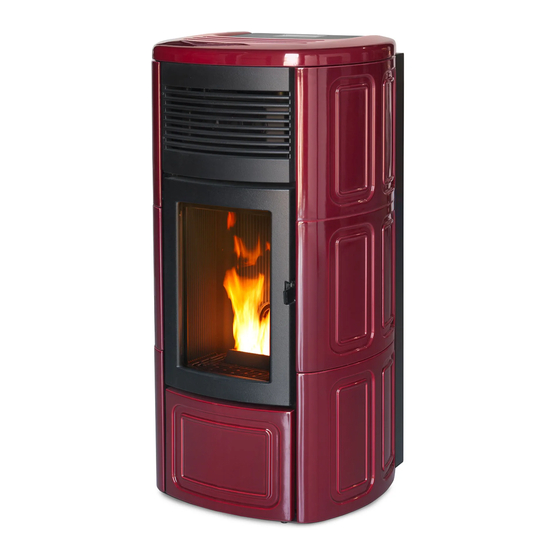
MCZ SUITE Installation And Use Manual

MCZ SUITE Installation And Use Manual

Hide thumbs Also See for SUITE:
Table of Contents

Advertisement

EN
INSTALLATION AND
USE MANUAL
8901166500

Advertisement

Table of Contents
loading

Summary of Contents for MCZ SUITE

  • Page 1 INSTALLATION AND USE MANUAL 8901166500...
  • Page 2: Table Of Contents

    Technical characteristics ......................20 3.1.7. PREPARATION AND UNPACK ING ....................22 3.2. CONNECTIONS OF HOT AIR DUCTS FOR SUITE/CLUB/MUSA/NIMA AND TOBA COMFORT AIR MODEL 25 3.3. INSTALLATION OF CERAMIC CLADDING FOR SUITE AND CLUB............26 3.4. Assembly of the lower panel – Suite and Club Stoves ..............26 3.4.1.
  • Page 3 CLEANING THE LOWER COMPARTMENT ..................60 8.2.2. Shutting the stove down (end of season) .................60 8.2.3. Check of internal components ....................60 8.2.4. 9. PROBLEMS / CAUSES / SOLUTIONS ....................62 10. ELECTRICAL DIAGRAMS ........................64 Introduction Technical service - Rights reserved MCZ Group S.p.A. - Reproduction prohibited...
  • Page 4: Installation And Use Manual Page

    INTRODUCTION Dear Customer, We wish to thank you for choosing an MCZ product, specifically a stove of the MCZ pellet line. In order to get the best performance from your stove and to enjoy to the full the warmth and the sense of well-being which...
  • Page 5: Warnings And Guarantee Conditions

    Danger of fire.  All responsibility for improper use is taken entirely by the user and such use relieves MCZ of any civil or criminal responsibility.  Any kind of tampering or unauthorised substitution of...
  • Page 6: Operating Warnings

     Do not light the stove with flammable materials if the ignition system breaks down. Warnings and guarantee conciliations Technical service - Rights reserved MCZ Group S.p.A. - Reproduction prohibited...
  • Page 7: Important Information For Correct Disposal Of The Product In Accordance With Ec Directive 2002/96/Ec

    INFORMATION  In case of any problems, get in touch with your dealer, or a qualified engineer authorised by MCZ, and if a repair is necessary, insist on the use of original spare parts.  Use only the fuel recommended by MCZ (for Italy pellets...
  • Page 8: Limitations

    MCZ's specification (see the relevant chapters in this user manual). MCZ refuses to accept any responsibility for any damage which may be caused, directly or indirectly, by persons, animals or things in consequence of the failure to observe all the prescriptions laid down in the instruction booklet, especially those concerning warnings on the subject of installation, use and maintenance of the appliance.
  • Page 9: Theoretical Notions For Installation

    Contents: 100% untreated wood, with no added bonding  substances (bark percentage 5% max) Packaging: in sacks made from ecologically compatible or  biologically decomposing material Theoretical notions for installation Technical service - Rights reserved MCZ Group S.p.A. - Reproduction prohibited...
  • Page 10: Precautions For Installation

    The holes for the passage of the smoke pipe and for the intake of air from outside should be made before positioning the stove unit. Theoretical notions for installation Technical service - Rights reserved MCZ Group S.p.A. - Reproduction prohibited...
  • Page 11: Operating Area

    If the floor is wooden, we recommend the use of a floor guard in compliance with the applicable standards in force in the country of installation. Theoretical notions for installation Technical service - Rights reserved MCZ Group S.p.A. - Reproduction prohibited...
  • Page 12: Connection To The External Air Intake

    The combustion chamber works in low pressure. The smoke duct for Combustion air intake the discharge of fumes will also be under low pressure when connected to an efficient flue pipe as directed. Theoretical notions for installation Technical service - Rights reserved MCZ Group S.p.A. - Reproduction prohibited...
  • Page 13 MUST BE USED IT IS ALSO ADVISABLE NOT TO EXCEED 6 METRES IN LENGTH WITH THE PIPE Ø 80 mm Example of pellet stove installation Theoretical notions for installation Technical service - Rights reserved MCZ Group S.p.A. - Reproduction prohibited...
  • Page 14: Connection To The Flue Pipe

    You must ensure that a windproof cowl should be fitted which complies with the standards in force. 1) Windproof cowl 2) Flue pipe 3) Inspection Theoretical notions for installation Technical service - Rights reserved MCZ Group S.p.A. - Reproduction prohibited...
  • Page 15: Operating Problems Caused By Draught Defects In The Flue

    Hazardous conditions can only be overcome by suitable setting-up of the stove carried out by qualified MCZ personnel. Theoretical notions for installation Technical service - Rights reserved MCZ Group S.p.A. - Reproduction prohibited...
  • Page 16: Installation And Assembly

    3.1.1. Dimensions CLUB mod. AIR – COMFORT AIR COMFORT AIR HOT AIR OUTLET Ø80 Ø48 COLD AIR INLET 3.1.2. Dimensions SUITE mod. AIR – COMFORT AIR COMFORT AIR HOT AIR OUTLET Ø80 Ø48 Installation and assembly Technical service - Rights reserved MCZ Group S.p.A. - Reproduction prohibited...
  • Page 17: Dimensions Musa Mod. Air- Comfort Air

    3.1.3. Dimensions MUSA mod. AIR- COMFORT AIR COMFORT AIR HOT AIR OUTLET Ø80 Ø48 COLD AIR INLET 3.1.4. Dimensions TOBA mod. AIR-COMFORT AIR Ø80 Ø48 Installation and assembly Technical service - Rights reserved MCZ Group S.p.A. - Reproduction prohibited...
  • Page 18: Dimensions Sagar Mod. Air

    PELLET STOVES Chapter 3 INSTALLATION AND USE MANUAL page 3.1.5. Dimensions SAGAR mod. AIR Ø80 Ø48 Installation and assembly Technical service - Rights reserved MCZ Group S.p.A. - Reproduction prohibited...
  • Page 19: Dimensions Nima Mod. Comfort Air

    The hole in CLUB, SUITE, MUSA, NIMA and TOBA stoves for hot air outlet, located at the top to the rear of the stove, is only present for the COMFORT AIR model. Installation and assembly Technical service - Rights reserved MCZ Group S.p.A. - Reproduction prohibited...
  • Page 20: Technical Characteristics

    230 Volt / 50 Hz Net weight 160 Kg. Weight with packaging 170 Kg. Technical characteristics CLUB – SUITE – MUSA - NIMA Mod. COMFORT AIR Overall thermal power Max. 11,5 kw / 9890 kcal Overall thermal power Min. 2,4 kw / 2064 kcal...
  • Page 21 * Data that may vary depending on the type of pellets used. **Heatable volume based on demand of cal/m 40-35-30 (respectively 40-35-30 Kcal/h for m Appliance suitable for installation in a shared flue. Installation and assembly Technical service - Rights reserved MCZ Group S.p.A. - Reproduction prohibited...
  • Page 22: Preparation And Unpack Ing

    Chapter 3 INSTALLATION AND USE MANUAL page PREPARATION AND UNPACK ING 3.2. Suite, Club and NIMA stoves are delivered in two packages: The first contains the stove  The second contains the ceramic cladding. (Fig. 2)  The Musa stove is only delivered in one set of packaging composed of: The first pack contains the stove ...
  • Page 23 Position the stove without its cladding and connect it to the flue pipe. Once the operations for connection are complete, assemble the cladding (ceramics or steel sides). Installation and assembly Technical service - Rights reserved MCZ Group S.p.A. - Reproduction prohibited...
  • Page 24 Piedino J 1. Turn the feet clockwise to lower the stove 2. Turn feet counter- clockwise lower stove Installation and assembly Technical service - Rights reserved MCZ Group S.p.A. - Reproduction prohibited...
  • Page 25: Connections Of Hot Air Ducts For Suite/Club/Musa/Nima And Toba Comfort Air Model

    Connect the soundproofed connection F (optional) that makes the output from square to round, and then make the various connections with appropriate MCZ pipes and connections to divert the flow in more hot air diffusers (120x120 mm nozzle). These ducts may also be walled up.
  • Page 26: Installation Of Ceramic Cladding For Suite And Club

    Assembly of the lower panel – Suite and Club Stoves 3.4.1. The stove is delivered with all the ceramics packed. Therefore, before assembling the side tiles and the top, it is necessary to insert the lower panel.
  • Page 27: Installation Of Side Tiles

    The part underneath is provided with four small cavities at the rubber supports indicated in the figure 10 Figura 9 – Installation of side tiles Figura 10 - Supports for installation of ceramic top Installation and assembly Technical service - Rights reserved MCZ Group S.p.A. - Reproduction prohibited...
  • Page 28: Assembly Of Sides On The Musa Stove

    The rear side must be fixed to the stove's structure using the four screws G provided. When both steel sides A are assembled, replace the cast iron top. REAR VIEW Installation and assembly Technical service - Rights reserved MCZ Group S.p.A. - Reproduction prohibited...
  • Page 29: Assembly Of Ceramic Side Tiles Onto Nima Stove

    When all 8 ceramics have been positioned (4 per side) reposition the top by simply resting in on the rubber supports on the upper part of the stove. Installation and assembly Technical service - Rights reserved MCZ Group S.p.A. - Reproduction prohibited...
  • Page 30: Assembling The Frontal/Side Panel And Top On The Toba Stove

    (a) found on the base of the stove. Once in position secure the side panel onto to upper part of the stove using the two screws (b-c). Installation and assembly Technical service - Rights reserved MCZ Group S.p.A. - Reproduction prohibited...
  • Page 31 The top lies on the upper part of the stove making sure that the holes on the top enter the plugs A-B on the side panels. Installation and assembly Technical service - Rights reserved MCZ Group S.p.A. - Reproduction prohibited...
  • Page 32 On the part in front of the top there is a grille G for hot air output. This grill G has tilted tabs which guide the air in front or behind the stove depending on how it is positioned. Installation and assembly Technical service - Rights reserved MCZ Group S.p.A. - Reproduction prohibited...
  • Page 33: Assembling Side Panels And Top On The Sagar Stove

    C-D. Alignment of the steel side panels with the structure of the stove (K) is carried out by adjusting the feet. Installation and assembly Technical service - Rights reserved MCZ Group S.p.A. - Reproduction prohibited...
  • Page 34 ( lift the steel cover and secure the tile internally using screws a-b-c-d) whereas the other one is laid on the apposite rubbers e-f-g-h found on the top of the stove. Installation and assembly Technical service - Rights reserved MCZ Group S.p.A. - Reproduction prohibited...
  • Page 35: Installation Of Air Filter

    In order for the stove to operate correctly, it is essential that the door be closed completely. In Suite/Club/Musa stoves the door is opened using the hook on the door which must be lifted by the cool hand supplied (fig.11); whereas for the Sagar/Toba/Nima stoves slide the cool hand onto door hook, lift and pull (fig.12).
  • Page 36: Operation

    Try to get familiar with commands given from the control panel or remote control. Try to memorize the messages that the stove provides on the display of the remote control. Operation Technical service - Rights reserved MCZ Group S.p.A. - Reproduction prohibited...
  • Page 37: Pre-Lighting Check

    When filling, do not let the sack of pellets touch any hot surfaces. Do not place any type of fuel in the hopper other than pellets that are compliant with the specifications provided previously. Operation Technical service - Rights reserved MCZ Group S.p.A. - Reproduction prohibited...
  • Page 38: Lcd Remote Control

    Graphic appearance 5.2. In the instructions herein, we will often refer to the indications of the buttons shown in the figure. For simplicity, always keep the figure to hand. Operation Technical service - Rights reserved MCZ Group S.p.A. - Reproduction prohibited...
  • Page 39: Operation Of The Remote Control

    AUTO temperature. The ventilation can be adjusted to 5 levels + auto (see paragraph 5.6.1). Figure 2 FIG.2 Operation Technical service - Rights reserved MCZ Group S.p.A. - Reproduction prohibited...
  • Page 40: Timer Mode (Indicated By Timer)

    (button A) or the next valid time frame is started. The use the TIMER combined with ECO mode requires good knowledge of the operating logic FIG.5 of the product. Operation Technical service - Rights reserved MCZ Group S.p.A. - Reproduction prohibited...
  • Page 41: Various Settings

    (figure 7). To disable the SLEEP function simply access the adjustment setting, decrease the time until dashes appear and confirm. FIG.7 Operation Technical service - Rights reserved MCZ Group S.p.A. - Reproduction prohibited...
  • Page 42: Timer Time Frame Display

    TIMER If the OFF option is confirmed the TIMER disables and the product returns to TIMER ECO mode operation without any time frames enabled. FIG.9 Operation Technical service - Rights reserved MCZ Group S.p.A. - Reproduction prohibited...
  • Page 43: Emergency Panel

    G. button to connect the stove to a new remote control (by means of a procedure explained below) TO OPERATE THE STOVE WITH THE REMOTE CONTROL, SELECTOR "D" MUST BE PLACED ON “REMOTE” Operation Technical service - Rights reserved MCZ Group S.p.A. - Reproduction prohibited...
  • Page 44: Start-Up/Shutdown From Emergency Panel

    To shut down the stove, place selector “D” to OFF. Once the remote control is working again, remember to put selector "D" back in the "REMOTE" position. Otherwise the stove will disregard inputs from the remote control. Operation Technical service - Rights reserved MCZ Group S.p.A. - Reproduction prohibited...
  • Page 45: Safety Devices And Alarms

    Operation Technical service - Rights reserved MCZ Group S.p.A. - Reproduction prohibited...
  • Page 46: Alarm Signalling

    The smoke probe is defective and does not Contact an authorized service centre to replace the properly measure the temperature of the component. discharge smoke Operation Technical service - Rights reserved MCZ Group S.p.A. - Reproduction prohibited...
  • Page 47 Periodic maintenance warning before the maintenance have elapsed and a new maintenance intervention is necessary. Contact a specialist MCZ technician. Operation Technical service - Rights reserved MCZ Group S.p.A. - Reproduction prohibited...
  • Page 48: Exiting Alarm Condition

    MCZ technician). Only after the cause of the blockage has been permanently eliminated can a fresh attempt to relight the stove be made. Operation Technical service - Rights reserved MCZ Group S.p.A. - Reproduction prohibited...
  • Page 49: Maintenance And Cleaning

    It is however advisable not to let it exceed 2 or 3 days. Once the operation is finished, reinsert the ash drawer below the grate making sure it is well inserted Cleaning the ash collection compartment Maintenance and cleaning Technical service - Rights reserved MCZ Group S.p.A. - Reproduction prohibited...
  • Page 50: Cleaning The Glass

    ATTENTION! Never operate the stove without the air filter. MCZ shall not be held liable for damage to internal components if this instruction is not followed. Maintenance and cleaning Technical service - Rights reserved MCZ Group S.p.A. - Reproduction prohibited...
  • Page 51: Periodic Cleaning By A Specialised Technician

    P, lift it slightly and extract the fans. 8. Remove the exchanger O by unscrewing the 4 screws that secure it Clean and refit all the components by using a new front gasket. Maintenance and cleaning Technical service - Rights reserved MCZ Group S.p.A. - Reproduction prohibited...
  • Page 52 PELLET STOVES Chapter 5 INSTALLATION AND USE MANUAL page Cleaning the upper exchanger (Musa Comfort Air stove) FRONT GASKET Maintenance and cleaning Technical service - Rights reserved MCZ Group S.p.A. - Reproduction prohibited...
  • Page 53: Suite And Club Stove (Ceramic Sides) Comfort Air Version

    8. Remove the exchanger O by unscrewing the four screws that secure it Clean and refit all the components by using a new front gasket. Cleaning the upper exchanger (Suite and Club stove) Maintenance and cleaning Technical service - Rights reserved MCZ Group S.p.A. - Reproduction prohibited...
  • Page 54 Cleaning the upper exchanger (Suite and Club stove) Using a stiff rod or a bottle brush, scrape the inner walls of the fire box so that the ashes drop into the part below. Maintenance and cleaning Technical service - Rights reserved MCZ Group S.p.A. - Reproduction prohibited...
  • Page 55: Nima Stove Version Comfort Air

    Clean and refit all the components using a new front gasket F. Using a stiff rod or a bottle brush, scrape the inner walls of the fire box so that the ashes drop into the part below. Maintenance and cleaning Technical service - Rights reserved MCZ Group S.p.A. - Reproduction prohibited...
  • Page 56: Suite And Club Stove (Ceramic Sides) Air Version

    6. Remove the exchanger O by unscrewing the four screws that secure it Clean and refit all the components by using a new front gasket. FRONT GASKET Cleaning the upper exchanger (Suite and Club stove) Maintenance and cleaning Technical service - Rights reserved MCZ Group S.p.A. - Reproduction prohibited...
  • Page 57: Sagar Stove Version Air

    6. Remove exchanger E by unscrewing the four screws Clean and refit all the components using a new front gasket F. Cleaning the upper exchanger Sagar stove (Air version) Maintenance and cleaning Technical service - Rights reserved MCZ Group S.p.A. - Reproduction prohibited...
  • Page 58: Toba Stove Air Version

    3. Remove the exchanger O by unscrewing the four screws that secure it Clean and refit all the components using a new front gasket C. Cleaning the upper exchanger Toba stove (Air version) Maintenance and cleaning Technical service - Rights reserved MCZ Group S.p.A. - Reproduction prohibited...
  • Page 59: Toba Stove Comfort Air Version

    5. Remove the exchanger I and gasket L Clean and refit all the components using a new front gasket L. Cleaning the upper exchanger Toba stove (Comfort Air version) Maintenance and cleaning Technical service - Rights reserved MCZ Group S.p.A. - Reproduction prohibited...
  • Page 60: Cleaning The Lower Compartment

    We recommend that an annual maintenance service is carried out, preferably under a programmed service contract. The essential part of this service is a visual and functional check on the internal components: Maintenance and cleaning Technical service - Rights reserved MCZ Group S.p.A. - Reproduction prohibited...
  • Page 61 ● Glass ● Lower heat exchanger ● Complete exchanger ● Smoke duct ● Door seal ● ● Air filter ● Flue pipe ● Remote control battery Maintenance and cleaning Technical service - Rights reserved MCZ Group S.p.A. - Reproduction prohibited...
  • Page 62: Problems / Causes / Solutions

     Check the state of the door gaskets.  Pellets damp or unsuitable.  Change the type of pellet.  Smoke extractor motor broken.  Check the motor and replace if necessary. Problems/ causes/ solutions Technical service - Rights reserved MCZ Group S.p.A. - Reproduction prohibited...
  • Page 63 The operations marked in bold type must be carried out by specialised MCZ personnel. The manufacturer refuses to accept any responsibility and the guarantee lapses if this condition is not respected. Problems/ causes/ solutions Technical service - Rights reserved MCZ Group S.p.A. - Reproduction prohibited...
  • Page 64: Electrical Diagrams

    6. Ignition plug 12. Air flow sensor 7. Flue-gas extractor fan N.B. The electrical wiring of the single components includes pre-wired connectors which are of different sizes. Electrical diagrams Technical service - Rights reserved MCZ Group S.p.A. - Reproduction prohibited...
  • Page 65 Unit 11, Warrenpoint Enterprise Centre Newry Road, Warrenpoint Co.Down, BT34 3LA Tel: + 44 28 417 53031 Email: info@nutechrenewables.com www.NuTechrenewables.com MCZ GROUP S.p.A. Via La Croce n°8 33074 Vigonovo di Fontanafredda (PN) – ITALY Telephone: 0434/599599 r.a. Fax: 0434/599598 Internet: www.mcz.it...

This manual is also suitable for:

ClubMusaTobaNimaSagar

Table of Contents