
Related Manuals for Chainway C3000


Summary of Contents for Chainway C3000
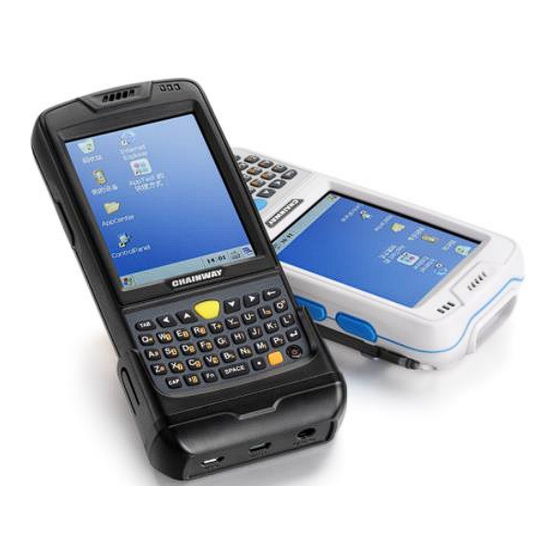
- Page 1 C3000 Handheld Terminal User Manual Shenzhen Chainway Information Technology Co., Ltd...
-
Page 2: Table Of Contents
CATALOGUE CHAPTER 1 Overview ......................- 5 - 1.1 Technical Parameters ....................- 5 - 1.2 Feature and Structure ....................- 8 - 1.3 Keyboard ........................- 9 - 1.4 Standard Accessories ....................- 10 - 1.5 Optional Accessories ....................- 11 - CHAPTER 2 Getting Started .................... - Page 3 8.1 Equipment and System Issues ................... - 54 - 8.2 Scanning Issues ......................- 54 - 8.3 RFID Issues ......................... - 55 - 8.4 Network and Communication Issues ................ - 55 - 8.5 Others .......................... - 55 - CHAPTER 9 AC Adapter & Battery Safety ................- 56 - Appendix 1 Code Types of 1D Barcode Scanner ..............
- Page 4 The software is provided strictly on an “as is” basis. All software, including firmware, furnished to the user is on a licensed basis. Chainway grants to the user a non-transferable and non-exclusive license to use each software or firmware program delivered hereunder (licensed program).
-
Page 5: Chapter 1 Overview
C3000 integrates 1D or 2D barcode scan engine, RFID HF, UHF multiple frequency read/write module, Bluetooth, WIFI, GPRS, GPS communication methods, 5MP auto-focus camera, etc. With C3000, workers in every walk of life (such as logistic expressage personnel, medical care personnel in the hospital, retail management... - Page 6 Electrostatic Discharge +/-15kv VDC air discharge, +/-8KV VDC direct discharge, +/-8KV VDC indirect discharge (ESD) Programming Environment Operating System Windows Embedded CE 6.0 Chainway Software Development Kit Language C++, C#, VB.NET Tool Visual Studio 2005/2008 Data Collection 1D Linear scanner ( SE655 CCD or SE955 laser);...
- Page 7 UHF: (Optional) Operating: 840~960MHZ (customizable) CN: 840~845MHZ CN: 920~925MHZ EU: 865~868 (ETSI EN 302 208) Protocol: EPC C1 GEN2/ISO18000-6C Read range up to: 2.0m Antenna: right-hand polarization (3dbi) Power: 1W (+10dBm ~ +30dBm) Wireless Data Communications WIFI: muRata® Protocol: IEEE802.11b/g; Data Rates: 802.11b max 11Mbps;...
-
Page 8: Feature And Structure
1.2 Feature and Structure Speaker Right Button Left Button Keyboard Power Button Pic 1-2-1 C3000 Front... -
Page 9: Keyboard
Barcode Scan Engine Stylus Camera RFID Sensing Zone Extension Screw Battery Battery Lock Pic 1-2-2 C3000 Back USB Port Serial Port DC Power IO Extension Slots(13pin) Pic 1-2-3 C3000 Bottom 1.3 Keyboard There are two optional types including QWERT and numeric keyboards. -
Page 10: Standard Accessories
Pic 1-3-1 C3000 QWERT Keyboard Numeric Keyboard: 24 silicon buttons and 3 side buttons for customization. Pic 1-3-2 C3000 Numeric Keyboard 1.4 Standard Accessories Name Quantity Description Picture AC Adapter Battery recharging USB Cable Synchronization and battery recharging... -
Page 11: Optional Accessories
Stylus Touch screen operation Li-ion polymer battery, with Battery 3200mha capacity USB port, UART port and DC IO Slot port 1.5 Optional Accessories Carrying Case: being ideal for outdoor using; Serial Cable: communicating with the PC;... - Page 12 Docking Station: Synchronizing with PC, and battery recharging. ...
-
Page 13: Chapter 2 Getting Started
CHAPTER 2 Getting Started 2.1 Battery Exchange Operating Steps: (Pic 2-1-1) Ensure the device is in non-working or recharging status, and unlock the battery cover; Remove the battery cover as the direction of ③; Take out the battery lightly; Install the new battery as the direction of ⑤; Lock the battery cover as the direction of ⑥. -
Page 14: Tf Card Installation
2.2 TF Card Installation Pic 2-2-1 Operating Steps: 1) Ensure the device is in non-working or recharging status; 2) Unlock the battery cover; 3) Take out the battery; 4) Install the TF card carefully as the direction of Pic 2-2-1; 5) Install the battery and lock the battery cover. -
Page 15: Battery Recharging
2) Unlock the battery cover; 3) Take out the battery; 4) Install the SIM card; 5) Install the battery and lock the battery cover; 2.4 Battery Recharging Three methods to charge the battery: 1) Use AC Adapter to charge by 220V AC power sockets; 2) Use USB cable to charge by connecting with the PC;... -
Page 16: Suspend/Shutdown/Restart
Pic 2-5-1 2.6 Suspend/Shutdown/Restart Suspend The button can be pressed to switch the status including Suspend/Shutdown/Restart. When suspending, the screen would be dark and all modules would stop working. The device would enter the suspend mode when being in non-working status after a specified time automatically to decrease the consumption. -
Page 17: Taskbar
Note: It is better to suspend it when charging, which would take less time. Please do not press this button frequently within a short period of time, otherwise it may cause damages to the screen and data. 2.7 Taskbar The taskbar is on the bottom right of the screen as Pic 2-7-1. Pic 2-7-1 Start menu : The menus including multiple applications can be viewed and opened as Pic... -
Page 18: Desktop
Pic 2-7-5 Clock : Show the current time, and ‘Date/Time Properties’ set, it can also be set by ‘Control Panel->Date/Time’. The showing can be enabled/disabled by ‘ ->Settings->Task and Start Memu’. Pic 2-7-6 and Pic 2-7-7. Pic 2-7-6 Pic 2-7-7 2.8 Desktop The desktop displays the normal icons and shortcuts which we can select efficiently. -
Page 19: Restart
2.9 Restart Press the power button for 10 seconds, and the device would restart automatically as Pic 2-9-1 Pic 2-9-1... -
Page 20: Chapter 3 System Setting
CHAPTER 3 System Setting Click , and select ‘Settings’ to enter the interface of ‘Control Panel. Pic 3-1 Pic 3-2 The detailed setting applications are listed as follows: Application Description Set internet options such as homepage, privacy, security etc. Specify the method connecting with PC. Recalibrate the screen Storage management, including HDD and TF cards. - Page 21 Set keyboard properties. Set password for system Regional settings, customized regions, user interface/input language. Adjust current time, current date, and change time zone. Select and remove programs. Switch input method. View properties of mouse. Change the owner information Network and dial-up connections. Used for WiFi or GPRS connecting configuration. Adjust volume and sounds.
-
Page 22: Internet
Adjust dialing properties. WLAN setting. Configure wireless network. Certificate information. Switch the three USB connection modes including Storage Card For U Disk, Flash Dish For U Disk and Activesync Note: Please do not modify the items not mentioned above unless being professional. 3.1 Internet Internet settings including ‘General/Connection/Security/Privacy/Advanced/Popups’... -
Page 23: Pc Connection
Pic 3-1-3 Pic 3-1-4 Pic 3-1-5 Pic 3-1-6 3.2 PC Connection PC Connection Properties can be set by ‘Control Panel->PC Connection’ as Pic 3-2-1 and Pic 3-2-2:... -
Page 24: Storage Manage
Pic 3-2-1 Pic 3-2-2 3.3 Storage Manage Storage Manager can be set by ‘Control Panel->Storage Manager’ as Pic 3-3-1 where the operations including formating and dismounting can be done: Pic 3-3-1 3.4 Power Power properties cannot be set by ‘Control Panel->Power’. Power properties including ‘Battery/Schemes/Device Status’... -
Page 25: Keyboard
Pic 3-4-1 Pic 3-4-2 3.5 Keyboard Keyboard Properties can be set by ‘Control Panel->Keyboard’ as Pic 3-5-1: --> Pic 3-5-1 3.6 Regional Settings Regional and Language settings can be set by ‘Control Panel->Regional Settings’ as Pic 3-6-1. - Page 26 Pic 3-6-1 Language (Pic 3-6-2) can be selected when the multiple languages are supported, but the default is recommended. Pic 3-6-2 Input: the input language can be set as Pic 3-6-3 once they are installed in the OS as Pic 3-6-3:...
-
Page 27: Date/Time
Pic 3-6-3 3.7 Date/Time Date/Time/Tim Zone can be set by ‘Control Panel->Date/Time’ as Pic 3-7-1. Pic 3-7-1 3.8 Remove Programs The installed programs can be removed by ‘Control Panel->Remove Programs’, the working principle is the same as PC. Pic 3-8-1... -
Page 28: Input Panel
Pic 3-8-1 3.9 Input Panel Input Panel including current input method can be set by ‘Control Panel->Input Panel’ as Pic 3-9-1; Pic 3-9-1 3.10 Mouse Mouse Properties including sensitiveness of double-click and physical distance can be set by ‘Control Panel->Mouse’ as Pic 3-10-1;... -
Page 29: Network And Dial-Up Connection
Pic 3-10-1 3.11 Network and Dial-up Connection Network Properties can be set by ‘Start->Settings->Network and Dial-up Connection’ as Pic 3-11-1 and Pic 3-11-2; Pic 3-11-1 Pic 3-11-2 3.12 System System Properties including ‘General/Memory/Device Name/Copyrights’ can be set by ‘Control Panel->System’ as Pic 3-12-1;... - Page 30 Pic 3-12-1 Memory: the memory using status can be viewed as Pic 3-12-2; Pic 3-12-2 Note: the slider cannot moved since we are using ROM system otherwise we would get unpredictable error unless restarting the device. Device Name: device name and device description can be modified as Pic 3-12-3;...
-
Page 31: Display
Pic 3-12-3 Copyright: the detailed copyright can be viewed as Pic 3-12-4; Pic 3-12-4 3.13 Display Display Properties including ‘Background/Appearance/Backlight’ can be set by ‘Control Panel->Display’; Background: the background image can be set and customized as Pic 3-13-1;... - Page 32 Pic 3-13-1 Appearance: the system appearance can be set as Pic 3-13-2; Pic 3-13-2 Backlight: the backlight can be set and customized to save the battery life by setting the idle time as Pic 3-13-3;...
-
Page 33: Volume&Sounds
Pic 3-13-3 3.14 Volume&Sounds Volume&Sounds Properties can be set by ‘Control Panel->Voluem&Sounds’; Volume: the volume can be set as Pic 3-14-1; Pic 3-14-1 Sounds: different sound solution can be set as Pic 3-14-2;... -
Page 34: Terminal Server Client Licenses
Pic 3-14-2 3.15 Terminal Server Client Licenses The local license can be managed by ‘Control Panel->Terminal Server Client License’ as Pic 3-15-1; Pic 3-15-1 3.16 Stylus Double-Tap: it is used for double-tap sensitivity setting and testing as Pic 3-16-1;... -
Page 35: Bluetooth Device Properties
Pic 3-16-1 Calibration: it is used for touch screen calibration when the screen is not responding properly. Click ‘Recalibrate’ and in the new interface, please operate as the introduction (5 times, from the middle to the four corners). Pic 3-16-2 and Pic 3-16-3 Pic 3-16-2 Pic 3-16-3 3.17 Bluetooth Device Properties... -
Page 36: Activesync Repair
Pic 3-17-1 3.18 ActiveSync Repair Abnormal synchronization failure can be repaired by ‘Control Panel-> ActiveSync Repair’ as Pic 3-18-1; Pic 3-18-1... -
Page 37: Chapter 4 Keyboard And Input Method
CHAPTER 4 Keyboard and Input Method 4.1 Soft Keyboard The soft keyboard can be used to input the letters/numbers/symbols as Pic 4-1-1, the default is English; Pic 4-1-1 Two methods to input the uppercase: 1) Click the of the soft keyboard to input the uppercase, and click change to the lowercase as Pic 4-1-2;... -
Page 38: Chapter 5 Network Connection
CHAPTER 5 Network Connection 5.1 WIFI Connection 1) Open ‘AppCenter’ on desktop , then run the application ‘WIFI’ in ‘ A ppCenter’; Pic 5.1-1 2) Click ‘Load’ on ‘WLAN Loader’ , then network icon will display on toolbar; Pic 5.1-2 Pic 5-1-1 Pic 5-1-2 3) Double click the network icon, choose the router from ‘Wireless Information’, and... -
Page 39: Gprs Dial-Up Connection
Pic 5-1-5 Pic 5-1-6 5.2 GPRS Dial-up Connection 5.2.1 GPRS Configuration Dial-up settings: 1) Click ‘Start Menu’->’ Settings’-> ‘Network and Dial-up Connections’, and then double click ‘Make New Connection’. Pic 5.2.-1 and Pic 5.2-2 Pic 5.2-1 Pic 5.2-2 2) Input connection name ‘GPRS’ and then ‘Next’ ; click ‘Configure’ then ‘Next’; Pic 5.2-3 and Pic 5.2-4... - Page 40 Pic 5.2-3 Pic 5.2-4 3) In ‘Port Settings’, set ‘Connection Preferences’ as below: ‘Baud Rate’: 115200; ‘Data Bits’: 8; ‘Parity’: None; ‘Stop Bits’: 1; ‘Flow Control’: None Then click ‘Call Options’ to turn to another tab page; 4) Input ‘+CGDCONT=1,”IP”,”CMNET”’ (input all blue characters including the commas and quotation marks) into ‘Extra Settings’, the ‘CMNET’...
- Page 41 Pic 5.2-7 Pic 5.2-8 Double click the GPRS icon; in ‘Dial-Up Connection’ page, keep ‘User Name’, ‘Password’ and ‘Domain’ blank, and then click ‘Dial Properties’; choose ‘Location’ as ‘Car’ and then click ‘Edit’; Fill the 3 edit boxes all with letter ‘G’ and then ‘OK’. Click ‘OK’...
-
Page 42: Gprs Dial-Up Connection
Pic 5.2-11 Pi 5.2-12 Note: During the process of our configurations, we use ‘CMNET’ as the reference, for users please input the local GPRS setting and dial-up information by contacting the local service provider. 5.2.2 GPRS Dial-up Connection Please pay attention to the following points before dial up: The configurations are set properly;... -
Page 43: Chapter 6 Synchronization With The Pc And Updating Os
CHAPTER 6 Synchronization with the PC and Updating OS The handheld, can be visited for data previewing, copying and file cutting after installing the ActiveSync software successfully. The following introduces the detailed steps on how to install 6.1 Introductions on the ActiveSync 3 versions ActiveSync software for different OS (operating system): ActiveSync4.5_OfficialRelease.msi ... - Page 44 Pic 6.2-1 2) Choose ‘Next’ and we will enter the following interface: Pic 6.2-2 Pic 6.2-2 3) Then we choose ‘I accept the terms in the license agreement’, and click ‘Next’; Pic 6.2-3...
- Page 45 Pic 6.2-3 4) Input the user name and organization information and then click ‘Next’; Pic 6.2-4 Pic 6.2-4 5) The default installation path is ‘C:\Program Files\ Microsoft ActiveSync’, we can click ‘Change’ to change the installation path; Pic 6.2-5...
- Page 46 Pic 6.2-5 6) Confirm the operating is correct before click ‘Install’ to continue the process of installation; Pic 6.2-6 Pic 6.2-6 7) After the successful installation, we can go to the followed interface:...
- Page 47 Pic 6.2-7 8) Click ‘Finish’ to finish the installation, and choose ‘Yes’ to reboot the PC; Pic 6.2-8 Pic 6.2-8 9) After the rebooting, we can find the icon on the right corner of the PC, double click it to open the ActiveSync; Pic 6.2-9 Pic 6.2-9 6.3 Update Operating System...
-
Page 48: Copy System Files To Sd Card
Before updating, please backup the data: copy the data to PC or other disk like SD card. All data and applications will be erased after updating. 6.3.1 Copy System Files to SD Card 1) Format the SD card; Note: Format the card. Do not choose fast format. - Page 49 size is 240x320. Then restart the device and press the left button as soon as possible; then you will see it as Pic 6-3-1; choose Update Logo.bmp, then press the yellow button on keyboard; then please wait the system restore and start.
-
Page 50: Chapter 7 Functional Utilization
CHAPTER 7 Functional Utilization 7.1 Barcode The barcode scan engine is mounted at the top of the device, and it should be operated properly when scanning. Pic 7-1-1, Pic 7-1-2 and Pic 7-1-3。 Pic 7-1-1 (Correct) (Incorrect) Pic 7-1-2 1D Barcode Scanning (Correct) (Incorrect) Pic 7-1-3... -
Page 51: Gps
RFID Sensing Zone Pic 7-2-1 High Frequency (13.56MHz) Operating Frequency: 13.56HMZ Protocol: ISO14443A/B, ISO15693; Types of cards: HF S50, S70 and ultralight Ultra High Frequency (840~960MHz) Pic 7-2-2 1) Protocol: EPC, GEN2/ISO 18000-6C 2) Operating Frequency: 840~960MHz China Standard 920-925MHz; ... -
Page 52: Camera
Pic 7-3-1 7.4 Camera The camera is 5 mega pixels and supports max resolution 2592*1944. Camera from AppCenter, select the resolution needed, default resolution is 640*480; then click Preview to preview (Pic 7-4-1), and then click Photo take photo (Pic 7-4-2). - Page 53 Pic 7-5-1...
-
Page 54: Chapter 8 Maintenance
CHAPTER 8 Maintenance 8.1 Equipment and System Issues Table 8-1 Equipment and System Issues Issues Solutions Ensure the battery is correctly placed Device can’t start Change another piece of fully-charged battery. Take off the battery and place again. ... -
Page 55: Rfid Issues
Replace with fully-charged battery. 8.3 RFID Issues Table 8-3 RFID Issues Issues Solutions Ensure the RFID module in the handheld terminal is compatible with the tags. RFID tag can’t be identified Ensure the program is correct (please refer to DEMO) ... -
Page 56: Chapter 9 Ac Adapter & Battery Safety
USB-IF logo or have completed the USB-IF compliance program. To enable authentication of an approved battery, as required by IEEE1725 clause 10.2.1, all batteries will carry a Chainway hologram. Do not fit any battery without checking it has the... - Page 57 In the event of a battery leak, do not allow the liquid to come in contact with the skin or eyes. If contact has been made, wash the affected area with large amounts of water and seek medical advice. If you suspect damage to your equipment or battery, contact Chainway to arrange for inspection.
-
Page 58: Appendix 1 Code Types Of 1D Barcode Scanner
Appendix 1 Code Types of 1D Barcode Scanner The 1D barcode scanner can set parameters by scanning specific Function Barcodes. Operation Steps: aim the scanner at a function barcode; scan it; the laser will quickly disappear if succeed, which shows that setting is successful. A1.1 Supported Code Types Appendix Table 1 Enable... -
Page 59: A1.3 Enable / Disable Barcodes
A1.3 Enable / Disable Barcodes Appendix Table 2 Function Barcodes Sample Barcodes... - Page 61 Scanning this barcode to enable for any length Code 39...
- Page 62 Trioptic Code 39 and Code 39 Full ASCII cannot be enabled simultaneously. If an error beep sounds when enabling Trioptic Code 39, disable Code 39 Full ASCII and try again. Scanning this barcode to enable for any length Code...
- Page 63 Scanning this barcode to enable for any length Code 11 Scanning this barcode to enable for any length I 2 of 5 Scanning this barcode to enable for any length D 2 of 5...
- Page 64 Scanning this barcode to enable for any length Codabar Scanning this barcode to enable for any length MSI...
Need help?
Do you have a question about the C3000 and is the answer not in the manual?
Questions and answers