Subscribe to Our Youtube Channel
Summary of Contents for REL Acoustics Arrow 2 version
- Page 2 Operating Instructions for the Arrow ™ Transmitter...
-
Page 3: Fcc Statement
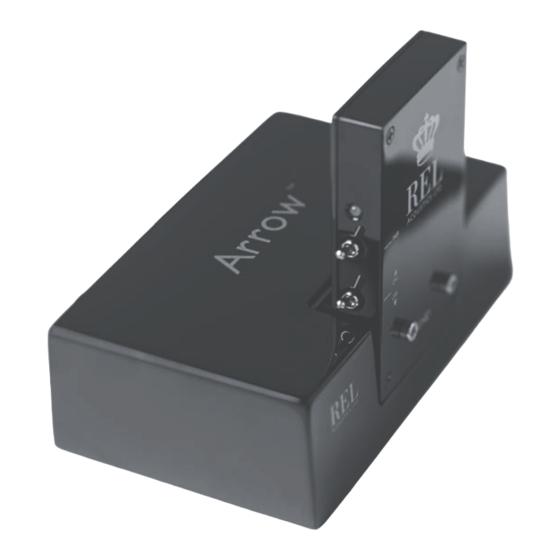
Arrow™ Wireless Transmitter Please note: Arrow Version 2 is not compatible with Arrow Version 1 REL have quickly acquired a sterling reputation within the industry for delivering great sounding, reliable wireless delivery of the REL experience. The freedom this confers on our customers is manifold; it permits ultra high performance without the cumbersome tether of a cable, permits careful placement without being limited by the length of a wire and can lead to a better sounding, less cluttered experience. - Page 4 Panel Connection Legend REL Arrow™ Transmitter 1 LED: Indicates whether the REL Arrow™ transmitter is paired with the receiver or not. 2 Pair Switch: Used to pair REL Arrow™ transmitter with REL cabinet. 3 Power Switch: Used to turn on and off REL Arrow™ transmitter. 4 Power Adapter Socket: DC input socket that accepts a detachable power adapter.
- Page 5 REL Arrow™ Receiver 1 LED: Indicates whether the REL Arrow™ receiver is paired with the transmitter or not. 2 Pair Switch: Used to pair REL Arrow™ receiver with REL cabinet. 3 Power Switch: Used to turn on and off REL Arrow™...
- Page 6 ALWAYS connect using the REL HIGH-LEVEL input, unless your system simply cannot accommodate this. While rare, a few systems, such as those that deliver a pure digital signal to active speakers, preclude the use of REL High-Level input. To increase the versatility of connecting up, the REL Arrow™ Wireless Transmitter has two separate inputs: A Neutrik Speakon socket and a phono socket.
- Page 7 HIGH-LEVEL INPUT: Connections should be made to the same binding post on main amplifier as the main speakers. Red to amplifier main right speaker red terminal, yellow to amplifier main left speaker red terminal and black to amplifier main speaker black terminal, right or left but not both. Plug the Neutrik Speakon plug into the HIGH-LEVEL Speakon socket.
- Page 8 Making Connections It is helpful to know that you will almost always connect the REL to the input on the rear panel labeled “HIGH-LEVEL INPUT.” This connection is made to the REL Arrow™ Wireless Transmitter using the cable supplied with your SerieT/i or similar REL sub bass system, the bare leads of which connect to the speaker output terminals of the power amplifier.
- Page 9 • For differential (i.e. fully balanced) amplifiers using one REL, simply use the standard connecting scheme with the exception of connecting the black wire to chassis ground (i.e. a metal bolt or screw, preferably not painted or anodized, on the chassis of the power amp or receiver), not to a negative speaker terminal, and then connecting into the HIGH-LEVEL input on the Arrow™...
- Page 10 • If connecting a single REL as a dedicated centre channel sub, connect the black wire of the REL to the negative centre channel speaker terminal; twist together the red and yellow wires and connect this pair to the positive centre channel speaker terminal. •...
- Page 11 REL Theater Reference™ Home Cinema Applications For Dolby Digital AC3 or other 5.1 theater systems, once the standard set-up for two-channel outlined above is complete, the LFE output from the processor or receiver should be connected to the .1/LFE input and appropriate volume adjustments made using the .1/LFE LEVEL control.
-
Page 12: Specifications
Supplied Accessories: Power adapter High Level Cable - 2 meter in length Note: Arrow Version 2 is not compatible with Arrow Version 1 In the interest of product improvement, REL Acoustics Limited reserves the right to alter these specifications without notice. - Page 13 REL Acoustics Limited North Road, Bridgend industrial Estate . Bridgend, CF31 3TP . United Kingdom Telephone: +44 (0)1 656 768 777 . Fax: +44 (0) 1 656 766 093 Web: www.rel.net...


Need help?
Do you have a question about the Arrow 2 version and is the answer not in the manual?
Questions and answers