
Related Manuals for Epson PictureMate Pal


Summary of Contents for Epson PictureMate Pal
-
Page 1: Table Of Contents
Loading Paper 7 Supported Paper 10 Printing From a Windows Computer 10 Printing From a Macintosh 16 Storing and Displaying Your PictureMate Pal Prints 19 Copying Photos to and From Your Computer 20 Compatible Memory Cards 20 Photo Image File Requirements 21... - Page 2 Solving Problems 65 Error Messages 65 Problems and Solutions 67 Uninstalling PictureMate Pal Software 74 Where To Get Help 75 Epson Technical Support 75 Setting Up Network Printing 76 Windows XP, XP Professional x64 Edition, and 2000 77 Windows Me and 98SE 79...
-
Page 3: Picturemate Pal User's Guide
Guide available in Adobe PDF format on your PictureMate Pal software CD. ■ To install software for using PictureMate Pal with your computer, see the Start Here sheet and your PictureMate Pal software CD. Please follow these guidelines when reading these instructions: Warnings must be followed carefully to avoid bodily injury. -
Page 4: Getting To Know Picturemate Pal
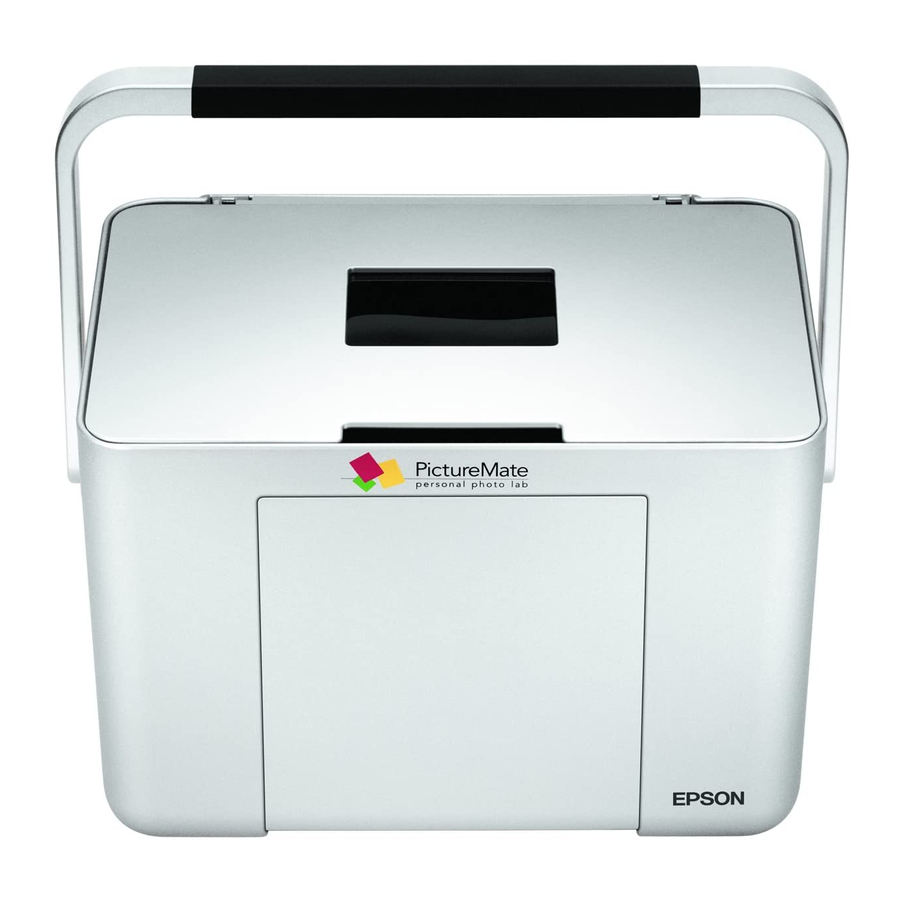
Getting to Know PictureMate Pal Paper support (load photo paper here) Edge guides Memory card light Photo viewer screen Memory card slots Output tray (catches printed photos) Handle External device port for camera or optional ® Bluetooth adapter Power inlet... - Page 5 Turns PictureMate Photo viewer screen Pal on or off On light Selects layout Displays optional of photos settings menu Selects all photos Starts for printing printing Opens the output tray Moves through Selects a menu Stops printing or photos and menu or setting cancels settings options...
-
Page 7: Printing From Your Computer
When you print from your computer, you can edit, enhance, and organize your photos using photo software such as Epson Easy Photo Print. Before you start, make sure your PictureMate Pal software is installed and PictureMate Pal is connected to your computer. - Page 8 2. Open the paper support. 3. Firmly press the button to open the output tray. Open...
- Page 9 4. Slide the edge guides outward. 5. Create a stack of up to 20 sheets of paper and separate the sheets slightly by fanning them. 6. Place your paper into the slot between the edge guides with the glossy or whiter side up.
-
Page 10: Supported Paper
Matte photo paper (100 sheets) T5845-M and photo cartridge Note: If you need more paper for any reason, you can use Epson Premium Photo Paper Glossy, borderless 4 × 6-inch (101.6 × 152.4-mm) size. Printing From a Windows Computer You can print your photos from an imaging application or you can use the Picture ®... - Page 11 2. Right-click the photo, highlight , and select Open With Windows Picture and Fax Viewer Print icon 3. Click the Print icon at the bottom of the screen.
- Page 12 4. Click . You see a Picture Selection window: Next 5. Select the photo(s) you want to print and click . You see the Printing Next Options window: Select EPSON PictureMate PM 200 Printing Preferences...
- Page 13 6. Select and click . You see EPSON PictureMate PM 200 Printing Preferences the printer settings window: Sample photo 7. Choose from the following settings: ■ Select to print a photo without borders. Borderless Select to print with a white border all around.
- Page 14 ■ If your photo was taken with a digital camera, select Digital Camera to minimize common digital flaws. Correction ■ Select to bring out the fine details of a particularly Enhance Fine Details intricate photo (printing may be slower). ■ Select to see what your photo will look like before you print.
- Page 15 You can cancel, pause, or resume printing. Cancel Pause or resume See Storing and Displaying Your PictureMate Pal Prints for tips on properly storing your printed photos. Selecting Default Settings Your printer settings apply only to the program you’re currently using. If you want, you can change the Windows default printer settings for all your programs.
-
Page 16: Printing From A Macintosh
Printing From a Macintosh ® You can print your photos from any Macintosh imaging application. 1. From the File menu, select Page Setup Select PictureMate PM 200 2. Select from the Format for menu. PictureMate PM 200 3. Open the Paper Size menu and place your cursor on the 4 ×... - Page 17 6. Select from the File menu. Print Select Print Settings 7. Select from the pop-up menu. You see the printer settings Print Settings window: Sample photo 8. Choose from the following settings: ■ Select to bring out the fine details of a particularly Enhance Fine Details intricate photo (printing may be slower).
- Page 18 ■ Borderless prints are automatically expanded. If too much of your photo edges are cut off, set the Expansion slider to If you see a white edge on your photo, select ® Note: iPhoto expands two sides of an image to the maximum print area, so you may see two small borders on an iPhoto print.
-
Page 19: Storing And Displaying Your Picturemate Pal Prints
Status 13. When you’re finished, exit the PictureMate PM 200 or Print Center program. See Storing and Displaying Your PictureMate Pal Prints for tips on properly storing your printed photos. Storing and Displaying Your PictureMate Pal Prints Photos printed on PictureMate Pal Photo Paper are beautiful, long-lasting images. -
Page 20: Copying Photos To And From Your Computer
Copying Photos to and From Your Computer You can insert a memory card into a PictureMate Pal memory card slot and copy the photos from the card to your computer. You can even copy photos from your computer to the memory card. -
Page 21: Photo Image File Requirements
(requires adapter) Photo Image File Requirements Make sure your photos meet these requirements for printing directly from PictureMate Pal, or for transferring files from card to computer (and vice versa) through PictureMate Pal: ■ JPEG files or uncompressed TIFF files only ■... - Page 22 Card (Type M and Type H) Sony Memory Stick Memory Stick Duo * Memory Stick PRO Memory Stick PRO Duo * MagicGate Memory Stick * Requires adapter MagicGate Memory Stick Duo Note: PictureMate Pal can’t read multiple cards at once.
- Page 23 4. Push the card in carefully until it stops (it won’t go in all the way). When the card is in, the memory card light comes on. What happens when your computer detects your photos depends on the type of system you have.
-
Page 24: Preparing To Remove A Memory Card
Preparing to Remove a Memory Card Once you’re finished copying photos to or from your memory card, follow the steps below to remove it. Be sure to remove any cards before turning off PictureMate Pal or unplugging its USB cable. - Page 25 Caution: Do not remove a card while the memory card light is flashing, or without performing the steps described below, or you may lose photos on your card. 1. Depending on your operating system, you may need to do one of the following: ■...
-
Page 27: Printing Without A Computer
See Printing From a Digital Camera. Selecting a Language and Print Layout You can select the language used on the PictureMate Pal photo viewer screen. English, French, and three versions of Spanish are available. All of the Spanish settings display the same language on the photo viewer screen, but... -
Page 28: Compatible Memory Cards
English Français Español 1 Español 2 Español 3 Português 4. Press Compatible Memory Cards You can insert any of these types of memory cards into PictureMate Pal: ■ CompactFlash (Type I and II) ■ Microdrive ■ SD (Secure Digital) ■... -
Page 29: Photo Image File Requirements
JPEG files or uncompressed TIFF files only ■ Resolutions ranging from 80 × 80 to 9200 × 9200 pixels Your PictureMate Pal recognizes and prints the first 999 photos on your memory card. Note: PictureMate Pal supports Exif Print image enhancement features. See your camera manual to see if this feature is included on your camera. - Page 30 Card (Type M and Type H) Sony Memory Stick Memory Stick Duo * Memory Stick PRO Memory Stick PRO Duo * MagicGate Memory Stick * Requires adapter MagicGate Memory Stick Duo Note: PictureMate Pal can’t read multiple cards at once.
-
Page 31: Removing Your Memory Card
4. Push the card in carefully until it stops (it won’t go in all the way). When the card is in, the memory card light comes on. To choose your photos and layout and start printing, see Choosing Photos and Printing. -
Page 32: Choosing Photos And Printing
Choosing Photos and Printing PictureMate Pal’s photo viewer screen makes it easy to select the photos you want to print. 2/99 : Select Photo Cancel You can choose from the following options: Printing All Photos Printing Selected Photos Printing Camera-Selected DPOF Photos... -
Page 33: Printing Selected Photos
3. Press to select the layout of your photos on the paper. See Choosing a Layout Layout for details. Borderless Border Wallet Mini-wallet Layout 4. Press Print 5. Press to review your photos on the Print Preview screen. Note: To change the number of copies for individual photos, press Cancel, press to select the photo, then press OK to increase or Cancel to decrease the number of copies. - Page 34 See your camera manual to choose photos for printing with DPOF, then insert your memory card in PictureMate Pal. You see this symbol on the screen: 1. Press to select the layout of your photos on the paper. See Choosing a Layout Layout for details.
-
Page 35: Doing More With Your Photos
Print Note: If your camera supports PictBridge or USB DIRECT-PRINT printing, you can connect it to PictureMate Pal and use the camera to control printing. See Printing From a Digital Camera for more information. Doing More With Your Photos... -
Page 36: Printing Photos In Black And White Or Sepia
You can also print proof sheets containing thumbnail images of all your photos using button. Each proof sheet contains 20 images and their file names. Menu Note: When you print without borders, your images are automatically expanded. To control the amount of expansion, see Adjusting Borderless Expansion. 1. - Page 37 The color effect you select will be applied to all photos until you go back to the Color Effect menu and select a different setting. 5. Press . You see your photo with the color effect you selected. 6. Press to select the layout of your photos on the paper.
-
Page 38: Setting Picturemate Pal Preferences
Enhancing Photos PictureMate Pal lets you correct photos that are too dark, too light, or backlit with the ™ feature. This setting improves your photos’ colors and increases PhotoEnhance contrast and sharpness. 1. Select the photos and number of copies you want to print. - Page 39 Then you press again to start printing. Print When Print Preview is , PictureMate Pal does not display this screen before printing. You can press just once to start printing. Print 1. Press Menu 2.
-
Page 40: Returning To Default Settings
Printing From a Digital Camera You can connect a digital camera that supports PictBridge or USB DIRECT-PRINT printing to PictureMate Pal and use the camera to control printing. (Check your camera manual to see if it supports PictBridge or USB DIRECT-PRINT. A cable may not be included with your camera.) -
Page 41: Printing Wirelessly From A Bluetooth Device
4. Connect your camera’s USB cable to your camera and the port on the back of PictureMate Pal. 5. Use your camera’s controls to select and print photos on PictureMate Pal. (See your camera manual for instructions.) 6. When you are finished, disconnect your camera from PictureMate Pal before inserting a memory card in PictureMate Pal. -
Page 42: Printing With Bluetooth
PictureMate Pal is printing; this may cause PictureMate Pal to malfunction. 2. Plug the adapter all the way into the port on the back of PictureMate Pal. 3. Make sure you are within about 9 meters (30 feet) of PictureMate Pal. -
Page 43: Disconnecting The Bluetooth Photo Print Adapter
Bluetooth file sharing and sending files. Printing starts automatically. If you see a Bluetooth error message on the PictureMate Pal screen, try printing the image from a memory card or your computer instead. Note: To print from a device with encryption, to use pairing or a passkey, or to adjust Bluetooth settings, see Choosing Bluetooth Settings. -
Page 44: Choosing Bluetooth Settings
Choosing Bluetooth Settings If necessary, use the PictureMate Pal buttons to choose settings for Bluetooth wireless communication. You may need to enter a passkey for PictureMate Pal or turn on encryption, depending on the Bluetooth-enabled device from which you print. - Page 45 Select On to encrypt communication and require that a four-digit Passkey be (Default = On) entered into a device before it can print from PictureMate Pal. Passkey Any four-digit number This setting allows you to set a four-digit Passkey that must be entered into a...
-
Page 47: Maintaining Your Picturemate Pal
Taking PictureMate Pal With You Checking Print Pack Status You can check the status of your Print Pack on the PictureMate Pal photo viewer screen or with your computer software as described in these sections: Checking Status Using the Photo Viewer Screen... - Page 48 Note: If the screen displays a Print Pack low message and the status screen shows only two bars, you should buy a new PictureMate Pal Print Pack. See Buying a PictureMate 200 Series Print Pack for details. Checking Status Using Status Monitor for Windows...
- Page 49 Send a print job to PictureMate Pal. The progress meter appears automatically showing the status: Note: If your Print Pack is low, you should buy a new PictureMate Pal Print Pack. See Buying a PictureMate 200 Series Print Pack for details.
-
Page 50: Replacing The Print Pack
This window appears showing the EPSON StatusMonitor status: Note: If your Print Pack is low, you should buy a new PictureMate Pal Print Pack. See Buying a PictureMate 200 Series Print Pack for details. 4. Click and close the EPSON Printer Utility. - Page 51 Caution: To ensure good results, use a genuine PictureMate Pal photo cartridge and do not refill it. Other products may cause ink spills or other damage to your printer not covered by Epson’s warranty. Note: The ink cartridges that came with your printer have a lower yield due to the ink charging process.
- Page 52 Note: If you need more paper for any reason, you can use Epson Premium Photo Paper Glossy, borderless 4 × 6-inch (101.6 × 152.4-mm) size. You can buy a PictureMate 200 Series Print Pack wherever PictureMate Pal is sold or from retailers that sell printer supplies.
- Page 53 3. Slide the cartridge lever left, to the position. Release Caution: Do not try to pull out the cartridge without moving the lever. 4. Pull out the cartridge and dispose of it properly. (For appropriate disposal, check local resources for recycling guidelines.) Caution: Keep photo cartridges out of the reach of children and do not drink the ink.
- Page 54 5. Remove the new photo cartridge from its package. Don’t touch the green chip Caution: Don’t touch the small green circuit board. Install the photo cartridge immediately after you remove it from its package. If you leave a cartridge unpacked for a long time before using it, normal printing may not be possible. 6.
- Page 55 7. Slide the lever all the way right, to the position. Lock Caution: If the cartridge is not inserted correctly, ink may leak out. 8. Close the cartridge door all the way. PictureMate Pal starts charging and displays a message. 9. When it’s finished charging, press...
-
Page 56: Improving Print Quality
Note: If you see a Print Pack low message on the photo viewer, you can’t clean the print head until you replace the Print Pack. 1. Load paper in PictureMate Pal so you can print a nozzle check pattern after cleaning the print head. See Loading Paper for details. - Page 57 Aligning the Print Head Directly From PictureMate Pal If you have moved PictureMate Pal and the print quality is not as good as it used to be—if your prints look fuzzy or have light or dark lines running through them—you may need to align the print head.
-
Page 58: Checking The Print Quality Using The Computer
You can check PictureMate Pal’s print quality from your computer and clean the print head, if necessary. 1. Make sure PictureMate Pal is connected to your computer and turned on but not printing. 2. Load paper in PictureMate Pal so you can print a nozzle check pattern after cleaning the print head. -
Page 59: Cleaning The Print Head Using The Computer
Note: If you see a Print Pack low message on the screen, you can’t clean the print head until you replace the Print Pack. 1. Make sure PictureMate Pal is connected to your computer and turned on but not printing. - Page 60 4. Follow the instructions on the screen to clean the print head. Cleaning takes about 60 seconds. PictureMate Pal makes some noise and you see a message on the screen. Cleaning 5. When cleaning is complete, do the following to print a nozzle check:...
-
Page 61: Aligning The Print Head Using The Computer
Then try cleaning the print head again. Aligning the Print Head Using the Computer If you have moved PictureMate Pal and the print quality is not as good as it used to be—if your prints look fuzzy or have light or dark lines running through them—you may need to align the print head. -
Page 62: Cleaning Picturemate Pal
Note: The number that you enter becomes the default setting (#5) the next time you align the print head. Cleaning PictureMate Pal To keep PictureMate Pal working at its best, you should clean it several times a year. 1. Turn off PictureMate Pal, unplug the power cord, and disconnect any USB cables. -
Page 63: Taking Picturemate Pal With You
4. Use a soft, dry cloth to clean the PictureMate Pal screen. Do not use liquid or chemical cleaners on it. Caution: Never use a hard or abrasive brush, or alcohol or thinner for cleaning; they can damage the components and case. - Page 64 5. Close the paper support and output tray. 6. Pack PictureMate Pal in the box that it came in or in the optional carrying case. Place the power cable and adapter in the accessory box that came with PictureMate Pal and pack it with the PictureMate Pal.
-
Page 65: Solving Problems
Uninstalling PictureMate Pal Software. If the solutions here don’t solve your problem, see Where To Get Help. Error Messages If you see one of these messages on the PictureMate Pal screen, here’s what to do: Message What to Do Not initial cartridge. Use You need to insert the initial photo cartridge that comes initial cartridge. - Page 66 If the error does not clear, contact Epson as described in Where To Get Help. Service required. Parts inside PictureMate Pal are near or at the end of their service life. Contact Epson as described in Where To Get Help.
-
Page 67: Problems And Solutions
Carefully follow the installation instructions in the electronic Basics guide. Do not connect PictureMate Pal to the computer until you are instructed to. Then connect the USB cable securely to the PictureMate Pal and the computer. Also make sure your system meets the requirements listed in System Requirements. - Page 68 PictureMate Pal software for use on a network. The photo viewer screen goes blank. The screen turns off after 13 minutes if PictureMate Pal is not used. Press any button to turn it back on. PictureMate Pal sounds as though it is printing, but nothing prints.
-
Page 69: Memory Card Problems
It takes PictureMate Pal a few moments to process your images before printing them. ■ If PictureMate Pal is in a hot or sunny location, move it to a cooler place and try printing again. ■ If you are printing from a computer, make sure your system meets the requirements in System Requirements. -
Page 70: Print Quality Problems
Make sure you’re using a compatible memory card; see Compatible Memory Cards. ■ PictureMate Pal recognizes and can print the first 999 photos on a memory card. ■ Photos must be JPEG or uncompressed TIFF format and taken with a DCF-compliant digital camera (a camera that complies with the Design rule for Camera File system). - Page 71 Make sure your paper isn’t damaged, old, dirty, or loaded face down. If it is, load new paper with the glossy side up. Colors in your photo are wrong or missing. ■ If you are printing directly from PictureMate Pal, press and make sure Menu Color Effect is not set to .
-
Page 72: Problems With Paper Feeding
Store paper flat to prevent curling. Miscellaneous Printout Problems PictureMate Pal prints blank pages. ■ If you are printing from your computer, make sure PictureMate Pal is selected in your program or is the active printer in the Macintosh Print Center. - Page 73 PictureMate Pal) or Printing From Your Computer (if printing from a computer). ■ Your photo size may not match the width/height proportions (aspect ratio) of PictureMate Pal paper or the layout you’re using. Photos may be cropped to fit the paper and layout. The wrong photo is printed. ■...
-
Page 74: Uninstalling Picturemate Pal Software
Uninstalling PictureMate Pal Software You may need to uninstall and then reinstall your PictureMate Pal software on your computer. This may be necessary when you upgrade your operating system, for example. However, you don’t need to uninstall this on-screen User’s Guide or Basics Guide. -
Page 75: Where To Get Help
Delete 4. Close Printer Setup Utility or Print Center. When you are ready to reinstall the PictureMate Pal software, follow the instructions for your operating system in your electronic Basics guide. Note: Remember that you don’t need to reinstall your on-screen User’s Guide or Basics Guide and you won’t see the license agreement. -
Page 76: Setting Up Network Printing
Epson authorized reseller. Contact your nearest sales office for dealer referral. Setting Up Network Printing These sections tell you how to set up PictureMate Pal so that other computers on a network can print to it. Note: These instructions are for small network users only. If you are on a large network and would like to share PictureMate Pal, consult your network administrator. -
Page 77: Windows Xp, Xp Professional X64 Edition, And 2000
Windows XP, XP Professional x64 Edition, and 2000 First, you need to set up PictureMate Pal as a shared printer on the computer that it is directly connected to. Then, you must install the PictureMate Pal software on each computer that will access it through the network. - Page 78 Follow these steps to print to PictureMate Pal from other computers on a network. Note: PictureMate Pal must be set up as a shared resource on the computer to which it is directly connected before you can access it from another computer.
-
Page 79: Windows Me And 98Se
Have Disk button and follow the on-screen instructions. Windows Me and 98SE First, you need to set up PictureMate Pal as a shared printer on the computer that it is directly connected to. Then, you must install the PictureMate Pal software on each computer that will access it through the network. - Page 80 Follow the steps below to print to PictureMate Pal from other computers on a network. Note: PictureMate Pal must be set up as a shared resource on the computer to which it is directly connected before you can access it from another computer.
-
Page 81: Macintosh
Macintosh First, you need to set up PictureMate Pal as a shared printer on the Macintosh that it is directly connected to. Then, you must choose the shared PictureMate Pal in the Page Setup and Print menus when you print your photos. - Page 82 See your Mac Help and Windows documentation for more information. Accessing a Networked Printer Follow the steps in this section to print to PictureMate Pal from other Macintosh computers on a network. 1. Turn on the shared printer. 2. Print as you normally would, choosing...
-
Page 83: Specifications
Specifications For details about PictureMate Pal and using it with a computer, see these sections: ■ System Requirements ■ Technical Specifications System Requirements To use PictureMate Pal with your computer, your system must meet the requirements below. Windows System Requirements ■... -
Page 84: Technical Specifications
■ VGA display or better ■ CD-ROM or DVD drive for installing the PictureMate Pal software ■ Built-in USB port and a shielded USB “AB” cable up to 2 meters (6.5 feet) long. Caution: Using an improperly shielded USB cable—especially a cable more than 2 meters (6.5 feet) long—may cause PictureMate Pal to malfunction. -
Page 85: Photo Cartridge
Paper Note: Since the quality of any particular brand or type of paper may be changed by the manufacturer at any time, Epson cannot guarantee the quality of any non-Epson brand or type of paper. Size 101.6 × 152.4 mm (4 × 6 inches) - Page 86 Other products may cause damage to your printer not covered by Epson’s warranty. Do not use a photo cartridge if the date on the package has expired. Do not leave a photo cartridge or PictureMate Pal exposed to heat or direct sunlight.
- Page 87 0.3 A (max. 0.4 A) 0.15 A (max. 0.3 A) Power consumption (approximate) Printing 10.0 W 10 W Sleep mode 4.0 W 4.0 W Powered off 0.2 W 0.3 W Note: Check the label on the bottom of PictureMate Pal for voltage information.
- Page 88 AC Adapter Model A381H Rated voltage AC 100 to 240 V Input voltage range AC 90 to 264 V Rated frequency 50 to 60 Hz Input frequency range 49.5 to 60.5 Hz Rated current 0.4 to 0.8 A Rated electrical power 40 to 42 W Output DC 20 V, 1.68 A...
-
Page 89: Memory Card Slots
Memory Card Slots Card slots CF Type II card slot Compatible with “CF+ and CompactFlash Specification 1.4” ® Sony Memory Compatible with “Memory Stick Stick/MemoryStick PRO/ Standard version 1.3” Duo (requires adapter) Compatible with “Memory Stick card slot Standard Memory Stick PRO Format Specifications version 1.0”... -
Page 90: Standards And Approvals
Data Encoding NRZI Recommended Less than 1.8 meters (6 feet) cable length * Not all USB devices are supported. Contact Epson for details. See Where To Get Help. Standards and Approvals Safety UL 60950-1 CSA C22.2 No. 60950-1 FCC part 15 Subpart B class B... -
Page 91: Notices
How Many Photos Will I Get From a PictureMate 200 Series Print Pack? Epson has packaged the PictureMate Photo Cartridge with a quantity of 4 × 6 PictureMate Photo Paper, so that purchasing supplies for PictureMate is convenient and affordable. The number of sheets of photo paper in your PictureMate Print Pack is stated on the Print Pack’s box. - Page 92 The other comments above also apply to the cartridge and paper included in the printer box. Important Safety Instructions Before using PictureMate Pal, read the following safety instructions to make sure you use it safely and effectively: ■...
- Page 93 AC adapter away from direct sunlight, strong light, water, or heat sources. Caution: Keep PictureMate Pal out of the sun and don’t leave it in your car or other location where it can get too hot or too cold. Otherwise PictureMate Pal may be damaged or ink may leak.
-
Page 94: Photo Cartridge Safety Instructions
■ Use only the power-supply cord that comes with this product. Use of another cord may result in fire or electrical shock, or injury. ■ The AC adapter model A381H is designed for use with the printer with which it was included. - Page 95 ■ Do not shake the photo cartridge after removing it from the bag; this can cause leakage. ■ Be careful when you handle used photo cartridges, as there may be some ink remaining around the ink supply ports. If ink gets onto your skin, wash the area thoroughly with soap and water.
-
Page 96: Copyright Notice
Seiko Epson Corporation. The information contained herein is designed only for use with this Epson product. Epson is not responsible for any use of this information as applied to other printers. -
Page 97: A Note Concerning Responsible Use Of Copyrighted Materials
Epson, Epson ESC/P, and PictureMate are registered trademarks, and Exceed Your Vision, USB DIRECT-PRINT, and the USB DIRECT-PRINT logo are trademarks of Seiko Epson Corporation. PhotoEnhance is a trademark and Epson Store is a service mark of Epson America, Inc. SD is a trademark. - Page 98 © 2006 Epson America, Inc. 7/06...
Need help?
Do you have a question about the PictureMate Pal and is the answer not in the manual?
Questions and answers