Advertisement
Quick Links
TRANSMITTER PROGRAMMING GUIDE
The transmitters included with the system have been pre-programmed at
the factory, with each button pre-assigned to control a specific function of
the system. Although the system in the vehicle has either a 3, 4, or 5 channel
RECEIVER, depending on the model, the transmitters included with the
system are 7 channel transmitters. This allows you to program each
transmitter to more than one vehicle in two car families and also allows you
to change which button or buttons control certain functions of the system.
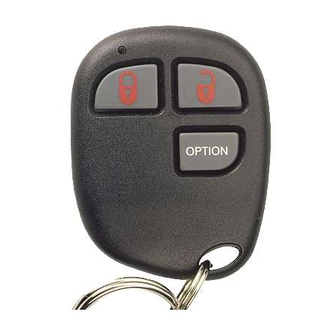
(Example: Transmitter channel 5, shown below, can be programmed to
activate Receiver channel 2.) Refer to the chart below for access to each of
the transmitter channels, and for the standard factory button assignments.
TRANSMITTER
CHANNEL BUTTONS CHANNEL
1
2
3
4
&
5
&
6
&
&
7
&
* Remote Emergency Panic is available only on certain models.
** Door Lock/Unlock may require additional components in certain vehicles.
*** Unlock Driver Door or Unlock All Doors May Require Additional Components
**** Some of the more common accessories for these additional channels are;
AS 9075
Remote Car Starter
AS 9256
Remote Trunk Release Relay
AS 9154
Remote Garage Door Interface
AS 9153
Remote Window Roll Up
Released 7-25-01.
Model AVX01BT3CL3
SYSTEM RECEIVER
FUNCTION
1
Remote Arm
* Remote Emergency Panic
**Remote Door Lock
2
Remote Disarm
*Remote Emergency Panic
***Remote Unlock Drivers Door
**Remote Unlock All Doors
3
Push And Hold For 3 Seconds For Opt1
Release, Push 2 Times For Aux. Out.
4
**** Pulsed Output for Accessories
5
**** Switched Output for Accessories
-
**** RF
-
**** RF
1
128-6105
1 of 6
Advertisement

Related Manuals for Audiovox AVX01BT3CL3


Summary of Contents for Audiovox AVX01BT3CL3
- Page 1 Model AVX01BT3CL3 TRANSMITTER PROGRAMMING GUIDE The transmitters included with the system have been pre-programmed at the factory, with each button pre-assigned to control a specific function of the system. Although the system in the vehicle has either a 3, 4, or 5 channel RECEIVER, depending on the model, the transmitters included with the system are 7 channel transmitters.
- Page 2 PROGRAMMING TRANSMITTERS: It is important to remember that during programming, each individual step of the procedure must be executed within 15 seconds of the previous step. When the 15 second time limit is allowed to expire, the system will automatically exit program mode. This is indicated by a long "chirp" from the siren.
- Page 3 The chirp tone confirms that programming of channel 1 was successful. Up to 4 transmitters can be programmed, press and hold the selected button of each additional transmitter until the chirp tone is heard, or move to step #5 (b) You can assign the Lock/Unlock, Arm/Disarm button, by pressing and holding the lock/unlock button until the siren emits a long chirp tone.
-
Page 4: Quick Reference
Press and release the valet/override switch one time to advance to channel 4 if so equipped. If your system does not have a 4th channel, a long chirp followed by a short chirp tone will indicate that the program mode has been exited. The dash mounted LED will flash 4 times and siren will "chirp"... -
Page 5: Battery Replacement
BATTERY REPLACEMENT: The transmitter incorporates a small red LED visible through the case. This LED can be used to indicate battery condition. You will notice a decrease in transmitter range as the battery condition deteriorates. Transmitter battery replacement is recommended at least every 10 to 12 months, depending upon how frequently the transmitter is used. - Page 6 6. Method of payment; check one of the boxes below. Mastercard Visa Check or money order * (do not send cash) * Make checks payable to Audiovox Corporation 7. Credit Card Number : ______________________________________ 8. Credit Card Expiration Date : __________________________ Credit card purchasers can order additional or replacement transmitters by phone.
Need help?
Do you have a question about the AVX01BT3CL3 and is the answer not in the manual?
Questions and answers
Where is the valet button located
There is no fixed location for the valet button on the Audiovox AVX01BT3CL3. Common places to check include:
1. Driver’s kick panel.
2. Behind the fuse cover panel.
3. Tie-wrapped to the OBD2 connector under the dash.
If not found, locate the keyless system brain, usually mounted in the upper left corner near the firewall, and trace the blue two-pin port to find the switch. If the blue port is empty, the valet switch may not have been installed.
This answer is automatically generated