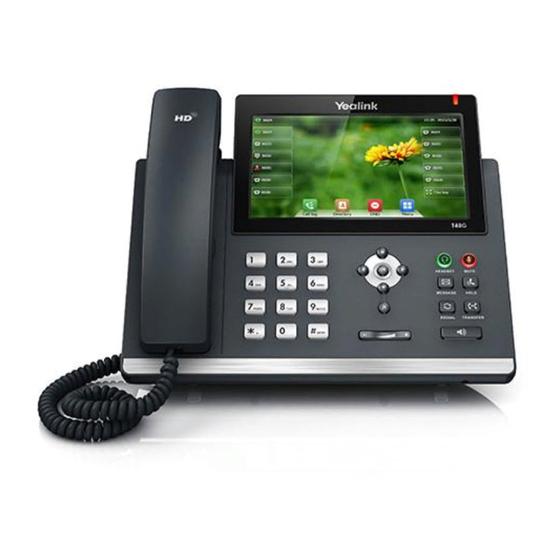
Yealink SIP-T48G User Manual
Hide thumbs
Also See for SIP-T48G:
- Administrator's manual (898 pages) ,
- User manual (270 pages) ,
- Quick start manual (45 pages)
Table of Contents
Advertisement
Quick Links
Advertisement
Table of Contents

Related Manuals for Yealink SIP-T48G


Summary of Contents for Yealink SIP-T48G
- Page 1 Yealink SIP-T48G IP Phone User Guide Version 1...
-
Page 2: Class B Digital Device Or Peripheral
Do not dispose of WEEE as unsorted municipal waste and have to collect such WEEE separately. User Guide for the SIP-T48G IP Phone... -
Page 3: Gnu Gpl Information
GNU GPL Information Yealink SIP-T48G IP phone firmware contains third-party software under the GNU General Public License (GPL). Yealink uses software under the specific terms of the GPL. Please refer to the GPL for the exact terms and conditions of the license. -
Page 4: About This Guide
About This Guide Thank you for choosing the SIP-T48G IP phone, an ultra-elegant Gigabit IP phone which is exquisitely designed to provide business telephony features, such as Call Hold, Call Transfer, Busy Lamp Field, Call Recording, Multicast Paging and Conference over an IP network. It also features an enhanced user experience and newly developed industrial designs, with a large touch screen for easy and efficient use. -
Page 5: Table Of Contents
Time & Date ..............................27 Audio Settings ..............................29 Ring Tones ................................ 30 Contact Management ............................32 Directory ................................32 Local Directory ..............................32 Blacklist ................................45 Call History Management ..........................46 System Customizations ............................ 51 User Guide for the SIP-T48G IP Phone... - Page 6 Troubleshooting ....................77 General Issues ..............................77 Display Issues ..............................77 Call Issues ................................ 78 Headset & Handset Issues ..........................78 Audio Issues ..............................78 Regulatory Notices ....................79 Service Agreements ............................79 User Guide for the SIP-T48G IP Phone...
- Page 7 Limitations of Liability ............................79 Safety Instructions ............................79 Appendix A - Time Zones ..................82 User Guide for the SIP-T48G IP Phone...
-
Page 8: Overview
This chapter provides the overview of the SIP-T48G IP phone. Topics include: Hardware Component Instructions The main hardware components of the SIP-T48G IP phone are the touch screen and the keypad. Hardware component instructions of the SIP-T48G IP phone are:... - Page 9 Hookswitch Picking up the handset from the handset cradle, the hookswitch bounces and the phone connects to the line, laying the handset down on the handset cradle, the phone disconnects from the line. User Guide for the SIP-T48G IP Phone...
-
Page 10: Icon Instructions
The shared/bridged line registers successfully Hands-free speakerphone mode Handset mode Headset mode Voice Mail Text Message Auto Answer Do Not Disturb Call Hold Call Mute Ringer volume is 0 Phone Lock Received Calls Placed Calls User Guide for the SIP-T48G IP Phone... -
Page 11: Led Instructions
The phone receives a voice mail or text message. The phone is powered off. The phone is idle. The phone is busy. The call is placed on hold or is held. The call is muted. User Guide for the SIP-T48G IP Phone... -
Page 12: Getting Started
Getting Started This chapter provides the following basic installation instructions and information for obtaining the best performance with the SIP-T48G IP phone. Packaging Contents The following components are included in your SIP-T48G IP phone package: • SIP-T48G IP Phone •... -
Page 13: Phone Installation
Check the list before installation. If you find anything missing, contact your system administrator. Phone Installation This section introduces how to install the phone: Attach the stand Connect the handset and optional headset Connect the network and power 1) Attach the stand Desk Mount Method User Guide for the SIP-T48G IP Phone... - Page 14 • Power over Ethernet (PoE) Note The IP phone should be used with Yealink original power adapter (5V/2A) only. The use of the third-party power adapter may cause the damage to the phone. User Guide for the SIP-T48G IP Phone...
-
Page 15: Power Over Ethernet
Power over Ethernet With the included or a regular Ethernet cable, the SIP-T48G IP phone can be powered from a PoE-compliant switch or hub. To connect the PoE: Connect the Ethernet cable between the Internet port on the phone and an available port on the in-line power switch/hub. -
Page 16: Phone Initialization
Account status (e.g., register status of SIP accounts) Note You can view the device certificate status via phone user interface only. To view the phone status via phone user interface: Press , or tap ->Status. User Guide for the SIP-T48G IP Phone... -
Page 17: Touch Screen Display
Touch Screen Display Idle Screen Display If the phone has successfully started up, the idle screen will be displayed. The following figure is an example of what is displayed on the touch screen. User Guide for the SIP-T48G IP Phone... - Page 18 : tap this shortcut key to enter the Directory screen and view contacts. : tap this shortcut key to toggle the DND mode or enter the custom DND configuration screen. : tap this shortcut key to enter the main menu. User Guide for the SIP-T48G IP Phone...
-
Page 19: Navigating Menus And Fields
Tap menu items, fields, and arrows on the touch screen. • Press keys on the phone keypad. Note The menu system will automatically exit to the idle screen after 60 seconds of inactivity. User Guide for the SIP-T48G IP Phone... -
Page 20: Entering Data And Editing Fields
(or numbers) options and stop to select. When the character (or numbers) you want to enter displays in the field, wait one second, and enter the next character (or numbers). User Guide for the SIP-T48G IP Phone... - Page 21 TUV8ÙÚÛ Ü 9wxyzWX YZ wxyz9ýÞ wxyz9ýÞ WXYZ9ÝÞ space space space *.,’?!\-()@/: *.,’?!\-()@/: *.,’?!\-()@/: *.,’?!\-()@/: .*:/@[] _;+&%=< _;+&%=< _;+&%=< _;+&%=< > > > > Ѕ$¥¤[]{} Ѕ$¥¤[]{} Ѕ$¥¤[]{} Ѕ$¥¤[]{} ~^¡¿§#”| ~^¡¿§#”| ~^¡¿§#”| ~^¡¿§#”| User Guide for the SIP-T48G IP Phone...
- Page 22 If it is in the uppercase (ABC), lowercase (abc), uppercase and lowercase (Abc) or alphanumeric (2aB) input mode, it will provide the following special characters: *.,?!\-()@/:_;+&%=<>Ѕ$¥¤[]{}~^¡¿§#”|. If it is in the numeric (123) input mode, it will provide the following special characters: .*:/@[]. User Guide for the SIP-T48G IP Phone...
- Page 23 Delete an entire field of data. Swipe your finger to the left or right to select the entire field of data, so that the data highlighted, and then tap the Delete or Press User Guide for the SIP-T48G IP Phone...
-
Page 24: Customizing Your Phone
General Settings Wallpaper You can customize the wallpaper of the SIP-T48G IP phone, and can change the wallpaper image via phone user interface. To change the wallpaper via phone user interface: ->Basic->Display->Wallpaper. -
Page 25: Backlight
15s, 30s, 60s, 120s, 300s, 600s or 1800s: Backlight is changed when the phone is inactive after the designated time (in seconds). You can also change the intensity of the LCD screen of EXP40 connected to the SIP-T48G IP phone. To configure the backlight via phone user interface: ->Basic->Display->Backlight. -
Page 26: Contrast
Contrast You can only configure the contrast of the expansion module EXP40 connected to the SIP-T48G IP phone to a comfortable level on the phone. Ensure that the expansion module has been connected to the phone before configuration. The intensity of contrast ranges from 1 to 10 and the highest intensity is 10. -
Page 27: Time & Date
Tap the gray box of the Type field, and then select Manual Settings from the pull-down list. Enter the specific date and time in the corresponding fields. Tap the Save soft key to accept the change. The time and date displayed on the touch screen will change accordingly. User Guide for the SIP-T48G IP Phone... - Page 28 (12 Hour or 24 Hour) from the pull-down list. Tap the Save soft key to accept the change or to cancel. Time and date are configurable via web user interface at the path Settings->Time & Date. User Guide for the SIP-T48G IP Phone...
-
Page 29: Audio Settings
To adjust the ringer volume: When the phone is idle: Press to adjust the ringer volume. When the phone is ringing: Press to adjust the ringer volume. User Guide for the SIP-T48G IP Phone... -
Page 30: Ring Tones
Ring tones are used to indicate incoming calls. You can select different ring tones to distinguish different accounts registered on your phone, or to distinguish your phone from your neighbor’s. To select a ring tone for the phone via phone user interface: ->Basic->Sound->Ring Tones->Common. Tap the desired ring tone. User Guide for the SIP-T48G IP Phone... - Page 31 Tap the Save soft key to accept the change or to cancel. A ring tone for the account is configurable via web user interface at the path Account->Basic->Ring Type. User Guide for the SIP-T48G IP Phone...
-
Page 32: Contact Management
Adding Groups To add a group to the local directory: The IP phone enters the local directory directly as there is only Local Directory enabled in the directory by default. User Guide for the SIP-T48G IP Phone... - Page 33 Tap Setting. Tap New Group. Enter the desired group name in the highlighted field. to accept the change. to specify a ring tone for the group. Tap the desired ring tone. User Guide for the SIP-T48G IP Phone...
-
Page 34: Editing Groups
The IP phone enters the local directory directly as there is only Local Directory enabled in the directory by default. If Local Directory is removed from the directory, tap ->Directory->All Contacts to enter the local directory. User Guide for the SIP-T48G IP Phone... - Page 35 The IP phone enters the local directory directly as there is only Local Directory enabled in the directory by default. If Local Directory is removed from the directory, tap ->Directory->All Contacts to enter the local directory. User Guide for the SIP-T48G IP Phone...
-
Page 36: Adding Contacts
From a remote phone book Adding Contacts Manually To add a contact to the local directory manually: The IP phone enters the local directory directly as there is only Local Directory enabled in the directory by default. User Guide for the SIP-T48G IP Phone... - Page 37 Tap the gray box of the Photo field, and then select the desired photo from the pull-down list. Tap the Save soft key to accept the change or to cancel. Note If the contact already exists in the directory, the touch screen will prompt “Contact name existed!”. User Guide for the SIP-T48G IP Phone...
- Page 38 You can also press to switch pages. after the desired entry. Tap Add. Edit the corresponding fields. Tap the Save soft key to accept the change. The entry is successfully saved to the local directory. User Guide for the SIP-T48G IP Phone...
-
Page 39: Editing Contacts
If the contact was added to a specified contact group, you can tap the contact group first, and then tap after the desired contact. Tap the desired field to edit the contact information. User Guide for the SIP-T48G IP Phone... -
Page 40: Deleting Contacts
If the contact was added to a specified contact group, you can tap the contact group first, and then tap after the desired contact. Tap Delete. The touch screen prompts the following warning: User Guide for the SIP-T48G IP Phone... - Page 41 If Local Directory is removed from the directory (refer to Directory on page 51), tap ->Directory- >All Contacts to enter the local directory. Tap Setting. Tap the checkbox of Select All. Tap Delete. The touch screen prompts the following warning: User Guide for the SIP-T48G IP Phone...
-
Page 42: Placing Calls To Contacts
If the contact was added to a specified contact group, you can tap the contact group first, and then tap the desired contact. • If only one number for the contact is stored in the local directory, the contact number will be dialed out. User Guide for the SIP-T48G IP Phone... -
Page 43: Searching For Contacts
->Directory->All Contacts to enter the local directory. Tap Search. Enter a few continuous characters of the contact name or continuous numbers of the contact number (office, mobile or other number) using the keypad. User Guide for the SIP-T48G IP Phone... -
Page 44: Search Source List In Dialing
The entries in the enabled search source lists whose name or phone number matches the characters entered will appear on the touch screen. You can tap the desired entry to place a call to the entry. User Guide for the SIP-T48G IP Phone... -
Page 45: Blacklist
To add a contact to the blacklist directory from the local directory: The IP phone enters the local directory directly as there is only Local Directory enabled in the directory by default. User Guide for the SIP-T48G IP Phone... -
Page 46: Call History Management
Call History Management The SIP-T48G IP phone maintains call history lists of Missed calls, Placed calls, Received calls and Forwarded calls. Call history list supports up to 400 entries. You can view call history, place a call, add a contact or delete an entry from the call history list. -
Page 47: To View Call History
You can tap Missed Calls, Placed Calls, Received Calls or Forwarded Calls to view entries in each call list directly. after the desired entry. The detailed information of the entry appears on the touch screen. User Guide for the SIP-T48G IP Phone... - Page 48 Calls to view entries in each call list directly. Tap the desired entry. To add a contact to the blacklist directory from the call history list: The touch screen displays all call records. User Guide for the SIP-T48G IP Phone...
- Page 49 You can tap Missed Calls, Placed Calls, Received Calls or Forwarded Calls to view entries in each call list directly. after the desired entry. Tap Delete. The touch screen prompts the following warning: User Guide for the SIP-T48G IP Phone...
- Page 50 You can tap Missed Calls, Placed Calls, Received Calls or Forwarded Calls to view entries in each call list directly. Tap Setting. Tap the checkbox of Select All. Tap Delete. The touch screen prompts the following warning: User Guide for the SIP-T48G IP Phone...
-
Page 51: System Customizations
With the handset on-hook, enter the desired number and tap Send, the phone will then place a call using the headset automatically. User Guide for the SIP-T48G IP Phone... -
Page 52: Hotline
The valid values range from 0 to 10 (seconds) and the default value is “4”. Tap the Save soft key to accept the change or to cancel. Hotline is configurable via web user interface at the path Features->General Information. User Guide for the SIP-T48G IP Phone... -
Page 53: Basic Call Features
Basic Call Features The SIP-T48G IP phone is designed to be easily used like a regular phone on a public switched telephone network (PSTN). You can place calls, answer calls, transfer a call to someone else, or conduct a conference call. - Page 54 The SIP-T48G IP phone can handle multiple calls at a time. However, only one active call (the call that has audio associated with it) can be in progress at any time. The SIP-T48G IP phone can handle a maximum of 50 calls at one time.
-
Page 55: Answering Calls
To place multiple calls: You can have more than one call on your SIP-T48G IP phone. To place a new call during an active call, do one of the following: • Tap the line key. The active call is placed on hold. -
Page 56: Ending Calls
Note To end a call placed on hold, you can tap the EndCall soft key to end the call directly, or tap the Resume soft key to resume the call before ending it. User Guide for the SIP-T48G IP Phone... -
Page 57: Redialing Numbers
To configure auto answer via phone user interface: ->Features->Auto Answer. Tap the On radio box in the desired line. Tap the Save soft key to accept the change or to cancel. User Guide for the SIP-T48G IP Phone... -
Page 58: Auto Redial
Enter the desired time (in seconds) in the Redial Interval field. The default value is —10. Enter the desired number of redial attempts in the Redial Times field. The default value is —10. User Guide for the SIP-T48G IP Phone... - Page 59 Auto redial is configurable via web user interface at the path Features->General Information. To use auto redial: When the called party is busy, the following prompt will appear on the touch screen of the phone: Tap the OK soft key to activate auto redial. User Guide for the SIP-T48G IP Phone...
-
Page 60: Call Mute
Call mute applies to all modes (Handset, Headset and Speakerphone). To mute a call: Press during an active call. The touch screen indicates that the call is muted. The mute key LED illuminates solid red when the call is muted. User Guide for the SIP-T48G IP Phone... -
Page 61: Call Hold/Resume
If multiple calls are placed on hold, do one of the following: • Tap the desired call, and then press or tap the Resume soft key to retrieve it. • Tap the desired call, and then tap the corresponding line key to retrieve it. User Guide for the SIP-T48G IP Phone... -
Page 62: Do Not Disturb (Dnd)
1 New Missed Call(s)) will appear on the touch screen. Note When DND and busy forward are enabled in phone mode, calls will be sent to the configured destination number. User Guide for the SIP-T48G IP Phone... -
Page 63: Call Forward
Enter the destination number you want to forward all incoming calls to in the Forward to field. (Optional.) Enter the always forward on code or off code respectively in the On Code or Off Code field. User Guide for the SIP-T48G IP Phone... - Page 64 The default ring time is 12 seconds. 4) (Optional.) Enter the no answer forward on code or off code respectively in the On Code or Off Code field. User Guide for the SIP-T48G IP Phone...
- Page 65 Tap he desired forwarding type. Tap the Off radio box. Tap the Save soft key to accept the change. Dynamic Forwarding To forward an incoming call to another party: When the phone is ringing, tap FWD. User Guide for the SIP-T48G IP Phone...
-
Page 66: Call Transfer
Attended Transfer: Transfer a call with prior consulting. To perform a blind transfer: Press or tap the Transfer soft key during a call. Enter the number you want to transfer the call to. User Guide for the SIP-T48G IP Phone... - Page 67 Tap the History soft key, and then tap the desired list. Tap the desired entry to dial out. • Tap the Directory soft key, and then tap Remote Phone Book. Search for the contact and tap the desired contact to dial out. User Guide for the SIP-T48G IP Phone...
-
Page 68: Call Waiting
Call waiting is configurable via web user interface at the path Features->General Information. Conference You can use the SIP-T48G IP phone to create a conference with other two parties using the phone’s local conference or create a conference with multiple participants which is called network conference. -
Page 69: Local Conference
Local Conference The SIP-T48G IP phone supports up to 3 parties (including yourself) in a conference call. This is the default method of conference called Local Conference. You can create a conference between an active call and a call on hold at any time by tapping the Conference soft key. -
Page 70: Call Park
Call Pickup You can use call pickup to answer someone else’s incoming call on your phone. The SIP-T48G IP phone supports directed call pickup and group call pickup. Directed call pickup is used for picking up a call that is ringing at a target phone number. -
Page 71: Anonymous Call
(Optional.) Enter the anonymous call on code and off code respectively in the On Code and Off Code field. The phone will send the configured on code or off code depending on your selection when you enable or disable anonymous call feature on the phone. User Guide for the SIP-T48G IP Phone... -
Page 72: Anonymous Call Rejection
Anonymous call rejection is configurable on a per-line basis. You can also configure the phone to send anonymous call rejection on/off code to the server to activate/deactivate anonymous call rejection on the server side. User Guide for the SIP-T48G IP Phone... - Page 73 Anonymous call rejection is configurable via web user interface at the path Account->Basic. If phone B has anonymous call feature enabled and places a call to your phone, the call will be rejected, and the touch screen of the phone B will display the following: User Guide for the SIP-T48G IP Phone...
-
Page 74: Advanced Phone Features
Voice Mail You can leave voice mails for someone else using the SIP-T48G IP phone. You can also listen to the voice mails that are stored in a voice mailbox. When receiving a new voice mail, the phone will play a warning tone. The power indicator LED will slow flash red, and the touch screen will prompt “n New Voice Mail(s)”... - Page 75 Before listening to voice mails, ensure that the voice mail access code has been configured. To view the voice mail via phone user interface: ->Message->View Voice Mail. The touch screen displays the amount of new and old voice mails. User Guide for the SIP-T48G IP Phone...
-
Page 76: Message Waiting Indicator (Mwi)
Message Waiting Indicator (MWI) The SIP-T48G IP phone supports MWI when receiving a new voice message. If someone leaves you a voice mail, you will receive a message waiting indicator. MWI will be indicated in three ways: a warning tone, an indicator message (including a voice mail icon) on the touch screen, and the power indicator LED slow flashes red. -
Page 77: Troubleshooting
Ensure that the Ethernet cable is plugged into the Internet port on the phone and the Ethernet cable is not loose. • Ensure that the switch or hub in your network is operational. User Guide for the SIP-T48G IP Phone... -
Page 78: Call Issues
If the dial tone exists on another audio mode, connect a different handset or headset to isolate the problem. Why doesn’t the phone ring? Check the ringer volume on the phone. To adjust the ringer volume setting, press the Volume key when the phone is on-hook and idle. User Guide for the SIP-T48G IP Phone... -
Page 79: Regulatory Notices
Contact your Yealink Authorized Reseller for information about service agreements applicable to your product. Limitations of Liability TO THE FULL EXTENT ALLOWED BY LAW, YEALINK EXCLUDES FOR ITSELF AND ITS SUPPLIERS ANY LIABILITY, WHETHER BASED IN CONTRACT OR TORT (INCLUDING NEGLIGENCE), FOR INCIDENTAL, CONSEQUENTIAL,... -
Page 80: Environmental Requirements
Do not insert any object into equipment slots that is not part of the product or auxiliary product. • Before connecting a cable, connect the grounding cable of the device first. Do not disconnect the grounding cable until you have disconnected all other cables. User Guide for the SIP-T48G IP Phone... -
Page 81: Cleaning Requirements
Use a piece of soft, dry and anti-static cloth to clean the device. • Keep the power plug clean and dry. Using a dirty or wet power plug may lead to electric shock or other perils. User Guide for the SIP-T48G IP Phone... - Page 82 Estonia(Tallinn), Finland(Helsinki), Gaza Strip(Gaza), Greece(Athens), Israel(Tel Aviv), Jordan(Amman), Latvia(Riga), Lebanon(Beirut), Moldova(Kishinev), Romania(Bucharest), Russia(Kaliningrad), Syria(Damascus), Turkey(Ankara), Ukraine(Kyiv, Odessa) East Africa Time, Iraq(Baghdad), Russia(Moscow) +3:30 Iran(Teheran) Armenia(Yerevan), Azerbaijan(Baku), Georgia(Tbilisi), Kazakhstan(Aktau), Russia(Samara) +4:30 Afghanistan(Kabul) Kazakhstan(Aqtobe), Kyrgyzstan(Bishkek), Pakistan(Islamabad), Russia(Chelyabinsk) +5:30 India(Calcutta) User Guide for the SIP-T48G IP Phone...
- Page 83 Australia(Adelaide), Australia(Darwin) Australia(Brisbane), Australia(Hobart), Australia(Sydney, Melboume, Canberra), Russia(Vladivostok) +10:30 Australia(Lord Howe Islands) New Caledonia(Noumea), Russia(Srednekolymsk Time) +11:30 Norfolk Island New Zealand(Wellington, Auckland), Russia(Kamchatka Time) +12:45 New Zealand(Chatham Islands) Tonga(Nukualofa) +13:30 Chatham Islands Kiribati User Guide for the SIP-T48G IP Phone...
- Page 84 User Guide for the SIP-T48G IP Phone...
Need help?
Do you have a question about the SIP-T48G and is the answer not in the manual?
Questions and answers