
Related Manuals for Honda UM536


Summary of Contents for Honda UM536
- Page 1 WEED MOWER UM536 UM616 • OWNER'S MANUAL MANUEL DE L'UTILISATEUR BEDIENUNGSANLEITUNG MANUAL DE EXPLICACIONES...
-
Page 2: Table Of Contents
8. MOWING ................... . 35 9. STOPPING THE ENGINE ..............38 10. MAINTENANCE ................. 39 11. TRANSPORTING/STORAGE ............. 54 12. TROUBLESHOOTING ............... . 57 13. SPECIFICATIONS ................58 14. MAJOR Honda DISTRIBUTOR ADDRESSES ........59... - Page 3 Honda UM536/UM616 OWNER’S MANUAL The ‘‘e-SPEC’’ mark symbolizes environmentally responsible technologies applied to Honda power equipment, which contains our wish to ‘‘preserve nature for generations to come’’.
- Page 4 This manual covers the operation and maintenance of the Honda WEED MOWER UM536/UM616. Honda Motor Co., Ltd. reserves the right to make changes at any time without notice and without incurring any obligation. No part of this publication may be reproduced without written permission.
-
Page 5: Safety Instructions
SAFETY INSTRUCTIONS To ensure safe operation For your safety and safety of others, pay special attention to these precautions: Honda weed mower is designed to give safe and dependable service if operated according to instructions. Read and understand the Owner’s Manual before operating the weed mower. - Page 6 Do not operate the weed mower with the foot guard bar removed. To ensure safe operation Operator Responsibility Any part from the machine is a potential source of danger if the machine is used in abnormal conditions or if the maintenance is not done correctly.
- Page 7 To ensure safe operation Operator Responsibility Exercise extreme caution when changing direction on slopes. Use extreme caution when pulling the weed mower towards you. Stop the blade if the weed mower has to be tilted for transportation when crossing surfaces other than grass, and when transporting the weed mower to and from the area to be mowed.
- Page 8 Do not use the machine with worn or damaged parts. Parts must be replaced, not repaired. Replace worn or damaged parts with Honda genuine parts. Blades must always bear the mark Honda and the reference number. Non equivalent quality parts may damage the machine and be prejudicial to your safety.
- Page 9 To ensure safe operation Thrown Object Hazard Objects hit by the rotating blade can be thrown from the weed mower with great force, and may cause serious injury. Thoroughly inspect the area where the equipment is to be used and remove all objects which may be thrown by the machine (stones, branches, wires, bones, etc...).
- Page 10 To ensure safe operation Never store the equipment with gasoline in the tank inside a building where fumes may reach an open flame, spark or high temperature source. Allow the engine to cool before storing in any enclosure. To prevent a fire hazard, keep the weed mower clean and free of grass, leaves or excessive grease.
- Page 11 To ensure safe operation Operation on Slope When mowing on slopes, keep the fuel tank less than half full to minimize fuel spillage. Mow across the slope (At equally spaced intervals) rather than up and down it. Be very careful when changing the direction of the weed mower on a slope.
-
Page 12: Safety Label Locations
Their meaning is explained below. (see page ). These decals are considered as a part of the weed mower. Should one become detached or unreadable, contact your Honda dealer for its replacement. CUTTING DANGER PLUG CAUTION READ OWNER’S... -
Page 13: Ce Mark Location
NOISE LABEL and CE mark location NOISE LABEL and CE MARK Manufacturer and address NOISE LABEL Description code Frame serial number Year of manufacture Machine mass Net power... -
Page 14: Component Identification
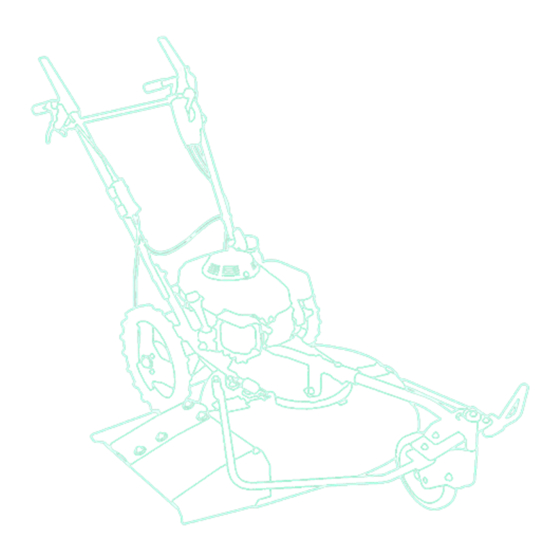
COMPONENT IDENTIFICATION UM536: BLADE CLUTCH LEVER DRIVE CLUTCH LEVER LOCK LEVER THROTTLE LEVER AIR CLEANER BRAKE LEVER (EBE type) SPARK PLUG CAP ENGINE OIL FILLER CAP MUFFLER ENGINE OIL DRAIN BOLT SIDE RUBBER DISCHARGE ADAPTER CUTTING HEIGHT ADJUSTING LEVER (FRONT) - Page 15 UM616: BLADE CLUTCH LEVER DRIVE CLUTCH LEVER LOCK LEVER THROTTLE LEVER SHIFT LEVER AIR CLEANER BRAKE LEVER (EBE type) SPARK PLUG CAP ENGINE OIL FILLER CAP MUFFLER ENGINE OIL DRAIN BOLT SIDE RUBBER DISCHARGE ADAPTER CUTTING HEIGHT ADJUSTING LEVER (FRONT) FRONT WHEEL STARTER GRIP FRONT WHEEL LOCK PIN...
-
Page 16: Controls
The throttle lever controls engine speed from LOW (idle) to HIGH (max. speed). Use when starting the engine, while operating the weed mower, or when stopping the engine. CHOKE is for starting a cold engine. HIGH CHOKE THROTTLE LEVER CHOKE HIGH STOP UM536 HIGH CHOKE THROTTLE LEVER CHOKE HIGH STOP UM616... - Page 17 Blade clutch lever The blade clutch lever is operated in two ways: The blade will start to rotate when the blade clutch lever is squeezed while squeezing the lock lever (yellow mark). Releasing the clutch lever will cause the blade to stop rotating, allowing the lock lever to return to the LOCK position automatically.
- Page 18 Drive clutch lever The mower will start to move when the drive clutch lever is squeezed and will stop when the lever is released. MOVE STOP DRIVE CLUTCH LEVER STOP MOVE Fuel valve The fuel valve is used to open or close the fuel passage from the fuel tank to the carburetor.
- Page 19 Cutting height adjusting levers Cutting height can be adjusted in 4 stages by changing the height of the front and rear wheels. Adjust the cutting height by operating these levers before mowing. CUTTING HEIGHT CUTTING HEIGHT ADJUSTING LEVER ADJUSTING LEVER FREE LOCK (Rear)
- Page 20 Gear shift lever (UM536) This lever is used to change mower speed in forward. It has two positions. 1st: 0.5 m/sec 2nd: 0.8 m/sec GEAR SHIFT LEVER Shift lever (UM616) The shift lever controls the mower’s maximum drive speed. Move the shift lever to select the pace at which you normally mow in open areas.
- Page 21 Brake lever (EBE type) The brake is provided to aid in changing direction or adjusting speed when mowing up and down the face of the grade or driving down a slope. BRAKE LEVER...
-
Page 22: Pre-Operation Checks
PRE-OPERATION CHECKS For safe and efficient mowing, always make a pre-operation inspection before operating: Perform a pre-operation inspection on a firm, level surface with the engine stopped and spark plug cap removed from the spark plug. Check the engine oil level Running the engine with low oil level will cause serious engine damage. - Page 23 Check the fuel level Remove the fuel tank cap and check that the fuel tank is filled to the upper limit of fuel level. If the level is low, fill up the fuel tank to the upper level. Use automotive unleaded gasoline with a Research Octane Number of 91 or higher (a Pump Octane Number of 86 or higher).
- Page 24 Gasolines containing alcohol If you decide to use a gasoline containing alcohol (gasohol), be sure it’s octane rating is at least as high as that recommended by Honda. There are two types of ‘‘gasohol’’: one containing ethanol, and the other containing methanol.
- Page 25 Check the air cleaner elements Never run the engine without the air cleaner; rapid engine wear will result. Remove the wing nuts to remove the air cleaner cover. Remove the air cleaner elements. If the elements are dirty, follow the cleaning procedure described on page After servicing the air cleaner elements, reinstall the air cleaner cover securely.
- Page 26 Check the cutting blade Before each use, check the cutter blade for damage or excessive wear. To avoid severe personal injury, disconnect the spark plug cap to prevent accidental starting, and wear heavy gloves to protect your hands from the cutter blade. Stop the engine and set the fuel valve in the OFF position.
- Page 27 If the blade needs sharpening or replacement, take the cutter deck to your authorized Honda weed mower dealer. Or, if you have the proper tools, you can remove and install the blades yourself. (see blade removal and...
- Page 28 Check all protectors and guards Inspect the protectors and guards to be sure that they are correctly installed and are not damaged. If a protector or guard is damaged, replace it before using the weed mower. Never use the weed mower without its protector. Stones or other foreign objects thrown outward by the cutting blades could cause personal injury or property damage.
-
Page 29: Starting The Engine
Turn the fuel valve ON. FUEL VALVE Move the throttle lever to the CHOKE position. When the engine is warm or the air temperature is high, move the throttle lever to LOW. CHOKE ······ CHOKE CHOKE UM536 ······ CHOKE UM616... - Page 30 While the engine is in operation, don’t pull the starter grip or damage may result. As the engine warms up, move the throttle lever to the LOW position. ······· UM536 THROTTLE LEVER ······· UM616...
- Page 31 If you always operate the rotary mower at altitude higher than 1,500 m (5,000 feet) above sea level, have your authorized Honda dealer perform these carburetor modifications. Even with suitable carburetor jetting, engine horsepower will decrease approximately 3.5 % for each 300 m (1,000 foot) increase in altitude.
- Page 32 OPERATION Cutting height adjustment. Before adjustment, be sure to stop the engine. Before moving the weed mower from one place to another, stop the engine and raise the cutting height to the highest position. Cutting height can be adjusted in 4 stages by operating the front and rear cutting height adjusting levers;...
- Page 33 Do not perform this operation on slopes or on loose or uneven surfaces. 75 mm 50 mm 30 mm 15 mm Move the shift lever to the desired shift lever position. GEAR SHIFT LEVER (UM536) ······ ······ FAST ······ FAST SLOW ······...
- Page 34 Move the throttle lever to the HIGH position. HIGH ····· HIGH UM536 HIGH ····· HIGH UM616...
- Page 35 Unlock the lock lever then squeeze the blade clutch lever. · · · · · · · · · · ROTATE LOCK LEVER BLADE CLUTCH LEVER Squeeze the drive clutch lever. · · · · · · · · · ·...
- Page 36 To stop the mower on a down slope, release the drive clutch lever and squeeze the brake lever (EBE type only). BRAKE LEVER DRIVE CLUTCH LEVER Be sure to disengage the drive clutch before applying the brake. Damage to the transmission mechanism could result if the brake and drive clutch levers are operated simultaneously.
-
Page 37: Mowing
MOWING On slopes When mowing on a slope, be sure to lock the front wheel securely with the wheel lock pin so that it cannot move from side to side. To ease mowing on a slope, it is recommended to equip an optional brake system (EE type) or to use a mower that is equipped with the system as standard (EBE type). - Page 38 < Cutting pattern > In order to discharge the cuttings as efficiently as possible, use one of the following recommended patterns. * (CLOCKWISE) * When using this pattern, the mower will begin to discharge the cuttings more efficiently after it has cleared the central area. (COUNTERCLOCKWISE) Discharge direction...
- Page 39 When mowing, it is important to keep the blade turning rapidly. Be sure to take the type of grass and the nature of the terrain into account when selecting engine speed and transmission settings. If the engine slows down while mowing, use one of the following procedures.
-
Page 40: Stopping The Engine
STOPPING THE ENGINE Release both clutch levers. Move the throttle lever to STOP. ····· STOP UM536 ····· STOP UM616 Move the fuel valve to the OFF position. FUEL VALVE... -
Page 41: Maintenance
Before performing any maintenance, stop the engine and remove the spark plug cap to be certain the engine will not start accidentally. Use only genuine Honda parts or their equivalent for maintenance or repair. Replacement parts which are not of equivalent quality may damage the mower. -
Page 42: Maintenance Schedule
Service more frequently when used in dusty areas. These items should be serviced by your servicing dealer, unless you have the proper tools and are mechanically proficient. Refer to Honda shop manual for service procedures. For commercial use, log hours of operation to determine proper maintenance intervals. - Page 43 Tool kit The tools supplied are necessary for performing some periodic maintenance, simple adjustments and repairs. SPARK PLUG WRENCH × 12 mm WRENCH...
- Page 44 Engine oil change Drain the oil while the engine is still warm to assure rapid and complete draining. Before draining the oil, set the cutting height adjusting levers in the highest position. Do not let the oil spill onto the rubber tires. Cover the tires with a rag or wooden plate if necessary.
- Page 45 Please dispose of used motor oil in a manner that is compatible with the environment. We suggest you take it in a sealed container to your local service station for reclamation. Do not throw it in the trash or pour it on the ground.
- Page 46 Air cleaner service A dirty air cleaner will restrict air flow to the carburetor. To prevent carburetor malfunction, service the air cleaner regularly. Service more frequently when operating the mower in extremely dusty areas. Never use gasoline or low flash point solvents for cleaning the air cleaner element.
- Page 47 Blade replacement To avoid severe personal injury, disconnect the spark plug cap to prevent accidental starting, and wear heavy gloves to protect your hands from the cutter blade. Removal: Tilt the mower backward (see page Hold the blade firmly, and remove the two blade bolts. Remove the blade.
- Page 48 Installation: Use a genuine Honda replacement blade or equivalent. Clean dirt and grass from the blade, blade holder, and the inside of the mower deck. Install the blade as described below. BLADE OUTSIDE The blade bolts are specially designed for this application and must not be replaced with any other bolts.
- Page 49 Spark plug service Recommended spark plug: BPR5ES (NGK) W16EPR-U (DENSO) To ensure proper engine operation, the spark plug must be properly gapped and free of deposits. If the engine has been running, the muffler will be very hot, be careful not to touch the muffler.
- Page 50 Measure the plug gap with a feeler gauge. Correct as necessary by carefully bending the side electrode. The gap should be:0.70 0.80 mm (0.028 0.031 in) − − SIDE ELECTRODE 0.70 0.80 mm − Thread the plug in by hand to prevent cross threading. After a new spark plug has been seated by hand, it should be tightened 1/2 turn with a wrench to compress its washer.
- Page 51 Blade clutch cable check and adjustment The blade drive belt will slip on the pulleys, or the blade clutch will not be disengaged (the blades will not be stopped even if the clutch is disengaged) if the blade clutch cable is not adjusted properly. Adjust the cable when the lock lever is not returned to the LOCK position completely.
- Page 52 Drive clutch cable check and adjustment (UM536) The drive clutch will slip or will not be disengaged if the clutch cable is not adjusted properly. (Inspection and adjustment) Inspect the drive clutch cable and adjust as necessary every 100 hours of operation.
- Page 53 50.0 60.0 mm (1.97 2.36 in) − − Apply the brake several times and check for free rotation after the brake lever is released. If proper adjustment cannot be obtained by this method, see your authorized Honda dealer. ADJUST NUT BRAKE LEVER...
- Page 54 Check to be sure the drive clutch lever operates properly. If the drive clutch lever does not operate properly after the cable is correctly adjusted, take the mower to an authorized Honda weed mower dealer for repair. ADJUST NUT SHIFT CABLE...
- Page 55 It is illegal in some areas to operate an engine without a spark arrester. Check local laws and regulations before operating. An optional spark arrester is available from Honda dealers. If the mower has been running, the muffler will be very hot. Allow it to cool before proceeding.
-
Page 56: Transporting/Storage
TRANSPORTING/STORAGE Transporting To prevent fire hazard, turn the fuel valve to OFF and drain fuel from the fuel tank before loading the weed mower on a trailer for transportation. Cleaning of parts behind belt cover. When the mower is to be stored or left standing for an extended period of time, remove the belt cover and clean the parts behind the cover as follows: −... - Page 57 Preparation for storage If the weed mower has been running, the engine and muffler will be very hot; allow them to cool before proceeding. The following steps should be taken to protect the weed mower whenever it will be stored for longer than 30 days. Drain all gasoline from the fuel tank into an approved gasoline container.
- Page 58 Change the engine oil (see page If the weed mower will be stored for longer than 3 months, remove the spark plug and pour three tablespoons (approximately 1 oz.) of clean motor oil into the cylinder. Pull the recoil starter rope gently to distribute the oil, and then reinstall the spark plug.
-
Page 59: Troubleshooting
Fuel not reaching Check the position of the fuel valve carburetor. (see p. ). If that’s not the problem, see your authorized Honda dealer. Engine loses power: Spark plug faulty or Regap plug or replace. (see p. improperly gapped. Engine overloaded. -
Page 60: Specifications
SPECIFICATIONS MODEL UM536 UM616 Power equipment KZAG KZAH description code ENGINE GXV160 Type 4-stroke, overhead valve, 1 cylinder Displacement 163 cm (9.9 cu-in) Bore and stroke 68.0 × 45.0 mm (2.7 × 1.8 in) Ignition timing 20° BTDC Ignition system... -
Page 61: Major Honda Distributor Addresses
MAJOR Honda DISTRIBUTOR ADDRESSES For European NAME OF FIRM ADDRESS TEL: FAX: (COMPANY) Honda (U.K.) Limited 470 London Road, Slough, Tel: 01753-590-590 Berkshire, SL38QY, Fax: 01753-590-000 United Kingdom Honda Europe Power Pole 45 Rue des Chataigniers Tel: 2-38-65-06-00 Equipment S.A. - Page 62 For European (continued) NAME OF FIRM ADDRESS TEL: FAX: (COMPANY) OY Brandt AB Tuupakantie 4 Tel: 90-895-501 SF-01740, Vantaa Fax: 90-878-5276 Finland Tel: 31-49-17-00 TIMA PRODUCTS A/S Tårnfalkevej 16, Postboks 511 DK 2650 Hvidovre Fax: 36-77-16-30 Denmark Greens Polig. Industrial Congost Tel: 93-871-84-50 08530, La Garriga Fax: 93-871-81-80...
- Page 63 oHonda Motor Co., Ltd. 2002 efgsY1500.2007.06 36VD8626 Printed in Japan 00X36-VD8-6260...