
Related Manuals for Honda HRU216M1


Summary of Contents for Honda HRU216M1
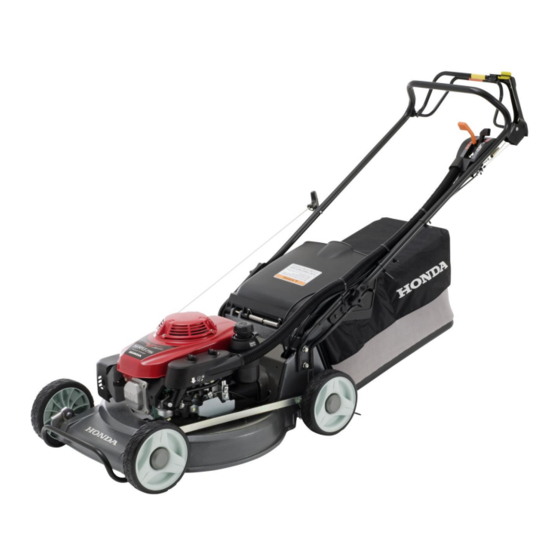
- Page 1 Honda Lawn Mower HRU216M1 Owner’s Manual & Service Record Booklet Read and understand this Owners Manual before operating the Lawnmower...
- Page 2 Thank you for purchasing a Honda lawn mower. This manual covers the operation and maintenance of the Honda HRU216 lawn mower. We want to help you get the best results from your mower and to operate it safely. This manual contains the information on how to do that; please read it carefully.
-
Page 3: Table Of Contents
CONTENTS 1. WARRANTY....................4 Honda Limited Warranty................4 2. SAFETY INSTRUCTIONS................5 3. COMPONENT IDENTIFICATION..............7 4. CONTROLS....................9 Fuel Valve....................9 Throttle Lever..................9 Blade Control Lever................10 Drive Clutch Lever................11 Cutting Height Adjustment Lever............12 Shift Lever..................13 Front Guard..................14 5. PRE-OPERATION CHECKS.................15 ARE YOU READY TO MOW? ..............15 CHECK YOUR LAWN.................15 CHECK YOUR MOWER................16 Blades....................16... - Page 4 CONTENTS - continued SAFE MOWING PRACTICES..............31 MOWING TIPS..................33 7. TRANSPORTING/STORAGE...............36 BEFORE LOADING..................36 LOADING AND UNLOADING..............36 STORAGE PREPARATION................37 Handlebar Folding................40 STORAGE PRECAUTIONS................41 8. MAINTENANCE..................42 THE IMPORTANCE OF MAINTENANCE.............42 MAINTENANCE SAFETY................43 MAINTENANCE SCHEDULE...............44 ENGINE MAINTENANCE................45 Engine Oil Change................45 Engine Oil Recommendations............46 Air Cleaner Service................47 Spark Plug Service................48 Carburetor Modification for Altitude operation......50 Fuel Recommendations..............50...
-
Page 5: Warranty
1. HONDA LIMITED WARRANTY Honda* warrants each new Honda lawn mower to be free from defects in material and workmanship for the period detailed on your warranty registration form. The Honda warranty is limited. In order to qualify, the service schedule sheets located at the back of this manual must be completed (page 64). -
Page 6: Safety Instructions
2. SAFETY INSTRUCTIONS To ensure safe operation Read and understand the Owner’s Manual before operating the mower. Failure to do so could result in personal injury or equipment damage. Read instructions carefully, become familiar with controls and proper use of equipment. - Page 7 2. SAFETY INSTRUCTIONS - continued Use extreme caution when reversing or pulling the lawn mower toward you. Stop the blades if the lawn mower has to be tilted for transporting, when crossing surfaces other than grass and when transporting the lawn mower to and from the area to be mowed.
-
Page 8: Component Identification
3. COMPONENT IDENTIFICATION... - Page 9 3. COMPONENT IDENTIFICATION - continues Record the frame and engine serial numbers and date of purchase in the space below. You will need these serial numbers when ordering parts and when making technical or warranty inquiries. Frame Serial Number: Engine Serial Number: Date of Purchase:...
-
Page 10: Controls
4. CONTROLS DESCRIPTION OF CONTROLS Fuel Valve The fuel valve opens and closes the fuel passage from the fuel tank to the carburetor. The fuel valve must be ON to start and operate the mower. The fuel valve should be kept OFF when the mower is not in use. Throttle Lever CHOKE For starting a cold engine... -
Page 11: Blade Control Lever
4. CONTROLS – continued Blade Control Lever This lever is connected to the Roto-Stop blade control system. The blades will not turn unless the blade control button is pushed in conjunction with the blade control lever being pushed forward. -
Page 12: Drive Clutch Lever
4. CONTROLS - continued Drive Clutch Lever The drive clutch lever engages (push forward) and disengages (release) the transmission that drives the rear wheels. The drive clutch lever should only be engaged after the engine has been started. -
Page 13: Cutting Height Adjustment Lever
4. CONTROLS - continued Cutting Height Adjustment Lever All wheels of the mower can be adjusted with one lever. The cutting height figures are approximate. The actual height of cut grass will vary with lawn and soil conditions. Move the adjuster forward to lower and back to raise the cutter housing. -
Page 14: Shift Lever
4. CONTROLS - continued Shift Lever The shift lever selects and controls the self-propelled drive speed. For mowing thick grass or manoeuvring in small areas. For intermediate self-propelled mowing speed. For maximum self-propelled transport speed. -
Page 15: Front Guard
4. CONTROLS - continued Front Guard Use the front guard when lifting the lawn mower, the front guard can also be utilised to tie down lawnmower for transportation (See page 36). NOTICE Do not step on the front guard. Replace the front guard at an authorised Honda service dealer whenever it is deformed. -
Page 16: Pre-Operation Checks
5. PRE-OPERATION CHECKS ARE YOU READY TO MOW? Be sure to wear protective clothing. Long pants and eye protection can lower your risk of injury from thrown objects. Wear footwear that protects your feet and won’t let you slip if you mow on slopes or uneven ground. CHECK YOU LAWN For your safety and for the safety of others, always inspect the area before mowing. -
Page 17: Check Your Mower
5. PRE-OPERATION CHECKS - continued CHECK YOUR MOWER Blades Before each use, check the cutter blades for damage or excessive wear. To avoid severe personal injury, disconnect the spark plug cap to prevent accidental starting, and wear heavy gloves to protect your hands from the cutter blades. - Page 18 5. PRE-OPERATION CHECKS - continued 5. Inspect the blades for wear and damage. 6. Check that the blade setting bolts and the blade disc holder bolt are tight (see page 51). Never operate the mower with a worn, damaged, split or dented blade. A piece of blade which breaks off and is thrown outwards can cause serious bodily injuries.
- Page 19 5. PRE-OPERATION CHECKS - continued NOTICE Blade wear is increased when the mower is used on sandy soils. Inspect the blades more often when the mower is used in these conditions. A dull blade can be sharpened, but a blade that is worn out, bent, cracked or otherwise damaged must be replaced.
-
Page 20: Engine Oil Level
5. PRE-OPERATION CHECKS - continued Engine Oil Level Check the engine oil level with the engine stopped and the mower on a level surface. 1. Clean the area around the oil filler cap. 2. Remove the oil filler cap, and wipe the dipstick clean. 3. -
Page 21: Fuel
5. PRE-OPERATION CHECKS - continued Fuel Refuel in a well-ventilated area before starting the engine. If the engine has been running, allow it to cool. See page 50 for fuel recommendations. Remove the fuel filler cap and check the fuel level. Refill the tank if the fuel level is low. -
Page 22: Air Cleaner
5. PRE-OPERATION CHECKS - continued Air Cleaner Inspection Make sure the air filters are clean and in good condition. A dirty air filter will restrict air flow to the carburetor, reducing engine performance. Refer to page 47 for air cleaner service. Grass Bag A lawn mower works like a vacuum cleaner;... - Page 23 5. PRE-OPERATION CHECKS - continued Installation 1. Raise the discharge guard and hook the grass bag frame onto the cutter housing as shown. 2. Release the discharge guard to secure the grass bag in place. Removal 1. Raise the discharge guard, grasp the grass bag handle and remove the grass bag.
-
Page 24: Cutting Height
5. PRE-OPERATION CHECKS - continued Cutting Height Check the cutter housing height settings. The lowest is approximately 16 mm and the highest setting is 76mm. To adjust cutting height, pull the adjustment lever toward the wheel, and move it into another notch. If you are not sure what cutting height to select, start with a high setting and check the appearance of the lawn after mowing a small area. -
Page 25: Operation
6. OPERATION MOWING PRECAUTIONS Before operating the mower for the first time, please review the SAFETY INSTRUCTIONS beginning on page 5 and SAFE MOWING PRACTICES on page 31. Even if you have operated other mowers, take time to become familiar with how this mower works and practice in a safe area until you build up your skills. -
Page 26: Throttle Lever
6. OPERATION - continued 2. Move the throttle lever to the proper starting position COLD ENGINE: Move the throttle lever to the CHOKE position. WARM ENGINE: Move the throttle lever to the HIGH position. - Page 27 6. OPERATION - continued 3. Release the drive clutch lever. If the drive clutch lever is engaged, the mower will move forward when you operate the starter. 4. Pull the starter grip lightly until you feel resistance, then pull briskly in the direction of the arrow as shown below.
-
Page 28: Blade Control Lever
6. OPERATION - continued OPERATING THE CONTROLS FOR MOWING Throttle Lever For best cut quality, always mow with the throttle lever in the HIGH position. When the blades rotates at the preset fast speed, it creates a strong fan action that lifts and cuts grass more efficiently. -
Page 29: Drive Clutch Lever
6. OPERATION - continued Drive Clutch Lever Push the drive clutch lever forward and hold it against the handlebar to propel the mower forward. Release the drive clutch lever to stop the mower’s forward movement. Always release the drive clutch lever before starting the engine. If the drive clutch is engaged, the mower will move forward when you operate the starter. -
Page 30: Shift Lever
6. OPERATION - continued Shift Lever With the drive clutch released, move the shift lever to select 1 (slow), (medium) or 3 (fast). Do not use the throttle lever to adjust your forward speed. Forward speed should be adjusted with the shift lever, not the throttle lever. The throttle lever must remain in the “HIGH”... -
Page 31: Stopping The Engine
6. OPERATION - continued STOPPING THE ENGINE 1. Release the drive clutch lever and the blade control lever. 2. Move the throttle lever to the STOP position. 3. When the mower is not in use, turn the fuel valve to the OFF position (Page... -
Page 32: Safe Mowing Practices
6. OPERATION - continued SAFE MOWING PRACTICES For your safety, keep all four wheels on the ground and be careful to avoid losing your footing and your control of the mower. Keep a firm grip on the handlebar and walk, never run with the mower. Be very careful when mowing uneven or rough ground. - Page 33 6. OPERATION - continued Obstacles Use the side of the mower to cut close to large obstacles, such as fences or walls. Release the drive clutch lever to disengage the drive when mowing around trees and other obstacles. Push the mower around obstacles for better directional control.
-
Page 34: Mowing Tips
6. OPERATION - continued MOWING TIPS Cutting Height Consult a local nursery or lawn and garden centre for cutting height recommendations and advice about specific types of grasses and growing conditions in your area. If you look closely, you’ll see that most grass has stems and leaves. - Page 35 6. OPERATION - continued Blade Sharpness A sharp blade cuts cleanly. A dull blade tears the grass, leaving shredded ends that turn brown. When your blades don’t cut cleanly anymore, have them sharpened or replaced. Dry Grass If the ground is too dry, mowing will stir up a lot of dust. Besides being unpleasant to work in, too much dust will clog the air filter.
- Page 36 6. OPERATION - continued Mowing Patterns Your Honda mower will work most efficiently if you use the following mowing patterns as much as possible. Cutter housing, equipment design and the direction in which the blades rotate, cause these mowing patterns to give the best results.
-
Page 37: Transporting/Storage
7. TRANSPORTING/STORAGE BEFORE LOADING If the engine has been running, allow it to cool for at least 15 minutes before loading the mower onto the transport vehicle. A hot engine and exhaust system can burn you and can ignite some materials. Turn the fuel valve to the OFF position. -
Page 38: Storage Preparation
7. TRANSPORTING/STORAGE - continued STORAGE PREPARATION Proper storage preparation is essential for keeping your lawn mower trouble- free and looking good. The following steps will help to keep rust and corrosion from impairing your lawn mowers function and appearance and will make the engine easier to start when you use the lawn mower again. - Page 39 7. TRANSPORTING/STORAGE - continued Fuel Petrol will oxidize and deteriorate overtime when stored. Old petrol will cause hard starting and it leaves gum deposits that clog the fuel system. If the petrol in your mower deteriorates during storage, you may need to have the carburetor and other fuel system components serviced or replaced.
- Page 40 7. TRANSPORTING/STORAGE - continued Draining the Fuel Tank and Carburetor 1. Empty the fuel tank into an approved petrol container. 2. Remove the carburetor drain bolt with a 10mm wrench and drain the carburetor bowl fuel into an approved container. Petrol is highly flammable and explosive.
-
Page 41: Handlebar Folding
7. TRANSPORTING/STORAGE - continued Handlebar Folding 1. Remove the grass bag (if installed). 2. Loosen or remove the two handlebar locking knobs. 3. Pull the handlebar struts to release them from the locating grooves, then swing the handlebar forward with the drive clutch lever held by your hand. Don’t allow the cables and air cleaner hose to be bent or pinched. -
Page 42: Storage Precautions
7. TRANSPORTING/STORAGE - continued STORAGE PRECAUTIONS If your mower will be stored with petrol in the fuel tank and carburetor, it is important to reduce the hazard of petrol vapour ignition. Select a well ventilated storage area away from any appliance that operates with a flame, such as a furnace or water heater. -
Page 43: Maintenance
8. MAINTENANCE THE IMPORTANCE OF MAINTENANCE Good maintenance is essential for safe, economical and trouble-free operation. It will also help reduce air pollution. To avoid the mower starting accidentally, pull off the spark plug cap before carrying out maintenance work. Improper maintenance or failure to correct a problem before operation can cause a malfunction in which you can be seriously hurt or killed. -
Page 44: Maintenance Safety
8. MAINTENANCE - continued MAINTENANCE SAFETY Some of the most important safety precautions follow. However, we cannot warn you of every conceivable hazard that can arise in performing maintenance. Only you can decide whether or not you should perform a give task. -
Page 45: Maintenance Schedule
8. MAINTENANCE - continued MAINTENANCE SCHEDULE 1) Service more frequently when used in dusty areas. 2) These items should be serviced by your servicing dealer, unless you have the proper tools and are mechanically proficient. Refer to the Honda workshop manual for service procedures. 3) Change engine oil every 25 hours when used under heavy load or in high ambient temperatures. -
Page 46: Engine Maintenance
8. MAINTENANCE - continued ENGINE MAINTENANCE Engine Oil Change Drain the used oil while the engine is warm. Warm oil drains quickly and completely. 1. Turn the fuel valve to the OFF position to reduce the possibility of fuel leakage (see page 9). 2. -
Page 47: Engine Oil Recommendations
8. MAINTENANCE - continued 5. After changing the engine oil and before starting the engine, check the oil level with the mower on a level surface: a) Wipe the dipstick clean. b) Insert and remove the dipstick without screwing it into the filler neck. Check the oil level shown on the dipstick. -
Page 48: Air Cleaner Service
8. MAINTENANCE - continued Air Cleaner Service A dirty air cleaner will restrict air flow to the carburetor, reducing engine performance. If you operate the mower in very dusty areas, clean the air cleaner more often than specified in the MAINTENANCE SCHEDULE. NOTICE Operating the engine without an air filter or damaged filters, will allow dirt to enter the engine, causing rapid engine wear. -
Page 49: Spark Plug Service
8. MAINTENANCE - continued Foam element: Clean in warm soapy water, rinse and allow it to dry thoroughly. Or, clean in non-flammable solvent and allow it to dry. Dip the filter element in clean engine oil, and then squeeze out excess oil. 5. - Page 50 8. MAINTENANCE - continued 2. Use a spark plug wrench to remove the spark plug. 3. Inspect the plug; replace it if the electrode is worn, or if the insulator is cracked or chipped. 4. If you are going to reuse the spark plug, remove carbon deposits with a stiff wire brush.
-
Page 51: Carburetor Modification For Altitude Operation
8. MAINTENANCE - continued Carburetor Modification of Altitude Operation At high altitude, the standard air-fuel mixture will be too rich. Performance will decrease and fuel consumption will increase. A very rich mixture will also foul the spark plug and cause hard starting. High altitude performance can be improved by specific modifications to the carburetor. -
Page 52: Blade Removal & Installation
8. MAINTENANCE - continued BLADE REMOVAL AND INSTALLATION If you have removed the blade assembly, always use a torque wrench to reinstall. Wear heavy gloves to protect your hands. To avoid weakening the blades or cause imbalance or poor cutting, the blades should be sharpened by trained staff at an authorised Honda servicing dealer. - Page 53 8. MAINTENANCE - continued Illustration showing the blade disc holder bolts, washers, blades/blade disc removed. 4. Remove the blade setting bolts, blades, spring washers, blade washers and self-lock nuts from the blade disc.
- Page 54 8. MAINTENANCE - continued Installation: 1. Clean dirt and grass from the blades, blade disc and the inside on the cutter housing. 2. Install the blade, spring washers, blade washers and self-lock nuts to the blade disc using the blade setting bolt as described below. 3.
- Page 55 8. MAINTENANCE - continued 4. Install the blade/blade disc, washers and blade disc holder bolts. 5. Hold the blade disc firmly and install the blade disc holder bolts.
- Page 56 8. MAINTENANCE - continued Tighten the blade disc holder with a torque wrench. Set a flat blade screwdriver at the engine’s bolt to prevent the blade disc from turning when tightening the blade disc holder bolt, tighten the blade disc holder bolt to the specified torque.
-
Page 57: Grass Bag Cleaning & Replacement
8. MAINTENANCE - continued GRASS BAG CLEANING AND REPLACEMENT Grass Bag Cleaning Wash the bag with a garden hose and allow it to dry completely before use, a wet bag will clog quickly. Grass Bag Replacement Replace a worn or damaged bag with a Honda genuine bag or its equivalent. Bag Removal Unclip the plastic edges of the bag from the frame. -
Page 58: Troubleshooting
9. TROUBLESHOOTING ENGINE PROBLEMS Engine Will Not Start Possible Cause Correction 1. Check control Fuel valve OFF. Turn fuel valve ON (page positions. 24). Throttle lever in wrong Move throttle lever to position. CHOKE position, unless the engine is warm (page 25). 2. - Page 59 9. TROUBLESHOOTING - continued VIBRATION PROBLEMS Excessive Vibration Possible Cause Correction 5. Check cutter housing Grass and debris lodged Clean out cutter housing and blades. under cutter housing (page 37). Blade loose, damaged or Tighten loose blade unbalanced by improper bolts.
-
Page 60: Specifications
10. SPECIFICATIONS MOWER MODEL Model HRU216M1 Description Code MATU Type TBUH DIMENSIONS, WEIGHTS & CAPACITIES Model HRU216M1 Overall Length 1,695mm Overall Width 570mm Overall Height* 1,050mm Dry Weight 53.0kg Wheel Base* 625mm Tread Front Rear 470mm Cutting Width 530mm 500mm Grass Bag Capacity 70ℓ... - Page 61 10. SPECIFICATIONS - continued ENGINE DESIGN AND PERFORMANCE Model HRU216M1 Engine Model GXV160H2 Engine Type 4-stroke, overhead valve, single cylinder Displacement 163cm² Bore and Stroke 68 x 45mm Compression Ratio 8.0 ± 0.2 Engine Net Power 2.7Kw (3.6HP) AT 3,000rpm...
- Page 62 10. SPECIFICATIONS - continued DRIVE TRAIN Mechanism from engine to transmission Shaft Drive Clutch Type Dog Clutch Operation Manual Lever Transmission Type Gear Transmission Operation Remote Control Number of Speeds 3 Speeds Lubrication System Oil Bath & Splash Lubricant Hypoid Gear Oil SAE #90 Oil Capacity 0.2 ℓ...
-
Page 63: Set-Up Instruction
11. SET-UP INSTRUCTION UNPACKING Remove all protective cardboards from the mower, including the piece around the handlebar. Handlebar Setup 1. Remove the locking knobs from the handlebar to the handlebar mounting section of the cutter housing enough so you can raise the handlebar into the normal position. - Page 64 11. SET-UP INSTRUCTION -continued 9. Secure the wires and air cleaner hose with the wire band as shown below. Secure the wires with the wire band as shown below.
-
Page 65: Service Schedule Sheet
12. SERVICE SCHEDULE SHEET Service Record First Year Service Record Record further services here: Here is an easy way to keep track of the hours your Honda lawnmower has done. Record how many hours you get from a tank of fuel, then simply record the number of tanks used. - Page 66 Part Number: C9050...
Need help?
Do you have a question about the HRU216M1 and is the answer not in the manual?
Questions and answers