
Related Manuals for Pepperl+Fuchs Raritan Dominion KX II-101


Summary of Contents for Pepperl+Fuchs Raritan Dominion KX II-101
- Page 1 PROCESS AUTOMATION QUICK INSTALLATION GUIDE Raritan Dominion KX II-101 KVM-over-IP ® ®...
-
Page 2: Table Of Contents
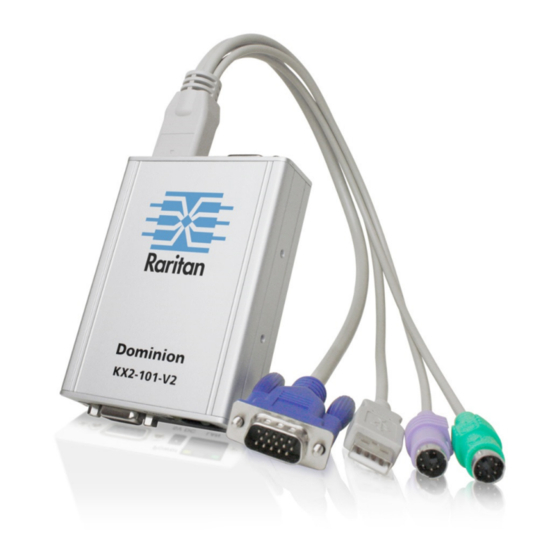
® Device Interfaces The Raritan Dominion KX II-101 KVM-over-IP switch (KVM switch) has multiple interfaces that are used to connect a VisuNet Remote Monitor / Box Thin Client (RM) to a local Host PC: Local VGA: This is a VGA port that can be used to connect an optional, local monitor to the KVM switch „... - Page 3 VisuNet Control Center Manual (Local Admin: Serial port for local administration of a host PC „ — this interface is not relevant for VisuNet Remote Monitors.) To Power Adapter: This is the interface to power the KVM „ switch. LAN Port: This is the Ethernet port that must be connected with „...
-
Page 4: Application Setup
VisuNet Control Center Manual Application Setup In addition to the local setup of the KVM switch and the host PC, there are also multiple options for connecting the KVM switch to an RM and integrating the KVM switch into a network: Figure 1: RM and KVM switch (point-to-point) Figure 2: RMs and KVM switches (Ethernet switched) -
Page 5: Preparing Visunet Rms
VisuNet Control Center Manual Preparing VisuNet Remote Monitors / Box Thin Clients In this section, the steps for a direct connection between an RM and a KVM switch are described. Before you can connect with a VisuNet RM Shell KVM profile to a host PC, you need to configure the KVM switch. Note: The following steps describe the configuration of the KVM switch from an RM. - Page 6 VisuNet Control Center Manual 2. Add IP address of KVM switch (Default: 192.168.0.192) to the "Local intranet" zone. Select the "Security" tab and the zone "Local intranet." „ Click on "Sites." „ Click on the "Advanced" button and add the IP address of the KVM switch to the list (default IP: „...
-
Page 7: Create Kvm Profile And Connect To Kvm Switch
VisuNet Control Center Manual Create KVM Profile and Connect to KVM Switch After the system has rebooted, you need to create a KVM profile and establish a connection to the KVM switch to setup the proper settings on the switch. 1. -
Page 8: Congifuring The Kvm Switch
VisuNet Control Center Manual Configuring the KVM Switch In this section, the configuration steps are described that are required to establish a connection from an RM to a KVM switch. Change Username/Password When you log in for the first time to the KVM switch, you will be prompted to change the default username and password (admin / raritan). -
Page 9: Set Up Date And Time
VisuNet Control Center Manual Set up Date and Time Check the KVM switch time. Navigate to "Device Settings Date/Time" and update the date and time. „ IMPORTANT: The times on the RM and KVM switch must match! -
Page 10: Create A Self-Signed Certificate
VisuNet Control Center Manual Create a Self-Signed Certificate Note: This step is only required if you do not have a valid "company certificate" that can be used on the KVM switch. IMPORTANT: A self-signed certificate should only be used when a direct connection between an RM and a KVM switch is established and when the RM is not connected to a company intranet or Internet. -
Page 11: Import A Self-Signed Certificate
VisuNet Control Center Manual Import a Self-Signed Certificate When you have created a self-signed certificate on the KVM switch, you need to import the created certificate into the RM Shell. 1. Open the KVM profile settings on the RM. 2. Connect to the KVM switch by pressing "Open Remote Console" 3. - Page 12 VisuNet Control Center Manual 4. Now you need to import the certificate into the Trusted Root Certificate Authorities Store. a. Click on "Install Certificate." A new window opens. Select "Place all certificates in the following store" and press "Browse." c. Select the folder "Trusted Root Certification Authorities" and press "OK."...
- Page 13 VisuNet Control Center Manual d. Import the certificate by pressing "Finish." Close the window by pressing "OK." e. A security warning pops up and asks if you really want to install the certificate. Accept by pressing "Yes." The certificate has now been successfully imported. 5.
- Page 14 Subject to modifications © Pepperl+Fuchs · Printed in Germany TDOCT-5540_ENG 01/17 00 ·...
Need help?
Do you have a question about the Raritan Dominion KX II-101 and is the answer not in the manual?
Questions and answers