
Subscribe to Our Youtube Channel
Related Manuals for JetCat P80

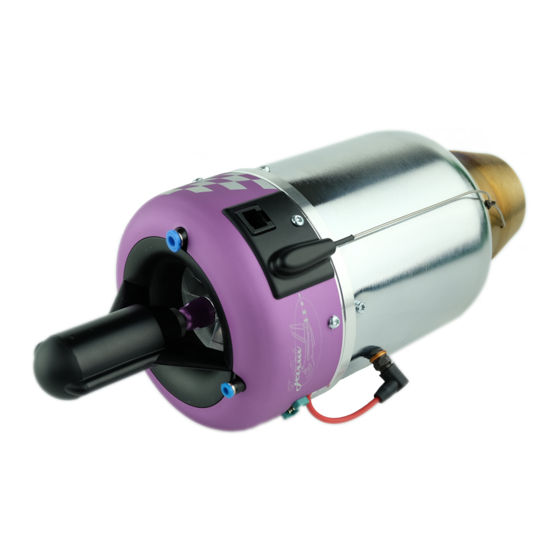
Summary of Contents for JetCat P80
-
Page 1: Instruction Manual
Instruction manual JetCAT P80 Ing. Büro CAT M.Zipperer GmbH Etzenbach 16 79129 Staufen Tel.: 07636-78030 Fax: 07636-7208 Internet: www.cat-ing.de Page 1/39... -
Page 2: Table Of Contents
Table of contents Page Introduction................................3 Safety Precautions ..............................4 The Checklist.................................5 Before Running the Turbine ........................5 After Stopping the Turbine........................5 Electrical connection diagramm (1/2) ........................6 Electrical connection diagramm (2/2) ........................7 Power Supply............................7 Charging the Battery..........................7 Glow Plug ..............................7 Fuel / Fuel Care..............................8 Fuel System..............................8 Hopper Tank.............................8 Fuel System Connection Diagram......................9... -
Page 3: Introduction
Should you still have doubts or questions, do not hesitate to contact CAT for further assistance. Once you are accustomed to handling the JetCAT P80, you will observe that it is a very reliable engine. Some experienced operators have expressed their belief that it handles better than many piston engines. -
Page 4: Safety Precautions
Obey all forest fire regulations and warnings by refraining from operating the JetCAT P80 in restricted fire zones. Never operate model turbine jet aircraft in or around residential or heavily populated areas. -
Page 5: The Checklist
Warning: A flying model with a turbine can reach higher flight speeds than ducted fan-powered models, because the turbine’s thrust degrades less with higher flight speeds. With attainable flight speeds of over 250 MPH, you can quickly run out if flying room. There is also a danger of developing control surface flutter or mechanical overload, causing the model to fail in flight. -
Page 6: Electrical Connection Diagramm (1/2)
6-wire phone cable (Programmier- und Anzeigegerät) 6-adriges Telefonkabel ECU top-view static pressure (von oben) (statischer Druck) Airspeed air pressure Sensor Jet-tronic - I I- P80 (Staudruck) pitot-tube (Staurohr) (optional) Microcomputer- .& 6-wire phone cable to turbine Shut-off Control 6-adriges Telefonkabel, zur Turbine... -
Page 7: Electrical Connection Diagramm (2/2)
Electrical connection diagramm (2/2) Connection - diagramm (2/2) (Verbindungsschema) ECU bottom-view (von unten) Fuelpump Jet-tronic -II- P80 To turbine (3 wire cable) (Kraftstoffpumpe) (Zur Turbine 3-adriges Kabel) Microcomputer-Control Power Supply Power for all electrical components of the turbine (starter / glow plug / ECU / fuel pump / fuel and gas valves) are supplied by the six-cell, 1250 mah ECU battery. -
Page 8: Fuel / Fuel Care
Fuel / Fuel Care The JetCAT P80 can use Jet-A1, 1-K kerosene or deodorized kerosene for fuel. Fuel must be mixed with 5% synthetic turbine oil. Example formula: 1 quart of oil in 5 gallons of fuel. Oil brands like Aeroshell 500 or Exxon 2380 are suitable. -
Page 9: Fuel System Connection Diagram
Fuel System Connection Diagram Entlüftung Shut-off valve ( Ventil ) main tank ( Haupttank) Sinterpendel Filter Fuelpump (Pumpe) to turbine (zur Turbine) Hoppertank hopper-tank tank fill connector (Befüllungsanschluß) Page 9/39... -
Page 10: Starting Gas Diagram
Starting Gas Diagram Version 1 3mm tubing to turbine 3mm Schlauch zur Turbine (Hilfsgas) Shut-off valve Turbine ( Ventil ) 4mm tubing 4 -> 3mm tubing adaptor 4mm Schlauch 4 -> 3mm Schlauchadapter Filter 4mm tubing 4mm Schlauch connector allways up ! Anschluß... -
Page 11: Filling The Starting Gas Tank
Important: The starting gas tank can be mounted vertically or horizontally. Whether the tank is mounted upright or on its side, the offset nipple must always be towards the top. This will prevent liquid propane from entering the turbine during startup. After every flying session, disconnect the release valve, before storing the model. -
Page 12: Mounting The Turbine
Mounting the Turbine A two-piece, aluminum mounting bracket is included with the turbine. Place the bracket around the turbine, with the glow plug situated within the slot of the smaller bracket piece. This will help stabilize the engine along the thrust axis. The glow plug must be in the vertical position, when mounted in your model (+/- 45°... -
Page 13: Connections At The Turbine
Connections at the Turbine Fuel Connector, From ECU, 4mm tubing from EGT & RPM the fuel pump sensor cable Starting Gas From ECU Connector, (Glow-plug / (Propane/ Butane) Starter device) 3mm tubing from the 3-lead cable starting gas tank Page 13/39... -
Page 14: The Led I/O Board
The LED I/O Board The LED I/O (Input/Output) board is a connection point for the data bus and a display for the current status of the ECU. The board should be mounted with the LED’s visible and the data bus connector accessible for GSU plug-ins. The connector facing opposite of the LED’s is attached to the ECU. -
Page 15: Aligning The Ecu To Your R/C System
Aligning the ECU to your R/C System Before the Jet-Tronic ECU can be used for the first time, throttle stick and auxiliary control positions must first be programmed. To accomplish this, complete the following steps: 1. Connect the two ECU servo cables to the receiver. The “THR” cable connects to the throttle channel and the “AUX”... - Page 16 5. Now the ECU can memorize the positions of the throttle and AUX channels. First, place the throttle stick and throttle trim to low. Next, press Select Menu or the LED I/O board switch, again. This will store the R/C system’s pulse width for immediate shutdown of the turbine.
- Page 17 The GSU display will read: Set AuxChan. to à AUX channel middle “Start/Standby” position CENTER: - learn RC - 9. Set the AUX channel to the middle position for Start/Standby and press Select Menu or the LED I/O board switch again, to store the R/C system’s pulse width for the turbine to start and run.
-
Page 18: Manual Mode
Manual Mode During normal ECU function, the operator has no direct control of the fuel pump or fuel shutoff valve. To prime the fuel pump and fuel lines (or for fuel pump test purposes), it is necessary to open the fuel shutoff valve and run the fuel pump manually. For this purpose, the ECU has a special feature that opens the fuel valve and acts as a speed control for running the pump. -
Page 19: Turbine Starting / Running
Turbine Starting / Running 1. Prepare to start by completing the startup checklist (previously described on page 2. Briefly hold the model upward, to ensure there is no residual fuel in the turbine. 3. Set the AUX switch to the Off position. All LED’s will be off. 4. -
Page 20: Turbine Stopping / Cool Down
Turbine Stopping / Cool Down To shut off the turbine, there are two methods: Manual Off Turbine immediately turns off! At anytime, the turbine can immediately be switched off manually by: • setting the three-position AUX switch to Off • bringing the throttle stick to idle position, while bringing the throttle trim to its minimum position Auto Off Turbine automatically turns off! -
Page 21: Battery / Fuel Warning Function
50% level, it returns to the warning function sequence. Turbine Running States The JetCAT P80 progresses through several operating states, from ignition to the cool down process. The transitions of these states are automatically controlled by the ECU and by user commands. - Page 22 If one of these conditions exists, turbine proceeds to the next operant condition (AccelrDly). If the P80 doesn't ignite after several attempts (within the pre- programmed time), the ignition state is discontinued and the turbine will shift to the SlowDown state.
- Page 23 RUN (reg.) Turbine in the normal running state; the throttle stick will regulate turbine thrust. During this operant condition, the green OK LED will illuminate, indicating that pilot has control. RUN (reg.) continues, until the turbine is switched off. AutoOff The AUX switch placed in the AutoOff position.
-
Page 24: Explanation For Turbine Shut Down
Explanation for Turbine Shut Down In the run menu, state selection, are the following explanations for the last shut down condition of the turbine. Value Explanation Manual AUX switched to Off position or throttle stick and throttle trim moved to the minimum position. -
Page 25: Ground Support Unit (Gsu)
Ground Support Unit (GSU) The GSU serves as a terminal for displaying and programming turbine parameters. It may be connected or disconnected at any time. The real time nature of the ECU allows the operator to adjust the turbine’s parameters, even when the turbine is running. -
Page 26: Gsu Switch Descriptions
GSU Switch Descriptions Button Meaning Info Directly displays the Info menu (Hotkey). Directly displays the Run menu (Hotkey). Limits Directly displays the Limits menu (Hotkey). Min/Max Directly displays the Min/Max menu (Hotkey). Select Menu When the Select Menu button is pressed and held, the + / - buttons are used to select another menu. -
Page 27: Menu Structure
Menu Structure All similar data and running parameters are grouped in separate menus. Menus can be displayed and their values modified (where accessible), by using the GSU. Menu Selections • Run menu • MIN/MAX menu • RC-Check menu • Info menu •... -
Page 28: The Run Menu
The RUN Menu As soon as the ECU is switched on, the Run menu is displayed. In the lower display line, the actual turbine RPM is indicated. In the upper display line, the following selections can be monitored. Use the + / - buttons alone for selecting the different parameters. -
Page 29: The Info Menu
The INFO Menu Info menu displays the following information: Value Explanation Rest Fuel Remaining fuel in tank. Tank size can be entered using the LIMITs menu. Value is reset every time the ECU is switched on (or can be reset manually by pressing the Change Value/Item button on the GSU). -
Page 30: The Statistic-Menu
The Statistic-Menu Menu parameters are for informational purposes only and cannot be changed. Value Explanation Total turbine running time (excluding startups). Totl Run-Time Number of successful turbine runs, without errors. Runs-OK Number of turbine shut downs, caused by the ECU’s safety system. Runs aborted Number of successful ignitions. -
Page 31: Troubleshooting
Troubleshooting Most frequent errors. Cause and remedy: Problem Cause Remedy Turbine doesn't Starting gas system has a leak Check starting gas system for or bad connection. leaks and poor connections. ignite Starting gas pressure is low. Fill starting gas tank; fly in May be caused by insufficient warmer conditions quantity of gas or low outside... -
Page 32: Maintenance
IGNITION button on the GSU. Check your fuel filters every ten (10) flights. Each JetCAT P80 has a prescribed maintenance interval. After approximately 25 hours, the engine should be returned to CAT (along with the ECU and fuel pump), for service. -
Page 33: Parts List
Parts List 1 – P80 engine 1 – ECU 1 – GSU 1 – PUMP 1 – Battery Pack 1 – Fuel Valve 1 – Starting Gas Valve 1 – Cable Set 1 – Fuel Line Set 1 – Starting Gas Tank 2 –... -
Page 34: Airspeed Sensor
Airspeed Sensor The optional Airspeed Sensor consists of a pitot tube and a precision, differential pressure sensor. By sampling the ambient air temperature, the current flight speed of the model is calculated by the ECU, from the measured difference in static versus dynamic pressure. When the ECU is used without the Airspeed Sensor, it is set in thrust control (normal) mode. - Page 35 Connection diagram for the Airspeed Sensor: flig h t d i r e c t i o n S ta tic p r e s s u r e Airspeed Sensor Dyn a m ic p re s s u r e P ito t tu b e E C U c o n n e c tio n c a b l e Connect the air lines from the pitot tube to the airspeed sensor, using the 1/16...
- Page 36 SPDCTRL SW0 With the Airspeed Sensor connected to the ECU – by moving the AUX switch to the Off (SW0) position, while maintaining a model air speed > 40km/h, the following options are available: Hold-Speed = momentarily sustains the current flight speed DISABLED/NONE = no function, thrust control remains active Turbine OFF...
- Page 37 Explanation of the speed regulator options: If the Airspeed Sensor is NOT connected – the standard functions of the AUX switch are assigned as follows: Standard assignments of the AUX switch: • Position SW0 = Off, turns the turbine off, immediately •...
- Page 38 Lrn Speed Lo Learns the slow flight speed. If the AUX switch is momentarily placed in the SW0 position, the current flight speed is assigned and recorded as the Min.AirSpeed parameter. WARNING: When the AUX switch is set in the SW0 position, the model must be flying faster than 40 km/h, otherwise the turbine will shut off.
- Page 39 In this configuration, the pitot tube should stand off from the fuselage, by at least two (2) inches. Because each model installation is different, Golden West Models and JetCAT will have additional mounting information for review, as auxiliary data becomes available.
Need help?
Do you have a question about the P80 and is the answer not in the manual?
Questions and answers