Table of Contents
Advertisement
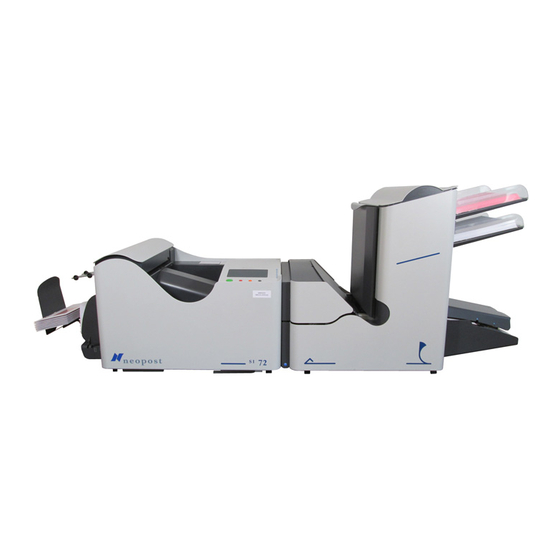
FOLD AND
INSERTING MACHINE
SI 72
OPERATOR MANUAL
1. FUNCTION
The machine inserts documents into envelopes and then seals
and stacks the envelopes. Automatic monitoring ensures the
correct number of inserts per envelope.
The machine is equipped with a variety of special features as
document thickness detection, programmable jobs,
Load "N Go
, FlexFeed
, double feed control,
TM
TM
hopper swap, multifeed, daily mail, IntelliDeck
PowerFold
TM
.
SI 72
TM
and
Fig. 1
1/33
Advertisement
Table of Contents

Related Manuals for Neopost SI 72


Summary of Contents for Neopost SI 72
- Page 1 FOLD AND INSERTING MACHINE SI 72 OPERATOR MANUAL 1. FUNCTION The machine inserts documents into envelopes and then seals and stacks the envelopes. Automatic monitoring ensures the correct number of inserts per envelope. The machine is equipped with a variety of special features as document thickness detection, programmable jobs, Load “N Go...
-
Page 2: Table Of Contents
JOBS OPTIONS damage the machine. Job menu SPECIFICATIONS Create job menu Edit job menu Warning, this symbol indicates a hazard to life Copy job menu because of high voltage. Delete job menu NOTE Additional information 2/33 SI 72... -
Page 3: General
The PowerFold part folds the documents. The following fold types are possible: The SI 72 is a sophisticated fold and inserting system which The system consists of the following parts: can process large quantities of mail rapidly and easily. The •... -
Page 4: Operating Controls
: collator area : PowerFold cover (opened) : locking handle PowerFold : power inlet, power switch and fuse : handle for clearing stoppages : handle for clearing stoppages : water tray : bellow : side cover (opened) 4/33 SI 72... -
Page 5: Display Buttons
• if desired set the counters in the “counters” menu. any (altered) settings. When the system is equipped with the Load “N Go function this can be used to create a new simple job (see page 12). SI 72 5/33... -
Page 6: The Main Menu
“menu (key 5) (only available • the length of the document in the feeder ( if the machine is equipped with the IntelliDeck • daily mail “on “or “off” ( • go to the “main menu (2)” (key 6). 6/33 SI 72... -
Page 7: Other Job Menu
• turn the knob A clockwise to get more resistance or counter clockwise to lower the resistance. The separation is adjusted correctly when a slight resistance is felt on the document. Pull the knob A (fig. 12) back again when ready. Close the left side guide upwards. SI 72 7/33... -
Page 8: Filling The Document Hopper
For use of longer documents, maximal 356 mm (14 inch), the four document stoppers must be set in last position (position C). The position of the document stoppers is set by service personnel according to the document sizes programmed in the jobs. 8/33 SI 72... -
Page 9: Feeding Documents
Address carrier in bottom feeder. Address carrier in bottom linked Address carrier in bottom feeder. Address carrier in top feeder. Face down and trailing pair feeders. Face down and trailing Face down and trailing Face down and trailing SI 72 9/33... -
Page 10: Adjustment Of The Envelope Feed
4.8.4 Envelope receiving tray Take a stack of about 20 envelopes. Fan the envelopes a The SI 72 has a rear envelope receiving tray A (see fig.19) 4.8.1 Envelope separation bit (see fig. 18) and place the envelopes in the hopper with this can be adjusted according to the envelope height, by the flap down and “trailing”... -
Page 11: Envelope Sealing
“error screen” see page 23). indicator A (fig. 22). If necessary adjust the flap folding line position by pressing key 4 or 5 in the “test run” menu. Each key stroke stops the next envelope 0,5 mm (0.02 SI 72 11/33... -
Page 12: Counters Menu
Press key 3 to start a testset run (fig. 25). The machine prepares a job 0 which is named “Load "N Go ”. Only the feeders that feed successfully will be selected. When feeders are fitted with the double feed control option, this will be selected automatically. 12/33 SI 72... -
Page 13: Daily Mail
• turn the left side guide upwards again. The Load “N Go job can not be saved. Be sure the daily mail function is switched off when When the machine is switched off the settings will be lost. switching to normal use again. SI 72 13/33... -
Page 14: Operator Menu Structure
Job info, page 6 Load "N Go help page 13 Escape key Adjust contrast, page 6 Testset run, page 12 Exit a menu without saving any Enter job menu, page 6 altered settings To main menu (1) 14/33 SI 72... -
Page 15: Jobs
6, starting on page After 3 times entering the wrong pin code the display shows the “main menu (2)” again. A new selected job number starts with default settings. SI 72 15/33... -
Page 16: Edit Job Menu
• copy the job with “OK” (key 6) which will get you to the settings are described in chapter 6, starting on page “job menu”. If all jobs are programmed the display shows “No more free jobs”. 16/33 SI 72... -
Page 17: Job Settings
• go to the “job name” menu (key 5), Default the envelope size is set to 162 mm (6.38 inch). • save the job settings by pressing key 6 which will automatically get you back to the “job menu”. SI 72 17/33... -
Page 18: Envelope With Open Flap
• increase the number of documents of the selected feeder (key 4), • decrease the number of documents of the selected feeder (key 5), • confirm the settings by pressing “OK” (key 6) which will get you back to the “job settings” menu. 18/33 SI 72... -
Page 19: Document Size
(3.54 inch) and 356 mm (14 inch) in steps of 1 mm (0.04 inch). The default document size setting of a new job is 297 mm (11.7 inch). The position of the document stoppers is set by service personnel according to the document sizes programmed in the jobs. SI 72 19/33... -
Page 20: Daily Mail
When no fold is selected, the display shows the screen as shown in fig. 43. The following choices are available: • go to the “single fold” menu (key 1), • select settings by pressing “OK” (key 6) which will get you back to the “job settings” menu. 20/33 SI 72... -
Page 21: Letter Fold
The fold length of the second fold can be minimally the then the length of the longest document used. length of the first fold and maximally 25 mm (1.0 inch) less then the length of the longest document used. SI 72 21/33... -
Page 22: Double Document Detection Menu
• confirm the settings by pressing “OK” (key 6) which • confirm the settings by pressing “OK” (key 6) which will will get you back to the “job settings” menu. get you back to the “job settings” menu. 22/33 SI 72... -
Page 23: Job Edit Menu Structure
20 area open flap see page 22 see page 18 No envelopes Hopper swap Letter fold see page 18 see page 19 see page 21 Daily mail Zig-zag fold see page 20 see page 21 SI 72 23/33... -
Page 24: Fault Finding
This error cannot be solved by operating personnel and When a stoppage occurs in the exit and sealing area, In the SI 72 the following error types are possible: assistance of the service support is needed. remove the material as follows: •... - Page 25 (fig. 53) inwards and then joggle. • remove the documents from the PowerFold • close the PowerFold cover. Reset the error after solving the problem with (key 6). Reset the error after solving the problem with (key 6). SI 72 25/33...
-
Page 26: Error Codes
Service assistance is needed for the error codes with the message "technical failure". First switch the inserter off and on again, to verify the machine operation. When the error still occurs write down the error code and contact your service organisation. 26/33 SI 72... - Page 27 4,5,6 or 7:11 Document stoppage. Remove documents. Page 25. Document too long. 4,5,6 or 7:12 Document stoppage. Remove documents. Page 25. Paper jam. 4,5,6 or 7:13 Document stoppage. Remove documents. Page 25. Document too short. 4,5,6 or 7:14 SI 72 27/33...
-
Page 28: Operator Troubleshooting
Check separation settings, adjust if needed. Fingers are placed on top of Fingers adjusted too deep into the envelope. Check fingers position, adjust if needed. the envelope. Envelope stops too early. Check envelope stop position, adjust if needed. 28/33 SI 72... - Page 29 Adjust the side guides. Skewed documents fed. Side guides set too wide. Adjust side guides. Double documents fed. Separation set too wide. Adjust the separation. Documents stoppage at Stopper position set incorrect. Adjust stopper position. collating area. SI 72 29/33...
- Page 30 Meanwhile the other empty feeder can be refilled without exit allows a conveyor, conveyor/stacker or a franking IntelliDeck stopping. machine to be fitted in line with the SI 72. The system can be equipped with the IntelliDeck Incorrect sets of documents automatically will be thrown out Multifeed by the IntelliDeck .
-
Page 31: Maintenance
To remove the water tray the side To clean the sensors, put the bellow in hole B (fig. 58). Squeeze a few times firmly to blow away the dust from the sensors. Repeat this procedure for hole C (fig. 58). SI 72 SI 72 31/33... -
Page 32: Specifications
230 mm ( 9.5 inch) Machine specifications length : 90 mm (3.5 inch) 356 mm (14.0 inch) Booklets depending on envelope size (inserter) Model : SI 72 Quality : 60 gr/m˝ 250 gr/m˝ Type : inserter system for medium office use. (15 lb bond) (62.5 lb bond) - Page 33 Envelope and insert specifications EEC-declaration of concurrence. Maximum insert specifications are based on single sheets. When multiples are handled, more room inside the envelope We, Neopost Industrie B.V., is needed depending on application. De Tijen 3 9201 BX Drachten The Netherlands...
Need help?
Do you have a question about the SI 72 and is the answer not in the manual?
Questions and answers