
Related Manuals for Riccar RSL1


Summary of Contents for Riccar RSL1
- Page 1 Ultra Lite Weight Vacuum Service Manual RSL1 RSL1A RSL1AC RSL2 RSL3 RSL3C RSL4 RSL5 RSL5C Revision: 1.1 Issued: 08-22-2012...
-
Page 2: Table Of Contents
A. How to Change the Vacuum Bag ......................9 B. Removing Nozzle Cover ........................10 C. Replacing the Belt (RSL1, RSL1A, RSL1AC, RSL2, RSL3, RSL3C, RSL4) ........11 C. Replacing the Belt (RSL5, RSL5C) ..................... 12 D. Replacing the Squeegee (RSL4, RSL5, RSL5C) ................. 13 E. - Page 3 WARNING! To reduce the risk of fire, electric shock, or injury: 1. Do not leave vacuum unattended when plugged in. Unplug from outlet when not in use and before servicing. 2. Do not attempt to service the unit while vacuum is plugged in. 3.
-
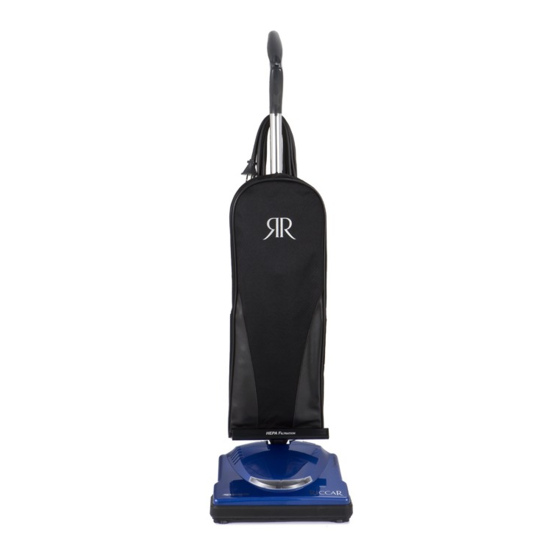
Page 4: Basic Assembly And Operation
Upper Cord Hook Handle Tube Power Cord Handle Tube Bracket Outer Bag Lower Cord Hook Handle Duct ON/Off Foot Switch (RSL1, RSL1A, RSL1AC) Nozzle Furniture Guard Circuit Breaker (RSL2, RSL3, RSL3C, RSL4) Bottom Plate Wheels (RSL4, RSL5, RSL5C) Agitator Basetray Cover... -
Page 5: Grounding Instructions
I. Basic Assembly and Operation B. Grounding Instructions This vacuum must be grounded. If it should malfunction or Figure B. Grounding break down, grounding provides a path of least resistance for electric current to reduce the risk of electric shock. Grounded Outlet This vacuum is equipped with a cord having an equipment-... -
Page 6: Installing The Handle
I. Basic Assembly and Operation D. Installing the Handle The vacuum cleaner and the handle are packed seperately. To assemble handle: 1. Remove the two handle bolts located at the top of the upper handle duct (Fig. A.) 2. Remove the handle tube bracket. (Fig. B) 3. -
Page 7: Operation
E. Operation On/Off Switch RSL1, RSL1A, RSL1AC: To turn the vacuum on press the foot switch on the nozzle (Fig. A) RSL2, RSL3, RSL3C: Press the switch in the handle to the I position. RSL4, RSL5, RSL5C: To Turn the vacuum on low speed, push the handle switch to the (I) position. -
Page 8: E. Operation
I. Basic Assembly and Operation E. Operation (continued) Cicuit Breaker Protector (Not applicable to RSL5 and RSL5C) Your vacuum cleaner comes equipped with a Manual Reset Circuit Breaker Protector. This circuit breaker is designed to protect your vacuum cleaner from damage due to an obstruction in the agitator or motor fan. -
Page 9: Maintenance
II. Maintenance A. How to Change the Vacuum Bag 1. Always operate the vacuum cleaner with a vacuum bag installed. 2. Unplug the vacuum cleaner. 3. Unzip the cloth outer bag. 4. Remove the old bag by pressing the tab as shown. (Fig. A) 5. -
Page 10: Removing Nozzle Cover
II. Maintenance B. Removing Nozzle Cover CAUTION: Unplug the vacuum cleaner before servicing. 1. Release the nozzle and flip the vacuum over so the bottom plate is showing. 2. Remove the two screws holding the nozzle cover on.(Fig. A) 3. Release the two tabs located at the rear of the nozzle and remove the nozzle cover. (Fig. B) 4. -
Page 11: Replacing The Belt (Rsl1, Rsl1A, Rsl1Ac, Rsl2, Rsl3, Rsl3C, Rsl4)
II. Maintenance C. Replacing the Belt (RSL1, RSL1A, RSL1AC, RSL2, RSL3, RSL3C, RSL4) CAUTION: Unplug the vacuum cleaner before servicing. 1. Release the nozzle and flip the vacuum over so the bottom plate is showing. 2. Remove the baseplate by pressing the two tabs and pulling down. (Fig. A) 3. -
Page 12: Replacing The Belt (Rsl5, Rsl5C)
II. Maintenance C. Replacing the Belt (RSL5, RSL5C) CAUTION: Unplug the vacuum cleaner before servicing. 1. Remove the nozzle cover as shown on page 10, II. Maintenance, B. Removing Nozzle Cover 2. Release the nozzle and flip the vacuum over so the bottom plate is showing. 3. -
Page 13: Replacing The Squeegee (Rsl4, Rsl5, Rsl5C)
II. Maintenance D. Replacing the Squeegee (RSL4, RSL5, RSL5C) CAUTION: Unplug the vacuum cleaner before servicing. 1. The squeeegee is located on the baseplate cover (Fig. A) 2. Remove the cover by pressing on the two tabs 3. Flip the baseplate over. There are 5 small openings on the underside (Fig. B) 4. -
Page 14: Replacing The Wheels
II. Maintenance E. Replacing the Wheels CAUTION: Unplug the vacuum cleaner before servicing. 1. Use a large flat screw driver to pop out the old wheel as shown. (Fig A) 2. Remove wheel from axle and slide new wheel onto axle. (Fig. B) 3. -
Page 15: Replacing The Power Cord (Rsl1, Rsl1A, Rsl1Ac)
II. Maintenance F. Replacing the Power Cord (RSL1, RSL1A, RSL1AC) CAUTION: Unplug the vacuum cleaner before servicing. 1. Remove the nozzle cover as shown on page 10, II. Maintenance, B. Removing Nozzle Cover 2. Remove the screw and strain relief washer holding the power cord in place. (Fig. A) 3. -
Page 16: Replacing The Power Cord (Rsl2, Rsl3, Rsl3C, Rsl4, Rsl5, Rsl5C)
II. Maintenance F. Replacing the Power Cord (RSL2, RSL3, RSL3C, RSL4, RSL5, RSL5C) CAUTION: Unplug the vacuum cleaner before servicing 1. Remove the upper cord hook screw (Fig. A) 2. Remove the (4) screws from the handle grip. (Fig. B) 3. - Page 17 II. Maintenance F. Replacing the Power Cord (RSL2, RSL3, RSL3C, RSL4, RSL5, RSL5C) 5. Disconnect the power cord leads from the switch and uncrimp from motor cord. (Fig.A) 6. Discard old cord 7. Connect the new power cord leads to the switch and motor cord (See wiring diagrams on pages 33-35 8.
-
Page 18: F. Replacing The Power Cord (Rsl2, Rsl3, Rsl3C, Rsl4, Rsl5, Rsl5C)
II. Maintenance F. Replacing the Power Cord (RSL2, RSL3, RSL3C, RSL4, RSL5, RSL5C cont.) 13. Remove the nozzle cover as shown on page 10, II. Maintenance, B. Removing Nozzle Cover 14. Remove the screw and washer holding the motor cord in place (Fig. A.) 14. -
Page 19: Replacing The Switch
II. Maintenance G. Replacing the Switch CAUTION: Unplug the vacuum cleaner before servicing. Foot Switch Version (RSL1, RSL1A, RSL1AC) 1. Remove nozzle cover as shown on page 10, II. Maintenance, B. Removing Nozzle Cover 2. Remove lead wires from switch. -
Page 20: Replacing The Circuit Breaker (Not Present On Rsl5 Or Rsl5C)
II. Maintenance H. Replacing the Circuit Breaker (Not present on RSL5 or RSL5C) CAUTION: Unplug the vacuum cleaner before servicing. 1. Remove nozzle cover as shown on page 10, II. Maintenance, B. Removing Nozzle Cover 2. Remove leads from circuit breaker. (Fig. A and B) 3. -
Page 21: Replacing The Pc Board (Rsl4)
II. Maintenance I. Replacing the PC Board (RSL4) CAUTION: Unplug the vacuum cleaner before servicing. 1. Remove the nozzle cover as shown on page 10, II. Maintenance, B. Removing Nozzle Cover 2. Remove the (2) screws holding the PC board. (Fig. A) 3. -
Page 22: Replacing The Pc Board (Rsl5, Rsl5C)
II. Maintenance I. Replacing the PC Board (RSL5, RSL5C) CAUTION: Unplug the vacuum cleaner before servicing. 1. Remove the nozzle cover as shown on page 10, II. Maintenance, B. Removing Nozzle Cover 2. Remove the screw holding the PC board. (Fig. A) 3. -
Page 23: Accessing The Handle Duct And Motor
II. Maintenance J. Accessing the Handle Duct and Motor CAUTION: Unplug the vacuum cleaner before servicing. 1. Release the handle duct from the bag collar holder by pressing the two tabs located on either side of the bag inlet on the handle duct as shown. (Fig. A) 2. -
Page 24: Removing Clogs
II. Maintenance K. Removing Clogs If a foreign object is caught in the vacuum a clog may form. If the vacuum is clogged a decrease in cleaning performance may occur.To remove a clog, follow the steps below: CAUTION: Unplug the vacuum cleaner before servicing. 1. -
Page 25: Replacing The Motor Fan
II. Maintenance L. Replacing the Motor Fan CAUTION: Unplug the vacuum cleaner before servicing 1. See page 22, Section II. Maintenance, J. Accessing the Motor to expose the motor. 2. Remove the two srews holding motor in place. 3. Secure motor shaft with vice grips. (Fig. A) 4. -
Page 26: Replacing The Motor
II. Maintenance M. Replacing the Motor CAUTION: Unplug the vacuum cleaner before servicing 1. Follow the instructions on page 22, Section II. J. Maintenance, Accessing the Motor to expose the motor. 2. Remove the two screws holding motor in place. (Fig. A) 3. -
Page 27: Replacing The Motor Seals
CAUTION: Unplug the vacuum cleaner before servicing NOTE: The blue seals cannot be used on any RSL1 or RSL2 made prior to the use of the blue seals. 1. Access and remove the motor as shown on page 22, Section II. Maintenance, J. Accessing the Motor 2. -
Page 28: Replacing The Hall Sensor Assembly (Rsl5, And Rsl5C Only)
II. Maintenance P. Replacing the Hall Sensor Assembly (RSL5, and RSL5C only) CAUTION: Unplug the vacuum cleaner before servicing 1. Remove the nozzle cover as shown on page 10, II. Maintenance, B. Removing Nozzle Cover 2. Carefully clip the zip tie that holds the wiring (Fig. A) 3. -
Page 29: Agitator Disassembly (Rsl5 And Rsl5C Only)
II. Maintenance Q. Agitator Disassembly (RSL5 and RSL5C only) CAUTION: Unplug the vacuum cleaner before servicing 1. Use two ratchets with 11mm sockets to loosen one of the nuts as shown in Fig. A. 2. Remove the end caps, bearing cartrige and pully. It may be necessary to gently pry the components apart with a screwdriver. -
Page 30: Troubleshooting
III. Troubleshooting A. Performance 1. Vacuum not cleaning floor surface. Possible Cause Solution 1. The belt is weak. Replace the belt. For wooden brushrolls: Flip the agitator end caps over so that the rounded side touches the baseplate as shown on pg. 11, Replacing the Belt. -
Page 31: Motor
III. Troubleshooting A. Performance (continued) 5. Excessive vibration or loud noise Possible Cause Solution 1. An agitator bearing is damaged. Replace the bearing or agitator. 2. The agitator is out of balance. Replace the agitator. 6. Circuit Breaker Trips Constantly Possible Cause Solution 1. -
Page 32: Electrical
III. Troubleshooting B. Motor 1. Excessive vibration in motor. Possible Cause Solution 1. The fan is damaged. Replace the fan. See page 25, Replacing the Motor Fan Replace the motor. See page 26, Replacing the Motor 2. The motor is damaged. 2. -
Page 33: Diagrams
IV. Diagrams A. RSL1, RSL1A, RSLAC Motor Power Cord Green (Commercial Models Only) Power Cord ON/OFF Switch Lamp Circuit Breaker Bottom Page 33... -
Page 34: Rsl2, Rsl3, Rsl3C
IV. Diagrams B. RSL2, RSL3, RSL3C Handle Assembly Compartment ON/OFF Switch White Power Cord Black Black White Green (Commerical Models Only) Handle Harness Nozzle Assembly Compartment Motor Green (Commerical Models Only) Lamp Circuit Breaker Bottom Page 34... -
Page 35: Rsl4
IV. Diagrams C. RSL4 Handle Assembly Compartment ON/OFF Switch Power Cord Black Black White White Handle Harness Nozzle Assembly Compartment Motor Green (Commercial Models Only) Black Circuit Lamp Breaker Bottom PC Board Page 35... -
Page 36: D.rsl5, Rsl5C
IV. Diagrams D. RSL5, RSL5C Handle Assembly Compartment ON/OFF Switch Power Cord Black Black White White Handle Harness Nozzle Assembly Compartment Motor PC Board Lamp White Hall Sensor Assembly Page 36... -
Page 37: Contact Information
V. Contact Information Should you need further assistance please contact Tacony Technical Service Phone: 800-643-7459 Email: d.humphrey@tacony.com Hours: 6:00am-4:30pm Monday through Friday Tacony Manufacturing #3 Industrial Drive St. James, MO 65559 For parts orders please speak with a Vac Pros Representative at 800-827-8877 Page 37...
Need help?
Do you have a question about the RSL1 and is the answer not in the manual?
Questions and answers