Table of Contents
Advertisement
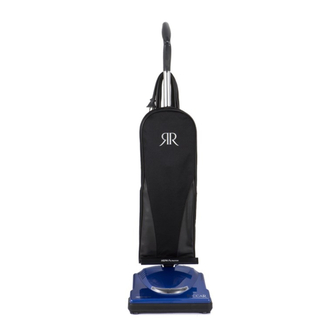
Owner's Manual
Model RSL1
RSL2
RSL2C
™
Vacuum Cleaner
Thank you for purchasing our product.
To ensure you get the
best results from your SupraLite vacuum cleaner, please read this manual first.
This manual should be kept for future reference.
To locate your nearest Authorized Riccar Dealer for sales or service,
please visit our website at www.riccar.com
or call 877-302-4746
Advertisement
Table of Contents

Summary of Contents for Riccar SUPRALITE RSL1
- Page 1 SupraLite vacuum cleaner, please read this manual first. This manual should be kept for future reference. To locate your nearest Authorized Riccar Dealer for sales or service, please visit our website at www.riccar.com or call 877-302-4746...
-
Page 2: Key Replacement Parts
EPLACEMENT ARTS Genuine SupraLite Vacuum Filter Bags: RSL-6 Genuine SupraLite Vacuum Agitator Belt: B014-0814... -
Page 3: Table Of Contents
• Wire and grounding instructions ......3 • Assembling the vacuum cleaner ......4-5 Vacuum Features: •... -
Page 4: Save These Instructions
IMPORTANT SAFETY INSTRUCTIONS When using an electrical appliance, basic precautions should always be followed. WARNING – Do not leave appliance when plugged in. Unplug from outlet when not in use and before servicing. WARNING: ELECTRIC COULD OCCUR IF USED OUT- DOORS OR ON WET SURFACES. -
Page 5: Wire And Grounding Instructions
– H OLARIZATION NSTRUCTIONS OUSEHOLD ODELS Models RSL1 and RSL2 To reduce the risk of electric shock, this appliance is equipped with a polarized alternating current line plug (a plug having one blade wider than the other). This plug will fit into the power outlet only one way. This is a safety feature. - Page 6 Cloth Bag Nozzle ACUUM Power cord Handles The vacuum cleaner handle is packed as a separate component that requires assembly. VACUUM ASSEMBLY PROCEDURE Installing the handle: 1. Release the handle bracket from the handle tube by removing the two screws (diagram 1).
-
Page 7: Assembling The Vacuum Cleaner
SSEMBLING THE 3. Place the handle bracket back into position (diagram 3). 4. Secure with two screws removed in step 1. Positioning the power cord: (Models RSL1 only.) 1. Loosen, but do not remove, the screw holding the upper cord hook (diagram 4). -
Page 8: On/Off Switch
UTOMATIC Your upright vacuum cleaner is designed with an automatic, self-adjusting rug nozzle. No manual adjustments are required. The height of the nozzle is instantly and automatically adjusted to the carpet pile height. This self- adjusting feature allows the rug nozzle to float evenly over all carpet pile sur faces. -
Page 9: How To
OW TO 1. Unzip outer cloth bag (diagram 7). 2. Remove used bag by pressing the bag holder tab and pulling bag off vacuum (diagram 8). Discard used bag. 3. To install new bag, position the bottom of the bag collar into the bag collar holder (diagram 9). -
Page 10: Remove/Install The Bottom Plate
CAUTION: First, disconnect the vacuum cleaner from the electrical outlet. To remove bottom plate: 1. After unplugging the power cord, turn the vacuum cleaner over, exposing the underside. 2. Press the two holding tabs inward (diagram 11) releasing the bottom plate. -
Page 11: Change The Belt
OW TO CAUTION: First, disconnect the vacuum cleaner from the electrical outlet. 1. Turn the unit over and remove the bottom plate (see "How to Remove Bottom Plate"). 2. Remove the brush roll and the worn or broken belt from the brush roll pulley and the motor drive shaft (diagram 13). -
Page 12: Replace The Headlight Bulb
OW TO Nozzle Tabs EPLACE THE WARNING: To reduce the risk of electric Nozzle shock and injury from moving parts, unplug screws vacuum before cleaning or servicing. 1. First remove the nozzle housing. Turn the unit over to expose the underside. -
Page 13: Reset The Circuit Breaker
Electrical surging can be a result of, though not limited to, a jammed brush roll (i.e. vacuuming up a sock or throw rug) or a jammed motor fan. Should your vacuum cleaner experi- Circuit Breaker ence a jammed brush roll with the cir- Reset Button... -
Page 14: For Best Performance
• Change filter bags as recommended to maximize optimal cleaning efficiency. • Always use genuine filter bags and replacement parts. Use of other products may result in poor cleaning performance and potential vacuum cleaner damage and may void vacuum warranty. Genuine filtration products are designed for maximum cleaning performance. -
Page 15: Warranty
IMPORTANT WARRANTY CONDITIONS: The warranty registration should be completed on the Riccar website (www.riccar.com) or the attached card must be filled out and returned to Riccar within LEANER Riccar’s Limited Warranty 30 days of purchase in order to register warranty coverage. - Page 16 Item IBRSL1B (B503-1200C)


Need help?
Do you have a question about the SUPRALITE RSL1 and is the answer not in the manual?
Questions and answers