Table of Contents
Advertisement
INSTRUCTION MANUAL
For users aged 14 or over
CAUTIONS:
This radio control model is not a toy! it is a technical
equipment,you must pay attention to the flying environment
and correct operation. Teenagers must fly with guardian.
Learner must fly with the experienced pilot
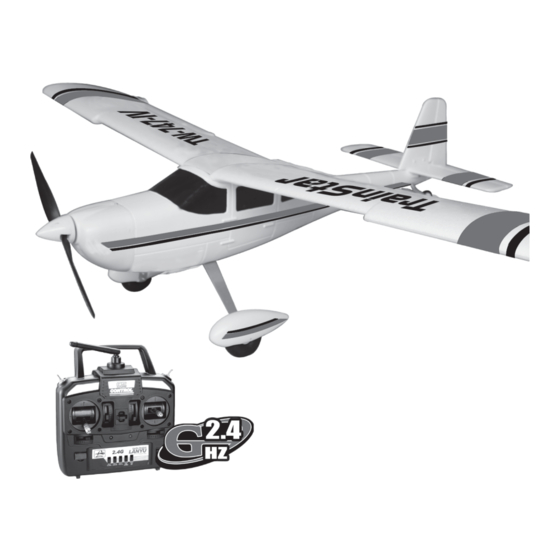
TECHNICAL DESCRIPTION
Wing Span: 1400mm ( 55.12")
Length: 1060mm ( 41.7")
Flying Weight: 1300g
Battery: 11.1V/1800mAh/20C
Motor: Brushless 850KV
ESC: 30A Brushless ESC
.
Advertisement
Table of Contents

Related Manuals for Hobby King TRAINSTAR


Summary of Contents for Hobby King TRAINSTAR
- Page 1 TECHNICAL DESCRIPTION Wing Span: 1400mm ( 55.12") Length: 1060mm ( 41.7") Flying Weight: 1300g Battery: 11.1V/1800mAh/20C Motor: Brushless 850KV ESC: 30A Brushless ESC INSTRUCTION MANUAL For users aged 14 or over CAUTIONS: This radio control model is not a toy! it is a technical equipment,you must pay attention to the flying environment and correct operation.
- Page 2 PROTECT YOUR MODEL , YOURSELF & OTHERS . . . FOLLOW THESE IMPORTANT SAFETY PRECAUTIONS 1. Your airplane should not be considered a toy, but rather a sophisticated working model that functions very much like a full - size airplane. Because of its performance capabilities,the plane, if not assembled and operated correctly, could possibly cause injury to yourself or spectators and damage property.
- Page 3 KIT CONTENTS ASSEMBLE THE MODEL 1. Install all the servo horn by screw. 2. Insert the linker to the corresponding hole of the tail.
- Page 4 3. Put the horizontal tail onto the tail of the fuselage. 4. Insert the linker to the corresponding hole of stabilizer and fix it with screw. 5. Install the vertical tail onto the horizontal tail and fix it with screw. 6.
- Page 5 7.Insert the push rod to the linker of the tail wheel. 8. Connect the tail wheel to the servo horn by the metal fixture and install it on the tail by screw. 9. Install the motor to the front of the fuselage by screw and connect the plug.
- Page 6 10. Install the cowling to the fuselage by screw. 11. Install the wheels to the main landing gear with wheel cover by crew.
- Page 7 12. Install the main landing gear to the corresponding place under the fuselage and fix it by the plastic cover. 13. Insert the connection pipe into the main wing and connect both part together.
- Page 8 14. Put the main wing onto the fuselage and fix it with a plastic cover by screw. 15. install the servo arm to the aileron servo and connect the push rod to the servo horn. 16. Pick up a shaft fixture suitable for the motor shaft and install it to the propeller. 17.
- Page 9 18. Insert the motor shaft to the propeller and make sure the concavity of the propeller face toward the tail and fix it by washer and nut. 19. Install the spinner with two screw. 20. The plane full assembled as shown in the figure. Tip: Use the trim sliders on the transmitter to adjust the control surfaces.
- Page 10 CENTER OF GRAVITY The ideal C.G.position is 58±5 mm behind the leading edge measured at where the wing meets the fuselage . In order to obtain the C.G. Specified ; add weight to the fuselage or move the battery position. Check the C.G.
- Page 11 CHARGE THE BATTERY Safety Caution: Unplug the battery and charger when the battery surface becomes warm.Can not put the battery insert the plane when it is charging!! Charge the Battery Be certain to refer to the instructions that accompany the charger to properly and safely charge the battery that goes in the model and powers the moter and controls.
- Page 12 2.4G Control System Instruction Precautions: Pls make sure the throttle stick is on the down position then bind the reciever. Before you connect the battery of the plane, pls leave away the propeller, before the receiver bind the transmitter it may cause the propeller run automaticly. Bind the receiver: 1.Turn the throttle to the bottom.
- Page 13 CHECK THE CONTROL SURFACE AND CHANNEL CONDITION Before trying to fly the airplane , please carefully check to make sure the transmitter and the servos work normally. CAUTION: Make sure that you must turn on the transmitter firstly and then you can connect the battery plug. If you want to turn off the transmitter you must ensure that the battery of the plane must be cut off first.
- Page 14 Know Your Frequency CAUTION: The transmitter used to control your plane transmits signalson one of several frequencies that are available. To find out your frequency (or “channel”), look on the transmitter, If your “channel” happens to be the same as another model that is being flown nearby (even within afew miles) , one or both models will crash.
- Page 15 If the controls respond erratically or if anything else seems wrong, make certain all the servo wires are securely connected to the receiver and that the transmitter and receiver batteries are fully charged. If you cannot find a mechanical problem with the model, it is slightly possible that there is radio interference somewhere in the area.
- Page 16 If the surface is smooth ( such as paverment or blacktop ) the plane can take off from the ground. But most grass is probably too tall, so if flying from grass the model will have to be hand launched. ROG (rise off ground) Take off If taking off from the ground, place the model on your “runway”...
- Page 17 gentle turn away from the runway. Flying One thing to remember is that, when the plane is flying away from you, moving the aileron stick to the right will make the plane bank to your right. However, when the model is flying toware you, moving the aileron stick to the right will make the plane move to your left.
- Page 18 Landing To land, fly down - wind past the landing area . Gently turn into the wind, add flaps and reduce the throttle so that the airplane initiates an ascending glide path. If necessary, add power to extend the glide path to reach the runway.
- Page 19 Never fly near the signs below: Highway, railway, high tension line, crowed people, Flying Area,and residential area. The best wind speed for fllght is 0-2m/s. As a visual reference, the flag at the flying fleld or the flag on the transmltter antonna will be below a 45 degree angle. 0 m/s 5m/s (windless)
Need help?
Do you have a question about the TRAINSTAR and is the answer not in the manual?
Questions and answers