Table of Contents
Advertisement
Advertisement
Table of Contents

Related Manuals for ChoiceMMed MD300W


Summary of Contents for ChoiceMMed MD300W
- Page 1 WRIST PULSE OXIMETER INSTRUCTION MANUAL Edition:V2.0W1...
- Page 2 WRIST PULSE OXIMETER V2.0W1 Copyright Our company owns all rights to this unpublished work and intends to maintain this work as confidential. Our company may also seek to maintain this work as an unpublished copyright. This publication is to be used solely for the purpose of reference, operation, maintenance or repair of our equipment.
- Page 3 V2.0W1 WRIST PULSE OXIMETER Read this entire manual carefully before using the wrist oximeter. Caution! The information in this manual has been checked carefully and is believed to be accurate. In the interest of continued product development, our company reserves the right to make changes and improvements to this manual and the products it describes at any time, without notice or obligation.
- Page 4 WRIST PULSE OXIMETER V2.0W1 Use the Oximeter only within the specified temperature ranges: 5℃ ~ 40℃ humidity≤80% for operating, and -20℃~50℃ humidity≤93% for storage and transportation. When you simultaneously measure blood pressure, attach the sensor to a different arm’s finger. Do not stretch the adhesive tale while applying the pulse oximeter sensor.
- Page 5 V2.0W1 WRIST PULSE OXIMETER Cautions! Before using any sensor, carefully read the direction for use. Do not, under any circumstance, perform any testing or maintenance on the wrist oximeter while it is being used to oximeter a patient. Verify that all visible indicators appear during the start-up (initialization) sequence. If any indicator does not appear, do not use wrist oximeter.
- Page 6 Unpacking and inspecting the wrist oximeter Contact the carrier immediately if the shipping carton for the wrist oximeter is damaged. Confirm that the items listed below are packed with the wrist oximeter: Model MD300W wrist oximeter Standard accessories: One 1.5V AAA alkaline Battery.
-
Page 7: Table Of Contents
V2.0W1 WRIST PULSE OXIMETER CONTENT 1. General Description ....................8 2. Inserting and Replacing the Batteries ............11 3. Setting up the Wrist Oximeter and Attaching the Sensor......12 4. Measurement ......................19 5. Specifications .....................20 6. Error code......................22 7. Key symbols .......................23 8. Maintenance and storage ................23 9. -
Page 8: General Description
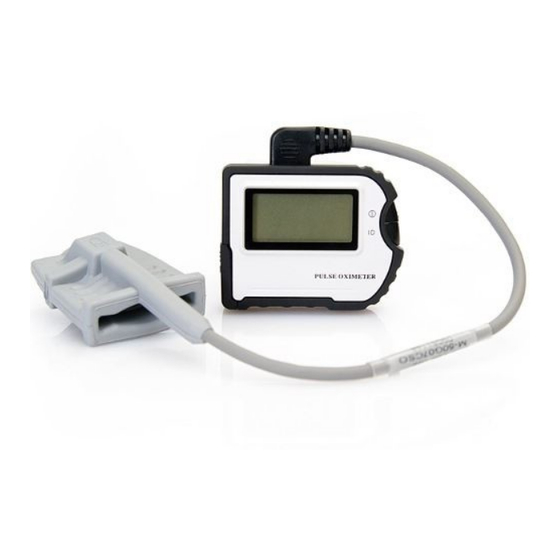
WRIST PULSE OXIMETER V2.0W1 1. General Description The MD300W wrist oximeter is a small, wrist-worn device indicated for use in measuring, displaying, and storing functional oxygen saturation of arterial hemoglobin (SpO ) and pulse rate. It may be used for spot-checking and/or data collection and recording of adult and pediatric patients in hospitals, medial facilities, ambulatory, subacute, and sleepy study environments. -
Page 9: Know Your Unit
V2.0W1 WRIST PULSE OXIMETER 1.1 Know your unit Picture 1... - Page 10 WRIST PULSE OXIMETER V2.0W1 Description of picture 1: ① SPO2: Real-time SpO2 value of measuring. (Now the value is 98%) ② PR: Real-time pulse rate value of measuring.(now the value is 65) : Pulse Strength Bargraph, the height of the pulse bargraph is ③...
-
Page 11: Inserting And Replacing The Batteries
V2.0W1 WRIST PULSE OXIMETER 2. Inserting and Replacing the Batteries (1). Slide the battery cover in the direction of the arrow by your thumb, and lift the end of the cover upwards. Note: Do not pull too hard on the cover. (2). -
Page 12: Setting Up The Wrist Oximeter And Attaching The Sensor
WRIST PULSE OXIMETER V2.0W1 3. Setting up the Wrist Oximeter and Attaching the Sensor 3.1 Use the following procedure to thread the wrist strap, attach the sensor. Begin threading the short of the wrist strap through the spring bars on the rear of the Wrist Oximeter. - Page 13 V2.0W1 WRIST PULSE OXIMETER 4. Apply the wrist band securely and comfortably around the patient’s wrist. 5. Plug the sensor into the connector at the top of the Wrist Oximeter, ensuring that the sensor is plugged correctly and firmly, refers to picture 8. Pic.8 NOTE: Do NOT insert the sensor incorrectly;...
- Page 14 WRIST PULSE OXIMETER V2.0W1 3.2 ID &Time setting Please set the ID number and time before first measurement. Set different ID number for different users. 3.2.1 ID Setting Press the” ” button for about three seconds to start up the unit. Pic.10 Pic.11 The display panel will be high light for self diagnoses when powered on.
- Page 15 V2.0W1 WRIST PULSE OXIMETER Regardless of the information press the “ ” button for about 3 seconds, then you will enter into the screen(Pic.14): Then press the “ ” button and the Id number will change from 1~10. Set the number and then press the “...
- Page 16 WRIST PULSE OXIMETER V2.0W1 3.2.2.2 Month setting After finish setting the year, press the “ ” button for about one second to enter into the month setting screen shown as Pic.16, And then press the “ ” button to set the right month. The setting range is 1~12.And then press the “...
- Page 17 V2.0W1 WRIST PULSE OXIMETER 3.2.2.4 Hour setting After finish setting the date, press the “ ” button for about one second to enter into the hour setting screen shown as Pic.18, and then press the “ ” button to set the right hour. The setting range is 0~23.
- Page 18 WRIST PULSE OXIMETER V2.0W1 3.2.2.6 Seconds setting After finish setting the minute, press the “ ” button for about one second to enter into the second setting screen shown as Pic.20, and then press the “ ” button to set the right minute. The setting range is 0~59.
-
Page 19: Measurement
V2.0W1 WRIST PULSE OXIMETER 4. Measurement (1). After parameter setting, you can press the “ ” button for about three seconds to return to the measuring screen. Place the patient’s finger inside the sensor shown as the picture 21. Refer to the respective sensor instructions for specific information about placement and patient safety. -
Page 20: Specifications
WRIST PULSE OXIMETER V2.0W1 5. Specifications 5.1 Parameters Display range: 0%~100% Measuring range: 70%~100% Measuring accurate: 80%~100% ±2% ; 70%~79% ±3% ; <70% unspecified. Displaying range: 0~254bpm Measuring range: 30~235bpm Measuring accurate: 30~100 ±2bpm ; 101~235bpm ±2%. 5.2 Operating conditions Operating temperature: 5℃~40℃... - Page 21 V2.0W1 WRIST PULSE OXIMETER 5.4 weight & Dimensions Weight: Dimensions: 60mmX50mmX20mm (length×width×height) 5.5 Automatic storage Total storage time: 30 h Frequency: the interval between two records is 1 s. Note: Data is saved automatically, when the oximeter is started. If the register of the oximeter is full, the newest data will replace the oldest data.
-
Page 22: Error Code
WRIST PULSE OXIMETER V2.0W1 Error 1 indication. Refer to picture 24.Error 2 indication. Refer to picture 25. Error 13 indication. Refer to picture 26. Pic.24 Pic.25 Pic.26 6. Error code In measuring mode, press the right button, the error code of the happened malfunction will be displayed. -
Page 23: Key Symbols
V2.0W1 WRIST PULSE OXIMETER 7. Key symbols Symbol Meaning Symbol Meaning OK button / Parameter selection button Type BF applied part. Warnings! Power / Data setting button Pulse rate Hemoglobin saturation Low battery voltage Serial number Protected against dripping water 8. -
Page 24: Warranty And Repair
WRIST PULSE OXIMETER V2.0W1 9. Warranty and Repair 9.1Service Method a)Service respond time: 9:00am~17:30pm, Monday to Friday b)Service support: Our company will offer user telephone and e-mail technology support and parts change. Parts change: Our company will change parts if it is necessary free of charge in the warranty period. Because parts are the sources of maintenance, user should send them back to our company if not specified. - Page 25 V2.0W1 WRIST PULSE OXIMETER The damage and failure caused by user or its representative doesn’t comply with the operator’s manual. c) The oximeter is installed or connected with such external device without our company permission as printer, computer, data cable and lead to oximeter failure. Our company will charge for the maintenance.
- Page 26 WRIST PULSE OXIMETER V2.0W1 ●Not-original package lead to oximeter during transportation ●Not our company professionals or authorized personnel disassemble oximeter and lead to oximeter failure. ●Not carefully read manual and so wrong operation lead to oximeter damage and failure. ● Any product of any other manufacturer. 9.5 User’s Special Request for Guarantee Time Our guarantee constitution for oximeter complies with electronic product after-sale service standard regulated by national laws.
- Page 27 V2.0W1 WRIST PULSE OXIMETER Freight policy: (1). Within Warranty: The customer is responsible for freight & insurance charges when the equipment is shipped to our company for service (this includes custom charges). Our company is responsible for the freight & insurance charges from us to the customer. (2).
Need help?
Do you have a question about the MD300W and is the answer not in the manual?
Questions and answers