
Related Manuals for WaterSoft AS24P


Summary of Contents for WaterSoft AS24P
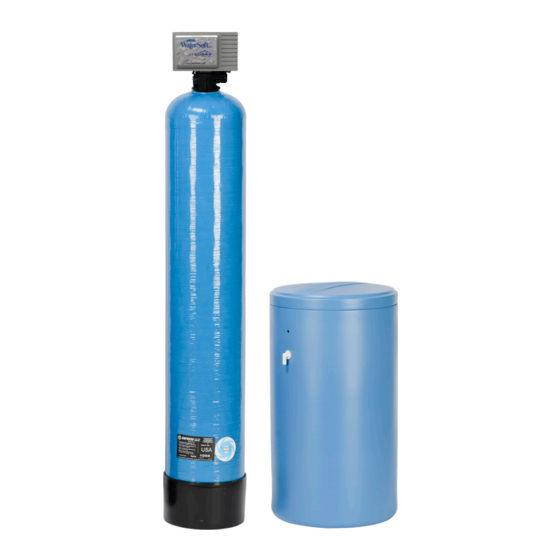
- Page 1 Softener Manual Installation / Operation Manual Fully Automatic & Demand Water Softeners with 2092 Isobar Control Valve...
- Page 2 Softener Specifications....................Page 3 Softener Installation......................Page 5 Softener Capacity......................Page 10 Installing the Control Valve..................Page 13...
-
Page 3: General Specifications
Softener Specifications AS24P AS32P AS48P AS64P General AS24VP AS32VP AS48VP AS64VP DS24P DS32P DS48P DS64P Specifications DS24VP DS32VP DS48VP DS64VP 32K / 15 48K / 23 63K / 30 Grains Capacity / lbs. 24K / 12 30K / 12 44K / 18... -
Page 4: How A Water Softener Works
Softener Specifications PLEASE NOTE THESE SPECIFICATIONS BEFORE PROCEEDING OPERATING PRESSURE RANGE : 20 - 125 PSI OPERATING TEMPERATURE RANGE : 33º F - 120º F INLET / OUTLET PIPE SIZE : 3/4: FNPT PLEASE COMPLY WITH ALL APPLICABLE PLUMBING CODES PROTECT THE SOFTENER AND PIPING FROM FREEZING TEMPERATURES Please read the entire Owner’s Manual and Instruction before installation. -
Page 5: Pre-Installation Checklist
Installation -Pre-Installation Check List- A water test should always be performed in order to determine total water hardness (in gpg) and total dis- solved iron (in parts per million - ppm). This is critical for proper equipment selection, sizing and for determining the program for regeneration frequency. - Page 6 Installation -Softener Location / Other Requirements- • Locate the unit near an unswitched, 120 volt / 60 Hz grounded electrical outlet. • Check for distance and proper drain installation (e.g. floor drain, washing machine standpipe). • Determine type and size of piping required for softener connection (e.g. copper, galvanized, PVC plastic). Note •...
-
Page 7: Installation Procedure
Installation -Installation Procedure- - Water Supply Connections and Bypass Valve - To allow for softener servicing, swimming pool filling or lawn sprinkling, a manual bypass valve has been installed at the factory. The bypass allows hard water to be manually routed around the softener. 1. -
Page 8: Electrical Connection
Installation -Brine Line and Overflow Connection- 1. Position brine tank on a smooth, level surface near the softener resin tank. If necessary, the brine tank can be placed at a higher level than the resin tank, but never at a lower level. 2. - Page 9 Installation - Control Valve Options- Each control valve position can be manually selected by rotating the regeneration knob CLOCKWISE until the desired position appears in the knob notch. 1. Manually index regeneration knob to BACKWASH position and allow water to run to drain for 3-4 minutes. 2.
- Page 10 Capacity - How To Use The Capacity Charts - EXAMPLE HARDNESS = 20 gpg 20 gpg UNIT SELECTED 32,000 GRAIN IRON = 3 ppm X 4 12 gpg NUMBER OF PERSONS MANGANESE = 1 ppm X 4 4 gpg COMPENSATED HARDNESS 36 gpg TOTAL COMPENSATED HARDNESS 36 gpg...
- Page 11 Capacity Model Nominal 24,000 Grain Unit (- 24) # of People Salt Setting 12 lbs. / Regeneration Hardness Range Number of Pins to Pull 3 - 10 11 - 20 21 - 30 31 - 40 41 - 50 51 - 60 61 - 75 NOTE: All of these charts assume 75 gallons per person per day usage.
- Page 12 Capacity Model Nominal 48,000 Grain Units (- 48) # of People Salt Setting 24 lbs. / Regeneration Hardness Range Number of Pins to Pull 3 - 20 21 - 30 31 - 40 41 - 50 51 - 60 61 - 70 71 - 80 81 - 90 91 - 100...
-
Page 13: Operation, Care And Cleaning
Installing the Control Valve - Setting The Regeneration Schedule - 1. Locate the program wheel just to right of the manual regeneration knob. (See Figure 1.) 2. Rotate program wheel until the white dot located on the outermost gear is aligned with the capacity (gallons) arrow on the control panel. -
Page 14: Servicing Instructions
Installing the Control Valve - General Care and Cleaning - 1. Do not place heavy or sharp objects on water softener or cabinet. 2. Use only mild soap and warm water to clean exterior of the unit. Never use harsh, abrasive cleaners. 3. - Page 16 710 Orange Street, Ashland, OH 44805 PH 419.289.1500 FAX 419.289.1515 www.watersoftinc.com...
Need help?
Do you have a question about the AS24P and is the answer not in the manual?
Questions and answers