TRENDnet TEW-751DR User Manual
2x2 802.11a+b+g+n dual band concurrent wireless router
Hide thumbs
Also See for TEW-751DR:
- User manual (67 pages) ,
- Quick installation manual (11 pages) ,
- Datasheet (3 pages)
Table of Contents
Advertisement
Quick Links
Advertisement
Table of Contents

Related Manuals for TRENDnet TEW-751DR


Summary of Contents for TRENDnet TEW-751DR
- Page 1 TEW-751DR 2x2 802.11a+b+g+n Dual Band Concurrent Wireless Router User’s Guide...
- Page 2 Federal C ommunication C ommission I nterference S tatement This equipment has been tested and found to comply with the limits for a Class B digital device, pursuant to Part 15 of the FCC Rules. These limits are designed to provide reasonable protection against harmful interference ...
- Page 3 Česky [ Czech] TRENDnet t ímto p rohlašuje, ž e t ento T EW-‐751DR j e v e s hodě s e z ákladními požadavky a d alšími p říslušnými u stanoveními s měrnice 1 999/5/ES. ...
- Page 4 1999/5/EC. Português TRENDnet declara que este TEW-‐751DR está conforme com os requisitos [Portuguese] essenciais e o utras d isposições d a D irectiva 1 999/5/CE. ...
- Page 5 1999/5/EY oleellisten vaatimusten ja sitä koskevien direktiivin muiden ehtojen m ukainen. Svenska Härmed intygar TRENDnet att denna TEW-‐751DR står I överensstämmelse [Swedish] med de väsentliga egenskapskrav och övriga relevanta bestämmelser som ...
-
Page 6: Table Of Contents
TABLE OF CONTENTS ..................1 BOUT UIDE Purpose ........................................1 Terms/Usage ......................................1 Overview o f t his U ser’s G uide ................................1 ................... 2 NTRODUCTION Applications: ......................................3 ... - Page 7 Statistic ......................................45 Wireless Client ....................................46 Routing ........................................46 Static ......................................... 46 Dynamic ......................................47 Routing Table ....................................48 Access ........................................49 Virtual Server ....................................52 Special AP ......................................53 ...
-
Page 8: About This Guide
ABOUT T HIS G UIDE Congratulations on your purchase of this TEW-‐751DR 600Mbps Wireless N Dual Band C oncurrent R outer. T his i ntegrated a ccess d evice c ombines I nternet g ateway functions ... -
Page 9: Introduction
INTRODUCTION The 2x2 802.11a+b+g+n Dual Band Concurrent Wireless Router delivers unsurpassed D ual B and w ireless s peed, c overage, a nd r eliability w ith u p t o 1 4x t he speed ... -
Page 10: Applications
Applications: Broadband Internet access: Several computers can share one high-‐speed broadband c onnection t hrough w ireless o r w ired ( WLAN, L AN a nd W AN-‐Internet). Resource ... -
Page 11: Wireless P Erformance C Onsiderations
Wireless P erformance C onsiderations There a re a n umber o f f actors t hat c an i mpact t he r ange o f w ireless d evices. ... -
Page 12: Unpacking And Setup
UNPACKING A ND S ETUP This chapter provides unpacking and setup information for the TEW-‐751DR 600Mbps W ireless N D ual B and C oncurrent R outer. Unpacking ... -
Page 13: Hardware Installation
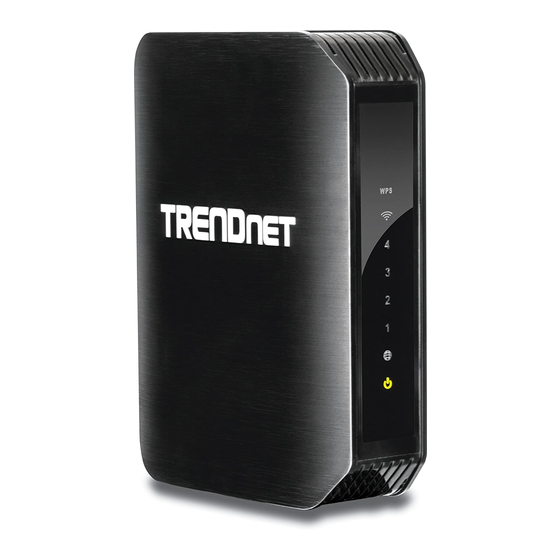
HARDWARE I NSTALLATION Front P anel The figure below shows the front panel of the TEW-‐751DR 600Mbps Wireless N Dual B and C oncurrent R outer. ... -
Page 14: Rear P Anel
Rear P anel The figure below shows the rear panel of the TEW-‐751DR 600Mbps Wireless N Dual B and C oncurrent R outer. ... -
Page 15: Side P Anel
Side P anel The figure below shows the side panel of the TEW-‐751DR 600Mbps Wireless N Dual B and C oncurrent R outer. ... -
Page 16: Hardware C Onnections
Hardware c onnections Connecting t he W LAN R outer 1. Plug i n o ne e nd o f t he n etwork c able t o t he W AN p ort o f t he W LAN R outer. 2. -
Page 17: Check The Installation
Check t he i nstallation The control LEDs of the WLAN Router are clearly visible and the status of the network l ink c an b e s een i nstantly: 1. -
Page 18: Pc Network Tcp/Ip Settings
PC N ETWORK T CP/IP S ETTINGS The network TCP/IP settings differ based on the computer’s operating system (Win95/98/ME/NT/2000/XP/Vista) a nd a re a s f ollows. Windows ... -
Page 19: Windows 2 000
6. Select “ None” f or t he “ Gateway a ddress” f ield. Windows 2 000 Double click on the “My Computer” icon on the desktop. When “My Computer” window ... -
Page 20: Windows X P
3. Set b oth “ IP a ddress” a nd “ DNS” t o A utomatic c onfiguration. Windows X P Point t he c ursor a nd c lick t he r ight b utton o n t he “ My N etwork P lace” i con. Select ... - Page 21 3. Right c lick “ Local A rea C onnection” a nd s elect “ Properties”. ...
- Page 22 4. Click o n “ Internet P rotocol ( TCP/IP)” a nd c lick o n “ Properties”. 5. Set “ IP a ddress” t o “ Obtain a n I P a ddress a utomatically.” 6.
-
Page 23: Windows V Ista / 7
Windows V ista / 7 1. Click on the “Start/Windows” button. Right click on “Network” and select “Properties”. 2. Window V ista: C lick o n “ Manage N etwork C onnections. Windows ... - Page 24 4. Set “ IP a ddress” t o “ Obtain a n I P a ddress a utomatically.” 5. Set “ DNS” t o “ Obtain D NS s erver a ddress a utomatically.” ...
-
Page 25: Configuration
CONFIGURATION First m ake s ure t hat t he n etwork c onnections a re f unctioning n ormally. This WLAN Router can be configured using Internet Explorer 6.0 or newer web browser ... -
Page 26: Using T He W Eb B Rowser
Using t he W eb B rowser 1. Open I nternet E xplorer 6 .0 o r a bove I nternet b rowser. 2. Enter I P a ddress ttp://192.168.10.1 ... -
Page 27: Shared Key
Step 2 : S et T he W ireless S ecurity: Click o n t he S ecurity M ode d rop-‐down l ist t o s elect y our w ireless s ecurity t ype. Selecting ... - Page 28 Encryption S trength -‐ C hoose t he k ey l ength 6 4-‐bit o r 1 28-‐bit. • Note: It is recommended to use 128-bit because it is more secure to use a key that consists of more characters.
- Page 29 The following section outlines options when selecting PSK (Preshared Key Protocol): Select a C ipher T ype: • When s electing W PA s ecurity, i t i s r ecommended t o u se T KIP. •...
- Page 30 • RADIUS Server Key -‐ Enter the shared secret used to authorize your router with y our R ADIUS s erver. Step 3 : I nternet S etup: The W LAN R outer w ill a ttempt t o a uto d etect y our I nternet C onnection. Dynamic ...
- Page 31 PPPoE: PPPoE t o o btain I P a utomatically: If connected to the Internet using a PPPoE (Dial-‐up xDSL) connection, and the ISP provides a User Name and Password, then choose this option and enter the required ...
- Page 32 PPPoE w ith a S pecify I P a ddress: If connected to the Internet using a PPPoE (Dial-‐up xDSL) connection, and the ISP provides a I P a ddress, S ubnet m ask, U ser N ame, P assword a nd a S tatic I P A ddress, choose ...
- Page 33 If connected to the Internet using a PPTP xDSL connection, enter your IP, Subnet Mask, G ateway, S erver I P, P PTP A ccount a nd P PTP P assword. L2TP: ...
- Page 34 If connected to the Internet using a L2TP (Dial-‐up xDSL) connection and the ISP provides a Server IP, Account and Password information, choose this option and enter ...
-
Page 35: Advanced C Onfiguration
A dvanced c onfiguration Main The screen enables users to configure the Internet Setup, Local Network, and Time a nd D ate s ettings. Local ... - Page 36 When s elected D HCP S erver: All DHCP client computers are listed in the table at the bottom of the screen, providing ...
-
Page 37: Internet Setup
Internet S etup This s creen e nables u sers t o s et u p t he W LAN R outer I nternet c onnection. ... - Page 38 If the Internet Service Provider (ISP) assigns a s tatic IP address, choose this option and enter the assigned WAN IP Address, WAN Subnet Mask, WAN Gateway Address ...
- Page 39 If connected to the Internet using a PPPoE (Dial-‐up xDSL) connection, and the ISP provides a User Name and Password, then choose this option and enter the required ...
- Page 40 When s elected t he P PPTP f or I nternet c onnection: If connected to the Internet using a PPTP xDSL connection, enter your IP, Subnet Mask, G ateway, S erver I P, P PTP A ccount a nd P PTP P assword. When ...
-
Page 41: Time And Date
If connected to the Internet using a L2TP (Dial-‐up xDSL) connection and the ISP provide a Server IP, Account and Password information, choose this option and enter ... -
Page 42: Wireless
NTP Enable: Checked to automatically adjust the system time from NTP Server; otherwise, uncheck for manually adjust the system time when you press the Set Time ... - Page 43 SSID: T ype a n S SID i n t he t ext b ox. T he S SID o f a ny w ireless d evice m ust m atch t he SSID ...
-
Page 44: Security
Security Security Mode: The a uthentication t ype d efault i s s et t o o pen system. There are four o ptions: D isabled, W EP, W PA, W PA2 a nd W PA-‐Auto. WEP ... - Page 45 o You c an d efine u p t o 4 p asswords o r 4 k eys. O nly o ne k ey c an b e a ctive at ...
- Page 46 This is the password or key that is used to connect your computer to this router w irelessly Confirmed P assphrase – R e-‐enter t he p assphrase. Note: 8-63 alphanumeric characters (a,b,C,?,*, /,1,2, etc.) The ...
-
Page 47: Advanced Wireless
Advanced W ireless This s creen e nables u sers t o c onfigure a dvanced w ireless f unctions. Beacon Interval: T ype t he b eacon i nterval i n t he t ext b ox. U ser c an s pecify a v alue from ... -
Page 48: Status
Configuration Status: Display the status (Un-‐configured State/Configured State) information o f W PS. Self-‐PIN N umber: D isplay t he c urrent P IN n umber o f t he W LAN R outer. Add ... -
Page 49: Log
Firmware Version: Displays the latest build of the WLAN Router firmware interface. After updating the firmware in Tools -‐ Firmware, check this to ensure that ... - Page 50 Time: D isplays t he t ime a nd d ate t hat t he l og e ntry w as c reated. Message: D isplays s ummary i nformation a bout t he l og e ntry. ...
-
Page 51: Log Setting
Log S etting This s creen e nables u sers t o s et R outer L og p arameters. SMTP Authentication: Selected the Enabled if the SMTP server need for authentication, ... -
Page 52: Statistic
n If the day is specified, the log is sent once per week, on the specified day. n Select t he t ime o f d ay y ou w ish t he E -‐mail t o b e s ent. n... -
Page 53: Wireless Client
Wireless C lient This screen enables users to view information about wireless devices that are connected t o t he W LAN R outer. ... -
Page 54: Dynamic
Destination Subnet Mask: Type the subnet mask of the destination network (ex 255.255.255.0). Gateway IP Address: Type the gateway IP address to the destination network or next ... -
Page 55: Routing Table
Routing T able This screen enables users to view the routing table of the WLAN Router. The routing t able i s a d atabase c reated b y t he W LAN R outer t hat d isplays t he n etwork interconnection ... -
Page 56: Access
Access This page enables you to define access restrictions, set up protocol and IP filters, create v irtual s ervers, d efine a ccess f or s pecial a pplications s uch a s g ames, a nd s et firewall ... - Page 57 URL F ilter: C heck t o e nable t he D omain/URL f ilter f unction. Add F RDN R ule: E nter t he d omain n ame w hich w ill b e d eny t o a ccess. Add ...
- Page 58 Enable: C heck t o e nable t he I P a ddress f ilter. Filter N ame: T ype t he n ame o f t he u ser t o b e d enied a ccess. Start Source IP Address/End Source IP Address: Type the IP range. From the IP ...
-
Page 59: Virtual Server
Virtual S erver This screen enables user to create a virtual server via the WLAN Router. If the WLAN Router is set as a virtual server, remote users requesting Web or FTP services ... -
Page 60: Special Ap
Enable: C lick t o e nable o r d isable t he v irtual s erver. Name: T ype a d escriptive n ame f or t he v irtual s erver. Protocol: ... -
Page 61: Dmz
Enable: C lick t o e nable o r d isable t he a pplication p rofile. W hen e nabled, u sers w ill be able to connect to the application via the WLAN Router’s WAN connection. Click ... -
Page 62: Dynamic Dns
DMZ Host IP: Type a host IP address for the DMZ. The computer with this IP address a cts a s a D MZ h ost w ith u nlimited I nternet a ccess. Apply: ... -
Page 63: Firewall Settings
Firewall S ettings This screen enables users to set up the firewall. The WLAN Router provides basic firewall functions, by filtering all the packets that enter the WLAN Router using a set of rules. The rules are listed in sequential order-‐-‐the lower the rule number, the ... -
Page 64: Management
Delete: Select a listed item and click Delete button to remove the entry from the list. New: C lick “ New” t o e rase a ll f ields a nd e nter n ew i nformation. Priority ... -
Page 65: Remote Management
Remote M anagement This screen enables users to set up remote management. Using remote management, the WLAN Router can be configured through the WAN via a Web browser. ... -
Page 66: Tools
Tools This page enables users to restart the system, save and load different settings as profiles, restore factory default settings, run a setup wizard to configure WLAN Router ... -
Page 67: Firmware
Firmware This s creen e nables u sers t o k eep t he W LAN R outer f irmware u p t o d ate. ... -
Page 68: Technical Specifications
TECHNICAL S PECIFICATIONS Hardware Standards IEEE 8 02.3 ( 10BASE-‐T), I EEE 8 02.3u ( 100BASE-‐TX), I EEE 8 02.11a/b/g/n WAN 1 x 1 0/100/1000Mbps A uto-‐MDIX p ort ( Internet) LAN ... -
Page 69: Limited Warranty
r epair o r r eplace t he d efective p roduct o r p art a nd d eliver a n e quivalent p roduct o r p art t o t he c ustomer. T he r epair/replacement unit’s warranty continues from the original date of purchase. All products that are replaced become the property of TRENDnet. ... - Page 70 Some TRENDnet products include software code written by third party developers. These codes are subject to the GNU General Public L icense ( "GPL") o r G NU L esser G eneral P ublic L icense ( "LGPL"). ...
Need help?
Do you have a question about the TEW-751DR and is the answer not in the manual?
Questions and answers