Table of Contents
Advertisement
Quick Links
Advertisement
Table of Contents

Related Manuals for TRENDnet TEW-723BRM


Summary of Contents for TRENDnet TEW-723BRM
- Page 1 Cover Page TRENDnet User’s Guide...
-
Page 2: Table Of Contents
Access control basics ....................18 Enable/disable Telnet ....................29 Wireless MAC address filters .................. 18 Configure ALG settings ....................30 Removing MAC Address ..................18 Configure NAT Forwarding settings ................30 MAC address filters ....................19 © Copyright 2014 TRENDnet. All Rights Reserved. - Page 3 Reset your router to factory defaults ................40 Router Default Settings ....................41 Backup and restore your router configuration settings ..........41 Upgrade your modem router firmware ............... 42 Restart your router ...................... 43 © Copyright 2014 TRENDnet. All Rights Reserved.
-
Page 4: Product Overview
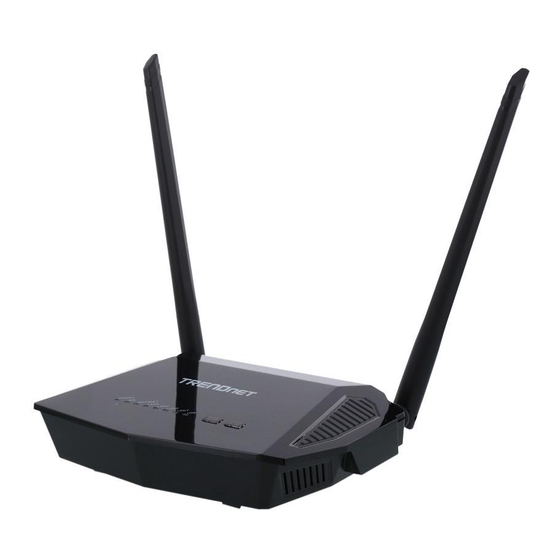
Features Product Overview TRENDnet’s N300 WiFi ADSL 2+ Modem Router, model TEW-723BRM, is a combination ADSL 2+ modem and wireless N300 router, which offers 300 Mbps WiFi N networking to share files, play games, and surf the internet. For your convenience, the wireless network is setup and pre-encrypted out of the box. -
Page 5: Product Hardware Features
• Power Port: Connect the included power adapter from your modem router power port and to an available power outlet. • On/Off Button: Push the button to turn the device on and off. © Copyright 2013 TRENDnet. All Rights Reserved. - Page 6 • LAN 1-4 (Link/Activity) LEDs – These LED indicators are solid green when the LAN ports are successfully connected to your wired network devices (which are turned on). These LED indicators will blink green while data is transmitted or received through your modem router’s LAN ports. © Copyright 2013 TRENDnet. All Rights Reserved.
-
Page 7: Basic Router Setup
(documents, downloads, and FAQs are available from this Web page) Provider). Note: The TEW-723BRM is a combination DSL modem and router, therefore, you do not require a separate DSL modem from your ISP when setting up this product. • Router: Connects multiple devices to the Internet. -
Page 8: Modem Router Installation
Secondary DNS Server Address: _____. _____._____._____ 2. IP over ATM (RFC 1483 Routed) • 2a. Obtain IP Address Automatically (Dynamic IP Address) Host Name (Optional) ______________________ ISP registered Mac Address or Clone MAC address (Optional)___:___:___:___:___:___ © Copyright 2015 TRENDnet. All Rights Reserved. -
Page 9: Modem Router Installation
TEW-723BRM TRENDnet User’s Guide Modem Router Installation © Copyright 2015 TRENDnet. All Rights Reserved. - Page 10 Mode: Select if you want the device to automatically pull the time from your process. Select your preferred language and click next. computer or if you want it to sync with a NTP server. © Copyright 2015 TRENDnet. All Rights Reserved.
- Page 11 Security Level: Select the type of security for your wireless network. Please see the section on Wireless Networking and Security on page 9 for definition on the security modes. • Pre-Shared Key: Input the desired password to secure your wireless network. © Copyright 2015 TRENDnet. All Rights Reserved.
-
Page 12: Connect Additional Wired Devices To Your Network
Please ensure that your computer or device network settings (also called TCP/IP settings) are configured to obtain IP address settings automatically (also called dynamic IP address or DHCP) and to Obtain DNS Server address settings automatically. © Copyright 2015 TRENDnet. All Rights Reserved. -
Page 13: Wireless Networking And Security
Setting up wireless security is very important. Leaving your wireless network open and encryption but more robust. This encryption standard also supports the highest unsecure could expose your entire network and personal files to outsiders. TRENDnet connection speeds. TRENDnet recommends setting your modem router to this recommends reading through this entire section and setting up wireless security on your encryption standard. -
Page 14: Secure Your Wireless Network
When selecting WPA2 security, it is recommended to use AES. Select the type of Authentication Mode. • Enterprise (RADIUS): Selecting this authentication mode allows for Enterprise level security, where a RADIUS Server will need to be set-up. © Copyright 2015 TRENDnet. All Rights Reserved. -
Page 15: Connect Wireless Devices To Your Modem Router
(See “Product Hardware Features” on page See the “Appendix” on page 59 for general information on connecting to a wireless For connecting additional WPS supported devices, repeat this process for each network. additional device. © Copyright 2015 TRENDnet. All Rights Reserved. - Page 16 1. Log into your modem router management page (see “Access your modem router management page” on page 23). 2. Click on Advanced Wireless and click WPS. 3. Click on Regenerate PIN to randomly generate a PIN. © Copyright 2015 TRENDnet. All Rights Reserved.
-
Page 17: Basic Wireless Settings
• Disable Wireless LAN Interface: turns off wireless networking on your router stabilize the wireless connectivity and reduce the effects of wireless interference in • Band: Select the appropriate band for your network areas where there are several 2.4GHz wireless devices. (Default: 100%) © Copyright 2015 TRENDnet. All Rights Reserved. -
Page 18: Steps To Improve Wireless Connectivity
1. Log into your router management page (see “Access your router management page” or even furniture may block or degrade the signal. page 23). 2. Click on Advanced, and click on Advanced Wireless, and then click on MBSSID. © Copyright 2015 TRENDnet. All Rights Reserved. -
Page 19: Securing Multiple Ssids
Key number. (e.g. if you have activated Key 2 with a password of 12345, then the client must select: Key 2 (entering Key 1, 3, or 4 will block the ability to connect) This section outlines Security for Multiple SSIDs. and enter password 12345) © Copyright 2015 TRENDnet. All Rights Reserved. -
Page 20: Additional Wireless Settings
The fragmentation threshold defines the maximum size of the data packets that are o IP address: Enter the IP address of the RADIUS server. (e.g. 192.168.10.250) © Copyright 2015 TRENDnet. All Rights Reserved. -
Page 21: Access Control Filters
Advanced > Advanced Wireless > Access Control 1. Log into your router management page (see “Access your router management page” page 23). 2. Click on Advanced, click on Advanced Wireless, and click on Access Control. © Copyright 2015 TRENDnet. All Rights Reserved. -
Page 22: Advanced Mac Address Filters
1. Log into your router management page (see “Access your router management page” 4. Review the available settings under URL Blocking and click Add Filter to save. page 23). 2. Click on Advanced, click on Filtering Options, and click on MAC Filter. © Copyright 2015 TRENDnet. All Rights Reserved. -
Page 23: Mac Blocking
2. Click on Advanced, click on Parental Control, and click on MAC Block. 3. Review the settings below and click Add Rule to save the settings. • Rule Name: Enter the name of the rule. © Copyright 2015 TRENDnet. All Rights Reserved. -
Page 24: Ip Filtering
• SPort/DPort: Enter the source and destination ports of the filter IP address. • Mask Address: Enter the network mask of your source • Start/End Destination IP Address: Enter the starting and ending points of the source IP address to filer. © Copyright 2015 TRENDnet. All Rights Reserved. -
Page 25: Advanced Router Setup
4. Click Apply at the bottom of the page to save the changes. Note: If you change the router login password, you will need to access the router management page using the User Name “admin” and the new password instead of the default password. © Copyright 2015 TRENDnet. All Rights Reserved. -
Page 26: Set Your Router Date And Time
1. Review the settings below and click Apply to save settings. • IP Protocol: Select IPv4, IPv6, or IPv4/IPv6 • User Name: Enter the user name provided by your ISP. © Copyright 2015 TRENDnet. All Rights Reserved. -
Page 27: Atm Settings
2. Click on Setup, click on Internet Setup, and click on ATM Settings. 1483 Bridge Mode 3. Review the settings and click Apply to save changes If you select 1483 Bridge mode, the screen below is displayed. © Copyright 2015 TRENDnet. All Rights Reserved. -
Page 28: Pvc Auto Search
IP address will use the following format using your new router IP address http://(new.router.ipaddress.here) to access your Setup > Local Network > LAN Interface router management page. • Subnet Mask: Enter the subnet mask of the router (e.g. 255.255.255.0) © Copyright 2015 TRENDnet. All Rights Reserved. -
Page 29: Set Up The Dhcp Server On Your Router
• IP Address: Enter the IP assigned IP address o DHCP Relay: Select this option to enable • MAC Address: Enter the MAC address of the computer of client. o DHCP Server: Select this option to enable © Copyright 2015 TRENDnet. All Rights Reserved. -
Page 30: Enable/Disable Upnp On Your Router
23). • Community name (read-write): Enter the trap community name here 2. Click on Advanced, hover on Network Tools and click on DLNA. 3. Click Enable or Disable DLNA on your modem router. © Copyright 2015 TRENDnet. All Rights Reserved. -
Page 31: Enable Tr-069 On Your Router
• Inform: Check this box to enable • Periodic Inform Enable: Select enable to enable • Periodic Inform Interval: Enter the interval time of sending RPCs. • Connection Request User Name: Enter the connection request user name. © Copyright 2015 TRENDnet. All Rights Reserved. -
Page 32: Blocking Applications
4. Click Add to save the entry. management page” on page 23). 2. Click on Advanced, hover on Network Tools and click on Telnet. 3. Select Enable or Disable Telnet on your modem router. © Copyright 2015 TRENDnet. All Rights Reserved. -
Page 33: Configure Alg Settings
ISPs to operate VPNs. • PPTP Pass-through: Point-to-Point Tunneling Protocol (PPTP) allows Point-to-Point protocol (PPP) to be tunneled through a network. Check this box to enable this function to work through your modem router. © Copyright 2015 TRENDnet. All Rights Reserved. -
Page 34: Configure Ftp Alg Config
4. Review and input the settings below and Apply Changes to save the settings. • Local Start IP: The start of the IP address range in your network • Local End IP: The end of the IP address range in your network © Copyright 2015 TRENDnet. All Rights Reserved. -
Page 35: Dns
• Last Member Query Count: Enter last member query count • Query Interval: Enter response query interval • Query Response Interval: Enter response interval • Group Leave Delay: Enter the delay interval IGMP Snooping Setup > Local Network > LAN Interface © Copyright 2015 TRENDnet. All Rights Reserved. -
Page 36: Identify Your Network On The Internet
You may want to make changes to your router from a remote location such at your office or another location while away from your home. 1. Log into your router management page (see “Access your router management page” page 22). © Copyright 2015 TRENDnet. All Rights Reserved. -
Page 37: Open A Device On Your Network To The Internet
You may want to expose a specific computer or device on your network to the Internet camera (typically on TRENDnet IP cameras use HTTP TCP port 80 for remote access web to allow anyone to access it. Your modem router includes the DMZ (Demilitarized Zone) requests) on your network for to allow remote access to it. -
Page 38: Port Trigger
Example: To forward TCP port 80 to your IP camera 1. Make sure to configure your network/IP camera to use a static IP address or you can use the DHCP reservation feature (see “Set up DHCP reservation” on page 53). © Copyright 2015 TRENDnet. All Rights Reserved. -
Page 39: Prioritize Traffic Using Qos (Quality Of Service)
Queue Classification to place ingress packets appropriately. Note: Please refer to the device documentation to determine which ports are required. 1. Click Add Rule to add and modify the QoS Queue. © Copyright 2015 TRENDnet. All Rights Reserved. -
Page 40: Add Static Routes To Your Router
• Physical Ports: Select the interface on the pull-down menu to implement this QoS queue. • IPP/DS Field: Select either IPP/TOS or DSCP • IP Precedence Range: Select in the pull-down menu the priority of the IP ranges. © Copyright 2015 TRENDnet. All Rights Reserved. -
Page 41: Enable Dynamic Routing On Your Router
Click Apply to save settings. 5. Click the <- button to add the selected interface into the group. Or click the -> button to remove selected interface from the group. © Copyright 2015 TRENDnet. All Rights Reserved. -
Page 42: Setup Ipv6 On Your Router
1. Log into your router management page (see “Access your router management page” page 23). 2. Click on Setup, click on Internet Setup and click on ADSL Settings. 4. Select the fields required by your ISP. Click Apply to save settings. © Copyright 2015 TRENDnet. All Rights Reserved. -
Page 43: Using 3G Wan Connection
3. Click Enable 3G WAN to have the device automatically input required settings. Click Apply to save settings. 1. Log into your router management page (see “Access your router management page” page 23). 2. Click on Management, and click on System. © Copyright 2015 TRENDnet. All Rights Reserved. -
Page 44: Router Default Settings
To back up your modem router configuration: 1. Log into your router management page (see “Access your router management page” page 23). 2. Click on Maintenance, and click System. 3. Click Backup Settings. © Copyright 2015 TRENDnet. All Rights Reserved. -
Page 45: Upgrade Your Modem Router Firmware
Maintenance > Firmware Update TRENDnet may periodically release firmware upgrades that may add features or fix problems associated with your TRENDnet modem router model and version. To check if there is a firmware upgrade available for your device, please check your TRENDnet model and version using the link. -
Page 46: Check Connectivity Using The Router Management Page
1. Log into your router management page (see “Access your router management page” page 23). 2. Click on Management, and click on System. 3. Click Reset to restart the router. If prompted, click yes or OK. © Copyright 2015 TRENDnet. All Rights Reserved. -
Page 47: Traceroute Diagnostic
Check the router system information Status > Device Info You may want to check the system information of your router such as WAN (Internet) connectivity, wireless and wired network settings, and router MAC address information. © Copyright 2015 TRENDnet. All Rights Reserved. -
Page 48: Check The Modem Router Adsl Status
• Downstream Speed: Displays the downstream data rate You may want to check the system ADSL information of your router. LAN Status 1. Log into your router management page (see “Access your router management page” page 23). © Copyright 2015 TRENDnet. All Rights Reserved. -
Page 49: Check The Router Wireless Clients
2. Click on Status and Statistics. Check the router Routing Table 3. Review the device information. Status > DHCP Clients This page displays the assigned IP address, MAC address and the expiration time for each DHCP leased client. © Copyright 2015 TRENDnet. All Rights Reserved. -
Page 50: View Your Router Log
3. Review the device log information. You can filter the log view by selecting Error, or Notice option. • Save Log to File: Downloads and saves the log on to your computer. • Clean Log Table: Clears log entries. © Copyright 2015 TRENDnet. All Rights Reserved. -
Page 51: Router Management
Statistics MBSSID 3G Backup • • Route Info Access Control List Telenet Access Control List • Routing IPv6 Access Control List Static Route • Port Triggering IPv6 Static Route • Port Forwarding • © Copyright 2015 TRENDnet. All Rights Reserved. -
Page 52: Technical Specifications
MAC address Inbound/Outbound filter diagnostic connectivity tests • VC and LLC multiplexing (Up to 8 PVCs) • • ALG: FTP, H.323, SIP, RTSP, PPTP/L2TP/IPsec Upgrade firmware • 802.1Q VLAN tagging • Backup/restore configuration VPN Passthrough © Copyright 2015 TRENDnet. All Rights Reserved. - Page 53 802.11n: FCC: 14 dBm (max.) @ 300 Mbps Receiving Sensitivity • 802.11b: -79 dBm (typical) @ 11 Mbps • 802.11g: -65 dBm (typical) @ 54 Mbps • 802.11n: -61 dBm (typical) @ 300 Mbps Wireless Channels • FCC: 1-11 © Copyright 2015 TRENDnet. All Rights Reserved.
-
Page 54: Troubleshooting
Click Internet Protocol (TCP/IP) and click Properties. d. Then click Obtain an IP address automatically and click OK. Note: If you are experiencing difficulties, please contact your computer or operating system manufacturer for assistance. © Copyright 2015 TRENDnet. All Rights Reserved. - Page 55 4. To verify whether or not wireless is enabled, login to the router management page, click on Wireless. 5. Please see “Steps to improve wireless connectivity” page 16 if you continue to have wireless connectivity problems. © Copyright 2015 TRENDnet. All Rights Reserved.
-
Page 56: Appendix
DHCP and click the Apply Now button. Note: If you are experiencing difficulties, please contact your computer or operating In MAC 10.5, from the Configure drop-down list, select Using DHCP system manufacturer for assistance. and click the Apply button. © Copyright 2015 TRENDnet. All Rights Reserved. - Page 57 3. You may be prompted to enter a security key in order to connect to the network. 4. Enter in the security key corresponding to the wireless network, and click Connect. © Copyright 2015 TRENDnet. All Rights Reserved.
- Page 58 This equipment has been tested and found to comply with the limits for a Class B digital TRENDnet hereby declare that the product is in compliance with the essential requirements device, pursuant to Part 15 of the FCC Rules. These limits are designed to provide reasonable and other relevant provisions under our sole responsibility.
- Page 59 This precaution may be particularly important in rural areas. Caution: Users should not attempt to make such connections themselves, but should contact the appropriate electric inspection authority, or electrician, as appropriate. © Copyright 2015 TRENDnet. All Rights Reserved.
- Page 60 USA and Canada are responsible for return shipping fees. Customers and look for the desired TRENDnet product to access to the GPL Code or LGPL Code. shipping from outside of the USA are responsible for custom charges, including but not These codes are distributed WITHOUT WARRANTY and are subject to the copyrights of limited to, duty, tax, and other fees.
Need help?
Do you have a question about the TEW-723BRM and is the answer not in the manual?
Questions and answers