Table of Contents
Advertisement
Quick Links
Advertisement
Table of Contents

Related Manuals for SHOWTEC MINI STUDIOBEAM RGB


Summary of Contents for SHOWTEC MINI STUDIOBEAM RGB
- Page 1 Mini StudioBeam RGB ORDERCODE 42447...
- Page 2 Congratulations! You have bought a great, innovative product from Showtec. The Showtec Mini StudioBeam RGB brings excitement to any venue. Whether you want simple plug-&- play action or a sophisticated DMX show, this product provides the effect you need. You can rely on Showtec, for more excellent lighting products.
-
Page 3: Table Of Contents
Showtec Showtec Mini StudioBeam RGB Product Guide ™ Warning ....................................2 Safety Instructions ................................. 2 Operating Determinations ............................4 Rigging .................................... 4 Return Procedure ................................5 Claims ....................................5 Description of the device ..............................6 Overview ..................................6 DMX Channel Summary .............................. 7 Installation ................................... -
Page 4: Warning
Save the carton and all packing materials. In the event that a fixture must be returned to the factory, it is important that the fixture be returned in the original factory box and packing. Your shipment includes: • Mini StudioBeam RGB • User manual LED Expected Lifespan LEDs gradually decline in brightness over time. - Page 5 This device can be installed on a flat surface or onto truss systems via the mounting bracket. The user is responsible for correct positioning and operating of the Mini StudioBeam RGB. The manufacturer will not accept liability for damages caused by the misuse or incorrect installation of this device.
-
Page 6: Operating Determinations
Always let the installation be carried out by an authorized dealer ! Procedure: If the Mini StudioBeam RGB is lowered from the ceiling or high joists, professional trussing systems have to be used. Use a clamp to mount the Mini StudioBeam RGB, with the mounting-bracket, to the trussing system. -
Page 7: Return Procedure
Return Procedure Returned merchandise must be sent prepaid and in the original packing, call tags will not be issued. Package must be clearly labeled with a Return Authorization Number (RMA number). Products returned without an RMA number will be refused. Highlite will not accept the returned goods or any responsibility. Call Highlite 0031-455667723 or mail aftersales@highlite.nl and request an RMA prior to shipping the fixture. -
Page 8: Description Of The Device
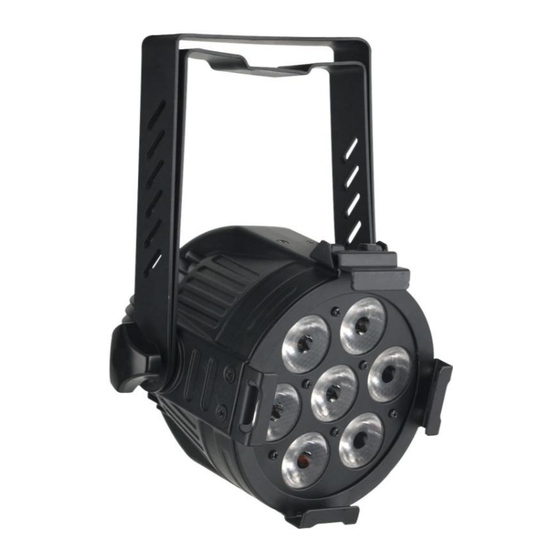
Description of the device Features The Showtec Mini StudioBeam RGB is a LED parcan with high output and great effects. • Very high light output and never change lamps again! • Beam angle 10 º • High class Italian lenses •... -
Page 9: Dmx Channel Summary
DMX Channel Summary RGB3 Channel Description Green Blue RGB6 Channel Description Green Blue Strobe Program Speed Master Dimmer RGB7 Channel Description Green Blue Strobe Program Speed Master Dimmer White Yellow Channel Description Color Change White Red Dimmer Strobe HUS_ Channel Description... -
Page 10: Installation
Installation Remove all packing materials from the Mini StudioBeam RGB. Check that all foam and plastic padding is removed. Connect all cables. Always disconnect from electric mains power supply before cleaning or servicing. Damages caused by non-observance are not subject to warranty. Set Up and Operation Follow the directions below, as they pertain to your preferred operation mode. -
Page 11: Control Panel
Control Panel Fig. 2 Control Mode The fixtures are individually addressed on a data-link and connected to the controller. The fixtures respond to the DMX signal from the controller. DMX Addressing The control panel on the front side of the Mini StudioBeam allows you to assign the DMX fixture address, which is the first channel from which the Mini StudioBeam will respond to the controller. -
Page 12: Menu Overview
Menu Overview... -
Page 13: Main Menu Options
Main Menu Options Press the MODE button to scroll through 15 options of the menu: 1. DMX 512 Address When you press RIGHT in menu DMX 512 address you can set the DMX address. 2) You can choose your DMX address between 001-509. 2. -
Page 14: Default Menu
5. Default Menu When you press RIGHT in menu Def, you can reset the device. 2) Press RIGHT and use the Up/Down buttons to choose: Canc or Rese. 3) If you choose Rese, the device will return to the factory default setting. 6. -
Page 15: Naht Menu
10. Naht Menu 1) When you press RIGHT in menu Unit, you can see the highest internal temperature measured. 2) You will see the temperature in Cels (Celsius °C) or Fahr (Fahrenheit °F), depending on the setting you have made. 11. -
Page 16: Dmx Channels
In order to receive a DMX signal, the controller must be attached to a DMX controller by a 3-pin DMX cable and the DMX controller must be turned on. The Mini StudioBeam RGB system can operate as a 3/4/4/4/6/7-channel DMX fixture. 3 Channels (Rgb3) Channel 1 –... -
Page 17: Channels (Rgb7)
7 Channels (Rgb7) Channel 1 – Red (Dimmer CH6 must be open 0-255 Red from 0 – 100% Channel 2 – Green (Dimmer CH6 must be open 0-255 Green from 0 – 100% Channel 3 – Blue (Dimmer CH6 must be open 0-255 Blue from 0 –... -
Page 18: Channels (Hus)
4 Channels (HUS) Channel 1 – Color Change (Dimmer CH3 must be open Red → Red+Green → Green → Green+Blue → Blue → Blue+Red → Red 0-255 CH2 must be set to 255 for an optimal color change effect. Channel 2 – White Red 0-255 From White to Red Note: When CH1 = 255, CH2 will not work... -
Page 19: Maintenance
3. Mechanically moving parts like axles, eyes and others may not show any traces of wearing. 4. The electric power supply cables must not show any damages or material fatigue. The Showtec Mini StudioBeam RGB requires almost no maintenance. However, you should keep the unit clean. - Page 20 Problem Probable cause(s) Remedy No power to the fixture • Check that power is switched on One or more and cables are plugged in. If the fixtures are problem persists contact your dealer completely dead. for servicing. Fixtures reset The controller is not connected. •...
-
Page 21: Product Specification
Product Specification Model: Showtec Mini StudioBeam RGB Power Supply: AC 230V-240V, 50/60 Hz Power consumption: 30W Power connector: Schuko LED system: Chip on board (3 colour LED's – 1 lens) LED/unit: 7 x 3 Watt Beam Angle: 10 degrees DMX-512: 3, 4, 4, 4, 6, 7 Channel mode...
Need help?
Do you have a question about the MINI STUDIOBEAM RGB and is the answer not in the manual?
Questions and answers