Onkyo TX-NR901 Instruction Manual
Hide thumbs
Also See for TX-NR901:
- Service manual (135 pages) ,
- Instruction manual (105 pages) ,
- Specification sheet (2 pages)
Table of Contents
Advertisement
Quick Links
AV Receiver
TX-NR901
Instruction Manual
Thank you for purchasing the Onkyo AV Receiver.
Please read this manual thoroughly before making
connections and plugging in the unit.
Following the instructions in this manual will enable
you to obtain optimum performance and listening
enjoyment from your new AV Receiver.
Please retain this manual for future reference.
Contents
E
n
Advertisement
Table of Contents

Subscribe to Our Youtube Channel
Related Manuals for Onkyo TX-NR901


Summary of Contents for Onkyo TX-NR901
- Page 1 Contents AV Receiver TX-NR901 Instruction Manual Thank you for purchasing the Onkyo AV Receiver. Please read this manual thoroughly before making connections and plugging in the unit. Following the instructions in this manual will enable you to obtain optimum performance and listening enjoyment from your new AV Receiver.
-
Page 2: Important Safety Instructions
WARNING: AVIS WARNING TO REDUCE THE RISK OF FIRE OR ELECTRIC RISK OF ELECTRIC SHOCK RISQUE DE CHOC ELECTRIQUE DO NOT OPEN NE PAS OUVRIR SHOCK, DO NOT EXPOSE THIS APPARATUS TO RAIN OR MOISTURE. The lightning flash with arrowhead symbol, within an equilateral triangle, is intended to alert the user to the CAUTION: presence of uninsulated “dangerous voltage”... -
Page 3: Precautions
This reminder is provided to call the CATV system 2. AC Fuse— The AC fuse inside the TX-NR901 is installer’s attention to Section 820-40 of the NEC which not user-serviceable. If you cannot turn on the provides guidelines for proper grounding and, in partic- TX-NR901, contact your Onkyo dealer. -
Page 4: Table Of Contents
Precautions ........................3 Features........................6 Supplied Accessories ....................7 Before Using the TX-NR901 ..................8 Setting the Voltage Selector (Worldwide model only) ..............8 Installing the Batteries........................8 Using the Remote Controller......................8 Front & Rear Panels ....................9 Front Panel........................... 9 Display ............................ - Page 5 Configuring the listening modes frequently you use (Listening Mode Preset) ......64 Audio adjust ..........................65 Preference..........................70 Other settings..........................72 Using Net-Tune ......................74 Connecting the TX-NR901 to your Ethernet Network ..............75 Enjoying Internet radio .......................76 Playing a music file saved on your PC..................78 Music Server Setup........................80 Network Setup..........................80 Using Zone 2 ......................
-
Page 6: Features
Dolby Laboratories. “DTS,” “DTS 96/24,” “DTS-ES,” and “Neo:6” are trademarks of Digital Theater Systems, Inc. “Theater-Dimensional” and “Net-Tune” are trademarks of Onkyo Corporation. Re-Equalization and the “Re-EQ” logo are trademarks of THX Ltd. Windows Media, and the Windows logo are trademarks, or registered trademarks of Microsoft Corporation in the United States and/or other countries. -
Page 7: Supplied Accessories
* In catalogs and on packaging, the letter added to the end of the product name indicates the color of the TX-NR901. Specifications and operation are the same regardless of color. Remote controller & two batteries (AA/R6) Indoor FM antenna (Connector type varies from country to country.) -
Page 8: Before Using The Tx-Nr901
INPUT 2 SURR SELECTOR 120V 12V TRIGGER OUT AC INLET 120V ZONE 2 RS232 220-230V VIDEO 3 To use the remote controller, point it at the TX-NR901’s SURR BACK TAPE REMOTE CONTROL VIDEO 4 AUDIO AUDIO VIDEO S VIDEO DIGITAL remote control sensor, as shown below. -
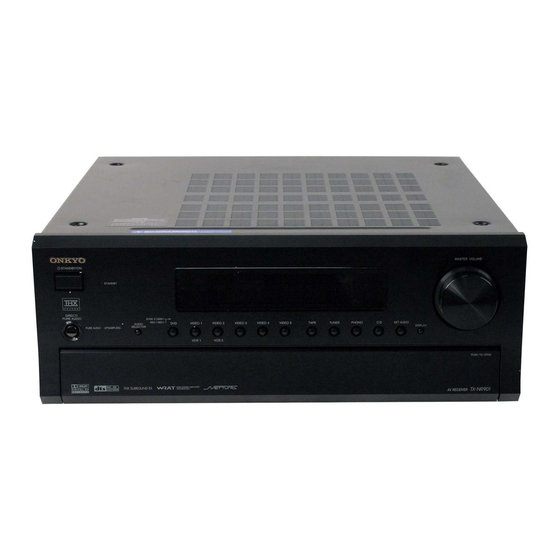
Page 9: Front & Rear Panels
Front & Rear Panels Front Panel North American Model MASTER VOLUME STANDBY/ON STANDBY ZONE REC ( VIDEO VIDEO VIDEO VIDEO VIDEO TAPE TUNER PHONO NET AUDIO AUDIO SELECTOR DISPL AY PURE AUDIO UPSAMPLING PUSH TO OPEN Front flap Push here to open the flap VIDEO INPUT PHONES... - Page 10 VIDEO 1 OUT, VIDEO 2 OUT). STANDBY/ON button (xx) ZONE 2 button (85) This button is used to set the TX-NR901 to On or This button is used to select the input source that you Standby. For models with a POWER switch, this but- want play in zone 2 (sub-room).
-
Page 11: Display
ENTER button RETURN button (xx) This button is used when navigating the onscreen This button is used to return to the previously dis- setup menus (OSD), entering names, and confirming played onscreen setup menu (OSD). settings. VIDEO 5 INPUTs (xx) PRESET [ ] buttons (xx) These optical digital audio, S-Video, composite... -
Page 12: Rear Panel
These optical digital audio outputs can be used to L/R surround back inputs on a separate power amp connect a CD recorder or other component with dig- when the TX-NR901 is used as a preamp, or to feed ital inputs. a power amp in zone 2 (sub-room). - Page 13 FM ANTENNA (xx) TX-NR901 from zone 2 (sub-room), or if the This connector is for connecting an FM antenna. TX-NR901 is installed in a cabinet and the line of sight between the TX-NR901 and the remote con- PHONO IN (xx)
-
Page 14: Remote Controller
The TX-NR901’s remote controller is a multipurpose SURR button device that can be used to control not just the TX-NR901 This button is used to select the Dolby and DTS lis- but your other AV components as well. This section tening modes. -
Page 15: Net-Tune Mode
This button is used to select the input source. Press This button is used to set the volume of the this button first, and then roll the scroll wheel until TX-NR901. They can also be used to set the volume “MSRV” (Music Server—Net-Tune Central) or in zone 2 (sub-room). -
Page 16: Dvd Mode
] button is used to select the next chapter or CD player, MiniDisc recorder, or cassette recorder to the track. TX-NR901’s RI jack allows you to control it with the FR/FF [ ] buttons TX-NR901’s remote controller. Since you only need to The FR [ ] button is used to start fast reverse. - Page 17 SETUP/GUIDE button This button is used to access the DVD player’s onscreen setup menus. MUTING button This button is used to mute the TX-NR901. This function can be set only with the remote controller. Play [ ] button This button is used to start DVD playback.
-
Page 18: Cd Mode
Number/letter buttons CD Mode These buttons are used to enter track numbers and to CD mode is used to control an Onkyo CD player con- enter times for locating specific points in time. nected to the TX-NR901 via . To select CD mode,... -
Page 19: Minidisc Mode
MiniDisc mode, press the [MODE] button, and then roll MUTING button the scroll wheel until “MD” appears on the display. This button is used to mute the TX-NR901. This ON button function can be set only with the remote controller. -
Page 20: Tape Mode
MODE button Tape Mode This button is used with the scroll wheel to select the Tape mode is used to control an Onkyo cassette recorder remote controller modes. Press this button first, and connected to the TX-NR901 via . To select Tape then roll the scroll wheel until “AMP”... -
Page 21: About Home Theater
The remote control code that you use with an Onkyo and then press the scroll wheel. DVD player depends on whether it’s connected via The following remote controller modes... -
Page 22: Connecting The Tx-Nr901
4036, 4037 Seemann 4013 Marantz 5025, 5026 Hughes Network 4017, 4028 4011 Mitsubishi 5005 Systems Seleco 4015, 4023 Onkyo 5001, 5002 Huth 4013, 4015, 4024 Skymaster 4025, 4034 Panasonic 5011, 5017, 5020 Imperial 4014 Skyvision 4015 Philips 5004, 5021, 5028... -
Page 23: Connecting Speakers
Using the Remote Controller with Other Components—Continued CBL (cable receiver) Manufacturer Control code Manufacturer Control code Manufacturer Control code 3001, 3002, 3021 Cyrus 2034 2005, 2006, 2007, 2009, 2032 Archer 3006 Daewoo 2012 Neckermann 2034 Cabletime 3028, 3032 Dansai 2033 Nesco 2033 Cableview... - Page 24 Using the Remote Controller with Other Components—Continued Manufacturer Control code Manufacturer Control code Manufacturer Control code 2010, 2021 Clatronic 1052 1001, 1004, 1005, 1006, JC Penney 1011, 1012, 1016, 1019, Sunkai 2046 Colortyme 1004, 1006 1022, 1025, 1034 Sylvania 2010, 2011, 2012, 2014 Condor 1052 Jensen...
-
Page 25: Connecting Antenna
Using the Remote Controller with Other Components—Continued Manufacturer Control code Manufacturer Control code 1003, 1004, 1007, 1008, Stern 1062 Philips 1014, 1018, 1019, 1020, Sunkai 1043, 1048, 1049, 1050 1037, 1038, 1040, 1053 1004, 1006, 1008, 1014, Sylvania 1059, 1060 1018, 1020 Phoenix 1040... - Page 26 ] Select menu items Stop [ENTER] Confirm selection Rewind Number buttons Enter numbers Fast forward The following buttons control the TX-NR901. Pause [VOL] Adjust the TX-NR901 volume Number buttons Enter numbers [MUTING] Mute the TX-NR901 The following buttons control the TX-NR901.
-
Page 27: Connecting Your Tv Or Projector
[TV INPUT] Select TV or VCR input Adjust the TV volume TV VOL [ Number buttons Enter numbers The following buttons control the TX-NR901. The following buttons control the TX-NR901. [VOL] Adjust the TX-NR901 volume [VOL] Adjust the TX-NR901 volume... -
Page 28: Connecting The Video Component
Point the remote controllers at Remote Controller each other, about 2 to 6 inches (5–15 cm) apart, and then, on the You can teach the TX-NR901’s remote controller new other remote controller, press the commands simply by transmitting commands from button whose command you another remote controller one at time. - Page 29 1. Press the scroll wheel, (to select AMP mode). wheel, press the [ON] button, roll the 2. Press the [ON] button (to turn on the TX-NR901). scroll wheel to select CD, press the 3. Roll the scroll wheel to select CD (to select the CD scroll wheel, and then press the Play remote controller mode and the CD input source).
- Page 30 Using the Remote Controller with Other Components—Continued Naming Macros Repeat step 5 until you’ve entered all 5 characters. You can name your macros as follows. Names may con- tain of up to five characters. The previous menu reappears. If the name you are entering consists of Press and hold the [CUSTOM] less than five characters, enter spaces at button for more than three sec-...
-
Page 31: Connecting A Tv, Satellite/Cable Tuner, Ld Player, Etc
Using the Remote Controller with Other Components—Continued Reordering the Remote Controller Modes Editing Remote Controller Modes You can change the order in which the remote controller Adding New Remote Controller Modes modes appears when you roll the scroll wheel. The posi- tion of the AMP mode cannot be changed. -
Page 32: Connecting A Camcorder, Games Console, Etc
Using the Remote Controller with Other Components—Continued Deleting Remote Controller Modes Assigning Remote Controller Modes You can delete remote controller modes that you don’t With this function you can assign a remote controller need, such as modes for components that you don’t have. mode to an input source. - Page 33 Using the Remote Controller with Other Components—Continued Resetting the Remote Controller You can reset the remote controller to its default settings. Press and hold the [CUSTOM] button for more than three sec- onds. The remote controller enters Custom mode. Roll the scroll wheel to select MODE, and then press the scroll wheel.
Need help?
Do you have a question about the TX-NR901 and is the answer not in the manual?
Questions and answers