
Subscribe to Our Youtube Channel
Related Manuals for DW DWC-B6763WTIR


Summary of Contents for DW DWC-B6763WTIR
-
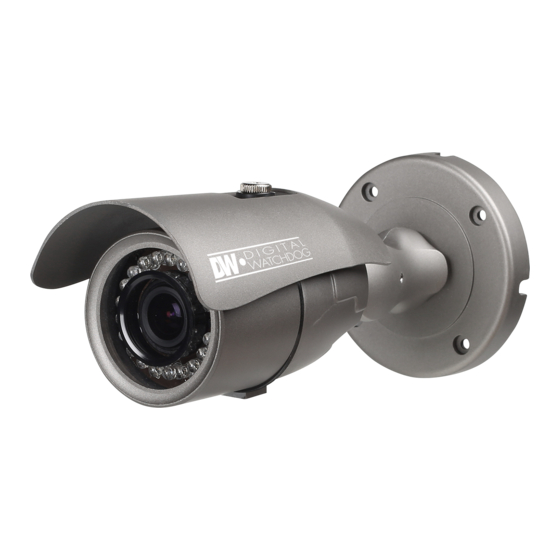
Page 1: Bullet Camera
Analog High Definition Bullet Camera DWC-B6763WTIR DWC-B6763WTIR650 ABOUT MANUAL Before installing and using the camera, please read this manual carefully. Be sure to keep it handy for future reference. 05/2015... - Page 2 PRECAUTIONS Do not open or modify. Do not open the case except during maintenence and installation, for it may be dangerous and can cause damages. Do not put objects into the unit. Keep metal objects and flammable substances from entering the camera. It can cause fire, short-circuits, or other damages.
-
Page 3: Table Of Contents
Table of Contents TABLE OF CONTENTS Introduction Features Parts and Descriptions Dimensions Installation Inside the Box Installation Instructions Connecting to Monitors Control Board Adjusting the Camera Angle Module OSD Menu 13-25 Troubleshooting Warranty Information 27-28 Specifications 29-30... - Page 4 Panasonic 1/3" CMOS Sensor 1080P Resolution at 30fps Wide Dynamic Range (WDR) Varifocal P-Iris Lens from 2.8~12mm [DWC-B6763WTIR Models] Varifocal P-Iris Lens from 6~50mm [DWC-B6763WTIR650 Models] Smart IR™ with Intelligent Camera Sync. 100-150ft Range Smart DNR™ 3D Digital Noise Reduction...
-
Page 5: Parts And Descriptions
PARTS & DESCRIPTION* OSD Joystick Controller Mounting Bracket BNC Cable Camera Module 12VDC Power Outlet Sunshield Adjusting Screws RS485 Cable Sunshield Cover UTP Cable IR Module Alarm Output Cable Front Case Set Screw... -
Page 6: Dimensions
DIMENSIONS IN MILLIMETERS (IN)* DWC-B6763WTIR 224.5 8.83 112.0 4.41 94.0 3.70 4.2 0.17 78.0 3.07 61.5 2.42... -
Page 7: Dimensions
DIMENSIONS IN MILLIMETERS (IN)* DWC-B6763WTIR650 252.0 (9.9”) 93.5 (3.68”) 222.5 96.7 (3.8”) (8.76”) 78.0 (3.07”) 4.2 (0.16”) -
Page 8: Inside The Box
4 Machine Screws and 4 Dry Wall Anchors DC Plug Power Cable Anlog High Definition Bullet Camera DWC-B6763WTIR DWC-B6763WTIR650 ABOUT MANUAL Before installing and using the camera, please read this manual carefully. Be sure to keep it handy for future reference. -
Page 9: Installation Instructions
INSTALLATION INSTRUCTIONS* 1. Using the mounting template or your own camera, mark and drill the necessary holes to mount the bracket to a wall or ceiling. 2. Pull all necessary wires through and make the proper connections. 3. Use the four (4) mounting screws to install the camera on the wall or ceiling. -
Page 10: Connecting To Monitors
CONNECTING TO MONITORS* Use the diagram below to connect to a Monitor or CRT Monitor properly. 12VDC/24VAC CCTV Monitor Left Right Down Second Video Output Monitor Power Connection - 12VDC/24VAC Dual Voltage (Auto Polarity Detection and Protection) All cameras are equipped with a second video output for on-site configuration. -
Page 11: Control Board
CONTROL BOARD* Secondary Connector: Video Output Connector for On-Site Configuration Joystick: Controls the OSD menu. Remove the camera’s lens cover by rotating it counter-clockwise. Use the Joystick to control the camera’s OSD options. -
Page 12: Adjusting The Camera Angle
ADJUSTING THE CAMERA ANGLE* CAUTION : Do not rotate more than 360 Do not unnecessarily twist too many times. -
Page 13: Module Osd Menu
MODULE OSD MENU* EXPOSURE COLOR DAY & NIGHT FUNCTION LENS WB BAL. D&N MODE SHARPNESS MANUAL / AUTO AUTO / AUTO-EX / PRESET AUTO / COLOR / BW / EXTERN 0 ~ 10 BACKLIGHT AGC THRES GAMMA / MANULAL OFF / HME / BLC / WDR 0 ~ 20 0.45 ~ 0.75 COLOR GAIN... - Page 14 EXPOSURE LENS Manual mode supports the fixed board lens or the manual iris lens. MANUAL/ AUTO mode sets the camera’s iris automatically. AUTO - Level: Change the camera’s iris value manually. If AUTO is selected, this option is disabled. - Brightness: Adjust the camera’s brightness from 0~20. The higher the number, the brighter the image will appear.
- Page 15 EXPOSURE BACKLIGHT HIGHLIGHT MASKING EXPOSURE HME allows objects to appear clearly on the screen by masking extremely bright areas. To setup HME, set the level and color. The lower the setting, the darker the masking areas have to be. Select from: 0 ~ 10. Color: Set the color of the HME mask.
- Page 16 EXPOSURE DYNAMIC RANGE COMPRESSOR DRC enables dark areas in images to become more visible without overexposing the bright areas to create one perfect image. Select from: OFF / ON. NOTE: If WDR or DEFOG are enabled, the DRC settings are set automatically and will not be available for adjustment.
- Page 17 COLOR WB MODE Auto Tracking White Balance Control mode compensates for color temperature changes between 2400K and 11000K Auto White Balance Control mode compensates for color temperature changes lower than 2000K and higher than 15000K PUSH Push fixes the white balance based on the current lighting automatically. MANUAL Users can control the white balance manually by changing RED GAIN and BLUE GAIN (see below).
- Page 18 DAY & NIGHT D&N MODE AUTO / Day/ Night switch will be based on the AGC levels. COLOR / The camera always stays in day/color mode. B&W The camera always stays in night/B&W mode. EXTERN Day/ Night switch will be based on using IR LED lights. AUTO: - AGC Threshold: Set when the camera switches between Day &...
- Page 19 FUNCTION SHARPNESS Sets the image sharpness. The higher the number, the sharper the image. 0 ~ 10 GAMMA Select the desired gamma level. 0.55 is default setting. 0.45 ~ 0.75 MIRROR / FLIP Reflects the camera horizontally. MIRROR FLIP Reflects the camera vertically. Mirror / Flip OFF Mirror ON Flip ON...
- Page 20 MOTION The camera can detect the movement and display an alarm on the screen when movement is detected. MOTION To use the motion detection settings, be fore Motion is ON. DET. WINDOW - Window Use: Select which zone to setup from the 4 motion zones available. - Window Zone: Enable or disable the selected motion zone.
- Page 21 PRIVACY You can hide some parts of the screen for privacy masking. A total of 8 different privacy masking zones are available. The cameras support square privacy masks or advanced polygon masks. BOX MASKS - ZONE NUM.: Select the zone number you want to setup. - ZONE DISP.: To enable it, turn the display option ON.
- Page 22 PRIVACY You can hide some parts of the screen for privacy masking. A total of 8 different privacy masking zones are available. The cameras support square privacy masks or advanced polygon masks. POLYGON MASKS - ZONE NUM.: Select the zone number you want to setup. - ZONE DISP.: To enable it, turn the display option ON.
- Page 23 SETUP COMMUNICATION Adjust the camera’s ID and Baudrate. Default Protocol is Pelco-D. - CAM ID: Provide an ID number for the camera (0 ~ 255). - BAUDRATE: 9600bps is default. Select the baudrate from the following options: 2400/4800/9600/57600/115200 bps. CAM. TITLE Add a name to the camera.
- Page 24 SETUP FRAME RATE Set the camera’s display frame rate and resolution. Select from: 720-30P, 720-60P, 1080-30P. The camera may have to be rebooted after frame rate change. FREQUENCY When the camera’s image appears to have flickering issues, change the frequency value to adjust the image. LANGUAGE Select from the following: English (Default), Chinese, Chinese (S), Japanese, and Koran.
- Page 25 EXIT EXIT SAVE Exit the OSD menu after saving the recent changes. INITIAL Exit the OSD menu after resetting the camera to factory default.
-
Page 26: Troubleshooting
TROUBLESHOOTING Before sending your camera for repair, check the following or contact our technical specialist. FOR NO VIDEO Check the coaxial cable and make sure it is connected securely. Check the lens’ iris adjustment at the camera’s OSD menu. Check the power supply and make sure the camera has the proper voltage and current. -
Page 27: Warranty Information
WARRANTY INFORMATION* Digital Watchdog (referred to as “the Warrantor”) warrants the Digital Watchdog Camera against defects in materials or workmanship as follows: LABOR: For the initial five (5) years and one (1) year on IR LED from the original purchase date, if the camera is determined to be defective, the Warrantor will repair or replace the unit with a new or refurbished product at its option at no charge. - Page 28 LIMITS & EXCLUSIONS* There are no express warranties except as listed. The warrantor will not be liable for incidental or consequential damages (including damage to recording media without limitation) resulting from the use of these products or arising out of any breach of the warranty. All express and implied warranties, including the warranties of merchantability and fitness for particular purpose, are limited to the applicable warranty period set forth above.
-
Page 29: Specifications
SPECIFICATIONS* VIDEO Image Sensor Panasonic 1/3" CMOS Active Pixels 1944(H) x 1092(V) Scanning System Progressive scan Frequency 60Hz/50Hz Signal Technology 2.0 Megapixel AHD Synchronization Internal Resolution 1920x1080 (1080p) Minimum Scene Illumination F1.4 (30IRE): 0.35Lux [Color] F1.4 (30IRE): 0 Lux [B&W] S/N Ratio 55dB Video Output... -
Page 30: Specifications
SPECIFICATIONS* OPERATIONAL (CONT.) Digital Noise Reduction Off, Low, Middle, High White Balance Auto / Auto-Ex/ Preset / Manual Day and Night Day/ Night/ Auto Auto Gain Control Max 60dB Privacy Zones 16 Privacy Zones RS485/ UTP Built-in PELCO D/PELCO C Digital Zoom x1.0 ~ x16.0 ENVIRONMENTAL... - Page 31 MEMO*...
- Page 32 5436 W Crenshaw St. Tampa, FL 33634 Tel : 866-446-3595 / 813-888-9555 Fax : 813-888-9262 www.Digital-Watchdog.com technicalsupport@dwcc.tv Technical Support Hours : Monday-Friday 9:00am to 8:00pm EST...
Need help?
Do you have a question about the DWC-B6763WTIR and is the answer not in the manual?
Questions and answers