Table of Contents
Advertisement
Advertisement
Table of Contents

Related Manuals for Singer ONE


Summary of Contents for Singer ONE
- Page 1 INSTRUCTION MANUAL MANUEL D’INSTRUCTION HANDLEIDING...
-
Page 2: Important Safety Instructions
This appliance has a polarized plug (one blade wider than the other). To reduce the risk of electric shock, this plug is intended to fit in a polarized outlet only one way. If the plug does not fit fully in the outlet, reverse the plug. If it still does not fit, contact a qualified electrician to install the proper outlet. - Page 3 électriques/électroniques. En cas de doute, veuillez communiquer avec le détaillant. SINGER est une marque exclusive de The Singer Company Limited S.à r.l. ou de ses Affiliés. © 2011 The Singer Company Limited S.à r.l. ou de ses Affiliés. Tous Droits Réservés.
- Page 4 Let op! Dit product moet op een veilige manier gerecycled worden volgens de geldende nationale wetgeving voor elektrische/ elektronische producten. Raadpleeg bij twijfel uw leverancier voor advies. SINGER is een geregistreerd handelsmerk van The Singer Company Limited of partners. ©2010 The Singer Company Limited of partners. Alle rechten voorbehouden.
-
Page 5: Table Of Contents
TABLE OF CONTENTS 1. KNOWING YOUR SEWING MACHINE Blindhem stitch, Multi-stitch zig zag -------------------------- 38 - 39 Machine identification ------------------------------------------------6 - 7 Stretch and Decorative Stitches ------------------------------- 40 - 45 Accessories -------------------------------------------------------------8 - 9 Straight stretch stitch, Ric-rac stitch, Honeycomb stitch, Setting up your machine -----------------------------------------10 - 11 Overedge stitch, Feather stitch, Pin stitch, Blanket stitch, Spool pins ----------------------------------------------------------- 12 - 13... - Page 6 TABLE DES MATIÈRES 1. DESCRIPTION DE LA MACHINE À COUDRE Point décoratifs et points extensibles ------------------------ 40 - 45 Description --------------------------------------------------------------6 - 7 Point droit extensible, Point ric-rac, Nid d’abeille, Accessoires -------------------------------------------------------------8 - 9 Point surjet extensible, Point plume, Point épingle, Préparation de la machine ---------------------------------------10 - 11 Point de languette, Point d’échelle, Point épingle oblique, Porte-bobine -------------------------------------------------------- 12 - 13...
- Page 7 INHOUD 1. UW NAIMACHINE STELT ZICH VOOR Zigzag met meerdere steken ---------------------------------- 40 - 45 Benaming van de onderdelen --------------------------------------6 - 7 Stretchsteken ------------------------------------------------------ 40 - 45 Accessoires -------------------------------------------------------------8 - 9 Rechte stretchsteek, Drievoudige rechte steek, Instellen van uw machine ----------------------------------------10 - 11 Smocksteek, Overlocksteek, Veersteek, Picosteek, Garenpennen ------------------------------------------------------ 12 - 13 Festonneersteek, Trapsteek,...
-
Page 8: Knowing Your Sewing Machine
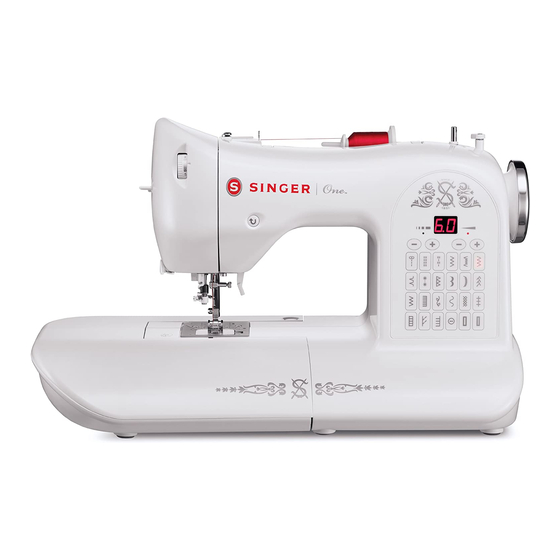
1. KNOWING YOUR SEWING MACHINE MACHINE IDENTIFICATION 1. Pre-tension guide 2. Bobbin winding tension disk 3. Thread tension control 4. Threading lever 5. Face cover 6. Thread cutter/holder 7. Extension table (Accessory box) 8. Bobbin winder shaft 9. Bobbin winder stop 10. -
Page 9: Description De La Machine À Coudre Description
1. DESCRIPTION DE LA 1. UW NAIMACHINE STELT ZICH VOOR MACHINE À COUDRE DESCRIPTION BENAMING VAN DE ONDERDELEN 1. Draadopname 1. Guide pré-tension 2. Disque de tension du bobineur 2. Draadgeleider 3. Draadspanningsregelaar 3. Réglage de la tension du fil supérieur 4. -
Page 10: Accessories
ACCESSORIES 1. Needles 2. Bobbins 3. Auxiliary spool pin 4. Spool pin felt disks 5. Spool pin cap (small) 6. Spool pin cap (medium) 7. Spool pin cap (large) 8. Buttonhole opener/seam ripper and brush 9. Screwdriver for needle plate 10. -
Page 11: Accessoires
ACCESSOIRES ACCESSOIRES 1. Aiguilles 1. Set naalden 2. Canettes 2. 4 spoelen (1 zit in de machine) 3. Porte-bobine auxiliaire vertical 3. Tweede garenpen 4. Rondelle feutre 4. 2 garenpenviltjes 5. Chapeau pour bobine (petit) 5. Garenschotel (klein) 6. Chapeau pour bobine (moyen) 6. -
Page 12: Setting Up Your Machine
SETTING UP YOUR MACHINE Be sure to wipe off any surplus oil from Set power/light switch at “OFF” needle plate area before using your machine the first time. Mettez l’interrupteur moteur/ lumière à la position « Fermé » POWER LINE CORD/FOOT CONTROL Aan/uit-schakelaar “OFF”... -
Page 13: Préparation De La Machine
PRÉPARATION DE LA MACHINE INSTELLEN VAN UW MACHINE Avant d’utiliser la machine pour la première fois, assurez-vous Verwijder de eventuele olievlekken van de naaldplaat voordat de bien essuyer tout surplus d’huile sur et autour de la plaque u met het gebruik van de machine begint. d’aiguille. -
Page 14: Spool Pins
SPOOL PINS Spool HORIZONTAL SPOOL PIN for normal Bobine thread spool Garenklos Place thread spool on the pin and secure with a spool cap to Felt disc ensure smooth flow of thread. If the thread spool has a thread Rondelle feutre Garenpenvilt retaining slit, it should be placed to the right. -
Page 15: Porte-Bobine
PORTE-BOBINE GARENPENEN PORTE-BOBINE HORIZONTAL HORIZONTALE GARENPEN voor normale (pour bobine de fil standard) garenklosen Placez la bobine sur la tige et fixez-y un couvre-fil pour Plaats de garenklos op de garenpen en zet deze vast met een assurer un débit de fil bien régulier. Si la bobine est dotée d’une garenschotel om er voor te zorgen dat de draad soepel loopt. -
Page 16: Winding The Bobbin
WINDING THE BOBBIN Be sure to use Class 15 J bobbins. 1. Place a spool of thread on the spool pin, and secure it with the spool pin cap. Pull the thread out from the spool and place it through thread guides as shown in illustration. 2. -
Page 17: Préparation De La Canette
PRÉPARATION DE LA CANETTE SPOELEN Zorg ervoor, dat u spoelen van klasse 15 J Assurez-vous d’utiliser des bobines de type gebruikt. « Classe 15 J » 1. Placez une bobine de fil sur un porte-bobine et fixez-la 1. Plaats een garenklos op de garenpen en zet deze met correctement à... -
Page 18: Threading The Bobbin Thread
THREADING THE BOBBIN THREAD 1. Raise the needle to its highest position by rotating the hand wheel counter clockwise. 2. Remove the bobbin cover plate by pushing the release button to the right. Bobbin cover will pop up sufficiently to allow you to remove the cover. -
Page 19: Enfilage Du Fil De La Canette
ENFILAGE DU FIL DE LA CANETTE INRIJGEN VAN DE ONDERDRAD 1. Faites tourner le volant vers vous jusqu’à ce que l’aiguille 1. Zet de naald in de hoogste stand door het handwiel naar u soit dans sa position la plus haute. toe te draaien. -
Page 20: Threading The Top Thread
THREADING THE TOP THREAD A. Raise the presser foot lifter. Always be sure to raise the presser foot lifter before threading the top thread. (If the presser foot lifter is not raised, correct thread tension cannot be obtained.) B. Turn the hand wheel counter clockwise until the needle is in its highest position. -
Page 21: Enfilage Du Fil Supérieur
ENFILAGE DU FIL SUPÉRIEUR INRIJGEN VAN DE BOVENDRAAD A. Soulevez le pied presseur. Assurez-vous toujours que le A. Zet de persvoethevel omhoog. Zet de persvoethevel pied presseur est soulevé avant de faire l’enfilage du fil altijd omhoog alvorens de bovendraad in te rijgen. (Als supérieur. -
Page 22: Using Automatic Needle Threader
USING AUTOMATIC NEEDLE THREADER UTILISATION DE L’ENFILEUR DE CHAS D’AIGUILLE Be sure to raise the presser foot lifter and raise the needle Assurez-vous de soulevez le pied presseur et d'amener to its highest position before threading. l’aiguille en position haute en tournant le volant vers vous (sens antihoraire) avant d'enfiler la machine. - Page 23 GEBRUIK VAN DE AUTOMATISCHE HELPFUL SUGGESTIONS: DRADINRIJGER Put a drop of sewing machine oil onto the felt disc, if the machine is used after a long interval. Zet de persvoethevel omhoog en zet de naald in de hoogste stand voordat u gaat inrijgen. ...
-
Page 24: Needle, Thread And Fabric Chart
16/100 purple band * For best sewing results, always use a Singer Branded Needle. TABLEAU DES TISSUS, DU FILS ET NALD-GAREN-STOFTABEL DES AIGUILLES De stof die u gebruikt bepaalt de keuze van de naald en de draad. Onderstaande tabel geeft praktische richtlijnen voor Le choix d’une aiguille et du fil correspondant à... -
Page 25: Changing The Needle
Always disconnect the machine from power supply by removing the plug from the electrical outlet. Flat side Côté plat Changing the needle platte kant Needle Aiguille 1. Raise the needle bar to its highest position by turning the naald hand wheel counter clockwise. 2. -
Page 26: Adjusting Top Thread Tension
ADJUSTING TOP THREAD TENSION Under side 90% of your sewing will be accomplished with the word “AUTO” Envers exposed on the tension control dial on top of the machine. Onderkant Well balanced Helpful Hint: A slight adjustment to a higher number or a Correct lower number may improve sewing appearance. -
Page 27: Réglage De La Tension Du Fil Supérieur
RÉGLAGE DE LA TENSION DU FIL AFSTELLEN VAN DE SUPÉRIEUR BOVENDRADSPANING 90% de la couture sera exécutée avec le cadran de réglage V o o r 9 0 % v a n u w n a a i w e r k h o e f t u a l l e e n d e de tension (en haut de la machine) réglé... -
Page 28: Control Panel Functions
CONTROL PANEL FUNCTIONS Number display Affichage du numéro Nummer weergave LED indicator LED indicator Témoin DEL Témoin DEL LED indicator LED indicator Stitch width/needle position control Stitch length control Largeur du point/position de l’aiguille sur le point droit Longueur du point Regelknop steekbreedte/naaldpositie Regelknop steeklengte Pattern selection buttons... -
Page 29: Fonctions Du Panneau De Commande
FONCTIONS DU PANNEAU DE BEDIENINGSPANELFUNCTIES COMMANDE Bouton de sélection des motifs Patroonkeuze-toetsen Lorsque la machine est mise en fonction, le témoin DEL du B i j h e t i n s c h a k e l e n v a n d e n a a i m a c h i n e m e t d e point droit s’allume. -
Page 30: Reverse Operation Button
REVERSE OPERATION BUTTON Dual purpose reverse/tacking stitch button Reverse stitch button Bouton du point de marche arrière Achterwaartsknop * Reverse stitch function for straight and zigzag stitches ( Reverse sewing is carried out while the reverse stitch button is pushed. The machine will continue to sew in reverse as long as the reverse stitch button is pressed. -
Page 31: Bouton D'opération Du Point De Marche Arrière
BOUTON D’OPÉRATION DU POINT DE ACHTERWAARTSKNOP MARCHE ARRIÈRE Dubbele-functieknop voor achterwaarts naaien en Bouton double usage point marche arrière/point d’arrêt afhechten * Fonction du point arrière pour le point droit et zigzag * Achterwaarts naaien voor rechte steken en zigzag steken ( La couture arrière se met en marche lorsque vous appuyez Voor het achterwaarts naaien houdt u de achterwaartsknop sur ce bouton. -
Page 32: Starting To Sew
2. POUR COUDRE 2. STARTING TO SEW 2. BEGINEN MET NAIEN TABLEAU DE RÉFÉRENCE SNELZOEKTABEL VOOR QUICK REFERENCE RAPIDE DES LONGUEURS STEEKLENGTE EN TABLE OF STITCH ET LARGEURS DE POINTS BREDTE LENGTH AND WIDTH LENGTH WIDTH STITCH SYMBOL LONGUEUR (mm) LARGEUR (mm) LENGTE BREDTE... - Page 33 LENGTH WIDTH STITCH SYMBOL LONGUEUR (mm) LARGEUR (mm) LENGTE BREDTE POINT SYMBOLE AUTO MANUAL AUTO MANUAL AUTO MANUEL AUTO MANUEL STEEK SYMBOL AUTO MANUAL AUTO MANUAL SERPENTINE 0.8 - 2.4 3.5, 7.0 SERPENTIN SERPENTIJNSTEEK HONEYCOMB 1.4 - 3.0 3.0 - 6.0 NID D'ABEILLE SMOCKSTEEK ENTREDEUX...
-
Page 34: Straight Stitching
KEEPING SEAMS STRAIGHT To keep the seam straight, use one of the numbered guide lines on the needle plate. The numbers indicate distance from the needle at its center position. -
Page 35: Point Droit
POINT DROIT RECHTE STEEK Le point droit est le point le plus utilisé pour toute genre de Bij elke aspect van het naaien wordt de rechte steek het meest couture. Apprenez à vous servir correctement de la machine, veelvuldig gebruikt. Laten we aan de hand van onderstaande en suivant les étapes ci-dessous. -
Page 36: Hand-Look Quilt Stitch
INSERTING ZIPPERS AND PIPING Use zipper foot to sew to the right or left of the zipper or to sew close to the cording. Needle to left of foot Needle to right of foot Aiguille à gauche du pied Aiguille à droite du pied presseur presseur Naald links van de voet... -
Page 37: Insérer Un Fermeture À Glissière Ou Un Passepoil
INSÉRER UN FERMETURE À GLISSIÈRE RITSSLUITING AANBRENGEN EN OU UN PASSEPOIL KOORDEN NAAIEN Utilisez le pied fermeture à glissière, au moyen duquel vous Gebruik de ritssluitingvoet voor het naaien van de linker- of pouvez piquer aussi bien à gauche qu’à droite, ou aussi au rechterkant van een ritssluiting resp. -
Page 38: Zigzag Stitching
ZIGZAG STITCHING Under side Côté de dessous SETTINGS : Presser foot - General Purpose Foot onderkant : Thread tension control - AUTO The top thread may appear on the bottom depending on the thread, fabric, type of stitch and sewing speed, but the bobbin thread must never appear on the top of the fabric. -
Page 39: Point Zigzag
POINT ZIGZAG ZIGZAGSTEEK RÉGLAGES : Pied presseur - Pied universel INSTELLINGEN : Voetje: Standaardvoet : Réglage tension du fil supérieur - AUTO : Spanningsregelaar - AUTO Le fil supérieur peut paraître sur l’envers, en fonction du fil, du De bovendraad mag aan de onderzijde verschijnen afhankelijk tissu et de la vitesse de couture, mais le fil de la canette ne van de draad, het material, het type steek en de naaisnelheid, doit jamais paraître sur l’endroit. -
Page 40: Blindhem Stitch, Multi-Stitch Zig Zag
: Thread tension control - AUTO This is a strong stitch because as its name implies, it makes three short stitches where the normal zig-zag makes only one. For this reason it is highly recommended for overcasting all types of fabrics. -
Page 41: Point Invisible
POINT INVISIBLE BLINDZOMEN RÉGLAGES : Pied presseur - Pied ourlet invisible INSTELLINGEN : Voetje - Blindsteekvoet invisible : Réglage tension du fil supérieur - AUTO : Spanningsregelaar - AUTO - Point ourlet invisible régulier pour tissu tissé Gewone blindzoomsteek voor normale stoffen. Elastische blindzoomsteek voor fijne, rekbare - Point ourlet invisible pour les tissus extensibles stoffen. -
Page 42: Stretch And Decorative Stitches
MUST be used. OVEREDGE STITCH This is a similar stitch used by the garment industry in making sportswear - it sews and finishes the seam in one operation. It’s very effective for use in repairing raw or worn edges of garments. -
Page 43: Point Décoratifs Et Points Extensibles
POINT DÉCORATIFS ET POINTS STRETCHSTEKEN EXTENSIBLES INSTELLINGEN : Voetje - Standardvoet of Cordonvoet RÉGLAGES :Pied presseur - Pied universel ou point : Spanningsregelaar - AUTO bourdon :Réglage de la tension du fil supérieur - AUTO De stretchsteken worden meestal gebruikt voor gebreide of Les points extensible sont utilisés surtout sur les tricots et les zeer rekbare stoffen maar kunnen ook voor de gewone stoffen tissus extensibles, mais peuvent tout aussi bien êtres utilisées... -
Page 44: Feather Stitch
SLANT OVEREDGE STITCH Seams and overcasts in one operation to produce a narrow, supple seam, particularly suited to swimwear, sportswear, T-shirts, babywear in stretch nylon, stretch toweling, jersey... -
Page 45: Point Plume
POINT PLUME VEERSTEEK L’aspect agréable de ce point lui permet de servir de couture Het mooie aanzien van deze steek maakt deze geschikt voor visible à plat, ou pour assembler les dentelles, ou pour het opnaaien of het bevestigen van kant of inzetpanelen bij l’insertion de pièces de type lingerie. -
Page 46: Decorative Patterns
Useful for decorative stitching on borders and for use in heirloom sewing. The Entredeux stitch is most often sewn with a Wing Needle (Singer Style 2040) to create holes in the stitch pattern. Helpful hint: A slight + adjustment of the tension will increase the size of the hole when using a wing needle. -
Page 47: Point Entredeux
à l’ancienne. Le point entredeux est le plus souvent steekpatronen gebruikt. Voor de open zoom-techniek heeft u cousu à l’aide d’une aiguille sabre (Style SINGER 2040) pour een Wing-naald nodig (Singer Style 2040). créer des trous dans le motif du point. -
Page 48: Sewing A Buttonhole
Lengüeta A buttonholes sewn by a system that measures the size of the button and calculates the size buttonhole required. All of this is done in one easy step. PROCEDURE * Use an interfacing in the area of the garment where buttonholes are placed. -
Page 49: Confection Des Boutonnières
CONFECTION DES BOUTONNIÈRES KNOOPSGATEN MAKEN BOUTONNIÈRE AUTOMATIQUE GEBRUIK VAN DE KNOOPSGATVOET La machine à coudre vous offre deux différentes largeurs Uw naaimachine is met 2 verschillende breedten voor de de boutonnières à brides; à oeillet et boutonnières arrondies knoopsgatcordons alsmede met een systeem voor het cousues au moyen d’un système mesurant la taille du bouton meten van de knoopgrootte en voor het bepalen van de et qui calcule la taille de la boutonnière. -
Page 50: Corded Buttonholes
* Sewing will be completed automatically in the following order. Buttonhole foot alignment position Positionnement du pied boutonnière Posición de alineación del pie ojalador Fabric marking Marque du tissu Marca de material 9. When sewing is finished, use a buttonhole opener/seam ripper to open up the fabric in the center of the buttonhole. -
Page 51: Boutonnière Gansées (Renforcées)
* La couture sera complétée automatiquement dans l’ordre * Het naaien zal automatisch in de onderstaande volgorde indiqué sur l’illustration. voltooid worden. 9. Une fois la couture terminée, utilisez un outil d’ouverture 9. G e b r u i k n a d a t h e t n a a i e n v o l t o o i d i s e e n de boutonnière pour ouvrir le tissu au centre de la knoopsgatenopener voor het openen van de stof in boutonnière. -
Page 52: Caring For Your Machine Cleaning Hook Area And Feed Dogs
3. Remove the bobbin case (2). 4. Clean the feed dogs and hook area with the lint brush. Put one drop of sewing machine oil on the hook race as indicated by the arrows. (A, B) NOTE: Singer brand sewing machine oil is suggested. -
Page 53: Entretient De La Machine Nettoyage Des Griffes Et Autour Du Crochet
(A, B). REMARQUE: nous vous suggérons d’utiliser OPMER KING : gebruik ui t s lui tend SINGER l’huile pour machine à coudre de marque Singer n a a i m a c h i n e o l i e . G e b r u i k i n g e e n g e v a l NE PAS utilisez une huile tout usage qui n’est pas... -
Page 54: Other Information Satin Stitch Foot
Doing so will result in broken needles and possible damage to your machine. Use of a Singer brand 3mm (Style 2025) twin needle is recommended. Twin needles are available in a range of sizes. Check with your Singer retailer. -
Page 55: Renseignements Additionnelles Pied Point Bourdon
Wij adviseren om uitsluitend Singer 3mm-dubbele naalden (style 2025) te gebruiken. Il est recommandé d’utiliser une aiguille jumelée de marque Singer de 3mm (modèle 2025). Les aiguilles jumelées Dubbele naalden zijn speciale accessoires. sont disponible en différente grosseur. Vérifiez avec votre marchand autorisé... -
Page 56: Performance Checklist
5. PERFORMANCE CHECKLIST GENERAL PROBLEMS Machine does not sew. * Power switch is turned off.- Turn on the switch. * Buttonhole lever is not raised when sewing stitch patterns. – Raise buttonhole lever. * Buttonhole lever is not lowered when sewing buttonhole. –... -
Page 57: Vérification Des Problèmes
5. VÉRIFICATION DES PROBLÈMES 5. PROBLEEMOPLOSSINGEN MINEUR DE COUTURE PROBLÈMES GÉNÉRAUX ALGEMEEN MACHINE NAAIT NIET La machine ne coud pas. * Schakelaar staat uit. Schakel de stroom in. * L’interrupteur est hors tension. Le mettre sous tension. * Knoopsgat hendel staat niet in de bovenste stand bij het * Le levier pour boutonnière n’est pas relevé... -
Page 58: Helpful Messages, System Error
HELPFUL MESSAGES Messages are displayed with LED lamps above the stitch selection panel on the machine. When a message is displayed, you may fix the problem by following the correction suggestion most suited to your issue. The corrections are preceded by an arrow. Helpful message Problem on control panel... -
Page 59: Messages D'aide, Erreur Du Système
WAARSCHUWINGSBERICHT MESSAGES D’AIDE Meldingen worden weergegeven via LED lampjes boven Les messages apparaissent sur l’écran ACL qui se retrouvent het steekselectiepaneel op de machine. Wanneer een au-dessus du panneau de sélection des motifs de la machine. melding verschijnt, kan U het probleem verhelpen door de Lorsqu’un message apparaît, vous pouvez le réglé... - Page 60 © Part No. 82981...
Need help?
Do you have a question about the ONE and is the answer not in the manual?
Questions and answers