
Related Manuals for Uniden UDR780HD


Summary of Contents for Uniden UDR780HD
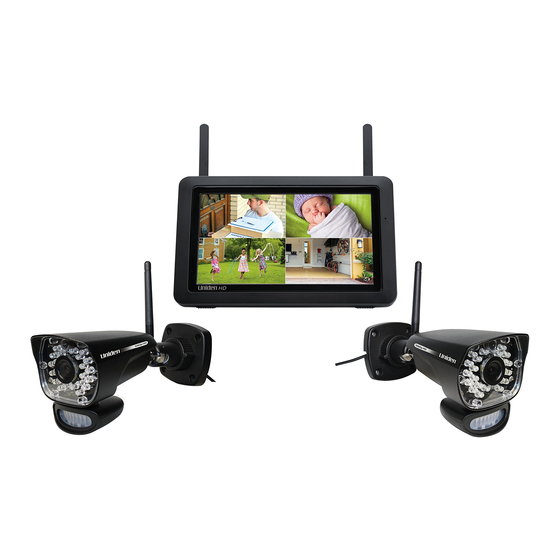
- Page 1 UDR780HD VIDEO SURVEILLANCE SYSTEM © 2016 Uniden America Corporation Issue 1, September 2016 Irving, Texas Printed in China...
-
Page 2: Customer Care
At Uniden®, we care about you! If you need assistance, please do NOT return this product to your place of purchase. Quickly find answers to your questions by: 1. Reading this owner’s manual. 2. Visiting our customer support website at www.uniden.com. -
Page 3: Table Of Contents
PLAYING BACK RECORDED VIDEO ............. 40 Uniden surveillance products are not manufactured and/or sold with the intent to be used for illegal purposes. Uniden expects consumer’s use of these products to be in compliance with all local, state and federal law. For further information on video surveillance and audio recording legal requirements, please consult your local, state and federal law. -
Page 5: Getting Started
GETTING STARTED FEATURE LIST 850nm IR LED distance up to 10m • 7” TFT LCD Digital panel (1024 x 600) • Two-way audio • Scan function • PIR- or motion detection-triggered recording • Manual recording • Touch screen operation • Schedule recordings from Sunday to Saturday •... -
Page 6: What's Included
• Mounting Hardware (2 sets) • Quick Start Guide Images may vary slightly from product. (2) 9V 600mA Power Adapter (2) Antenna (may be (Camera) attached to camera) If any items are missing or damaged, visit our website at www.uniden.com for assistance. Never use damaged products! -
Page 7: Getting To Know The Udr780Hd System
GETTING TO KNOW THE UDR780HD SYSTEM HARDWARE UDR780HD MONITOR No. What it is LCD Screen: Displays video from the camera(s) or system operation interface. Microphone Wireless Antenna Power Button/ Scan Button: Press and hold about 5 seconds to turn the receiver on/off. Press and release while the unit is powered on to turn Scan mode on/off. Speaker Power Port: Connert to a local power outlet using the included power adapter. Ethernet Port (RJ45): Connect the receiver to your router using the included Ethernet cable to enable smartphone / tablet connectivity. Reset: Using a paper clip or other thin object, push the reset button to restore the system to its default settings. Receiver Stand Battery Cover... -
Page 8: Udr780Hd Camera
No. What it is Volume Up Volume Down Talk. Press and hold to talk through the camera. Release to listen for a response. SD Card Slot. Insert SD card for recording videos. Blue LED Flashing - Battery power is low UDR780HD CAMERA What it is Camera Antenna: Sends and receiveds signals to/from the monitor. Pair Button: The pair button is located on the back of the camera. It is used to pair the camera with monitor. Camera Lens: Catches the video in front of the lens and transmits video from camera to monitor. Light Sensor: Sense brightness for changing between daytime and nighttime vision IR LEDs. Infrared LEDs provide viewing in low/ no light conditions. -
Page 9: Set Up The Hardware
3 - 4 seconds to power it up. POWER 4. The monitor displays the Uniden Guardian screen for a few seconds and then transitions to the LIVE view. The screen remains dark until the cameras are powered up. -
Page 10: Install Cameras
3. Use the included screws and anchors to attach the base to the wall or ceiling. 4. Tug gently on the stand to make sure it is securely in place. MONITOR SCREEN The UDR780HD monitor’s screen has 3 main parts: Live View area. The main screen area displays live video from the camera(s). •... - Page 11 Pop Out Menu Tab. Tap this tab to display 4 menus that let you manage the UDR780HD system. • See page 17 for details. Icon bars. Icons display on the top and bottom of the monitor screen. See page 13 for icon details.
-
Page 12: Udr780Hd Operation
Tap SEQ. enter single channel mode. Dual/Quad channel mode UDR780HD OPERATION Your UDR780HD monitor operates through a series of screens that let you choose groups of operations. For example, when you tap in the pop-up menus, you can view recorded PLAYBACK files. -
Page 13: Live View Screen
Tap the video displays. UDR780HD LIVE SCREEN ICONS Different icons display on the monitor screen depending on what is going on with your cameras. This image shows an example of what could be on your screen (the video image is removed to make it easier to see the icons). - Page 14 What the Icons Mean UDR780HD Icon What it does SIGNAL INDICATOR • Shows how strong the camera’s signal is. Signal ranges from 4 bars down to 0 bars (out of range). This graphic displays if an SD card is inserted into the monitor. SD CARD If blue, recording space is available. If red, the SD card is full. Tap this icon to view recorded files. NEW RECORD INDICATOR New recordings are saved on the SD card. RECORDING INDICATOR When this icon flashes red, it indicates that recording is in progress. • Green - System is connected to the internet and the monitor is connected NETWORK STATUS with internet mode. INDICATOR • Yellow - System is connected to internet and the monitor is connected with intranet mode. • Red - Connection has failed or system is not connected to a network. TIME STAMP Current date/time in month/day/year, hour/minute/second format.
- Page 15 UDR780HD Icon What it does CHANNEL Displays the current channel number you are currently viewing. If viewing INDICATOR multiple cameras at once, the camera indicator will appear above each video display. Indicates the LCD monitor’s battery life: BATTERY INDICATOR • Flashing Red - Low battery • Blue - Full battery • Flashing Blue - Charging When you tap this icon on the screen, the monitor breaks the screen image ZOOM INDICATOR into 5 areas. Tap the area you want to see in Zoom. That area displays in 2X size and the magnifying glass icon changes to the arrows icon ( ). Tap the arrows icon to exit Zoom mode. VOLUME INDICATOR The Volume Indicator displays when you tap + or − to raise or lower the volume while in single channel display. It indicates current audio volume. displays when the volume is off (mute). TALK BACK INDICATOR Displays when is pressed. Press and hold on the side of the TALK TALK monitor to talk back through the camera. Release to wait for a reply.
- Page 16 UDR780HD Icon What it does CHANGE CHANNEL Tap this icon to manually change channels. See page 11. Indicates motion detection status. MOTION RECORDING • Blue - Automatic recording OFF. Press BLUE icon to record. Icon turns INDICATOR RED. • Red - Automatic recording ON. Press RED icon to stop recording. Icon turns BLUE. POP-UP MENU TAB Tap to access the pop up menu system.
-
Page 17: Udr780Hd Screen Descriptions
UDR780HD SCREEN DESCRIPTIONS OVERVIEW This section describes the UDR780HD pop-up menu screens in detail. These pop-up menus enable you to: Play back recorded video files • Set alarms • Set the brightness level for each camera connected (single channel display only) •... - Page 18 2. Days that are highlighted have recorded files. Tap the day you want to review and a list of recordings for that day displays.
-
Page 19: Alarm
3. Tap the record you want and it plays, with a control bar across the bottom of the screen. Next Home Stop Forward Record Play/Pause Back Reverse Previous Delete Record Record 4. When the file finishes, the monitor displays the Recording File List screen again. 5. -
Page 20: Brightness
BRIGHTNESS This feature allows you to set each camera’s brightness level from single camera mode. 1. Tap . The following screen displays. 2. Tap + or - to increase or decrease the selected camera’s brightness. Tap when you are finished. GENERAL SETTINGS The General Settings screen contains 6 subsections, each of which may contain sub-screens These sub-screens let you set features about your system. - Page 21 Tap the following icons as they This screen should display: appear on the screens: Main Screen Sub-Screens What it Does Camera Setup Pairing (see page This system comes with cameras already paired. (see page 23) Use Pairing to assign these cameras to different channels or to pair additional new cameras to the monitor. ON/OFF Makes the cameras visible to the monitor. (see page 24) Resolution Adjusts the video quality of each camera. (see page 25) Recording Duration Set the length of time the camera records once Setup (see page 26) motion sensitivity tiggers the camera to record.
- Page 22 Main Screen Sub-Screens What it Does System Settings Date & Time • Time Setting. Set the current time (including Daylight Savings Time). (see page 28) (see page 29) • Time Zone. Set the time zone for your UDR780HD system. Time Zone • Set the time zone for your UDR780HD system. (see page 30) • Enable/Disable Daylight Savings Time Language Changes language setting for the monitor. (see page 31) Default Settings Restores the UDR780HD to default settings. (see page 31) Reformats the SD card and deletes all existing data. Format Memory Card (see page 32) Information Displays firmware information for the monitor and (see page 32) each camera.
-
Page 23: Camera Setup Screen
CAMERA SETUP SCREEN The Camera Setup screen lets you: Pair cameras • Turn cameras on and off • Adjust the resolution • Pairing Your cameras are paired to the monitor at the factory to channels 1 and 2. When you add a new camera to your system, you have to “introduce”... - Page 24 2. Tap the channel number you want to pair the camera to. 3. A message displays with instructions to press the button on the camera. A 30-second PAIR countdown begins. Press and release the button on the back of the camera (see page PAIR You must press the PAIR button on the back of the camera during the 30-second countdown;...
-
Page 25: Recording Setup Screen
Resolution Tap the following icons as they This screen should display: appear on the screens: 1. Tap High or Low to set the resolution for each camera (High - 1080; Low - 720p). 2. Tap to return to the previous screen and tap it again to return to the General Settings screen. - Page 26 Duration You can set how long the camera keeps recording after motion detection triggers it. The options are 15 seconds, 30 seconds, or 1 minute. (Default = 15 seconds) 1. Tap the duration you wish to set. 2. Tap to return to the previous screen. Schedule Recording This feature lets you set up a block of time for a camera to record on a weekly schedule.
- Page 27 3. Select a camera. If you want more than one camera to record at the same time, select both cameras. 4. Set the recording start and end times. ● Tap the block to toggle between them. AM/PM ● Tap the hour and minute boxes separately and tap the up and down arrows to set the start and end times in HH:MM format.
-
Page 28: System Settings Screen
2. Tap to return to the previous screen and again to return to the General Settings screen. Audio On/Off This feature lets you turn the microphone on or off for any camera. Recording Setup Turn recording audio on/off Toggle the ON/OFF button under the desired camera. SYSTEM SETTINGS SCREEN Use these setting options to configure your system:... - Page 29 Date and Time • Time Zone • Language • Default Settings • Format Memory Card • Information • Tap the following icons as they This screen should display: appear on the screens: Date and Time 1. Tap to access the Date & Time screen. 2.
- Page 30 ● Tap the up or down arrows to set the correct hour and minute. 4. Tap Synchronize with an internet time server if you want the internet clock to set your time automatically. You must keep your system connected to your wireless network using the Ethernet cable in order to synchronize with the internet time server.
- Page 31 4. Tap to return to the previous screen. Language to set the language used on your system. Options are English, Español, and Français. 1. Tap the language you want your system to use. 2. Tap . The system returns to the previous screen and automatically changes over to the requested language;...
- Page 32 3. Tap to confirm the reset. 4. Tap to return to the previous screen. Format Memory Card Formatting the memory card erases all data stored on the card. (Default = 1. Tap to reformat your SD card. 2. Tap on the All stored files will be deleted! screen (Default = ).
-
Page 33: Motion Detection Settings Screen
1. Tap to display the screen. 2. Tap to return to the previous screen. 3. Tap to return to the General Settings screen. MOTION DETECTION SETTINGS SCREEN Video motion detection settings control how strong the motion needs to be to trigger recording. This screen also lets you mask off any areas in the image for the camera to ignore. -
Page 34: Network Setup Screen
2. Tap High, Low, or Off to set sensitivity. 3. Tap to return to the previous screen. Mask Area Use this selection to mask off any parts of the viewing area you do NOT want to be included for motion detection. Note: the video image is removed to make it easier to see the masking grid. - Page 35 to see the Network Setup screen and option. Advanced Setup 1. Tap to display the Advanced Setup screen. 2. Tap on your selection and fill in the fields requested. Tap SAVE...
- Page 36 3. Tap on your selection and fill in the fields requested. DCHP is the most common connection. Your router will automatically assign an IP address to your UDR780HD system. Static IP is for those that have the ability to specify an IP address for their system.
- Page 37 ; the Reset Password screen displays again. Tap to return to the Network Setup screen. to return to the General Settings screen. Information This screen displays current IP informatiion when the system is connected to the internet. to display the Information screen, then tap to return to the Information screen.
-
Page 38: Firmware Upgrade Screen
FIRMWARE UPGRADE SCREEN Tap the following icons as they This screen should display: appear on the screens: Upgrade from SD Card 1. Tap to upgrade the firmware through the SD card. A confirmation screen displays. Tap... - Page 39 2. A warning screen displays, indicating that AC power must be connected. After verifying that AC power is connect, a progress screen displays. CAUTION: The monitor MUST be plugged into AC power before you begin the upgrade. If it is not, the monitor will freeze and must be reset (see page 47).
-
Page 40: Udr780Hd Operation Basics
UDR780HD OPERATION BASICS This section gives you instructions on how to perform the most commonly used actions for the UDR780HD. There is also a table of other actions you might find useful. MANUALLY RECORDING LIVE VIDEO (NOT SCHEDULED) 1. From a single-channel mode Live View screen, tap the blue for the camera to begin recording. -
Page 41: Adding New Cameras
Recording File List. ADDING NEW CAMERAS Your monitor supports a total of four active cameras at a time; your UDR780HD comes with two cameras already paired to your monitor. When you add a camera, you have to pair it to the monitor (that is, you have to “introduce”... -
Page 42: Pair Cameras
2. During the 30 second countdown, quickly press and release the Pairing button on that camera (see “Pairing” on page 23). 3. The system automatically adjusts the Live View screen accordingly. UDR780HD BASIC OPERATION To do this... From monitor, do this... - Page 43 To do this... From monitor, do this... Watch recorded video 1. From the main screen, tap the pop out menu tab and then tap . The Recording File List displays the recorded files. 2. Tap the day you want to view, and then tap the file. 3. The video begins playing (see page 17). Delete recorded videos 1. From the Recorded File List, tap icon. 2. Tap to confirm deletion. Take snapshots Download Uniden’s U Guard app to take and manage snapshots of recorded video. View snapshots Download Uniden’s U Guard app to take and manage snapshots of recorded video. Delete snapshots Download Uniden’s U Guard app to take and manage snapshots of recorded video. Change password (mobile device Go to Network Setup/Reset Password (see page 36) to only) change the U Guard app password. Reset password (Resets the app 1. From General Settings/Network Setup, tap password) 2. Tap...
- Page 44 To do this... From monitor, do this... Change channels (view a different 1. Tap the icon. camera) 2. The next channel displays. 1. Make sure the camera is plugged in. 2. Make sure that the camera’s antenna is attached and the camera’s signal status icon the monitor’s antenna is extended. shows no bars 3. Make sure the camera is paired to the correct channel. 4. Re-pair the camera and monitor. 1. Make sure the camera is plugged in. the camera won’t pair with the 2. Press and release the pairing button quickly. Do not monitor press and hold the pairing button.
-
Page 45: Maintaining Your System
MAINTAINING YOUR SYSTEM UPGRADING YOUR UDR780HD MONITOR FIRMWARE We are ready to help you upgrade your monitor firmware if necessary. Go to www.uniden.com and search for the UDR780HD product page. Follow the instructions there. CAUTION: The monitor MUST be plugged into AC power before you begin the upgrade. If it is not, the monitor will freeze and must be reset (see page 47). -
Page 46: Solving Problems
If you have any trouble with your system, try these simple steps. If you are still having a problem with your camera, check the manual that came with your camera. If you still have a question, visit the Uniden website at www.uniden.com for assistance. If…... -
Page 47: Interference
If… Try.. • making sure the camera is plugged in. • pressing and releasing the pairing button quickly. Do not press and The camera won’t pair with hold the pairing button. the monitor. • Check if other cameras in the area are also in Pairing mode. Disconnect power to other cameras. When I power up my • verifying that the cameras are turned on (see page 24). monitor and cameras for the first time, they seem • verifying that the monitor is displaying a channel with a camera to be on but there is no assigned to it. picture on the screen. The monitor picture has Using a blunt object like an unbent paper clip to press on the RESET frozen. back of the monitor to reset the monitor. The monitor turns off. Press to turn it back on. POWER I cannot remotely access • Verify that the monitor is connected to the internet. my recorded files. • Verify that the time zone is set correctly for the monitor. If you are away from your system, you will need someone to verify these items for you. - Page 48 Move the equipment away from the monitor. • Plug the equipment into an outlet on a circuit different from that to which the monitor is • connected. Consult the dealer or an experienced radio/television technician for additional suggestions. • CAUTION! Any changes or modifications to this equipment not expressly approved by the party responsible for compliance could void your authority to operate the equipment.
-
Page 49: Specifications
SPECIFICATIONS Camera Specifications Image Sensor - ok 1/2.7 inch FHD Single chip CMOS Image Sensor Effective Pixel Area 1920 (H) x 1080 (V) Image Processing Format H.264 Full High Definition 1080p (FHD) @10fps / High Definition 720p Image Resolution / Frame Rate @ 24fps Lens 3.6mm F1.8 Low Light Resolution <8~15 lux IR on Low Light Solution 24 IR LEDs, 1 low light sensor Night Vision Up to 40 feet IR cut filter Viewing Angle / Field of View 92° Automatic Gain Control Auto Automatic Electric Shutter 1/10~1/270100 Second (AES) Speed White Balance Auto Power Requirement 9V 600mA DC +/-10% Power Consumption 240mA W/O IR, 540mA with IR +14° F to 122° F Operating Temperature Range (-10° C to +50° C) Operating Humidity Range 0%~ 85% 8.3 x 3.2 x 3.6 in Dimensions (211 x 82 x 93mm) - Page 50 Camera Specifications Environment Rating IP65 RoHS Compliance (Hazardous Substances) FCC ID SJ8UDRC58 IC ID 7644A-UDRC58 Camera Housing Material Metal Monitor Specifications Display Size / Type 7” TFT LCD Panel Resolution 1024 x 600 Viewing Angle H:120° V:140° Response Time Ton (Rise): 10ms Toff (Fall): 15ms Power Requirement 5V/2A DC +/-10% Power Consumption 750mA (Typical) 250mA (Charging current) Battery Type/Capacity 3.7V 2000mAh Hours of Battery 2 hr Operation Operating Temperature 0~40° C Range Operating Humidity 0~85% Range Dimensions 10.25 x 6.02 x .75 in, 260.5 x 153 x 19 mm Regulation Compliance FCC Part 15C 247/IC RSS210...
- Page 51 Monitor Specifications RoHS Compliance (Hazardous Substances) FCC ID SJ8-UDR780HD IC ID 7644A-UDR780HD Recording/Display Remote viewing via Android/iOS Remote viewing to live and recorded video 2-Way Audio Record to SD Card Multiple Camera Recording Dual motion detection recording Scheduled Cameras supported Digital zoom Recording capacity at maximum 720p 1080p 1 GB 1.2 hrs 1 hrs 2 GB 2.5 hrs 2.2 hrs 4 GB 4.9 hrs 4.3 hrs Included 8 GB 10 hrs 8.6 hrs 16 GB 19.8 hrs...
- Page 52 Recording/Display 64 GB 79.5 hrs 68.5 hrs 128 GB 159.0 hrs 137.0 hrs...
-
Page 53: Compliance Information
COMPLIANCE INFORMATION RF Exposure Information The antenna used for this transmitter must be installed to provide a separation distance of at least 20 cm (7.9”) from all persons and must not be collocated or operating in conjunction with any other antenna or transmitter. -
Page 54: One-Year Limited Warranty
Uniden service center for a defect or malfunction covered by this warranty, (E) used in any conjunction with equipment or parts or as part of any system not manufactured by Uniden, or (F) installed or programmed by anyone other than as detailed by the owner’s manual for this product. - Page 55 Product. Include evidence of original purchase & a note describing the defect that has caused you to return it. The Product should be shipped freight prepaid, by traceable means, to warrantor at: Uniden America Service C/O Saddle Creek 743 Henrietta Creek Rd.
Need help?
Do you have a question about the UDR780HD and is the answer not in the manual?
Questions and answers