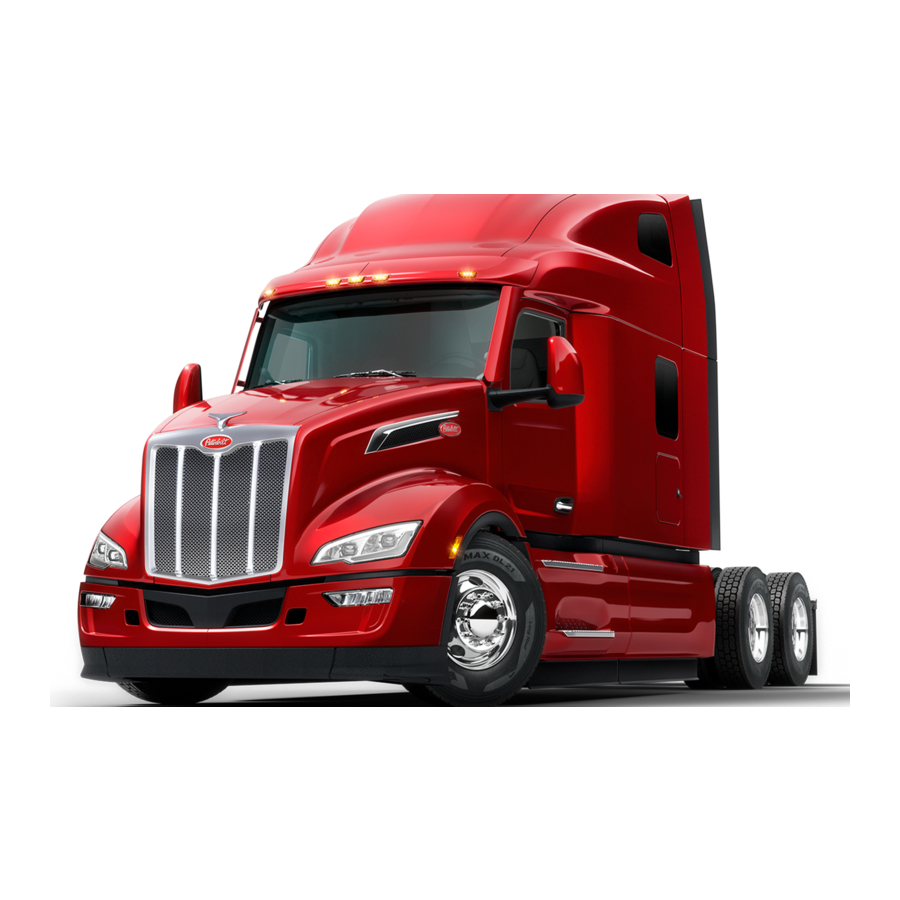
Table of Contents

Advertisement

Advertisement

Table of Contents
loading

Summary of Contents for Peterbilt 579

  • Page 5: Table Of Contents

    Contents Safety Emergency Controls Driving Maintenance Information Index...
  • Page 6 Contents ©2013 Paccar Inc - All Rights Reserved This manual illustrates and describes the operation of features or equipment which may be either standard or optional on this vehicle. This manual may also include a description of features and equipment which are no longer available or were not ordered on this vehicle.
  • Page 7 Truck Model Example...
  • Page 9: Safety

    SAFETY INTRODUCTION How to use this Manual ... . . 1-3 How to Find What You Want ... 1-3 Safety Alerts ....1-4 Vehicle Safety .
  • Page 10 SAFETY SEATS AND RESTRAINTS Introduction ....1-19 Safety Restraint Belts ... . . 1-22 Tether Belts .
  • Page 11: Introduction

    Driver’s Check List on page 1-36). You There will be times when you need to won’t have to go searching for more take this manual out of your Peterbilt. information. When you do, please be sure to return it to the cab when you are finished Finally you’ll find a helpful Subject...
  • Page 12: Safety Alerts

    INTRODUCTION Safety Alerts and alphabetically lists the subjects WARNING covered. So if you want information on Please read and follow all of the WARNING! brakes, for example, just look under safety alerts contained in this manual. Brake in the Subject Index. You’ll find They are there for your protection all the pages listed where brakes or and information.
  • Page 13 INTRODUCTION CAUTION NOTE Example: CAUTION NOTE WARNING! Do not carry additional fuel containers in your vehicle. Fuel containers, either The safety alert following this symbol The alert following this symbol and full or empty, may leak, explode, and and signal word provides a caution signal word provides important cause or feed a fire.
  • Page 14: Vehicle Safety

    INTRODUCTION Vehicle Safety out on the road, it is the responsible task. Keep distraction to a minimum to driver's duty to do so. Inspect the improve your concentration. Examples WARNING! vehicle according to the Driver's Check of distractions may include radio List beginning on page 1-36.
  • Page 15 INTRODUCTION California Proposition 65 Warning Data Recorder Environmental Protection • Diesel engine exhaust and some California Vehicle Code - Section WARNING! of its constituents are known to 9951- Disclosure of Recording Device Diesel engine exhaust and some of its the State of California to cause constituents are known to the State cancer, birth defects, and other Your vehicle may be equipped with one...
  • Page 16: A Special Word About Repairs

    INTRODUCTION A Special Word About for information concerning proper must be performed by an authorized disposal. service facility. If you aren’t an Repairs experienced mechanic, or don’t have the right equipment, please leave all WARNING! repairs to an authorized service facility. Do not attempt repair work without suf- They are the ones equipped to do the ficient training, service manuals, and...
  • Page 17: Additional Sources Of Information

    INTRODUCTION Additional Sources of Other Sources WARNING! Information Another place to learn more about Modifying your vehicle can make it un- Installed Equipment - Operator's trucking is from local truck driving safe. Some modifications can affect Manuals schools. Contact one near you to learn your vehicle's electrical system, stabil- about courses they offer.
  • Page 18: Cab And Frame Access

    CAB AND FRAME ACCESS CAB AND FRAME WARNING! ACCESS Jumping out of the cab or getting into the cab without proper caution is dan- Safety gerous. You could slip and fall, which could lead to death or personal injury. WARNING! Keep steps clean.
  • Page 19: Door Lock And Keys

    CAB AND FRAME ACCESS Door Lock and Keys Keys To lock or unlock the doors from Door Lock outside the cab, insert the key in the The same key fits your ignition, doors, Doors can be locked from the inside by lock.
  • Page 20: Remote Keyless Entry (Rke)

    CAB AND FRAME ACCESS Remote Keyless Entry (RKE) Operation NOTE To Unlock the Driver’s Door (Optional) FCC ID: L2C0031T IC: 3432A-0031T Press the UNLOCK button once. The This vehicle may be equipped with a FCC ID: L2C0032R IC: 3432A-0032R driver's door will unlock and the parking Remote Keyless Entry (RKE) system This device complies with Part 15 of lights will come on for 40 seconds.
  • Page 21: Climbing Onto The Deck Plate

    CAB AND FRAME ACCESS Climbing onto the Deck Batteries Synchronization Plate The key fob uses one CR2032, The key fob may need to be 3V battery. Batteries should last synchronized to the truck when the WARNING! approximately three years, depending battery is replaced or when the key fob When you are climbing onto and off on use.
  • Page 22 CAB AND FRAME ACCESS WARNING! The following pictures show you the right way to get on and off the area Keep steps clean. Clean any fuel, behind your cab. oil, or grease off the steps before en- tering the cab or accessing the deck plate.
  • Page 23: Getting To Your Engine

    GETTING TO YOUR ENGINE GETTING TO YOUR 1. Hood Latch in the Closed Position ENGINE Hood Hold Downs Hood hold downs keep a hood from opening unexpectedly. CAUTION A hood not latched securely could open during operation and cause ve- hicle damage.
  • Page 24: Hood Tilt

    GETTING TO YOUR ENGINE Hood Tilt 2. Pull Latch to Open 3. Pull Up to Separate To open your hood, unlock the hood hold downs by unlatching them. Put one or both hands on the top of the hood front. Tilt the hood forward by pulling at the top of the hood keeping your feet on the ground for stability.
  • Page 25: Hood Hold-Open Device

    GETTING TO YOUR ENGINE Hood Hold-Open Device The release lever for the hood hold The hood is equipped with a hood open device is located near the front hold-open device. In order for the hood hinge of the hood. Press the lever in to hold-open device to become engaged, disengage the hood hold open device.
  • Page 26 GETTING TO YOUR ENGINE WARNING! Before opening or closing the hood, make sure your footing is secure and stable. Failure to do so may cause the hood to close uncontrollably which may result in death or personal injury. WARNING! Always ensure the hood hold-open latch is engaged to keep the hood fully open any time anyone gets under the hood for any reason.
  • Page 27: Seats And Restraints

    SEATS AND RESTRAINTS SEATS AND Seat Adjustment Suggested Control Setting Order: RESTRAINTS WARNING! Seat fore/aft position Do not adjust the driver's seat while Introduction Seat height the vehicle is moving. The seat could move suddenly and unexpectedly and Thigh support This section covers the operation can cause the driver to lose control of and safe use of your seats.
  • Page 28 SEATS AND RESTRAINTS WARNING! Seat heaters should not be used if the operator or passenger has difficulty in sensing and reacting to an increased temperature of the seat. The heater function may result in personal injury. CAUTION Do not use the seat heater for more than 10 minutes at one time.
  • Page 29 SEATS AND RESTRAINTS WARNING! Do not drive or ride with your seat back in the reclined position. You could be injured by sliding under the seat belts in a collision. Failure to comply may result in death or personal injury. Lumbar (and bolster support if available) are provided for superior support to the back during operation.
  • Page 30: Safety Restraint Belts

    SEATS AND RESTRAINTS Safety Restraint Belts Passenger Seat Swivel (Optional) WARNING! This vehicle may be equipped with a Do not use the swivel function while a swivel function on the passenger seat. passenger is in the seat and the vehi- This function allows the passenger cle is in motion.
  • Page 31 SEATS AND RESTRAINTS much worse when riders are unbelted. above the speedometer/tachometer Lap/Shoulder Belt Always fasten your seat belt and be (see “Seat Belt, Fasten” on page 3-41). The combination lap-shoulder belt is sure anyone riding with you does the equipped with a locking mechanism.
  • Page 32 SEATS AND RESTRAINTS 5. Pull belt to check for proper If the belt is locked, lean the body back fastening and adjustment, as to remove any tension in the belt. After follows: releasing the belt, allow the belt to retract completely by guiding the belt •...
  • Page 33: Tether Belts

    SEATS AND RESTRAINTS Safety Restraint Belts Lap Belt Shoulder Belt Correct Incorrect (too high on hips) Correct (over arm) Incorrect (under arm) Incorrect (twisted) Tether Belts WARNING! Internal tether belts do not require Proper seat belt adjustment and use This vehicle may have an external adjustment.
  • Page 34: Komfort-Latch® Feature

    SEATS AND RESTRAINTS Komfort-Latch® Feature To adjust an external tether belt: WARNING! • Make sure that the tether belt is Your vehicle includes a feature Do not remove, modify, or replace attached to the cab floor and seat designed to eliminate cinching and the tether belt system with a different frame.
  • Page 35 SEATS AND RESTRAINTS 4. While seated appropriately, push WARNING! the "on" button to engage the Do not set the Komfort Latch with too Komfort Latch. much slack. Too much slack may re- 5. Learn forward in the seat until you duce the effectiveness of the seat belt.
  • Page 36: During Pregnancy

    SEATS AND RESTRAINTS During Pregnancy Belt Damage and Repair Pregnant women should always wear Damaged belts in the cab must combination lap/shoulder belts. The be replaced. Belts that have been lap belt portion must be worn snugly stretched, cut, or worn out may not and as low as possible across the protect you in an accident.
  • Page 37: Sleeper Bunks And Restraints

    SEATS AND RESTRAINTS Sleeper Bunks and the vehicle is in motion. Your vehicle Lower may have belts and/or a net restraint Restraints system which are over the bunk or WARNING! cover the opening. Always keep the lower bunk in its down position while the vehicle is moving.
  • Page 38 SEATS AND RESTRAINTS Upper Upper Rear Sleeper Storage WARNING! Your vehicle may be equipped with an WARNING! Any loose items on the upper or lower upper storage shelf that extends over bunk should be moved to a secured Be sure the latch that holds the upper the lower bunk and across the rear place before driving the vehicle.
  • Page 39: Safety Restraint Tips

    SEATS AND RESTRAINTS Safety Restraint Tips the optional sleeper) should hold a • Keep seat belt and bunk restraint combined total not exceeding 5 lbs buckles free of any obstruction • Do not wear a belt over rigid or (2.2 kg) per compartment. that may prevent secure locking.
  • Page 40 SEATS AND RESTRAINTS to keep you and your passengers • All belts must be kept clean or the safe. retractors may not work properly. • If any seat belt or bunk restraint • Never bleach or dye seat or bunk is not working properly, see an restraint belts: chemicals can authorized dealer for repair or...
  • Page 41: Start-Up

    START-UP START-UP Safe Vehicle Operation or federal ordinances to use cellular devices while operating the vehicle. For your safety, as well as those Introduction around you, be a responsible driver: Much has gone into the manufacturing of your vehicle including advanced The following section covers start-up •...
  • Page 42: Vehicle Loading

    START-UP Vehicle Loading WARNING! WARNING! Compare your vehicle's load capacity The use of alcohol, drugs, and cer- Do not text and drive. Your reaction with the total load you are carrying. If tain medications will seriously impair time, perceptions and judgment can adjustments need to be made, make perception, reactions, and driving abil- be affected while texting or using any...
  • Page 43 START-UP on to the vehicle and their designed Load Distribution: be sure any load WARNING! specifications. (Axle weight ratings are you carry is distributed so that no axle listed on the driver's door edge.) An unevenly distributed load or a load has to support more than its GAWR.
  • Page 44: Emergency Equipment

    START-UP Emergency Equipment Driver's Check List The following operations are to be performed by the driver. Performing It is good practice to carry an To keep your vehicle in top shape and these checks and following the emergency equipment kit in your maintain a high level of safety for you, maintenance procedures in this vehicle.
  • Page 45 START-UP Approaching Your Vehicle Daily Checks b. Replace belts that are cracked • torn or broken. Check the overall appearance and Engine Compartment Checks - Daily condition. Are windows, mirrors, 3. Fuel Filter/Water Separator and lights clean and unobstructed? 1. Engine Fluid Levels - add more if Draining - check and drain.
  • Page 46 START-UP to springs or other suspension 9. Check clutch hydraulic fluid. 9. Fuel Tank Hardware - is the tank parts such as cracks, gouges, fill cap secure? Are the tank straps Chassis and Cab Checks - Daily distortions, bulges or chafing. tight? Is the strap webbing in 5. Brake Components - check lines, place?
  • Page 47 START-UP of turn signals and emergency a. Is the trailer spare wheel The above items should be checked lights. secure and inflated? daily, as a minimum. They are in Instruments - check all addition to, not in place of, Federal b. Is the landing gear up and the instruments.
  • Page 48 START-UP Weekly Operations b. Check the air cleaner, muffler, 1. Battery - check battery and and exhaust pipes. Are they terminals. tight and secure? 2. Wheel Cap Nuts - are they all c. For vocational vehicles in place and torqued properly - with optional engine air tighten if necessary.
  • Page 49: Emergency

    EMERGENCY WHAT TO DO IF... You Need Roadside Assistance ..2-3 Low Air Alarm Turns On ... . . 2-3 Stop Engine Lamp Turns On ... 2-4 Engine Oil Pressure Lamp Turns On.
  • Page 51: What To Do If

    Transmission on page 4-18, for questions but can get you in transmission shifting and parking • Open 24-7-365 days a year contact with a Peterbilt dealer who brake information.) can. • They can help you get roadside 4. Turn OFF the engine.
  • Page 52: Stop Engine Lamp Turns On

    WHAT TO DO IF... Stop Engine Lamp Turns On Engine Oil Pressure Lamp WARNING! Turns On Stop Engine Lamp - If the If the air pressure falls below 60 psi Stop Engine warning lamp Engine Oil Pressure Lamp illuminates, it means you (414 kPa) the spring brakes may - If the oil pressure suddenly have a serious engine system...
  • Page 53: Engine Is Overheating

    WHAT TO DO IF... Engine is Overheating parking brake. (See Parking Brake 6. Wait a few minutes to allow oil to Valve on page 4-22 and Putting drain into the engine oil pan, and The cooling system may overheat if the Vehicle in Motion on page then check the oil level.
  • Page 54: Fuse Or Relay Blows

    WHAT TO DO IF... Fuse or Relay Blows 3 to 5 minutes before shutting it WARNING! off. This allows the engine to cool Fuses are located behind the drivers gradually and uniformly. To reduce the chance of death, per- side kick panel, below the ignition sonal injury and/or vehicle damage 7. If overheating came from switch, and accessible by a door panel.
  • Page 55 WHAT TO DO IF... Fuse Inspection and Replacement If it is blown, replace it with a fuse of CAUTION All the electrical circuits have fuses the same rating. Before replacing a fuse, turn OFF all to protect them from a short circuit or lights and accessories and remove If a fuse of the same rating is not overload.
  • Page 56: Jump Starting Vehicles

    JUMP STARTING VEHICLES JUMP STARTING metal jewelry and avoid leaning over WARNING! the battery. VEHICLES Never jump start a battery near fire, flames, or electrical sparks. Batteries Introduction generate explosive gases that could explode. Keep sparks, flame, and Jump starting a vehicle is not a lighted cigarettes away from batteries.
  • Page 57 JUMP STARTING VEHICLES To Jump Start your Vehicle Preparing the vehicles: CAUTION 1. Remove any personal jewelry WARNING! Improper hook-up of jumper cables that may come in contact with the When jump starting using a battery or not following these procedures can battery terminals.
  • Page 58 JUMP STARTING VEHICLES Connect the batteries: 7. If either vehicle is equipped with Start the vehicle that has the battery disconnects ensure they good battery first. Let it run for 5 Attach one end of a jumper cable are in the "OFF" position prior to minutes.
  • Page 59 JUMP STARTING VEHICLES Remove jumper cables: WARNING! When disconnecting jumper cables, make sure they do not get caught in any moving parts in the engine com- partment. Failure to comply may result in death, personal injury, equipment or property damage. Reverse the above procedure exactly when removing the jumper cables.
  • Page 60: Vehicle Recovery And Spring Brakes

    VEHICLE RECOVERY AND SPRING BRAKES VEHICLE RECOVERY the lubricant in the top front of the drive axle will drain to the rear. This CAUTION AND SPRING BRAKES will leave the top components dry. The Connect only to the Recovery Hitches, resulting friction may damage them.
  • Page 61 VEHICLE RECOVERY AND SPRING BRAKES Recovery Procedure the vehicle’s air system is connected to that of the recovery 1. Review and understand all the vehicle. Ensure that any air line cautions and warnings of this that has been removed from a section, see Vehicle Recovery driver-controlled main differential Guidelines on page 2-12.
  • Page 62 VEHICLE RECOVERY AND SPRING BRAKES Recovery Hitch Connection Technology and Maintenance Council 7. Follow state/provincial and local 950 N. Glebe Road laws that apply to vehicles in tow. Specially designed hitches are (703) 838-1763 required to recover your vehicle. The Arlington, VA 22203 8. Do not tow vehicles at speeds in Email: tmc@trucking.org...
  • Page 63 VEHICLE RECOVERY AND SPRING BRAKES Recovery Hitch Installation Driver Controlled Main Differential If your vehicle is not equipped with the proper recovery hitch assembly, Use the following procedure to install Follow these steps to lock a contact an authorized dealer to obtain the Vehicle Recovery Hitches.
  • Page 64 VEHICLE RECOVERY AND SPRING BRAKES CAUTION CAUTION Failure to lift the driving wheels off Water, dirt and other material can en- the ground or remove the driveline ter an open hub or axle. This can con- and axle shafts before towing the ve- taminate the axle fluid and cause pos- hicle could seriously damage your sible damage to components.
  • Page 65 VEHICLE RECOVERY AND SPRING BRAKES This action will lock the CAUTION differential by pushing a piston CAUTION into a “lock” position. Connect recovery rigging only to A recovered vehicle will have no op- hitches intended for that purpose. Do erational brake system. Additionally, CAUTION not attach to bumpers or brackets.
  • Page 66 VEHICLE RECOVERY AND SPRING BRAKES Recovery Hitch Capacities CAUTION The maximum rated loads for vehicle Recovery pull maximums assume the recovery varies depending on the tow rigging evenly distributes the load direction or angle of pull. These between both recovery hitches. See capacities are listed in the table below examples in Recovery Rigging on and are for the two hitches working...
  • Page 67 VEHICLE RECOVERY AND SPRING BRAKES Recovery Rigging cable no closer than 6 ft. from the • Never loop a single chain or cable vehicle (2). through both hitches (3). To connect to the vehicle, follow the suggested rigging methods below. •...
  • Page 68: Returning Vehicle To Service

    VEHICLE RECOVERY AND SPRING BRAKES Returning Vehicle to Service Spring Brakes—Manual The brakes can be released in this Release You will have to add lubricant to manner should the pressure in the air prevent damage after your vehicle has system not be enough to release them. Recovering a vehicle requires that you been towed.
  • Page 69 VEHICLE RECOVERY AND SPRING BRAKES 2. Remove the release 5. Assemble the release WARNING! stud assembly from the stud washer and nut on side pocket, and remove the release stud. Always secure the vehicle with wheel the release nut and chocks, chains, or other safe means to washer from the release prevent rolling before manually releas-...
  • Page 70: Sand, Mud, Snow And Ice

    VEHICLE RECOVERY AND SPRING BRAKES Sand, Mud, Snow and Ice • Do not shift into reverse while the WARNING! vehicle is moving. If the vehicle gets stuck in sand, Do not spin the wheels faster than mud, snow, or ice: •...
  • Page 71: Towing The Vehicle

    VEHICLE RECOVERY AND SPRING BRAKES Towing the Vehicle • If towing from the front, ensure that the rear axles are prepared Towing the vehicle should be done for towing. by either an authorized dealer or a commercial vehicle towing • If towing from the rear, ensure service.
  • Page 73: Controls

    CONTROLS INSTRUMENT PANEL Getting to know your Instrument Panel..3-5 Instrument Cluster ....3-7 Instrument Cluster Description ..3-8 Driver Information Display .
  • Page 74 CONTROLS Engine, Oil Pressure ... . . 3-44 Engine, Oil Temperature ... . 3-45 Manifold Pressure Gauge ... 3-45 Fuel Pressure Gauge .
  • Page 75 CONTROLS Exterior Lights Self Test ... . 3-78 HEATING AND AIR CONDITIONING Cab Controls ....3-79 Introduction .
  • Page 76 CONTROLS Passenger Side 'down' Mirror..3-99 Passenger Side Pull Out Tray ..3-100 Y53-6047–2C (04/13)
  • Page 77: Instrument Panel

    INSTRUMENT PANEL INSTRUMENT PANEL Getting to know your Instrument Panel This part explains the location of the various features on your vehicle and describes their function. For information on using these features in driving, see the paragraphs that follow. Please remember that each vehicle is custom-made.
  • Page 78 INSTRUMENT PANEL Instrument Cluster Cup Holder Ignition Switch Gauge (or Optional Glove Box Headlight Switch PACCAR Navigation) Overhead Storage Menu Control Switch (MCS) Switches Park Brake Controls Passenger Side Pull Out Air Conditioning Radio Tray Y53-6047–2C (04/13)
  • Page 79: Instrument Cluster

    INSTRUMENT PANEL Instrument Cluster Speedometer Engine Oil Pressure Trip Reset Button Tachometer Diesel Exhaust Fluid (DEF) Ignition Switch Engine Coolant Primary Air Pressure Headlight Switch Temperature Secondary Air Pressure Menu Control Switch (MCS) Fuel Level (primary) Driver Information Display (04/13) Y53-6047–2C...
  • Page 80: Instrument Cluster Description

    INSTRUMENT PANEL Instrument Cluster Audible Alarm Optional Icons Description The audible alarm will sound during Additional icons may be operational Instrument System Self Test the Instrumentation System Self Test. depending on individual vehicle The audible alarm will also sound in specifications.
  • Page 81 INSTRUMENT PANEL Check Messages 1. Speedometer 2. Tachometer Check messages are provided to give The Speedometer indicates the vehicle The Tachometer measures the engine the operator additional information speed in miles per hour (mph) and speed in revolutions per minute (RPM). regarding systems that require in kilometers per hour (km/h).
  • Page 82 INSTRUMENT PANEL governed speed. (See your Engine 3. Engine, Coolant Temperature 4. Fuel Level, Primary Operation and Maintenance Manual The Primary Fuel gauge indicates the for RPM recommendations.) total (approximate) amount of fuel in The tachometer will illuminate a small the fuel tank.
  • Page 83 INSTRUMENT PANEL 5. Engine, Oil Pressure NOTE WARNING! For Export vehicles, the fuel gauges Do not carry fuel containers or any will not state: ULTRA LOW SULFUR container used to store combustible It is important to maintain oil pressure DIESEL FUEL ONLY. liquids.
  • Page 84 INSTRUMENT PANEL 6. Diesel Exhaust Fluid (DEF) 7 and 8. Primary and Secondary Air Check the engine manufacturer's Pressure manual for the correct oil pressure ranges for your vehicle's engine. If the oil pressure suddenly drops, or the audible alarm and engine oil Primary Air Pressure The diesel exhaust fluid gauge shows pressure warning light come on while...
  • Page 85 INSTRUMENT PANEL Please refer to Low Air Alarm Turns WARNING! WARNING! On on page 2-3 for instructions on If the air pressure falls below 60 psi The air pressure warning light and the what to do if the air system becomes (414 kPa), the spring brakes may stop audible alarm tone indicate a danger- inoperative.
  • Page 86: Driver Information Display

    INSTRUMENT PANEL Driver Information Display 9. Driver Information Display 10. Trip Reset The display can show multiple warning The cluster mounted trip reset button lights. Warning information will appear is the only way to zero trip data. After momentarily and then will minimize in toggling the trip ODO (short pushes to the screen.
  • Page 87: Driver Information Display Description

    INSTRUMENT PANEL Driver Information Display • MCS button is pushed or spun NOTE Description (independent of ignition key switch position) Some Driver Information Display func- WARNING! tions are only accessible when the ve- • clock alarm sounds hicle is parked. Other functions are ac- Do not look at the Instrument Clus- cessible while the vehicle is moving or •...
  • Page 88 INSTRUMENT PANEL 1. Odometer/Trip Odometer 2. Outside Air Temperature The outside air temperature display uses a sensor (located at the bottom The Odometer/Trip Meter comes on Used to display outside air temperature of the driver's side mirror assembly) when the door is opened and when information and a warning of low to measure outside air temperature the ignition key is in the ACC or ON...
  • Page 89 INSTRUMENT PANEL 3. Clock 4. Active Warnings Please refer to Settings on page 3-27 The clock presents either the home to read more about how to set the Active warnings will appear in this time or the local time when the clock is clock.
  • Page 90 INSTRUMENT PANEL 5. Cruise Control Indicator 6. Automated Transmission and 7. Header Shift Indicator Area This area is used to provide the This area displays the function driver with a dedicated location for This area will provide the operator with category in which the MCS knob and cruise control set speed and if so feedback from the transmission.
  • Page 91: How To Navigate The Functions In The Instrument Cluster Display

    INSTRUMENT PANEL How to Navigate the 8. MCS Knob Cue 9. Main Content Area Functions in the Instrument Used to provide the driver with screen There are 5 functions allowed when Cluster Display navigation feedback. Cues are driving, and 7 when the vehicle is Menu Control Switch (MCS) provided regarding when a user can parked.
  • Page 92 INSTRUMENT PANEL • Virtual gauges - This menu item The MCS knob can perform two provides dynamic information to functions. It can select and set values the operator. when spun and enter your settings when pushed. • Ignition timer - Use this menu to set the time to idle the engine after The MCS button has a BACK button removing the ignition key.
  • Page 93 INSTRUMENT PANEL Navigation of the system is organized Navigating at the Trunk level Navigating at the Branch Level into 3 levels of functions. The first level of organization is identified as "Trunk" level functions. The second level is identified as "Branch" level functions. The lowest level of functions are identified as the "Leaf"...
  • Page 94 INSTRUMENT PANEL Description of Menu Screens Navigating at the Leaf Level The blank screen mode is selected through the rotary MCS knob. The Display OFF Mode is selected by pressing the button above the MCS knob for more than 2 seconds. Blank Screen This screen is available in both parked and driving modes.
  • Page 95 INSTRUMENT PANEL Tire Pressure Monitoring System pressure that is outside of normal Virtual Gauges parameters. This information is only available when parked. The tire pressure monitor menu The virtual gauges function is selected provides individual tire pressure through the rotary MCS knob and is and temperature information for available in both parked and driving each tire identified on the vehicle...
  • Page 96 INSTRUMENT PANEL Ignition Timer Fuel Economy Trip Information This function displays the dynamic fuel economy performance of the vehicle. It shows Average Speed, Average Fuel Economy, and a dynamic instantaneous indication of fuel economy above or below the current average. The screen is available when driving.
  • Page 97 INSTRUMENT PANEL Truck Information • • Fuel Economy % PTO Fuel Used • • NOTE Average Speed PTO Economy Only available truck information will be • Engine Hours The cluster mounted trip reset button shown (e.g., manual transmissions do is used to zero and clear accumulated •...
  • Page 98 INSTRUMENT PANEL Warning and Faults to see the different warnings. The 2. Engine Information highest priority warning defaults to the top of the stack. a. Engine Make Diesel Exhst Fluid Poor Quality b. Engine Model When the vehicle is parked, the Refill with new DEF “Warnings and Faults”...
  • Page 99 INSTRUMENT PANEL parked. The menu selection shown Settings Fault Details Example in the image above simply won’t be This menu is available only when the there if the truck is driving, though vehicle is parked. the warnings and tell-tale indicators on the cluster will still be available as Various settings may be changed using indicators if the problem is serious.
  • Page 100 INSTRUMENT PANEL To turn alarm ON/OFF: To set home, local or alarm time: Display Mode The display off mode is available at any time in menu navigation, but the screen minimize mode can only be done when on this screen. NOTE There are times when the “Display Off”...
  • Page 101: Warning Symbols

    WARNING SYMBOLS WARNING SYMBOLS in the instrument cluster and Driver WARNING! Performance Center. Guide to the Warning Do not ignore a warning light or audible • the Symbol Name alarm. These signals tell you some- Symbols • thing is wrong with your vehicle. It the appearance of the Symbol could be a failure in an important sys- The warning lights and audible alarm...
  • Page 102 WARNING SYMBOLS Warning Light/Indicator Symbols Symbol Name Symbol Color Std/Opt Page 1. Axle, Traction Control Yellow on page 3-37 2. Brakes, Anti-Lock Brake System (ABS) Yellow on page 3-37 3. Brakes, Low Air on page 2-3 4. Brake, Park Brake on page 3-37 5.
  • Page 103 WARNING SYMBOLS Symbol Name Symbol Color Std/Opt Page 6. Brakes, Trailer Anti-Lock Brake System (ABS) Yellow on page 3-38 7. Differential, Inter Axle Diff Lock Yellow on page 3-61. 8. Dump Truck, Body Up on page 3-38 9. Dump Truck, Gate Yellow on page 3-38 10.
  • Page 104 WARNING SYMBOLS Symbol Name Symbol Color Std/Opt Page 12. Emissions, High Exhaust System Temperature (HEST) Yellow on page 3-39 13. Emissions, Malfunction Indicator Lamp (MIL) Yellow on page 3-39 14. Engine, Check Engine Yellow on page 3-40 15. Engine, Engine Fan Green on page 3-40 16.
  • Page 105 WARNING SYMBOLS Symbol Name Symbol Color Std/Opt Page 18. Engine, Overspeed Air Shutdown on page 3-40 19. Engine, Retarder (Brake) Green on page 3-40 20. Engine, Stop Engine on page 3-40 21. Engine, Wait To Start Yellow on page 3-40 22.
  • Page 106 WARNING SYMBOLS Symbol Name Symbol Color Std/Opt Page 24. Lights, High Beam Blue on page 3-41 25. Power Take-off (PTO) Yellow on page 3-41 26. Power Take-off (PTO), Pump Mode Green on page 3-41 27. Refrigerator Green on page 3-41 28.
  • Page 107 WARNING SYMBOLS Symbol Name Symbol Color Std/Opt Page 30. Tire Inflation Yellow on page 3-41 31. Transmission, Auxiliary Yellow on page 3-41 32. Transmission, Check on page 3-42 33. Transmission, Oil Temperature High Yellow on page 3-42 34. Transmission, Retarder (may include BrakeSaver when ●...
  • Page 108 WARNING SYMBOLS Symbol Name Symbol Color Std/Opt Page 36. Turn Signal, Left Green on page 3-42 37. Turn Signal, Right Green on page 3-42 3-36 Y53-6047–2C (04/13)
  • Page 109: Description Of Warning Symbols

    WARNING SYMBOLS Description of Warning 2. Brakes, Anti-Lock Brake System NOTE Symbols (ABS) For vehicles equipped with Electronic 1. Axle, Traction Control (ATC or Stability Program, please refer to ad- Illuminates during the Instrumentation Automatic Traction Control) ditional material supplied with this op- System Self Test.
  • Page 110 WARNING SYMBOLS is turned off (inter-axle differential 5. Brake, Service Brake NOTE unlocked) the engine power is allowed to flow to any of the 4 drive tires based Tractors/Trucks and trailers built af- on the differential effect (mostly to the ter 3/1/01 must be able to turn on an Indicates that a fault exists in the brake forward rear differential).
  • Page 111 WARNING SYMBOLS WARNING! Illuminates when diesel particulate WARNING! filter is plugged. This warning will also If this light is on, do not park in an If this light is on, temperature of the illuminate when regeneration operation area of combustible vapors or materi- tail pipe, exhaust pipes, diesel partic- is disabled.
  • Page 112 WARNING SYMBOLS in conjunction with the High Exhaust Temperature, Diesel Particulate Filter 17. Engine, Low Coolant Level 20. Engine, Stop Engine (DPF) and Diesel Exhaust Fluid (DEF) Warning Lights. Illuminates with an audible alarm Illuminates and an audible alarm tone indicating critically low coolant level.
  • Page 113 WARNING SYMBOLS icon will flash, but without an audible 22. Fuel, Water In Fuel (WIF) alarm, if there is a problem with the 27. Refrigerator low beam headlights or the low beam headlight wiring. In such event, the Illuminates when water has been high beam headlights will turn on at Illuminates to indicate that the detected in the fuel.
  • Page 114 WARNING SYMBOLS 35. Transmission, Service 31. Transmission, Auxiliary Transmission (Allison only) Illuminates to indicate auxiliary Illuminates when Allison 1000/2000 transmission is in neutral. transmission requires service. 32. Transmission, Check 36. Turn Signal, Left Illuminates when transmission Blinks when the left turn signal or the has recorded a fault code.
  • Page 115: Optional Gauges

    OPTIONAL GAUGES OPTIONAL GAUGES Axle, Pusher Air Pressure Axle, Tag Air Pressure Introduction Listed here are gauges that may or may not be on your dashboard or The Tag Axle Air Pressure gauge the center instrument cluster. For indicates the amount of air pressure in vehicles with a telematic navigation the tag axle suspension air bags.
  • Page 116: Fuel Filter Restriction

    OPTIONAL GAUGES Fuel Filter Restriction Air Filter Restriction Engine, Oil Pressure Indicator or Gauge It is important to maintain oil pressure within acceptable limits. If oil pressure This gauge tells you the condition drops below the minimum psi a red of the fuel filter by indicating the This gauge indicates the condition of warning light in the gauge will turn on,...
  • Page 117: Engine, Oil Temperature

    OPTIONAL GAUGES Engine, Oil Temperature Manifold Pressure Gauge Fuel Pressure Gauge The Engine Oil Temperature gauge Your manifold pressure gauge Your vehicle may also have a fuel indicates the engine oil temperature. indicates the power your engine is pressure gauge. If the oil temperature exceeds the putting out by showing the amount of maximum limits, a red warning...
  • Page 118: Transmission Temperature Gauge

    OPTIONAL GAUGES Transmission Temperature Drive Axle Temperature driver. The icon will have an X over the representative axle to indicate Gauge Gauge (Forward and Rear) which axle the temperature is being displayed in the gauge. These gauges indicate the temperature of the lubricant in your vehicle’s axle(s).
  • Page 119: Suspension Load Air Pressure, #1, #2

    OPTIONAL GAUGES Suspension Load Air Tractor Brake Application Trailer Brake Application Air Pressure, #1, #2 Air Pressure Pressure The Tractor Brake Application Air Suspension Load Air Pressure #1 The Trailer Brake Application Air Pressure gauge indicates the amount Pressure gauge indicates the amount of air pressure applied to the tractor of air pressure applied to the trailer brakes.
  • Page 120: Trailer Air Tank Air Pressure

    OPTIONAL GAUGES Trailer Air Tank Air Pressure Transfer Case Oil Transmission Oil Temperature Temperature, Auxiliary The Trailer Air Tank Air Pressure The Transfer Case Oil Temperature gauge indicates the amount of air The Auxiliary Transmission Oil gauge indicates the temperature of pressure in the trailer brake air tank.
  • Page 121: Transmission Retarder Oil Temperature

    OPTIONAL GAUGES Transmission Retarder Oil Temperature The Transmission Retarder Oil Temperature gauge indicates the temperature of the oil in the transmission retarder. NOTE Watch this gauge to know when the transmission is overheating. Do not exceed maximum oil temperature recommended by the manufacturer.
  • Page 122: Switches

    SWITCHES SWITCHES The instrument display will display position and the switch needs to be information regarding what needs to re-engaged. Some of the switches that change in order for the air device to control air functions will not disengage Dash Switches operate as expected.
  • Page 123 SWITCHES Symbol Name Symbol Color Standard Option Page ● Amber 3. Axle, Diff-Lock - Steer See Axle, Diff-Lock - Front on page 3-61. ● 4. Axle, Diff-Lock - Rear Rear Amber See Axle, Diff-Lock - Rear Rear on page 3-61. ●...
  • Page 124 SWITCHES Symbol Name Symbol Color Standard Option Page ● 10. Brakes, Parking Brake Valve See Brakes, Parking Brake Valve on page 3-61. ● 11. Cab Dimmer Switch None See Cab Dimmer Switch on page 3-61. ● 12. Dump Truck Gate See Dump Truck Gate on page 3-61.
  • Page 125 SWITCHES Symbol Name Symbol Color Standard Option Page ● 17. Engine, Fan Override Green See Engine, Fan Override on page 3-62. ● 18. Engine, Heater Green See Engine, Heater on page 3-62 See Engine, Overspeed Air Shutdown on page ● 19.
  • Page 126 SWITCHES Symbol Name Symbol Color Standard Option Page ● 24. Fuel Heater Amber See Fuel Heater on page 3-63. ● 25. Generic Air, Accessory Green See Generic Air, Accessory on page 3-63. ● 26. Generic, Spare SPARE Green See Generic, Spare on page 3-64. ●...
  • Page 127 SWITCHES Symbol Name Symbol Color Standard Option Page ● 31. Lights, Dome None See Lights, Dome on page 3-64. See Lights, Exterior Lights Self Test on page ● 32. Lights, Exterior Lights Self Test None 3-64. ● 33. Lights, Flood Amber See Lights, Flood on page 3-64.
  • Page 128 SWITCHES Symbol Name Symbol Color Standard Option Page ● 37. Lights, Headlight None See Lights, Headlight on page 3-65. ● 38. Lights, Marker/Clearance None See Lights, Marker/Clearance on page 3-65. See Lights, Marker/Clearance/Cab on page ● 39. Lights, Marker/Clearance/Cab None 3-65.
  • Page 129 SWITCHES Symbol Name Symbol Color Standard Option Page ● 44. Pintle Hook Green See Tow Hook on page 3-66. ● 45. Power Take-off (PTO) Amber See Power Take-off (PTO) on page 3-66. See Power Take-off (PTO), Forward on page ● 46.
  • Page 130 SWITCHES Symbol Name Symbol Color Standard Option Page ● Amber 51. Suspension, Lift See Suspension, Lift on page 3-67. ● 52. Suspension, Third Axle Lift Green See Suspension, Third Axle Lift on page 3-67. ● 53. Trailer Air Supply See Trailer, Air Supply on page 3-67. ●...
  • Page 131 SWITCHES Symbol Name Symbol Color Standard Option Page ● 58. Trailer, Dump Gate See Trailer, Dump Gate on page 3-67. ● 59. Trailer, Dump Gate Center See Trailer, Dump Gate Center on page 3-67. ● 60. Trailer, Dump Gate Front See Trailer, Dump Gate Front on page 3-67.
  • Page 132 SWITCHES Symbol Name Symbol Color Standard Option Page See Transmission, Transfer Case 2 Speed on ● Amber 65. Transmission, Transfer Case 2 Speed page 3-68. ● 66. Winch Clutch Green See Winch Clutch on page 3-68. 3-60 Y53-6047–2C (04/13)
  • Page 133 SWITCHES 1. Axle Diff-Lock - Dual 11. Cab Dimmer Switch Turn switch on to engage Front 7. Axle, Two Speed and Rear Axle Diff Lock. This switch is used to alter the If equipped, the two speed axle brightness of the instrument switch allows you to select axle high panel lights.
  • Page 134 SWITCHES vehicle, see the engine brake owner’s 17. Engine Fan Override manual for additional engine brake CAUTION The engine fan switch allows you information. to control the engine fan manually The fan or equipment near it could be or automatically. Please refer to damaged if the fan turns on suddenly 15.
  • Page 135 SWITCHES 19. Engine, Overspeed Air 23. Fifth Wheel Slide WARNING! Shutdown (Manual) Turn switch on to “Unlock” Fifth Turn switch on to engage the Wheel Slide mechanism. Do not move the fifth wheel while the Engine Overspeed Air Shutdown The switch is guarded to protect tractor-trailer is in motion.
  • Page 136 SWITCHES 30. Lights, Daytime Running 31. Lights, Dome NOTE Lights (DRL) (with optional Turn switch on for Cab Dome Lights. over-ride switch) The generic air accessory switch is de- Three controls (or conditions) 32. Lights, Exterior Lights Self Test signed by the original equipment man- will affect whether the system This switch will engage a program ufacturer to reset when the ignition...
  • Page 137 SWITCHES WARNING! NOTE CAUTION Across the U.S.A. and Canada, Use your Hazard Warning Light Sys- If you have confirmed there is a prob- State/Provincial requirements vary as tem any time you have to stop off the lem in the low beam wiring circuit, pro- to when high beams and fog lights can road or on the side of the road, day ceed with caution to the next available...
  • Page 138 SWITCHES 39. Lights, Marker/Clearance/Cab 45. Power Take-off (PTO) CAUTION Turn switch on to control Cab Turn switch on to engage PTO. Marker/Clearance lights separately Your vehicle may be equipped with Increasing engine RPM before the from the trailer. a dash mounted switch that controls PTO is actually engaged could pre- PTO engagement/disengagement.
  • Page 139 SWITCHES 50. Suspension, Dump 51. Suspension, Lift 56. Trailer, Axle Lift Rear Turn switch on to deflate Suspension Turn switch on to over-inflate Turn switch on to lift Rear Trailer Air Bags. The switch is guarded Suspension Air Bags. Turn switch off Axle.
  • Page 140: Steering Column Controls

    SWITCHES Steering Column Controls 1. Tilt/Telescoping Steering Column 63. Trailer, Suspension Air Dump Introduction Turn switch on to deflate Trailer Air Depending on your vehicle’s Suspension. This switch does not configuration, you may have either require ignition power to maintain the desired switch setting.
  • Page 141 SWITCHES 2. Turn Signal/High Beam Switch To adjust the steering wheel, PUSH and HOLD the lever down fully. Push NOTE or pull the wheel to the desired height The ignition key must be turned to ON and angle, then PUSH the lever back for the signal/switch to operate.
  • Page 142 SWITCHES • • To signal a left turn, pull the lever To return to previous beam: pull WARNING! back (counterclockwise). the lever towards the steering After you complete a turn, shut the wheel again. • Each time the turn indicator is system off by returning the lever to •...
  • Page 143 SWITCHES Windshield Wipers/Washer Your vehicle is equipped with a two-speed, intermittent windshield wiper system. The windshield wiper system is integrated with the exterior lights so that the low beam headlights ID and Clearance Lights Flash will turn on when the windshield wipers turn on.
  • Page 144 SWITCHES the washing cycle. After the lever NOTE is released, the wipers will shut off CAUTION automatically or resume the wiper’s The ignition key must be turned to ON Do not use antifreeze or engine setting speed. or ACC for the wiper/washer switches coolant in the windshield washer to operate.
  • Page 145: Steering Wheel Controls (Optional)

    SWITCHES Steering Wheel Controls 3. Trailer Brake Hand Valve (Optional) This hand valve, mounted on the steering wheel column, provides air CAUTION pressure to apply the trailer brakes Under no circumstances should you only. It operates independently of attempt to service the steering wheel, the foot treadle valve.
  • Page 146 SWITCHES System Description Operating the System The steering wheel contains controls Horn - Depressing the bottom center for commonly used functions so that bar activates the electric horn. the operator does not have to take Cruise Control - Vehicles with their hands off of the steering wheel to steering wheel controls will have cruise operate.
  • Page 147: Door Mounted Controls

    SWITCHES Door Mounted Controls WARNING! Introduction Do not operate the cruise control when If your vehicle is equipped with power operating on road surfaces with poor mirrors, the mirror controls will be traction (wet, icy, or snow covered located on the driver side door pad. roads) or in heavy traffic.
  • Page 148 SWITCHES 1. Mirror Heat Switch WARNING! Your vehicle may be equipped with Adjust all mirrors before driving. Ad- optional heated mirrors. Mirror heat justing the mirrors while driving can is controlled by the mirror heat switch cause you to take your eyes off the button, which is part of the mirror road, which could result in an accident.
  • Page 149 SWITCHES 2. Power Mirror Switch 4. Power Door Lock Switch 5. Power Window Switch If your vehicle is equipped with power Power door lock rocker switches are Power window rocker switches are mirrors, the directional controls for located on the door pads. To lock or located on the door pads.
  • Page 150: Exterior Lights Self Test

    SWITCHES Exterior Lights Self Test • Lo beam headlamps To start the Exterior Light Self-Test • First set of fog/driving lights (ELST) feature: The test will turn those lights off and 1. Park the vehicle and set the then illuminate the: parking brakes.
  • Page 151: Heating And Air Conditioning

    HEATING AND AIR CONDITIONING HEATING AND AIR CONDITIONING Cab Controls 1. Fan Control Dial 4. MAX Defrost Button 7. Temperature Sensor 2. AUTO Mode Button 5. Air Distribution Dial 8. Air Conditioner Button 3. Temperature Control Dial 6. Sleeper Override Button (for vehicles with a 9.
  • Page 152: Introduction

    HEATING AND AIR CONDITIONING Introduction WARNING! WARNING! Your vehicles heating and air Do not drive with visibility reduced Exhaust fumes from the engine con- conditioning system operates in three by fog, condensation, or frost on the tain carbon monoxide, a colorless and distinct modes;...
  • Page 153 HEATING AND AIR CONDITIONING WARNING! NOTE CAUTION Never idle your vehicle for prolonged Keep the engine exhaust system and Do not stay in the vehicle with the en- periods of time if you sense that ex- the vehicles cab ventilation system gine running or idling for more than 10 haust fumes are entering the cab.
  • Page 154: Manual Control Mode

    HEATING AND AIR CONDITIONING Manual Control Mode For vehicles with a sleeper, the NOTE cab control can be used to The manual mode is the default mode If you are required to idle your vehi- activate/deactivate the sleeper when the heating and air conditioning cle for long periods of time, install an HVAC using the button inside the system is turned on.
  • Page 155: Automatic Control Mode

    HEATING AND AIR CONDITIONING Automatic Control Mode is located at the base of the windshield Using the automatic mode: on the driver’s side of the instrument Your vehicle’s air conditioning system panel. Do not block this sensor. Step 1: Turn on HVAC by rotating is equipped with an automatic button fan speed control clockwise.
  • Page 156: Max Defrost Mode

    HEATING AND AIR CONDITIONING MAX Defrost Mode on the HVAC control. In the partial without the use of the A/C compressor. automatic mode, the AUTO button The operator may select economy The heating and air conditioning indicator will cease to be illuminated. by initiating AUTO mode and then system provides for one touch Instead, the indicator of the adjusted...
  • Page 157: Buttons And Dials

    HEATING AND AIR CONDITIONING Buttons and Dials Air Distribution Dial Fan Speed Control Dial *Defrost Vents The mode of air distribution inside the The fan speed is adjusted by rotating cab is set using the air distribution *Automatically engages outside air and A/C the dial clockwise to increase speed or dial.
  • Page 158: Operating Tips

    HEATING AND AIR CONDITIONING Operating Tips Temperature Control Dial NOTE Defrosting and Defogging the The cab temperature is set using the Windshield Fan control dial must also be in the temperature control dial. The operating ON position to engage the A/C com- range is 60°F (16°C) and 84°F (28°C).
  • Page 159 HEATING AND AIR CONDITIONING Manual Windshield dial to maintain a clear windshield while For Maximum Cooling Defrosting/Defogging providing heat to the floor. This setting Step 1: Adjust the fan speed to high by may be helpful in conditions where the The manual defrost/defogging mode rotating the fan control dial clockwise.
  • Page 160 HEATING AND AIR CONDITIONING For Maximum Heating Air Dehumidification Cab Air Distribution Step 1: Adjust the fan speed to high by The HVAC system can be used to Equal distribution of air is important rotating the fan control dial clockwise. reduce the humidity level of the cab in maintaining a constant cab interior Step 2: Set the air distribution...
  • Page 161: Sleeper Heater - A/C Controls (Optional)

    HEATING AND AIR CONDITIONING Sleeper Heater - A/C Outside Air / Recirculation Air A separate switch on the dash HVAC Controls (optional) unit will send power to the “bunk” or Selecting air recirculation mode sleeper control unit The button on the completely isolates the cab interior cab HVAC unit must be pressed and from the outside air.
  • Page 162 HEATING AND AIR CONDITIONING NOTE The sensor is located on the sleeper heater - A/C control panel and mea- sures the sleeper air temperature at the panel. There will be a time de- lay between temperature control ad- justment and sleeper air temperature change.
  • Page 163: Sleeper Alarm Clock

    ACCESSORIES ACCESSORIES Sleeper Alarm Clock Alarm - press to turn on the Increase value of setting time/date and or alarm alarm Decrease value of setting setting Snooze - press to snooze Select - press to choose the Active alarm icon - alarm the alarm bell setting being changed while is activated when this icon...
  • Page 164 ACCESSORIES Setting System Time Setting System Alarm d. Hours 1. Press the MODE button twice until e. Minutes NOTE the screen displays the AL icon. The year “2010” will display when set- 5. To exit and save your settings, 2. Use the UP and DOWN buttons to ting the clock for the first time or if bat- press the MODE button once you adjust the setting.
  • Page 165 ACCESSORIES Turning the Alarm On/Off Snooze Operation Dim Control Operation Press the ALM button to turn the alarm When the alarm is ringing press the Press the DIM+ or DIM- buttons (3, 4) on and off. The icon (9) will illuminate SNZ button (2) to silence the alarm for to change the brightness of the display.
  • Page 166: Radio (Option)

    ACCESSORIES Radio (Option) Cigarette Lighter and appliances, such as a hand spotlight or small vacuum cleaner. Ashtray (Option) As an option, your vehicle has either an AM/FM Stereo Receiver, which may WARNING! NOTE or may not have a CD, or may have Do not place paper or other com- The cigarette lighter will operate with the stereo system integrated with your...
  • Page 167: Cab Storage

    ACCESSORIES Cab Storage Appliances - overhead storage compartments Glove Box If your vehicle is equipped with a WARNING! A glove box is provided to store television, or other appliance, be sure important documents, the vehicle they are compatible with your vehicle's Do not carry loose objects in your cab, literature set (including this Operator's electrical system.
  • Page 168: Ignition Key Switch

    ACCESSORIES Ignition Key Switch • brake lights ON: In the ON position all circuits are The ignition key switch (located to the • energized. Panel warning lights will emergency hazard flasher left of the steering column) has four light and the buzzer will sound until •...
  • Page 169: Vehicle Telematic System

    ACCESSORIES Vehicle Telematic System WARNING! WARNING! Your vehicle may be equipped with Only glance at the system monitor Regardless of how and where the nav- an onboard telematics system. This while driving. Prolonged periods of igation system directs you, it is your re- system is a Global Positioning Satellite viewing while driving could result in an sponsibility to operate the vehicle in a...
  • Page 170 ACCESSORIES Care of the Display Screen Screen Display On/Off NOTE From time to time it may be necessary 1. Press and hold the POWER/LIGHT The map database is the most cur- to clean the display screen. To clean button for approximately 1 second. rent available at the time of produc- the screen, dampen a clean, soft, tion.
  • Page 171 ACCESSORIES Passenger Side 'down' 4. To turn the system off, press and Warning/Informational Screen Mirror hold the POWER/LIGHT button for 3 seconds. Disclaimer WARNING Do not let this device distract you while driving. Always concentrate on you The vehicle manufacturer is not driving.
  • Page 172 ACCESSORIES Passenger Side Pull Out Tray Rotate the mirror up or down to get the desired view. The dashboard for the front passenger contains a pull out tray for writing convenience. To use the tray, push in on the panel and allow the tray to pop out.
  • Page 173 STARTING and OPERATING STARTING and OPERATING Introduction ....4-5 Normal Weather ....4-5 Cold Weather .
  • Page 174 STARTING and OPERATING More Transmission Tips ... . 4-19 OPERATING THE BRAKE SYSTEM Introduction ....4-20 Retarders .
  • Page 175 STARTING and OPERATING DRIVING TIPS AND TECHNIQUES Introduction ....4-53 Coasting ....4-53 Descending a Grade .
  • Page 177: Introduction

    STARTING and OPERATING STARTING and Normal Weather NOTE OPERATING When the outside temperature is Some starters are equipped with over- above 50° F (10° C), you can use the crank protection. Check the “Engine Introduction following procedure: Operation and Maintenance Manual” 1. Set the parking brake.
  • Page 178: Cold Weather

    STARTING and OPERATING Cold Weather Engine Block Heater manual for the right pressure for your engine. If the oil pressure (Option) In cold weather, fast engine starting doesn’t rise within a few seconds, helps relieve the loads on the electrical stop the engine.
  • Page 179: Engine Warm-Up

    STARTING and OPERATING Engine Warm-up slowly and evenly. In extremely CAUTION Engine cold temperatures, you may have to increase idle speed. Always unplug heater before starting The purpose of engine warm-up is to the engine. Damage to the cooling allow oil film to be established between NOTE system could occur if the heater is not pistons and liners, shafts and bearings...
  • Page 180 STARTING and OPERATING WARNING! CAUTION NOTE Exhaust fumes from the engine con- The use of a winterfront can result Keep the engine exhaust system and tain carbon monoxide, a colorless and in excessive engine coolant, oil, and the vehicle’s cab/sleeper ventilation odorless gas.
  • Page 181 STARTING and OPERATING WARNING! NOTE CAUTION To reduce the chance of death or per- • Do not stay in the vehicle with Do not allow your engine to idle, at sonal injury and/or vehicle damage the engine running or idling low rpm's (400–600 rpm), longer than from overheated engines, which can for more than 10 minutes with...
  • Page 182 STARTING and OPERATING Transmission a. Put the main transmission in gear. In cold weather (below 32° F (0° C), you may find shifting sluggish b. Put the auxiliary transmission when you first start up. Transmission in Neutral. This will allow warm-up is especially important at the transmission countershaft this time, but it is always a good...
  • Page 183: Operating The Engine

    OPERATING THE ENGINE OPERATING THE Engine Fan Control 5. Toggle the SET/RESUME switch ENGINE to obtain the desired engine rpm. Cancelling Cruise Control Stationary PTO Operation You can cancel cruise control in any The cruise control buttons for this of these ways: The engine fan can be turned ON vehicle may be used to control the using a switch that is mounted on the...
  • Page 184: Winterfronts

    OPERATING THE ENGINE Winterfronts WARNING! NOTE A winterfront or other air flow restriction Do not work on or near the fan with the Do not operate the engine fan in the device may be mounted in front of engine running. Anyone near the en- MANUAL position for extended peri- the radiator to increase cab heater gine fan when it turns on could be in-...
  • Page 185: Engine Control Display

    OPERATING THE ENGINE Engine Control Display NOTE Your vehicle may come with an optional The winterfront is designed to min- Engine and Driver Information Display. imize the temperature differences This instrument records information across the radiator and reduce the on engine diagnostics, scheduled possibility of cooling module damage.
  • Page 186: Operating The Transmission

    OPERATING THE TRANSMISSION OPERATING THE Operating Manual If the transmission is not shifting TRANSMISSION Transmissions smoothly into gear while the clutch pedal is completely pressed to the The transmission shift pattern for Operating Hydraulic Clutch floor, then it is time to have the clutch your vehicle may be located on the (Manual Transmission) and hydraulic system inspected and...
  • Page 187: Putting The Vehicle In Motion

    OPERATING THE TRANSMISSION Putting the Vehicle in Motion start up on an incline, apply your CAUTION service brakes before you release After making sure the vehicle's oil the parking brake. Then release Always use first gear or a low speed and air pressure are correct and all your service brakes as you engage range to start the vehicle in motion.
  • Page 188 OPERATING THE TRANSMISSION More Driving Tips and Techniques on Shifting Gears in a New Vehicle Clutch Brake and Travel page 4-53. Shift carefully in a new vehicle. The The clutch brake is used for stopping transmission may be a little stiff at transmission gears, allowing you to first.
  • Page 189: Driving

    OPERATING THE TRANSMISSION During Normal Driving Double Clutching b. Downshifts: press accelerator, increase engine and gear If you want to shift directly into any gear Whether you are upshifting or down speed to the RPM required in other than first or reverse, depress the shifting, it is best to double clutch.
  • Page 190: Automatic And Automated Transmissions

    OPERATING THE TRANSMISSION Automatic and Automated Hill Hold WARNING! Transmissions If your vehicle has an automated trans- An automatic or automated mission, be aware that it can roll back- transmission makes shifting much wards when stopped on a hill or grade, easier.
  • Page 191: Auxiliary Transmission

    OPERATING THE TRANSMISSION Auxiliary Transmission More Transmission Tips • Never downshift when the vehicle Riding the Clutch is moving too fast. If you have an auxiliary transmission, see your transmission manufacturer’s The clutch is not a footrest. Do not • Never slam or jerk the shift lever manual for its proper operation.
  • Page 192: Operating The Brake System

    OPERATING THE BRAKE SYSTEM OPERATING THE Certain conditions may result in your The air compressor on the engine will BRAKE SYSTEM brake surfaces becoming overheated typically provide 100-130 psi (690-896 (above 800° F or 427° C). Overheated kPa) to the air tanks. The vehicle Introduction brakes will damage linings and is also designed with an air dryer,...
  • Page 193 OPERATING THE BRAKE SYSTEM WARNING! WARNING! WARNING! The Anti-Lock Brake System is a crit- Do not drive through water deep Do not rely on an anti-lock brake sys- ical vehicle safety system. For the enough to wet brake components, as tem that is functioning improperly.
  • Page 194 OPERATING THE BRAKE SYSTEM brake pedal application to provide the Parking Brake Parking brakes work in reverse action equivalent braking to a bobtail tractor of the regular brakes. When the not equipped with a proportioning parking brakes are engaged, air is system.
  • Page 195 OPERATING THE BRAKE SYSTEM brakes but will not disengage the trailer Trailer ABS CAUTION parking brakes (if applicable). Either Power Line Communication (PLC) knob will pop back out if the system Do not splice into the non-switchable North American on-highway vehicles pressure is not above 60 psi (414 kPa).
  • Page 196 OPERATING THE BRAKE SYSTEM Special Trailer ABS (Without PLC) NOTE CAUTION Option For doubles or triples, the lamp does The center pin of the 7-way trailer light If a trailer does not have PLC, but not distinguish between trailers. An line may be constantly powered for it does have ABS that is powered ABS problem in any of the trailers...
  • Page 197 OPERATING THE BRAKE SYSTEM Advanced ABS with Stability Roll Stability Program thereby reducing the tendency to roll Control over. Bendix® Roll Stability Program (RSP), This vehicle may be equipped an element of the overall ESP system, with an optional Electronic Stability addresses rollover conditions.
  • Page 198 OPERATING THE BRAKE SYSTEM Yaw Stability Yaw Control The Bendix® Yaw Control system reduces engine throttle and selectively Yaw stability counteracts the tendency Yaw Control responds to a wide applies brakes to reduce the vehicle of a vehicle to spin about its vertical range of low- to high-friction surface speed, thereby reducing the tendency axis.
  • Page 199 OPERATING THE BRAKE SYSTEM ESP May Reduce the Vehicle Speed Towing Doubles or Triples May Limitations of Stability Systems Automatically Reduce the Effectiveness of The ESP stability system’s Stability Systems To minimize unexpected deceleration effectiveness may be greatly reduced and reduce the risk of a collision the ESP is designed and optimized for operator must: trucks and for tractors that tow single...
  • Page 200 OPERATING THE BRAKE SYSTEM To Maximize the Effectiveness of Truck Chassis Modifications • There are mechanical problems with suspension leveling of the The ESP system was specifically tractor or trailer resulting in uneven • Loads must be properly secured calibrated and validated only for loads.
  • Page 201 OPERATING THE BRAKE SYSTEM Steering Angle Sensor Optional ATC Functions WARNING! Re-Calibration Wheel Spin Control (option) For vehicles equipped with ESP “Elec- Whenever maintenance or repair Your truck/tractor ABS may have an tronic Stability Program” do not re- work is performed to the steering acceleration slip regulation (ASR) place the vehicle’s steering wheel with mechanism, linkage, gear, adjustment...
  • Page 202 OPERATING THE BRAKE SYSTEM detected and the ASR or ATC system transfers engine torque to the increases available traction on extra is applying the drive wheel brakes or wheels with better traction. soft surfaces like snow, mud or gravel, reducing engine torque. Engine torque by slightly increasing the permissible •...
  • Page 203 OPERATING THE BRAKE SYSTEM • • At speeds between 10 and 25 Improves vehicle control and WARNING! mph, the ABS control software is helps reduce stopping distances While the off-road mode can improve modified to allow short periods in off-road conditions or on poor (0.25 seconds) of locked-wheel vehicle control and shorten stopping traction surfaces such as loose...
  • Page 204: Retarders

    OPERATING THE BRAKE SYSTEM Retarders pressure to slow the drivetrain. Use WARNING! the service brakes for quick stops. Various retarders are available, which Do not use any of the vehicle’s re- function against the engine, driveline, Do not use the retarder when operating tarders in any situation that requires an or transmission.
  • Page 205 OPERATING THE BRAKE SYSTEM Driving Bobtail or with an Unloaded Transmission Retarder WARNING! Trailer Do not rely on your automatic trans- We recommend that you do not use mission hydraulic retarder to stop your your engine retarder to slow down vehicle.
  • Page 206: Cruise Control

    CRUISE CONTROL CRUISE CONTROL Using Cruise Control While Driving Changing the Cruise Set Speed Cruise Control Switch Setting Cruise Speed For vehicles with cruise control buttons on the steering wheel, the cruise 1. Ensure that the vehicle speed is This vehicle may have cruise control speed may be changed by using the above the minimum cruise control switches located on the steering wheel...
  • Page 207 CRUISE CONTROL • • Press the ON/OFF button if the Press the "OFF" button (or Using Cruise Control for Stationary vehicle has dash board mounted the steering wheel mounted PTO Operation cruise control switches or the "CANCEL" button). CANCEL button if the vehicle has Setting Idle Speed cruise control switches on the NOTE...
  • Page 208: Adaptive Cruise Control (Optional)

    CRUISE CONTROL Adaptive Cruise Control has not been pressed since the vehicle has been started. (Optional) In vehicles with Eaton transmissions, This vehicle may have an Adaptive the cruise control switches may be Cruise Control with Braking (ACB) located on the shift control knob. system that enhances the cruise The information in the instrument control function.
  • Page 209 CRUISE CONTROL repeating at a rate of 42 tones per applying more braking power and/or This warning is active when the minute. steering clear of the vehicle ahead to following distance is less than what avoid a potential collision. The system Level 2 (Amber) Following Distance is set in the system.
  • Page 210 CRUISE CONTROL WARNING! Fault Alert The Wingman® ACB sensor may not be able to detect vehicles and objects with limited metal surfaces (such as recreational vehicles, horse-drawn This warning is presented to alert buggies, motorcycles, logging trail- the operator that the ACB system is ers, etc.).
  • Page 211: Axle

    AXLE AXLE In the LOCK position, continuous WARNING! operation on paved, dry surfaces, put Differential Lock Do not put the differential lock in the stress on the axles, and can possibly LOCK position while the wheels are damage the internal gears. The switch The vehicle may be equipped with spinning freely (slipping), you could has a guard to prevent accidental...
  • Page 212: Dual Range (Two-Speed) Rear Axle

    AXLE Dual Range (Two-Speed) Dual Range Axle Operation CAUTION Rear Axle Important tips on operating a Dual If you shift the axle range with the in- Range Axle with Interaxle Differential: ter-axle differential in LOCK, you could seriously damage the axles. Never •...
  • Page 213 AXLE Starting-Up Proper shifting of the axle depends on CAUTION 1. Unlock the inter-axle differential the synchronization of engine/driveline To avoid damaging your vehicle shift before starting. and wheel speed. When you shift the axle at slower travel speeds until the axle, the connection between the 2. Put the Range Selector in the you are used to driving with a dual...
  • Page 214: Auxiliary Axles - Pusher Or Tag

    AXLE Auxiliary Axles - Pusher or LOW to HIGH (Cruising) HIGH to LOW (Rough Terrain) When you go from rough terrain to If you need to downshift the axle for highway driving, shift the axle to the more power or you are driving on HIGH range following this procedure: rough terrain: 1. Be sure the differential is...
  • Page 215 AXLE Gross Axle Weight Rating (GAWR) creep ratings are assigned by the WARNING! and the load that is being carried. See axle manufacturer and are based on Vehicle Loading on page 1-34. axle model and intended service of Do not operate or park the vehicle the vehicle.
  • Page 216 AXLE Axle Creep Rating Definition ratings are generally limited to the WARNING! Creep Ratings following: Never operate the vehicle with more • Tandem rear axles only Low speed, off-highway (work site) pressure in the lift axles than is nec- axle loads, which exceed the standard •...
  • Page 217 AXLE Liftable/Steerable or Setting the Pressure-to-Load Ratio CAUTION Liftable/Non-Steerable Pusher To obtain the desired axle load and/or Tag Axle Calibration A change in tire size on either the aux- distribution, you must correlate the Procedure iliary axles or the drive/steer axles can suspension air gauge pressure to the change the calibration of the auxiliary Below are some general instructions...
  • Page 218 AXLE General Calibration Guidelines Operation guidelines 4. Adjust the amount of load on each axle by turning the pressure These instructions are general in NOTE regulator clockwise to increase nature. For more specific instructions, Steerable-pusher and/or tag axle(s) the load or counterclockwise review the pusher or tag suspension will raise when the transmission is to decrease the load.
  • Page 219 AXLE Unloading Operation Always deflate air springs of the auxiliary axles before attempting to unload vehicle. This allows maximum traction of the drive axles to control the vehicle. Non-liftable (Non-steerable) Axles Some suspensions require dump valve calibration. Example: Neway dead axles do not lift, but the air can be dumped out of them to unload them when empty.
  • Page 220: Suspension

    Proprietary Ride Height, FLEX Air 8.75 (222) If your vehicle is equipped with a Rear inches (mm) Peterbilt rear air suspension, and if it Tandem Follow this procedure to temporarily Single Drive becomes necessary to reset the ride Suspension Drive set ride height.
  • Page 221 Peterbilt repair facility to have the valve. ride height and pinion angle reset us- ing the proper equipment and tech- •...
  • Page 222 SUSPENSION specified for that suspension. Measure 8. Repeat Steps 2 through 6 above WARNING! the ride height from the bottom of the for the RH valve on vehicles with a frame rail to the approximate centerline • The rear of a vehicle will drop dual-valve system.
  • Page 223: Driving With Deflated Air Springs

    SUSPENSION Driving with Deflated Air control arm to center in the closed position. Springs The air system can then be If an air spring is ruptured, there will pumped up to normal pressure for be enough air pressure to drive the continued operation.
  • Page 224: After-Treatment System

    AFTER-TREATMENT SYSTEM AFTER-TREATMENT SYSTEM Introduction This vehicle will has an exhaust After-Treatment System (ATS), to control vehicle exhaust emissions, which consist of a Diesel Particulate Filter (DPF), Selective Catalyst Reduction (SCR), Regeneration Switch and warning lights. The DPF will trap soot from the engine exhaust gases.
  • Page 225: Coasting

    DRIVING TIPS AND TECHNIQUES DRIVING TIPS AND Coasting Coasting with the transmission TECHNIQUES in neutral also prevents proper WARNING! transmission component lubrication. Do not coast with the transmission in Introduction During coasting the transmission is neutral or with the clutch pedal de- driven by the rear wheels, and the pressed—it is a dangerous practice.
  • Page 226: Descending A Grade

    DRIVING TIPS AND TECHNIQUES Descending a Grade Engine Overspeed Under normal load and road conditions operate the engine in the lower end of WARNING! CAUTION the range. Do not hold the brake pedal down too To avoid engine damage, do not let the long or too often while going down a engine rpm go beyond the maximum steep or long grade.
  • Page 227 DRIVING TIPS AND TECHNIQUES Use of Tachometer to the engine. However, the governor Optimal Engine Speed has no control over the engine rpm The tachometer is an instrument that WARNING! when it is being driven by the vehicle's aids in obtaining the best performance transmission, for example, on steep Do not look at the Instrument Clus- of the engine and manual transmission,...
  • Page 228: Fuel - Excess Consumption

    DRIVING TIPS AND TECHNIQUES Fuel - Excess Consumption during steady state driving. In addition Use of Instrument Cluster Display to proper maintenance and good The Instrument cluster display The vehicle's fuel consumption is driving habits, this visual cue can help provides information to help the driver connected to three important factors: minimize the fuel consumption.
  • Page 229 DRIVING TIPS AND TECHNIQUES Maintenance Maintenance factors affecting fuel Driving Habits consumption: Proper maintenance will keep the Wrong driving habits must be • air and/or fuel filters partially vehicle running like new even after corrected and the recommendations clogged long periods of use. The driver must on economic driving should be perform the daily and weekly checks followed.
  • Page 230 DRIVING TIPS AND TECHNIQUES General Condition Other factors affecting fuel consumption are related to loads and type of roads on which the vehicle operates. It is not always possible to choose the most adequate road, but it must be kept in mind that the ideal road is the one that allows a steady speed in high gear, without requiring frequent braking and acceleration.
  • Page 231: Sleeper Bunks

    SLEEPER BUNKS SLEEPER BUNKS WARNING! WARNING! Sleeper Bunk Be sure the latch that holds the upper Always keep the lower bunk in its down bunk in the folded position is working (latched) position while the vehicle is If your vehicle has an upper and lower properly so the bunk will not fall down.
  • Page 232 SLEEPER BUNKS Sleeper Occupant Restraint WARNING! The sleeper restraint is stored in a Be sure the restraint system is used compartment on the rear sleeper cab when anyone is occupying the sleeper wall. while the vehicle is moving. In an ac- cident, an unrestrained person lying in WARNING! a sleeper bunk could be injured.
  • Page 233: Stopping The Engine

    STOPPING THE ENGINE STOPPING THE ENGINE Refueling Turbochargers This cooling-down practice is Air inside the fuel tanks allows water Before Stopping the Engine especially important on a turbocharged to condense in the tank. To prevent engine. The turbocharger contains this condensation while the vehicle is A hot engine stores a great amount of bearings and seals that are subjected parked for extended periods of time,...
  • Page 234: Refuel Before The Final Stop

    STOPPING THE ENGINE Refuel Before the Final Stop Location of Fuel Shut-Off Valves WARNING! If your vehicle is equipped with shut-off Air space in your fuel tanks allows Diesel fuel in the presence of an ig- valves for the take-off and return lines, water to condense there.
  • Page 235: Final Stop

    STOPPING THE ENGINE Final Stop Final Stopping Procedures 2. If you are parked on a steep grade, To make sure your vehicle is ready 1. Set the parking brake before leaving block the wheels. to go after a long stop (such as over the driver’s seat.
  • Page 236 STOPPING THE ENGINE air supply. Be sure to close the drains before leaving the vehicle. Opening Drains 4. Secure the vehicle. Close all the windows and lock all the doors. 4-64 Y53-6047–2C (04/13)
  • Page 237: Maintenance

    MAINTENANCE PREVENTIVE MAINTENANCE SCHEDULE Introduction ....5-9 Maintenance Schedule ... . 5-12 LUBRICANT SPECIFICATIONS Introduction .
  • Page 238 MAINTENANCE AIR SYSTEM Introduction ....5-48 Air Dryer ....5-51 Air Tanks .
  • Page 239 MAINTENANCE ELECTRICAL Electrical System ....5-76 Light Bulbs ....5-77 Bulb Specifications .
  • Page 240 MAINTENANCE Turbocharger ....5-98 Air Cleaners ....5-99 ServiSignal™...
  • Page 241 MAINTENANCE HEATER AND AIR CONDITIONER Introduction ....5-111 Air Filters ....5-112 Heater.
  • Page 242 MAINTENANCE Fluid Level and Refill ... . . 5-131 Steering Shaft ....5-132 DRIVELINE Driveshaft Maintenance ... . 5-134 U-Joints .
  • Page 243 MAINTENANCE CLUTCH Introduction ....5-149 Clutch Hydraulic Fluid ... . . 5-149 Clutch Adjustment ....5-150 Clutch Adjustment –...
  • Page 245: Preventive Maintenance Schedule

    PREVENTIVE MAINTENANCE SCHEDULE PREVENTIVE WARNING! WARNING! MAINTENANCE Before attempting any procedures If work has to be done with the en- SCHEDULE in the engine compartment, stop the gine running, always (1) set the park- engine and let it cool down. Hot com- ing brake, (2) block the wheels, and (3) Introduction ponents can burn skin on contact.
  • Page 246 PREVENTIVE MAINTENANCE SCHEDULE The following pages contain a table WARNING! WARNING! of maintenance tasks with the related Disconnect the battery ground strap When working underneath the vehi- intervals for each task on the right whenever you work on the fuel sys- cle without appropriate safety stands side of the table.
  • Page 247 PREVENTIVE MAINTENANCE SCHEDULE interval. Refer to Oil Changes on Off highway is defined for applications page 5-43 before you put a new where the vehicle may be driven off vehicle into service. the pavement on a regular basis, even • The initial fill of lubricant in if it is an infrequent basis and/or for a manual transmissions must be...
  • Page 248: Maintenance Schedule

    PREVENTIVE MAINTENANCE SCHEDULE Maintenance Schedule New Vehicle Maintenance Schedule New Vehicle Maintenance Schedule After First Miles (km) 50 – 100 500 (800) 2,000 3,000 Operation\Frequency First Day (80 – 160) (3218) –5,000 (4800 –8000) Steering Shaft U-Bolts. (OFF-HIGHWAY) See Steering System on page 5-130. Wheel Mounting.
  • Page 249 PREVENTIVE MAINTENANCE SCHEDULE PREVENTIVE MAINTENANCE (PM) INTERVALS Recommended PM Interval SYSTEM COMPONENT MAINTENANCE TASK Frame Fifth Wheel Check the kingpin lock and plate for wear and function; lubricate (NLGI #2 grease). Inspect fifth wheel operation (shown on page 5-126) Frame Fasteners Check for tightness;...
  • Page 250 PREVENTIVE MAINTENANCE SCHEDULE PREVENTIVE MAINTENANCE (PM) INTERVALS Recommended PM Interval SYSTEM COMPONENT MAINTENANCE TASK Front Axle Total Vehicle Alignment Check and adjust as required. (Meritor) Steering knuckle spindles, Inspect for wear and damage and endplay. Shim or replace as thrust bearings, kingpins, required (shown on page 5-130).
  • Page 251 PREVENTIVE MAINTENANCE SCHEDULE PREVENTIVE MAINTENANCE (PM) INTERVALS Recommended PM Interval SYSTEM COMPONENT MAINTENANCE TASK Front Axle Total Vehicle Alignment Check and adjust as required. (Dana) Kingpin bushings, thrust Lubricate with approved grease. bearings, and tie rod ball ends (ON HIGHWAY) Kingpin bushings, thrust Lubricate with approved grease.
  • Page 252 PREVENTIVE MAINTENANCE SCHEDULE PREVENTIVE MAINTENANCE (PM) INTERVALS Recommended PM Interval SYSTEM COMPONENT MAINTENANCE TASK Front Front Spring Inspect for cracked leaves, worn bushings, and excessive Suspension corrosion. Spring Pins and Shackles Inspect for worn parts and excessive joint clearance. Shim or replace as required.
  • Page 253 PREVENTIVE MAINTENANCE SCHEDULE PREVENTIVE MAINTENANCE (PM) INTERVALS Recommended PM Interval SYSTEM COMPONENT MAINTENANCE TASK Drive Axle Axle Housing Visually inspect for damage or leaks. (Dana) Check oil level. Check “cold.” Torque the drain plug. Drain the lubricant while warm. Flush each unit with clean See information on page 5-44 flushing oil.
  • Page 254 PREVENTIVE MAINTENANCE SCHEDULE PREVENTIVE MAINTENANCE (PM) INTERVALS Recommended PM Interval SYSTEM COMPONENT MAINTENANCE TASK Drive Axle Axle Housing Check the “cold” fill level at the differential carrier plug for a (Meritor) pinion angle of less than 7 degrees, or at the axle bowl plug for a pinion angle of greater than 7 degrees.
  • Page 255 PREVENTIVE MAINTENANCE SCHEDULE PREVENTIVE MAINTENANCE (PM) INTERVALS Recommended PM Interval SYSTEM COMPONENT MAINTENANCE TASK Rear U-bolts Check the torque. Tighten to specified torque value as required Suspension (shown on page 5-127). Frame and crossmember Check the torque. Tighten to specified torque value as required bolts (shown on page 5-105).
  • Page 256 PREVENTIVE MAINTENANCE SCHEDULE PREVENTIVE MAINTENANCE (PM) INTERVALS Recommended PM Interval SYSTEM COMPONENT MAINTENANCE TASK Drum Brakes Slack adjusters Check the push rod travel and check the control arm for cracks. (All) Adjust at reline (shown on page 5-60). Lubricate (NLGI #2 grease). Brake camshaft bearing Check for excessive camshaft paly in the axial and radial directions.
  • Page 257 PREVENTIVE MAINTENANCE SCHEDULE PREVENTIVE MAINTENANCE (PM) INTERVALS Recommended PM Interval SYSTEM COMPONENT MAINTENANCE TASK Disc Brakes Brake pads Inspect; replace as required. (Bendix®) Brake disc/rotor Inspect for visible cracks, heat checking, galling, or scoring of surface. Check for runout (max allowable is 0.002 in.). Caliper sliding function Ensure caliper slides freely with no obstructions or excessive play.
  • Page 258 PREVENTIVE MAINTENANCE SCHEDULE PREVENTIVE MAINTENANCE (PM) INTERVALS Recommended PM Interval SYSTEM COMPONENT MAINTENANCE TASK Hub, Drum, Hubs (non-LMS) Check the bearing endplay and adjust as required (shown on and Hubcap page 5-46). Hubs (non-LMS) with Clean the components and check for excessive wear or outrunner seals damage.
  • Page 259 PREVENTIVE MAINTENANCE SCHEDULE PREVENTIVE MAINTENANCE (PM) INTERVALS Recommended PM Interval SYSTEM COMPONENT MAINTENANCE TASK Main and Main and auxiliary Inspect for visible damage, signs of overheating, and leaks. auxiliary transmission and transfer Check the drain plugs for tightness. transmission case Mounting Brackets and Check the condition of the fasteners and their torque.
  • Page 260 PREVENTIVE MAINTENANCE SCHEDULE PREVENTIVE MAINTENANCE (PM) INTERVALS Recommended PM Interval SYSTEM COMPONENT MAINTENANCE TASK Air Intake Air intake piping, mounting, Check the system for broken pipes, leaks, joint integrity, and charge air cooler cleanliness, and proper support (shown on page 5-99). Air cleaner Replace the engine intake air cleaner element (shown on page When required by air restriction...
  • Page 261 PREVENTIVE MAINTENANCE SCHEDULE PREVENTIVE MAINTENANCE (PM) INTERVALS Recommended PM Interval SYSTEM COMPONENT MAINTENANCE TASK Tires and Tires Check inflation pressure (shown on page 5-135). Weekly “cold” using calibrated gauge Wheels Inspect for cuts, irregular wear, missing lugs, sidewall damage, etc. Disc wheels Inspect the wheel disc for any cracks or surface irregularities.
  • Page 262 PREVENTIVE MAINTENANCE SCHEDULE PREVENTIVE MAINTENANCE (PM) INTERVALS Recommended PM Interval SYSTEM COMPONENT MAINTENANCE TASK Power Reservoir Check the fluid level (shown on page 5-47). Steering Reservoir (ON HIGHWAY) Drain, replace the filter, and refill (shown on page 5-47). Reservoir (OFF HIGHWAY) Drain, replace the filter, and refill (shown on page 5-47). Steering gear Check the lash of the sector shaft;...
  • Page 263 PREVENTIVE MAINTENANCE SCHEDULE PREVENTIVE MAINTENANCE (PM) INTERVALS Recommended PM Interval SYSTEM COMPONENT MAINTENANCE TASK Power Steering intermediate shaft Lubricate [EP NLGI #2 HD grease, +325° F to -10° F (+163° C Steering U-joints (ON HIGHWAY) to -23° C) range]. Steering intermediate shaft Lubricate [EP NLGI #2 HD grease, +325°...
  • Page 264 PREVENTIVE MAINTENANCE SCHEDULE PREVENTIVE MAINTENANCE (PM) INTERVALS Recommended PM Interval SYSTEM COMPONENT MAINTENANCE TASK Driveshafts Models SPL-90, 1710 and Lubricate*. 1810 slip member and Inspect. U-joint inspections should be U-joints performed every time a vehicle comes in for scheduled maintenance.** Model SPL-100 slip Lubricate*.
  • Page 265 PREVENTIVE MAINTENANCE SCHEDULE PREVENTIVE MAINTENANCE (PM) INTERVALS Recommended PM Interval SYSTEM COMPONENT MAINTENANCE TASK Driveshafts Models Lubricate*. SPL-140/140HD/170/ Inspect. U-joint inspections should be 170HD/250/250HD slip performed every time a vehicle comes members and U-joints (OFF in for scheduled maintenance.** HIGHWAY) Models Lubricate*.
  • Page 266 PREVENTIVE MAINTENANCE SCHEDULE PREVENTIVE MAINTENANCE (PM) INTERVALS Recommended PM Interval SYSTEM COMPONENT MAINTENANCE TASK Battery Boxes, Battery cables Check the condition of the cables, cushion clamps, nylon tie Tool Boxes, straps, and routing. Replace a cushion clamp if the rubber has and Steps deteriorated.
  • Page 267 PREVENTIVE MAINTENANCE SCHEDULE PREVENTIVE MAINTENANCE (PM) INTERVALS Recommended PM Interval SYSTEM COMPONENT MAINTENANCE TASK Electrical and Headlamps Check the aim and adjust as required. lights Warning lights in light bar Check at the ignition start position to verify bulbs and driver information display function (shown on page 3-30).
  • Page 268 PREVENTIVE MAINTENANCE SCHEDULE PREVENTIVE MAINTENANCE (PM) INTERVALS Recommended PM Interval SYSTEM COMPONENT MAINTENANCE TASK Heating Air conditioner Operate the system. and Air Heater and air conditioner Perform the checks listed shown on page 5-111. Conditioning Full operational and diagnostic check. Cabin fresh air filter (ON Inspect and clean, replace if necessary, as shown on page HIGHWAY)
  • Page 269 PREVENTIVE MAINTENANCE SCHEDULE PREVENTIVE MAINTENANCE (PM) INTERVALS Recommended PM Interval SYSTEM COMPONENT MAINTENANCE TASK Air compressor governor Replace air strainer. Air lines Check condition and routing to prevent chafing. System Lubricate (shown on page 5-48). Inline filters Replace elements or clean with solvent. Air dryer Perform the checks listed (shown on page 5-48).
  • Page 270: Lubricant Specifications

    LUBRICANT SPECIFICATIONS LUBRICANT Engine its life is proper lubrication servicing. Neglecting this essential aspect of SPECIFICATIONS Proper engine lubrication depends vehicle care can cost time and money on the outside temperatures where in the long run. Introduction you will be driving. Use the oil recommended for the conditions you CAUTION WARNING!
  • Page 271 LUBRICANT SPECIFICATIONS WARNING! NOTE Exhaust fumes from the engine con- Keep the engine exhaust system and tain carbon monoxide, a colorless and the vehicle’s cab ventilation system odorless gas. A poorly maintained, properly maintained. It is recom- damaged, or corroded exhaust system mended that the vehicle’s exhaust can allow carbon monoxide to enter system and cab be inspected:...
  • Page 272 LUBRICANT SPECIFICATIONS Pipe and Hose Clamps Use the following table for torque specifications to check pipe and hose clamps. Pipe and Hose Clamp Torque Values APPLICATION APPROVED CLAMP TORQUE Lb-In Radiator and Heat Exchanger Hoses Constant-Torque CT-L 10.2-12.5 90-110 Heater Hoses not required not required Constant Tension...
  • Page 273: Master Lubrication Index

    LUBRICANT SPECIFICATIONS Master Lubrication Index Lubricant Symbol Key MD3 or MERCON®-approved automatic transmission fluid High temperature ball bearing grease. Chevron SRI Mobile Grease HP, Texaco Multifax 2 or equivalent Engine oil for mild to moderate requirements CC/CD Engine oil for severe requirements (MIL-L-2104B /MIL-L-45199B w/ 1.85% max. sulfated ash content) Engine oil meeting API “Five engine test sequence”...
  • Page 274 LUBRICANT SPECIFICATIONS Component Lubrication Index Universal Joints Drive Shaft Splines Steering Column Alternator Bearing Fan Hub Power Steering Reservoir Steering Drag Link Steering Knuckles Spring Pins Clutch Release Bearings Brake Shoe Anchor Pins Brake Cam Bearings Slack Adjusters Starter Bearings Turbocharger Aneroid Water Pump Suspension Fittings (other than threaded pins and bushings)
  • Page 275 LUBRICANT SPECIFICATIONS Component Lubrication Index Manual Transmission Hydraulic Clutch DOT3 or DOT4 (Brake Fluid) *Consult manufacturer or lubricant supplier for special details. 5-39 (04/13) Y53-6047–2C...
  • Page 276: Fuller Transmission Lubrication

    LUBRICANT SPECIFICATIONS Fuller Transmission Lubrication Change and Inspection Off-Highway Use Lubrication Refer to the Eaton Fuller transmission Fuller transmissions are designed so manual for servicing information. that the internal parts operate in a bath of oil circulated by the motion of Highway Use gears and shafts.
  • Page 277 LUBRICANT SPECIFICATIONS Recommended Lubricants Type Grade (SAE) Ambient Temperature Heavy Duty Engine Oil MIL-L-2104B, C, or D; Above 10° F (-12° C) API - SF, or API-CD Above 10° F (-12° C) Below 10° F (-12° C) Mineral gear oil with rust and oxidation inhibitor Above 10°...
  • Page 278: Allison Transmission Lubrication

    LUBRICANT SPECIFICATIONS Allison Transmission Spicer Transmission Recommended Lubricants Lubrication Lubrication The lubricants listed below are Lubrication Change and Inspection recommended, in order of preference, It is extremely important to use the • Refer to your transmission for use in all Spicer mechanical proper lubricants and maintain the manual (furnished separately) for transmissions, auxiliaries, and...
  • Page 279: Oil Changes

    LUBRICANT SPECIFICATIONS Type Grade (SAE) Ambient Temperature *Synthetic Gear Oil Meeting MIL-2105C or EP75W90 API-GL5 EP75W140 *EP Gear Oils are not recommended when lubricant operating temperatures are above 230° F (110° C). Oil Changes Refilling Remove all dirt around filler plug. Refill CAUTION with new oil of the grade recommended When adding oil, types and brands of...
  • Page 280: Meritor Axle Lubrication

    LUBRICANT SPECIFICATIONS Meritor Axle Lubrication Under Meritor’s Advanced Lube Rear Drive Axle program, the axles listed NOTE below are exempt from an initial Axles utilized in 100% off-highway use lubricant change: are not eligible for Meritor’s Advanced Lube Rear Drive Axle program. AVAILABLE ADVANCED LUBE AXLES RS-17-145 RS-23-180...
  • Page 281: Eaton/Dana Axle Lubrication

    LUBRICANT SPECIFICATIONS Application Type Of Lubricant Mileage Interval City Delivery Synthetic 120,000 mi. (192,000 km) Synthetic with Pump and Filter 240,000 mi. (384,000 km) Mineral Base 120,000 mi. (192,000 km) Off Highway Synthetic 120,000 mi. (192,000 km) Synthetic with Pump and Filter 120,000 mi.
  • Page 282: Wheel Bearing Lubrication

    LUBRICANT SPECIFICATIONS Type of Lubricant On-Highway Mi. (km) Maximum Change Interval On/Off Highway Severe Maximum Change Interval Service Mi. (km) Mineral-Based Yearly Yearly 120,000 (192,000) 60,000 (96,000) Eaton-Approved Synthetic 240,000 (384,000) 2 Years 120,000 (192,000) Yearly Eaton-Approved Synthetic 350,000 (560,000) in axle with extended drain interval option Wheel Bearing Lubrication...
  • Page 283: Steering Gear Lubrication

    LUBRICANT SPECIFICATIONS Steering Gear Lubrication Inspection If incompatible (insoluble) fluids are Fluid Refill mixed in a power steering system, NOTE The following recommendations are air bubbles can be produced at the Before removing reservoir cover, wipe for general purpose steering systems interface of the two fluids.
  • Page 284: Air System

    AIR SYSTEM AIR SYSTEM WARNING! WARNING! Introduction Prior to the removal of any air system Never connect or disconnect a hose component, always block and hold the or line containing air pressure. It may vehicle by a secure means other than whip as air escapes.
  • Page 285 AIR SYSTEM reservoirs to be stored until needed. WARNING! WARNING! When you operate your air brakes, the stored compressed air flows into the Never attempt to disassemble a com- Completely bypassing a Bendix® chambers where it is used to apply ponent until you have read and un- AD-IS air dryer will bypass the sys- your truck and trailer brakes.
  • Page 286 AIR SYSTEM Daily Periodically WARNING! • • Drain moisture from the supply Clean filter screens ahead of the If the supply and service tanks are and service air tanks. valves by removing the screens not drained at the recommended fre- and soaking them in solvent.
  • Page 287: Air Dryer

    AIR SYSTEM Air Dryer Twice a Year NOTE • Maintain the air compressor to The function of the air dryer is to collect A small amount of oil in the system prevent excessive oil by-pass. and remove air system contaminants in may be normal and should not, in it- See your maintenance manual for solid, liquid and vapor form before they...
  • Page 288 AIR SYSTEM Overhaul Bendix® AD-IS Series Air Dryer • In areas where more than a 30° F (17° C) range of temperature Maintenance intervals typical for Your vehicle may be equipped with a occurs in one day, small amounts on-highway operation would be 2 - 3 Bendix®...
  • Page 289: Air Tanks

    AIR SYSTEM Air Tanks installed separately on the vehicle (see WARNING! below for components/areas affected): If the supply and service air tanks are • Pressure protection valves not drained at the recommended fre- • quency, water could enter the air lines Safety valve and valves.
  • Page 290: Air Gauges And Air Leaks

    AIR SYSTEM Air Gauges and Air Leaks If the light and alarm do not turn off at Your vehicle comes with air pressure start-up, do not try to drive the vehicle gauges for two separate systems, until the problem is found and fixed. If Primary and Secondary: the Primary the pressure in either or both systems gauge indicates pressure in the rear...
  • Page 291: Air Compressor

    AIR SYSTEM Air Compressor Preventive Maintenance 5. Start the engine and build up the Operation air pressure again. The following service checks are All compressors, regardless of make provided for your information only and 6. Stop the engine, and apply the or model, run continuously while the should be performed by a certified brakes fully.
  • Page 292 AIR SYSTEM presence of excessive carbon. If excessive carbon is found, clean or replace the compressor cylinder head. Also, check compressor discharge line for carbon, and clean or replace the discharge line if necessary. • Disassemble compressor and thoroughly clean and inspect all parts.
  • Page 293: Brake System

    BRAKE SYSTEM BRAKE SYSTEM system. All of the following areas CAUTION are interrelated and must conform to original specifications: Brake Adjustment The air brake system of this vehicle was configured for ONE of the follow- • Tire Size ing operations: tractor or truck, and WARNING! •...
  • Page 294 BRAKE SYSTEM Air Disc Brakes WARNING! WARNING! Have brake pads inspected by a Do not use brake linings with a thick- Do not use any replacement part in the qualified mechanic for wear at regular ness below the specified minimum. brake system unless it conforms ex- intervals according to the Preventive Such linings will have lining rivets...
  • Page 295 BRAKE SYSTEM • • Have a qualified mechanic Chock the wheels. perform a detailed inspection • Temporarily release the parking if the notches are not found. brakes. The pads and rotors should be measured and compared • Grab the caliper and move it. This against the manufacturers movement is Running Clearance.
  • Page 296 BRAKE SYSTEM Drum Brakes Automatic Slack Adjusters Chamber Type Stroke 36 (rear brakes) 1-1/2" - 2-1/4" Have brake drum linings and disc Periodically check the Brake Chamber (38 - 57 mm) brake pads inspected by a qualified Stroke. Replace the slack adjuster if 30 (rear brakes) 1-1/2"...
  • Page 297 BRAKE SYSTEM WARNING! Manual adjustment of automatic slack adjusters is a dangerous practice that could have serious consequences. It gives the operator a false sense of se- curity about the effectiveness of the brakes. Contact the Service Depart- ment at your dealership if the stroke exceeds the above specifications.
  • Page 298: Exterior Maintenance

    CAB Chrome and Aluminum Surfaces • Under corrosive conditions, such as driving on salted roads, clean To prevent rust, keep chromed parts Exterior Maintenance aluminum parts with steam or high clean and protected with wax at all Painted Surfaces pressure water from a hose. A times, especially in winter conditions mild soap solution will help.
  • Page 299: Cleaning, Protecting And Weather Stripping

    CAB Cleaning, Protecting and Tail Pipe Surface Cleaning Stainless Steel Weather Stripping Even high quality stainless steel parts WARNING! can rust under prolonged exposure Frequent washings of the vehicle Always allow hot surfaces to cool to salt water, especially when the are required to remove grime and down before attempting to work near salt-laden moisture is held against...
  • Page 300 CAB Vehicle Cleaning • Do not use any solution that can WARNING! damage the body paint. Precautions Do not clean the underside of chas- • Most chemical cleaners are sis, fenders wheel covers, etc. with- WARNING! concentrates that require dilution. out protecting your hands and arms.
  • Page 301 CAB Washing the Exterior plated, and polished metal CAUTION surfaces. 1. Begin by spraying water over the Do not aim the water jet directly at door dry surface to remove all loose dirt 3. Rinse surfaces frequently while locks or latch. Tape the key holes to before applying the car wash and washing to flush away dirt that prevent water from seeping into the...
  • Page 302 CAB Cleaning the Chassis Cleaning Interior Vinyl and NOTE Upholstery • Hose dirt and grime from the To allow enough time for your truck's • entire chassis. Then, if an oil Wipe vinyl upholstery and lining finish to cure, wait at least thirty days leak develops, you will be able to with a good commercial upholstery after the date of manufacture before...
  • Page 303: Safety Restraint System - Inspection

    CAB Safety Restraint System - Factors contributing to reduced seat Due to these factors, the three-point belt life: Inspection safety belt system installed in your Factors contributing to reduced seat vehicle requires thorough inspection The seat belt system, including belt life: every 20,000 miles (32,000 km).
  • Page 304 CAB Inspection Guidelines These areas are typical places WARNING! where the web will experience Follow these guidelines when cutting or abrasion. Cuts, fraying, It is important to remember that any inspecting for cuts, fraying, extreme or excessive wear would indicate time a vehicle is involved in an acci- or unusual wear of the webbing, the need for replacement of the...
  • Page 305 CAB often be damaged if abused, even Retractor Web Storage for unintentionally. Check operation damage. (located behind to ensure that it is not locked up trim panel) and that it spools out and retracts Tethers for web wear and webbing properly. proper tightness of mounting hardware.
  • Page 306: Windshield Wiper/Washer

    CAB Windshield Wiper/Washer an authorized PACCAR Parts Washer Reservoir replacement seat belt. The windshield wiper system is CAUTION If the inspection indicates that any maintenance free. Check wiper blades Do not use antifreeze or engine part of the seat belt system requires annually or every 60,000 miles (96,000 coolant in the windshield washer replacement, the entire system must...
  • Page 307: Cooling System

    COOLING SYSTEM COOLING SYSTEM What to Check in an ELC-filled CAUTION Cooling System ELC Concentration Cooling system The engine cooling system has very specific maintenance and inspection maintenance Check the level of freeze/boilover requirements. Failure to follow re- protection, which is determined by quirements can damage the engine.
  • Page 308 COOLING SYSTEM Desired ELC/ 90% 100% Water ratio: Freeze point °F (-4) (-7) (-9) (-12) (-15) (-21) (-24) (-31) (-37) (-46) (-54) (-59) (-64) (-57) (-48) (-42) (-34) (-21) (°C) Items in bold are the recommended levels of concentration. ELC Condition (Contamination and test kits, test strips, and laboratory Topping Off Inhibitor Concentration)
  • Page 309 COOLING SYSTEM • The minimum fluid level is NOTE determined by the line on the If frequent topping off is necessary and surge tank indicated by the letters there are no visible signs of coolant “MIN”. This indicator is located leaks when the engine is cold, check below the fill cap.
  • Page 310: Engine (Block) Heater

    COOLING SYSTEM Engine (Block) Heater rate until the surge tank is full (to 9. Fill the surge tank as necessary the base of the fill neck). It may be to raise the coolant level to ½ in. WARNING! necessary to pause for 1 minute above the “MIN”...
  • Page 311 COOLING SYSTEM Use a solution of half ethylene glycol antifreeze and half water for best heater performance. Do not use more than 65 percent concentration of antifreeze, as a shortened heater life will result. After servicing the cooling system, operate the vehicle for a day or two before using the heater.
  • Page 312: Electrical System

    ELECTRICAL ELECTRICAL Low Voltage Disconnect (LVD) See an authorized dealer if the LVD Purpose fails to reconnect loads during normal Electrical System operation. The LVD may increase battery life WARNING! and prevent unnecessary jump Circuits Disconnected By LVD Battery posts, terminals and related start conditions by ensuring that an •...
  • Page 313: Light Bulbs

    ELECTRICAL Light Bulbs WARNING! Aero Hood - Headlight Replacement Do not use the Spare Battery A and Replacing a headlight bulb is B circuits or other circuits that are accomplished by accessing the rear controlled by the LVD to power elec- of the headlight via a access panel in tronic engine controls, ABS circuits, the front fender.
  • Page 314: Bulb Specifications

    ELECTRICAL Bulb Specifications Vocational - Headlight Replacement Headlight Aiming Bulb Location Type of Bulb The headlights were properly Low Beam Halogen H11-LL (SAE), H7 aimed at the factory to meet safety (ECE) (long life specifications. If the headlights need to version not required) be adjusted, please have an authorized Low Beam HID...
  • Page 315: Fuses, Circuit Breakers And Relays

    ELECTRICAL Fuses, Circuit Breakers and Relays Fuses, circuit breakers, and relays are located in the Power Distribution Box to the left of the steering column behind the clutch pedal. Additional fuses are located in the engine compartment (drivers side bulkhead) and also in the sleeper under bunk storage compartment.
  • Page 316 ELECTRICAL Engine Area Fuse Label 5-80 Y53-6047–2C (04/13)
  • Page 317 ELECTRICAL In-Cab Fuse Label 5-81 (04/13) Y53-6047–2C...
  • Page 318 ELECTRICAL Sleeper Fuse Label 5-82 Y53-6047–2C (04/13)
  • Page 319: Fuse Inspection And Replacement

    ELECTRICAL Fuse Inspection and Adding Electrical Options Replacement WARNING! If a fuse is blown, see What to do if Do not add a fuse with a rating higher fuse or relay blows on page 2-6 for than 30 amps. Follow the circuit pro- more information.
  • Page 320: Batteries

    ELECTRICAL Batteries WARNING! NOTE If you are unfamiliar with proper elec- Battery Access Never install a circuit breaker in a trical repair practices and procedures, circuit that is designated as “fuse- The vehicle is originally equipped with see your authorized dealer for assis- only”...
  • Page 321 ELECTRICAL In-Cab Battery Box WARNING! WARNING! Your vehicle may be equipped Replace only with AGM (Group 31) Electrical damage or battery explosion with Absorbed Glass Mat (AGM) batteries. Use of other batteries could can occur when improperly charg- batteries located in the cab under the result in acid leaks causing personal ing batteries.
  • Page 322 ELECTRICAL Removing and Installing Batteries: WARNING! CAUTION 1. Be sure all switches on the vehicle Batteries release gases that are Properly secure battery tie downs and are turned OFF. flammable. Batteries are equipped battery box cover when reinstalling 2. Wait 2 minutes after turning with vent tubes and flash arrestors batteries after service.
  • Page 323 ELECTRICAL Follow the procedure below to reinstall Replacing Parts Removed for WARNING! batteries on the vehicle: Access Fairings not installed properly could Follow the procedure below to reinstall 1. Replace battery cover. come loose and cause other motorists batteries on the vehicle: 2. Install 2 bolts in step strut.
  • Page 324: Battery Care

    ELECTRICAL Battery Care Battery Charging Dirty or Loose Connections: improper connections may stop the Regular attention to the charging Except for using small trickle charges flow of electrical power to and from the system will help prolong the service to maintain battery condition, you battery.
  • Page 325 ELECTRICAL disconnect the battery negative positive terminal), could cause a can seriously damage sensitive cable. short circuit or an explosion. electronic components such as relays, radio, etc., as well • Allow no sparks or open flame Charging Reminders as the battery charger. Fast anywhere near the charging area.
  • Page 326: Electrical And Alternator Precautions

    ELECTRICAL Electrical and Alternator Slow Battery Charging WARNING! Precautions NOTE Always make sure the battery charger Take the following precautions to Follow the instructions that come with is OFF before connecting or discon- avoid burning out alternator diodes: your battery charger. necting the cable clamps.
  • Page 327: Remote Keyless Entry

    ELECTRICAL Remote Keyless Entry • When charging the battery (installed in the vehicle) disconnect The remote keyless entry system may the battery cables. become inoperational due to a key • fob battery. If you have issues with Do not reverse the cables of the a key fob, replace the battery and alternator, starter motor, or battery.
  • Page 328: Engine Maintenance

    ENGINE ENGINE WARNING! NOTE Engine Maintenance Never idle your vehicle for prolonged Keep the engine exhaust system and periods of time if you sense that ex- the vehicles cab ventilation system haust fumes are entering the cab. In- properly maintained. It is recom- WARNING! vestigate the cause of the fumes and...
  • Page 329: Engine Lubrication

    ENGINE Engine Lubrication Inspection of the Engine Oil Level 1. Make sure that the vehicle frame rail is standing on a flat and level Refer to the engine manufacturer's NOTE surface. Engine Operation and Maintenance It takes approximately 15 minutes for Manual supplied with your vehicle for 2. Make sure that the vehicle is all the oil to run into the sump when the...
  • Page 330 ENGINE Topping Up the Engine Oil Pipe and Hose Clamps Reinstall the dipstick and twist to lock it in place. 1. Top up with oil, if necessary, via Use the following table for torque the filler opening. Use the correct specifications to check pipe and hose grade in the correct quantity.
  • Page 331 ENGINE Pipe and Hose Clamp Torque Values APPLICATION APPROVED CLAMP TORQUE Lb-In Radiator and Heat Exchanger Hoses Constant-Torque CT-L 10.2-12.5 90-110 Heater Hoses Constant Tension not required not required Air Intake Pipes Hi-Torque HTM-L 11.3-14.2 100-125 7.9-11.3 70-100 Charge Air Intake Hoses Flex Seal 667 B9296 50-60...
  • Page 332: Accessory Drive Belts

    ENGINE Accessory Drive Belts 2. Slip the belt around the idler pulley attached to the automatic You can extend the reliability and tensioner. service life of your vehicle's drive belts with proper attention to installation, 3. Release the automatic tensioner. and maintenance.
  • Page 333: Engine Fan

    ENGINE Engine Fan Fan Drive and Blade • With the engine idling and the hood open, stand at the front of WARNING! WARNING! the vehicle. Listen for any noises Do not work on the fan with the engine Do not work on the fan with the engine coming from the fan hub.
  • Page 334: Air Intake System

    ENGINE Air Intake System Turbocharger High Frequency Vibration: Vibration may indicate turbo rotor imbalance. Engine heat, vibration, and age When servicing the air intake and Have your dealer investigate this combine to loosen air intake exhaust systems on a turbocharged immediately.
  • Page 335: Air Cleaners

    ENGINE Air Cleaners mirrors, the mirror must be pivoted to Replacing the Engine Air Intake provide access for servicing the filter Filter The following service information is element. 1. Open hood. basic to all air cleaner makes and models. 2. Loosen a total of 4 screws. (screws will not come out of the CAUTION housing)
  • Page 336: Servisignal™ Mini Indicator

    ENGINE ServiSignal™ Mini Indicator Exhaust System Engine Mounting The ServiSignal™ Mini Indicator is The exhaust system is part of the Periodic Inspection: Inspect engine installed on the air cleaner or air noise and emission control system. mounts every 60,000 miles (96,560 induction piping so it has access to Periodically check the exhaust for km).
  • Page 337 ENGINE CAUTION Do not re-torque or reuse existing flange head bolts. These bolts are factory set to the specified torque. If bolts are loose or damaged, they must be replaced with the new bolts. Fail- ure to comply may result in equipment or property damage.
  • Page 338: Fuel System

    FUEL SYSTEM FUEL SYSTEM Specification Fuel Filters Use only diesel fuel as recommended See Engine Manufacturer’s Operator Location of Fuel Shut-off by engine manufacturers. Manual provided with this chassis Valves or the instructions provided with a WARNING! Fleetguard filter. Fuel shut-off valves for the fuel A mixture of gasoline or alcohol with crossover line are on the bottom of the diesel fuel in the presence of an igni-...
  • Page 339: Introduction

    FRAME FRAME Emergency Welding Welding Precautions In the event of emergency welding of a WARNING! Introduction frame rail and when welding any other Frame welding is NOT recommended. part of your truck or any component WARNING! The high heat of welding nullifies the attached to your truck, observe the special heat treatment of the rails, Do not cut, splice or weld frame rails or...
  • Page 340 FRAME weld point as possible. This Painting Fifth Wheel Maintenance ensures maximum weld current Do not electrostatically paint your Proper preventive maintenance is and minimum risk to damage truck or any component on your essential to trouble-free service and of electrical components on the truck without first removing all of safe operation of the fifth wheel.
  • Page 341 FRAME Frame Fastener Torque Every 60,000 miles or 6 months: Standard Grade 8 UNF or UNC and Metric Requirements • Refer to specific manufacturer's FASTENER TORQUE * Tighten all frame fasteners with a SIZE literature for any special Lb-Ft torque wrench. Torque specifications 5/16 22-30 16-22...
  • Page 342 FRAME Sliding Fifth Wheels Lubricate bearing surface of support bracket through the grease fittings on the side of the fifth wheel plate. Use a water resistant lithium-base grease. NOTE The plate must be lifted up slightly to relieve the weight of the bracket while applying grease.
  • Page 343: Front Axle And Suspension

    FRONT AXLE AND SUSPENSION FRONT AXLE AND Kingpin Lubrication Suspension Lubrication SUSPENSION Lubricate with approved lubricant. Each standard spring anchor pin Lubricate knuckle thrust bearings, has a grease fitting. Pressure Axle Lubrication knuckle pins, and tie rod ends. See lubricate spring pins as specified. See Preventive Maintenance Schedule Preventive Maintenance Schedule on Change bearing lubrication when seals...
  • Page 344: Inspection

    FRONT AXLE AND SUSPENSION Inspection Wheel Alignment For all vehicles, mandatory For driving safety and comfort, and maintenance procedures include to prolong the life of your vehicle, it retightening all U-bolts and inspecting is important to have wheels correctly the suspension for loose fasteners, aligned.
  • Page 345: U-Bolt Torque

    FRONT AXLE AND SUSPENSION U-Bolt Torque Chevron zinc lubricant (SAE 20 or 30 WARNING! oils acceptable but not preferred). It is important that U-bolts remain tight. Do not operate the vehicle if the Severe use of your vehicle will cause WARNING! U-bolts are not properly tightened.
  • Page 346 FRONT AXLE AND SUSPENSION Front Spring Suspension U-Bolts, Grade 8 U-BOLT SIZE TORQUE DIAMETER Lb-Ft (Inch Dimensions) 333-408 245-300 598-734 440-540 925-1,060 680-780 1-1/8 1,470-1,660 1,080-1,220 1,890-2,120 1,390-1,560 1-1/4 1-1/2 3,130-3,860 2,300-2,840 5-110 Y53-6047–2C (04/13)
  • Page 347: Heater And Air Conditioner

    HEATER AND AIR CONDITIONER HEATER AND AIR Special Precautions • Whenever the exhaust system, CONDITIONER underbody or cab is damaged WARNING! To allow for proper operation of the Excessive heat may cause the pres- Introduction vehicle ventilation system, proceed as surized components of the air con- follows: ditioning system to explode.
  • Page 348: Air Filters

    HEATER AND AIR CONDITIONER Air Filters refrigerant leak on your vehicle have your system serviced immediately and Cabin Fresh Air Filter observe the following precautions: The fresh air filter for the cab HVAC is Stay away from the hot engine until the located in the air intake housing that is exhaust manifold has cooled.
  • Page 349 HEATER AND AIR CONDITIONER the side of the filter element with Cab Recirculation Air Filter Sleeper HVAC Air Filter the airflow direction that is clearly Please contact an authorized dealer The sleeper recirculation filter is marked on the air intake housing. when the service interval is required to located under the sleeper bunk on the inspect the cabin recirculation air filter.
  • Page 350: Heater

    HEATER AND AIR CONDITIONER Heater will allow the filter to be removed element such that it points into the in an upward direction. HVAC housing. • Check all heater controls for 4. Insert the filter and make sure the full-range operation. retention tab has re-engaged to •...
  • Page 351: Air Conditioner

    HEATER AND AIR CONDITIONER Air Conditioner be removed with compressed to worsen. Have a qualified air blown through the core in the technician correct the problem. WARNING! opposite direction of normal air flow. NOTE The air conditioning system is under pressure.
  • Page 352: Noise And Emission Control

    NOISE AND EMISSION CONTROL NOISE AND EMISSION Tampering with Noise Control Air Intake System System CONTROL • Removing or rendering inoperative the air cleaner/silencers or intake Federal law prohibits the following Noise Emission Warranty piping. acts or the causing thereof: Engine Cooling System There are specific components on (1) The removal or rendering...
  • Page 353: Inspection And Maintenance Instructions

    NOISE AND EMISSION CONTROL Inspection and Maintenance Fuel System • Cutting holes in, or cutting away Instructions part of noise insulators. • Removing or rendering engine speed governor inoperative, • Removing hood-mounted noise The following instructions are based on allowing engine speed to exceed insulation.
  • Page 354 NOISE AND EMISSION CONTROL Air Intake System Engine Mounted Noise Insulators Exhaust System • • • Do all checks and maintenance Check condition. Is the insulator Check for exhaust leaks, procedures listed in this manual secure? How you do this will which would indicate a leaking under Engine Air Intake System depend on the method of attaching...
  • Page 355 NOISE AND EMISSION CONTROL Joints and Clamps Selective Catalyst Reduction (SCR) Piping • • • Check for leaks, and tighten as Check SCR canister filter, clamps Check exhaust piping for rust, necessary. Check for deterioration and mounting brackets. Tighten if corrosion, or damage.
  • Page 356 NOISE AND EMISSION CONTROL Diesel Particulate Filters (DPF) Diesel Exhaust Fluid Tank CAUTION • Check diesel particulate filter The Diesel Exhaust Fluid (DEF) sys- (DPF), clamps, and mounting tem purges to prevent damage from brackets. Tighten if necessary. freezing. If your vehicle is equipped Inspect diesel particulate filter with battery disconnect switches, do (DPF) for signs of rust or corrosion.
  • Page 357 NOISE AND EMISSION CONTROL Exhaust Tail Pipe 3. Using a 27 mm socket wrench WARNING! • (DIN3124), remove the filter cap Check the mounting. Tighten as The exhaust piping can become ex- that is screwed to the DEF Supply necessary. The miter cut at the tip tremely hot during engine operation pump.
  • Page 358 NOISE AND EMISSION CONTROL Engine Fan and Shroud Hood Insulation Blanket Inner Fender Shields and Cab Skirts • • Check all fasteners for condition Check all fasteners that hold the WARNING! and security. Repair or replace fender shields in place. Do not work on the fan with the engine any broken or defective fasteners.
  • Page 359: Noise Control System - Maintenance Log

    NOISE AND EMISSION CONTROL Noise Control System - maintenance checks. Use the following log sheet and retain copies Maintenance Log of documents regarding maintenance services performed and parts replaced To ensure your vehicles noise control on the vehicle. requirements are maintained, record Noise Control System - Maintenance Log Recommended Repair Facility...
  • Page 360: Rear Axle And Suspension

    REAR AXLE AND SUSPENSION REAR AXLE AND WARNING! WARNING! SUSPENSION Do not operate the vehicle if the Failure to maintain the specified U-bolts are not properly tightened. torque values or to replace worn parts General Maintenance Loose U-bolts will cause the axle to can cause component system failure, not be properly secured to the sus- possibly resulting in an accident.
  • Page 361: Visual Inspection

    REAR AXLE AND SUSPENSION Visual Inspection • Visually check for loose or missing NOTE fasteners, cracks in hanger, or For all vehicles, mandatory Failure to follow these recommenda- axle connection brackets. maintenance procedures include tions could void warranty. retightening of U-bolts and complete •...
  • Page 362: Rear Suspension Fasteners

    REAR AXLE AND SUSPENSION Rear Suspension Fasteners U-Bolt Torque Rear Suspension Fasteners (Metric and Standard) To maintain the performance of the NOTE air suspension, check fastener torque SIZE/TYPE TORQUE * To ensure an accurate torque read- values after the first 2,000 miles (3,218 Lb-Ft ing, use properly maintained and cal- km) of service and every 60,000 miles...
  • Page 363: Rear Axle Lubrication

    REAR AXLE AND SUSPENSION Rear Axle Lubrication WARNING! Rear Suspension U-Bolts, Grade 8 (lubricated*) Check oil level with the vehicle parked Do not replace U-bolts and nuts with on level ground and the fluid warm. common U-bolts or standard nuts. U-BOLT SIZE TORQUE** The level should be even with the...
  • Page 364 REAR AXLE AND SUSPENSION Dana Spicer and Fabco CAUTION All Vehicles with Dana Spicer No initial drain is required on Dana and Fabco Axles: See Preventive Do not mix lubricants of different Spicer axles that are factory filled with Maintenance Schedule on page 5-12. grades;...
  • Page 365: Rear Axle Alignment

    REAR AXLE AND SUSPENSION Rear Axle Alignment Continual road shock and load stresses may force the rear axles out of alignment. If you detect rapid tire wear on the rear axles, you may have misaligned axles. If you suspect rapid tire wear, have your rear axle alignment checked and adjusted by an authorized dealer.
  • Page 366: Steering System

    STEERING SYSTEM STEERING SYSTEM any reason, the power assist system If the steering feels unbalanced from goes out, steering the vehicle is still side-to-side while turning, check for possible, yet it will require much Power Steering the following possible causes: greater effort.
  • Page 367: Fluid Level And Refill

    STEERING SYSTEM Fluid Level and Refill take your truck to an authorized • Maximum/Minimum level is dealer for evaluation. indicated on the reservoir. These Have the power steering fluid and same levels are also indicated by filters changed at an authorized dealer. two lines on the dipstick in the reservoir.
  • Page 368: Steering Shaft

    STEERING SYSTEM Steering Shaft between the Maximum and Bleed the system if necessary. Minimum level indicators. The following are common torque Fluid Filter Replacement specifications for most steering shafts. • Torque on U–joint pinch bolt and nut (7/16 in) 74–81 Nm (55 to 60 lb-ft), lubricated.
  • Page 369 STEERING SYSTEM WARNING! If this chassis is equipped with an elec- tronic stability system (ESP) and any part of the steering system (e.g., link- age, steering driveline, column, front- end alignment, etc) is repaired, re- moved, or disassembled in any way, or if the steering angle sensor is re- placed, the steering angle sensor must be recalibrated.
  • Page 370: Driveshaft Maintenance

    DRIVELINE DRIVELINE U-Joints For SPL170XL and SPL250XL, the U-joint lube interval changes after the Driveshaft Maintenance initial lube at 350,000 miles. After the first lube interval, the U-joint The slip joints and universal joints of needs lubrication every 150,000 miles. the driveshaft should be lubricated Inspection of the U-joints is the same periodically.
  • Page 371: Tires And Wheel

    TIRES AND WHEEL TIRES AND WHEEL right care will give you the assurance Checking Inflation Pressure of safe and reliable tire operation. Give your tires a visual test every day, Here are some tips on maintaining Tires and check inflation with a gauge every your tires.
  • Page 372 TIRES AND WHEEL Underinflated Tires WARNING! WARNING! Low pressure is a tire’s worst enemy. Do not operate a vehicle with underin- Do not attempt to raise the vehicle to Underinflation allows tires to flex flated tires. The extra heat caused by remove or install a damaged tire and improperly, causing high temperatures underinflation can cause sudden tire...
  • Page 373 TIRES AND WHEEL Overloaded Tires Overloading your truck is as damaging Proper-Inflation: the Over-Inflation: to your tires as underinflation. The correct profile for full reduces the tread following chart shows how neglect or contact with the road. contact area with the road surface, deliberate abuse can affect the life of concentrating all of...
  • Page 374 TIRES AND WHEEL Matching Tires WARNING! WARNING! Be sure to buy matched tires for Overinflated tires can cause acci- Do not install regrooved or reinforce- your vehicle, especially on the rear dents. They wear more quickly than ment-repaired tires on steering axles. axles.
  • Page 375 TIRES AND WHEEL Replacing Tires Greenhouse Gas Certified Tires WARNING! Front: Replace front tires when less Replacing a tire that is greenhouse Do not replace original equipment than 4/32 in. of tread remains. Check gas certified. tires with load ratings less than the at three places equally spaced around original tires.
  • Page 376 TIRES AND WHEEL Tire Chains Speed Restricted Tires Maintaining a greenhouse gas certified tire. If you need tire chains, install them on WARNING! both sides of each driving axle. This vehicle may be equipped with In order to limit the rolling resistance of speed restricted tires.
  • Page 377: Wheel Mounting And Fastening

    TIRES AND WHEEL Wheel Mounting and Wheel Cap Nut Torque WARNING! Fastening At the first scheduled lube interval, Never use oil or grease on studs or have all wheel cap nuts torqued to After the vehicle travels about 50 to 100 nuts;...
  • Page 378 TIRES AND WHEEL WHEEL and NUT STUD SIZE TORQUE FOR INNER and OUTER CAP NUTS and RIM CLAMP NUTS CONFIGURATION Lb-Ft 240-270 175-200 Stud Backnuts (when used) 3/4-16 1-14 240-410 175-300 Rim Clamp Nut Torque 1/2” Dia. 110-120 80-90 Cast Spoke Wheel Assembly 5/8”...
  • Page 379: Wheel Replacement With Disc Brake Option

    TIRES AND WHEEL Wheel Replacement with installing any replacement wheel, always inspect the tires/wheels to Disc Brake Option ensure there is adequate clearance between other vehicle components. WARNING! Use only the wheel brand, size and With the hood open, check for Nut Tightening Sequence for Stud part number originally installed.
  • Page 380: Disc Wheels

    TIRES AND WHEEL Disc Wheels WARNING! WARNING! WARNING! If the hood falls, anyone under it could Improperly mounting and demounting be injured. Always make sure that the tire and rim assemblies is dangerous. Use the correct components and tools hood hold open device engages when Failure to observe proper precautions when working on wheels.
  • Page 381: Wheel Bearing

    WHEEL BEARING WHEEL BEARING Wheel Bearing Adjustment For safe, reliable operation and adequate service life, your wheel bearings must be adjusted properly at the recommended intervals. Contact your authorized dealer to make sure the wheel bearings are properly adjusted. 5-145 (04/13) Y53-6047–2C...
  • Page 382: Transmission Maintenance

    TRANSMISSION MAINTENANCE TRANSMISSION Oil Change For more details, please refer to MAINTENANCE the maintenance section in the Change fluid according to change transmission manufacturer’s manual procedures specified in the Introduction or service literature. Transmission Service Manual. Use the recommended types of oil Proper maintenance of the CAUTION as specified in the Operation and...
  • Page 383: Transmission Lubricants

    TRANSMISSION MAINTENANCE Transmission Lubricants Service Intervals Standard Transmission Oil Level Manual Transmission For recommended types and brands NOTE Manual transmissions are designed so of all lubricants, see the transmission The vehicle must be parked on level that the internal parts operate in a bath manufacturer's Service Manual and ground.
  • Page 384: Automatic Transmissions

    TRANSMISSION MAINTENANCE Automatic Transmissions Automatic Transmission Oil Level Service Intervals NOTE Check daily with engine idling. See The vehicle must be parked on level Preventive Maintenance Schedule on ground. page 5-12 for service intervals. See the Transmission Operator's Manual for information on checking the transmission oil level.
  • Page 385 CLUTCH CLUTCH Clutch Hydraulic Fluid air to escape. Close the fitting when fluid starts coming out. Then refill the Visually inspect the clutch fluid from the reservoir. Repeat this until all air has Introduction reservoir. There are molded lines with been purged from the system.
  • Page 386 CLUTCH Clutch Adjustment Clutch Adjustment – Normal Wear Some clutches are self-adjusting, however; there are manually adjusted See the clutch manufacturer's Service clutches that will require the operator Manual for the proper adjustment to know when to adjust the clutch. The procedures.
  • Page 387: Information

    INFORMATION CONSUMER INFORMATION AND VEHICLE IDENTIFICATION Vehicle Identification ....6-3 General VIN Information ... . . 6-3 Component Identification.
  • Page 389: Consumer Information And Vehicle Identification

    Federal Regulations. G = 2016 Glider Kit Identification The Vehicle Identification Number is on the Peterbilt labels on the left hand 0 (zero) = Glider Kit door post. The VIN contains 17 digits. Plant Code The 10th digit is the code for the model year of your vehicle.
  • Page 390 CONSUMER INFORMATION AND VEHICLE IDENTIFICATION Chassis Number Certification Labels Components and Weights Label The Chassis Number refers to the last Your vehicle information and The Components and Chassis Weight six characters of the VIN. This number specifications are documented on Label is located on either the driver’s will allow your dealer to identify your labels.
  • Page 391 CONSUMER INFORMATION AND VEHICLE IDENTIFICATION Tire and Rim Data Label Noise Emission Label WARNING! The Tire, Rim and Weight Rating The Noise Emission Label is located Do not exceed the specified load rat- Data Label is located on the driver’s in the driver's side door frame.
  • Page 392: Component Identification

    CONSUMER INFORMATION AND VEHICLE IDENTIFICATION Component Identification Paint Identification Label Federal Safety Standard Certification Label The Paint Identification Label contains Each of the major components on the paint colors used by the factory The NHTSA regulations require a label your vehicle has an identification label to paint your vehicle.
  • Page 393 CONSUMER INFORMATION AND VEHICLE IDENTIFICATION 1. Axle Specification Number, usually stamped on the right rear side of the axle housing. This number identifies the complete axle. 2. Axle Housing Number Tag, usually located on the left forward side of the housing arm. This tag identifies the axle housing.
  • Page 394: Consumer Information

    CONSUMER INFORMATION CONSUMER How to Order Parts NHTSA Consumer INFORMATION Information Replacement parts may be obtained from an authorized dealership. If you believe that your vehicle has Federal Safety Standard a defect, which could cause a crash Certification Label When you order, it is IMPORTANT or could cause death or personal that you have the following information injury, you should immediately inform...
  • Page 395: Canadian Consumer Information

    CONSUMER INFORMATION Canadian Consumer Warranty Toll Free 888-327-4236 Greenhouse Gas Tires Information (800-4249153 TTY) 8:00 am to 10:00 pm ET Monday-Friday The following warranty is for vehicles Canadian customers who wish to report Office of Defects equipped with Greenhouse Gas a safety-related defect to Transport Investigations/CRD certified tires:...
  • Page 396 CONSUMER INFORMATION BY LAW, PACCAR EXPRESSLY The tires are separately warranted YOUR SOLE AND EXCLUSIVE DISCLAIMS ANY WARRANTY OF by their manufacturer for defects in REMEDY AGAINST PACCAR materials and workmanship other than MERCHANTABILITY OR FITNESS Inc IS LIMITED TO THE FOR A PARTICULAR PURPOSE those which cause non-compliance REPAIR OR REPLACEMENT...
  • Page 397: Index

    Index Index 5th wheel liftable/non-steerable pusher air pressure - air suspension air maintenance ....5-104 calibration ....4-45 bags #1 and #2.
  • Page 398 Index Air system maintenance... 5-48 Appliances......3-95 jump starting vehicles .
  • Page 399 Index Bulb specifications ....5-78 Cleaning vinyl and upholstery ..5-66 how to order parts ....6-8 Cleaning, protecting and weather Controls .
  • Page 400 Index Diesel exhaust fluid gauge ..3-12 remote keyless entry (RKE) descending a grade ... . . 4-54 Diesel Exhaust Fluid Tank ..5-120 system .
  • Page 401 Index batteries ......5-84 pipe and hose clamp torque Engine overspeed ....4-54 battery care .
  • Page 402 Index Fifth wheel slide switch ... . 3-63 Fuel specification ....4-61 speedometer..... . .3-9 Final stopping procedures .
  • Page 403 Index GCW - Gross Combination air conditioner button... . 3-86 hood hold downs ....1-15 Weight .
  • Page 404 Index fuel system..... . 5-102 Fuller transmission lubrication . 5-40 Main content area....3-19 Jump starting vehicles.
  • Page 405 Index steering and driveline ..5-130 shifting gears ....4-16 engine fan and shroud ..5-122 steering gear lubrication .
  • Page 406 Index Oil pressure gauge ....3-11 Parking brake valve....3-61 Rear axle and suspension Operating hydraulic clutch .
  • Page 407 Index batteries ......1-13 Safety restraint belts....1-22 Setting System Alarm .
  • Page 408 Index Speedometer ......3-9 Suspension dump switch..3-67 brake on/off switch .
  • Page 409 Index headlight switch ...3-56, 3-65 rear power take-off (PTO) ignition key ..... . . 3-54 switch .
  • Page 410 Index Tires ....... . 5-135 Trailer center dump gate switch . . 3-67 auxiliary transmission oil greenhouse gas certified tires.
  • Page 411 Index Vehicle identification cleaning ......5-66 engine, engine fan ....3-40 chassis number.
  • Page 412 Index turn signal, right ....3-42 Wheel spin control ....4-29 water in fuel (WIF).

This manual is also suitable for:

567

Table of Contents