Silvercrest SKMK 1200 A1 Operating Instructions Manual
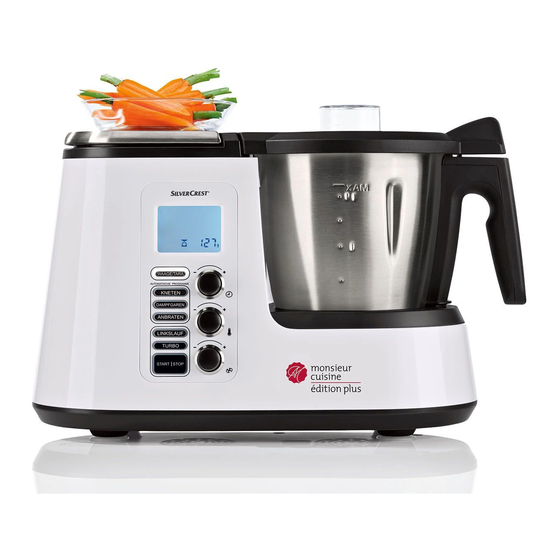
Monsieur cuisine édition plus
Hide thumbs
Also See for SKMK 1200 A1:
- Operating instructions manual (70 pages) ,
- Operating instructions manual (70 pages) ,
- Operating instructions manual (70 pages)

Related Manuals for Silvercrest SKMK 1200 A1


Summary of Contents for Silvercrest SKMK 1200 A1
- Page 1 MONSIEUR CUISINE ÉDITION PLUS SKMK 1200 A1 MONSIEUR CUISINE MONSIEUR CUISINE ÉDITION PLUS ÉDITION PLUS Operating instructions Instrucţiuni de utilizare IAN 277740...
- Page 2 Român ................... 2 English................... 34...
- Page 3 Privire de ansamblu / Overview TIME TEMP. SPEED REVERSE SCALE/TARE AUTOMATIC PROGRAMS KNEAD STEAMER ROAST REVERSE TURBO START STOP...
-
Page 4: Table Of Contents
Cuprins 1. Privire de ansamblu ................. 4 2. Afi aje ecran ..................5 3. Rezumatul func iilor ................6 4. Utilizare corespunz toare ..............7 5. Instruc iuni de siguran ..............8 6. Con inutul livr rii ................11 7. Scoaterea din ambalaj i asamblarea ..........12 8. - Page 5 14. Pr jire .................... 25 14.1 Informa ii generale despre programe ............25 14.2 Pornirea programului ................26 15. Cur area i între inerea aparatului ..........26 15.1 Cur area aparatului de baz ...............27 15.2 Cur area în ma ina de sp lat vase............27 15.3 Cur area accesoriilor ................27 15.4 Cur area, verificarea i înlocuirea garniturilor ........27 15.5 Decalcifierea ..................28...
-
Page 6: Privire De Ansamblu
1. Privire de ansamblu Capac pentru sitele de aburi Sit de aburi, plat Sit de aburi, adânc Garnitur de etan are pentru sita de aburi adânc (respecta i pozi ia corect ) Vasul de mixare Întrerup tor principal Cablu de alimentare cu techer de re ea Suport pentru vasul de mixare (cu coroan din at ) Orificiu de protec ie la preaplin... -
Page 7: Afi Aje Ecran
2. Afi aje ecran TIME TEMP. SPEED REVERSE Afi aj timp (1 secund pân la 90 de minute) Vasul de mixare nu este montat corect sau nu este închis corect Viteza selectat (1 – 4) este adecvat pentru tija de amestecare Temperatura alimentelor în vasul de mixare Afi aj greutate în grame pân la 5.000 g Afi aj vitez 1 –... -
Page 8: Rezumatul Func Iilor
3. Rezumatul func iilor Buton/instrument Func ie Observa ii de lucru cânt rire exact la gram cu func- pân la 5 kg SCALE/TARE 23/ ia Tara (seta i pe 0 pentru a Cântar 14 cânt ri mai multe ingrediente) amestecarea blând a alimente- REVERSE 19 lor, care nu trebuie m run ite Func ia se blocheaz... -
Page 9: Utilizare Corespunz Toare
V mul umim pentru 4. Utilizare încrederea corespunz toare dumneavoastr ! Robotul de buc t rie Monsieur Cuisine serve - te la amestecarea, mixarea, baterea, m run i- V felicit m pentru noul dumneavoastr ro- rea, pasarea, emulsionarea, g tirea la aburi, bot de buc t rie cu func ia de fierbere în bu irea, fr mântarea, pr jirea, fierberea i „Monsieur Cuisine Édition Plus”. -
Page 10: Instruc Iuni De Siguran
5. Instruc iuni de siguran Simboluri de avertizare Dac este necesar, în manualul de utilizare se vor folosi urm toarele simboluri de avertizare: PERICOL! Grad crescut de risc: Nerespectarea avertiz rii poate provoca v t m ri corporale i poate pune în pericol via a utilizatorului. AVERTIZARE! Grad mediu de risc: Nerespectarea avertiz rii poate provoca r niri grave sau poate cauza pagube importante produsului. - Page 11 Pentru a utiliza func ia Turbo, în vasul de mixare nu trebuie s se afle ingrediente fierbin i. Acestea ar putea fi aruncate afar i pot cauza arsuri. Cu itul de fixat în portcu it i tija de amestecare continu s se ro- teasc dup oprire.
- Page 12 Nici dup oprire aparatul nu este deco- nectat complet de la re eaua de alimen- PERICOL DE INCENDIU tare cu energie electric . Pentru a-l Înainte de a porni aparatul, a eza i-l pe deconecta, scoate i techerul. o suprafa plat , stabil , uscat i re- Asigura i-v astfel încât cablul de ali-...
-
Page 13: Con Inutul Livr Rii
6. Con inutul livr rii Nu a eza i niciodat pe o suprafa fierbinte, cum ar fi plita. 1 Robot de buc t rie cu func ie de fierbere Tija de amestecare se va utiliza numai „Monsieur Cuisine Édition Plus”, Aparat cu treptele de vitez 1 pân la 4. -
Page 14: Scoaterea Din Ambalaj I Asamblarea
7. Scoaterea din amba- 8. Cântar laj i asamblarea Cântarul de buc t rie incorporat permite cânt rirea exact la gramaj, pân la 5 kg. În produc ie, multe piese sunt prev zute cu Cântarul 14 este u or de operat i utilizat un film sub ire de ulei pentru protec ie. -
Page 15: Operarea Aparatului
6. Repeta i procedura cu un nou aliment 9.2 Pornirea i oprirea apa- sau lua i alimentul jos de pe cântar 14. ratului 7. Ap sa i un buton de program sau selec- • Seta i întrerup torul principal 6 de pe ta i o durat sau o temperatur , pentru partea posterioar a aparatului pe I: a dezactiva func ia de cânt rire. -
Page 16: Operarea Butoanelor
9.4 Operarea butoanelor Lumini/pâlpâirea Situa ie Func ia butonului butoanelor S-au efectuat set ri i se poa- Ap sa i butonul pentru a START/STOP 17 pâlpâie. te porni un program de ope- porni un program de opera- rare. START/STOP 17 luminea- Programul de lucru este ac- Ap sa i butonul pentru a tiv. -
Page 17: Setarea Timpului
9.5 Setarea timpului 9.6 Setarea temperaturii Cu ajutorul dispozitivului de temporiza- De la dispozitivul de reglare a temperaturii 24, prin r sucire, seta i durata proce- 15, seta i temperatura de preparare prin sului de fierbere, respectiv prelucrarea: rotire: • Roti i dispozitivul de temporizare 24 în Temperatura setabil este între 37 °C i direc ia „-”: Reducerea timpului 130 °C. -
Page 18: Setarea Vitezei
9.7 Setarea vitezei Pornire lin Pentru a preveni ca la accelerarea brusc s De la treapta de vitez 16, seta i viteza sar lichid fierbinte din alimentul aflat în vasul prin rotire: de mixare 5, sau pentru a preveni balansa- Viteza se poate regla în 10 trepte: rea aparatului, exist o pornire lin pentru - Treapta 1 –... -
Page 19: Func Ia Turbo
9.9 Func ia Turbo 9.10 Orificiu de protec ie la preaplin ATEN IE: În suportul pentru vasul de mixare 9 se afl La amestecarea lichidelor în vasul de un orificiu de protec ie la preaplin 10. mixare 5 trebuie s existe maximum 1 litru de lichide, deoarece altfel lichi- dul poate fi aruncat afar . -
Page 20: Utilizarea Vasului De Mixare
10. Utilizarea vasului de OBSERVA IE: • Pentru unele procese, în vasul de mixa- mixare re 5, nu ar trebui s existe prea pu in li- chid altfel aparatul nu va func iona f r OBSERVA IE: În acest manual de utilizare probleme. -
Page 21: Fixarea Vasului De Mixare
2. Ap sa i butonul de debloca- 10.3 Fixarea vasului de mi- re 34 de pe partea de jos a xare vasului de mixare 5 astfel încât 1. A eza i vasul de mixare 5 în suport 9. s indice spre simbolul de la- 2. -
Page 22: A Ezarea Capacului Vasului De Mixare
Pentru a scoate tija de amestecare 29, tra- • În cazul în care capacul 32 ge i-o în sus. nu este a ezat corect, pe ecran 25 apare simbolul spre dreapta. 10.5 A ezarea capacului va- sului de mixare Capacul vasului de mixare 32 poate fi a e- 10.6 Utilizarea capacului zat numai dac vasul de mixare 5 a fost fi- pentru orificiul de um-... -
Page 23: Fierberea I În Bu Irea Cu Recipientul Pentru Fierbere
10.7 Fierberea i în bu irea 10.8 Utilizarea spatulei cu recipientul pentru Spatula 30 serve te la amestecarea ingre- fierbere dientelor i la scoaterea recipientului pentru fierbere 28. 1. Umple i cel pu in 500 ml de ap în vasul de mixare 5. -
Page 24: G Tirea La Aburi
11. G tirea la aburi 11.2 Preg tirea sitelor de aburi PERICOL de r nire prin op ri- 1. A eza i vasul de mixare 5 în suport 9. 2. Turna i 1 litru de ap în vasul de mixa- La deschiderea capacului 1, respec- re 5. -
Page 25: Pornirea G Tirii La Aburi
OBSERVA II: OBSERVA IE: Pentru a porni programul îna- • În cazul în care sita de abu- inte de expirarea celor 10 minute, ap sa i din ri 3 nu este a ezat corect, nou butonul STEAM 21. pe ecran 25 , apare simbolul spre dreapta. -
Page 26: G Tirea La Aburi Cu Recipientul Pentru Fierbere
- Dac acesta este gata preparat, ap - 11.6 Protec ia împotriva su- sa i butonul START/STOP 17, iar la praînc lzirii final ap sa i întrerup torul princi- Aparatul are protec ie împotriva supraînc lzirii. pal 6, pentru a opri aparatul. Dac în vasul de mixare 5 nu mai este ap , iar - Dac mâncarea nu este gata înc , acest lucru duce la cre terea excesiv a tempe-... -
Page 27: Fr Mântare
13. Fr mântare 6. Dup expirarea timpului setat se aude un semnal acustic scurt, butoanele Cu aparatul acesta pute i fr mânta pân la ma- START/STOP 17 i KNEAD 22 se ximum 500 g de f in . Programul se opereaz sting, iar pe ecran 25 sunt afi ate toate numai cu cu itul de fixat în portcu it 27. -
Page 28: Pornirea Programului
15. Cur area i 14.2 Pornirea programului între inerea 1. Ad uga i pu in gr sime (ex. ulei) în va- aparatului sul de mixare 5. 2. Umple i cu alimente vasul de mixare 5. 3. Închide i vasul de mixare 5 cu capa- cul 32. -
Page 29: Cur Area Aparatului De Baz
15.1 Cur area aparatului de 3. Cur a i toate accesoriile manual într-o chiuvet , cu ap curat sau în ma ina de sp lat. 1. Cur a i aparatul de baz 12 cu o la- 4. La cur area manual cl ti i toate piese- vet umezit . -
Page 30: Decalcifierea
Sita de aburi adânc Depuneri de calcar mai complexe 1. Trage i garnitura 4 de pe partea interi- oar a sitei de aburi adânci 3. 2. Introduce i garnitura cur at sau o ATEN IE: nou garnitur 4 de etan are în sita de Nu utiliza i agen i uzuali de decalcifie- aburi adânc 3. -
Page 31: Defec Iuni, Cauze, Remediere
16. Defec iuni, cauze, remediere 16.1 Defec iuni de operare Defec iune Cauz Remediere Fixa i corect vasul de mixare 5 Vasul de mixare 5 nu este fi- (consulta i „Fixarea vasului de mi- xat corect xare” la pagina 19). Capacul 32 sau sita de aburi A eza i corect capacul 32 sau Aparatul nu porne te. -
Page 32: Mesaj De Defec Iune Pe Ecran
Defec iune Cauz Remediere Nu se poate seta o treapt de vitez mai Este setat o temperatur . Seta i temperatura pe 0. mare de treapta 3. 16.2 Mesaj de defec iune pe ecran Afi aj Cauz Remediere • Cu aparatul acesta pute i fr mânta pân la maximum 500 g de f in . -
Page 33: Eliminarea
În cazul în care dori i s arunca i ambalajul, respecta i prevederile na ionale în vigoare privind protec ia mediului. 18. Date tehnice Model: SKMK 1200 A1 Tensiune de alimentare: 230 V ~ 50/60 Hz Clasa de protec ie: I Putere: 1.200 wa i... -
Page 34: Garantat De Hoyer Handel Gmbh
20. Garantat de Domeniul de aplicare a garan iei Aparatul a fost produs cu grij , cu respectarea HOYER Handel GmbH strict a directivelor privind calitatea, i a fost Stimat client , stimate client, testat con tiincios înainte de livrare. Pentru acest aparat primi i o garan ie de Garan ia se aplic pentru defec iuni ale mate- 3 ani de la data cump r rii. - Page 35 • Un produs înregistrat astfel ca fiind de- fect poate fi apoi transmis împreun cu dovada achizi iei (bonul de cas ) i in- forma iile cu privire la defec iune i mo- mentul apari iei acesteia, la adresa Centrului de Service pus la dispozi ia dumneavoastr , cu taxare la destina ie.
- Page 36 Contents 1. Overview ..................36 2. Display screens ................37 3. Functions in an overview ............... 38 4. Intended purpose ................39 5. Safety instructions ................. 40 6. Items supplied ................43 7. Unpacking und setting up .............. 44 8. Scale ..................... 44 9.
- Page 37 14. Browning ..................58 14.1 General programme information ............58 14.2 Starting the program................58 15. Cleaning and servicing the device ..........58 15.1 Cleaning the base unit ................. 59 15.2 Cleaning in the dishwasher ..............59 15.3 Cleaning the accessories ..............59 15.4 Cleaning, checking and replacing seals ..........
-
Page 38: Overview
1. Overview Lid for the steamer baskets Steamer basket, shallow Steamer basket, deep Seal of the deep steamer basket (ensure the correct position) Blender jug Main switch Power cable with mains plug Mains power socket Holder for blender jug (with gear ring) Overflow hole Locking system Base unit... -
Page 39: Display Screens
2. Display screens TIME TEMP. SPEED REVERSE Time display (1 second to 90 minutes) Blender jug has not been positioned or closed correctly Selected speed (1 - 4) is suited for the mixer attachment Temperature of the food in the blender jug Display of the weight in grams up to 5,000 g Display of the speed 1 - 10 Set to anti-clockwise / active... -
Page 40: Functions In An Overview
3. Functions in an overview Button/Component Function Notes Weighing accurately to the gram up to 5 kg SCALE/TARE 23 / with tare function (set to 0 to Scale 14 weigh additional ingredients) Gentle mixing of food not to be REVERSE 19 chopped Function is blocked if the Briefly switch to the highest... -
Page 41: Intended Purpose
Thank you for your trust! 4. Intended purpose Monsieur Cuisine is used to mix, whisk, beat, Congratulations on the purchase of your stir, chop, mash, emulsify, steam, stew, knead, new “Monsieur Cuisine Édition Plus” food brown, cook and weigh food. processor with cooking function. -
Page 42: Safety Instructions
5. Safety instructions Warnings If necessary, the following warnings will be used in these user instructions: DANGER! High risk: failure to observe this warning may result in injury to life and limb. WARNING! Moderate risk: failure to observe this warning may result in injury or serious material damage. - Page 43 After being switched off, the blade assembly and the mixer attach- ment will continue to rotate for a while. Please wait until all parts have come to a standstill before unlocking the blender jug and opening the lid. This device is not intended to be operated using an external timer clock or a separate remote control system.
- Page 44 Even after it has been switched off, the device has not been completely discon- FIRE HAZARD nected from the mains. In order to fully Before turning the device on, place it on disconnect it, pull out the mains plug. a level, stable, dry, heat-resistant sur- Ensure that the power cable never de- face.
-
Page 45: Items Supplied
6. Items supplied The button TURBO must not be used when using the mixer attachment. 1 food processor with cooking function Use the blender jug exclusively with the “Monsieur Cuisine Édition Plus“, lid in place, otherwise liquid might be base unit 12 ejected. -
Page 46: Unpacking Und Setting Up
7. Unpacking und 8. Scale setting up The installed kitchen scales allows accurate weighing to the gram up to 5 kg. During production, a thin film of oil is ap- The scale 14 is easy to operate and ready plied to protect many components. Prior to for use unless another cycle is in operation. -
Page 47: Operating The Device
5. Add the new object to be weighed to 9.2 Switching the device on the existing object to be weighed. and off On the display 25 the weight of the • Set the main switch 6 on the rear to I: added object to be weighed is shown in - All buttons light up briefly. -
Page 48: Operating The Buttons
9.4 Operating the buttons Illumination/Flashing of Situation Function of the button the button(s) Settings were performed, Press the button to start a cy- START/STOP 17 flashes. and a cycle can be started. cle. The cycle is in operation. Press the button to stop a cy- START/STOP 17 lights up. -
Page 49: Setting The Time
9.5 Setting the time 9.6 Setting the temperature Turn the timer 24 to set the time of the Turn the temperature controller 15 to set cooking process or the processing: the cooking temperature: • Turn the timer 24 in the direction “-”: The adjustable temperature ranges from reduce time 37 °C to 130 °C. -
Page 50: Setting The Speed
9.7 Setting the speed Soft start In order to avoid that during sudden acceler- Turn the speed controller 16 to set the ation of hot food liquid is ejected from the speed: blender jug 5 or the device starts wobbling, The speed can be adjusted in 10 incre- a soft start is provided for all settings except ments:... -
Page 51: Turbo Function
9.9 Turbo function 9.10 Overflow In the holder of the blender jug 9 there is an overflow hole 10. CAUTION: When mixing liquids, the blender jug 5 must not contain more than 1 litre, since otherwise liquid might be ejected. Never use this function when the mixer attachment 29 is used. -
Page 52: Using The Blender Jug
10. Using the blender NOTE: • For some applications, the blender jug 5 should not contain an insufficient amount of liquid, so that the device can NOTE: these user instructions describe the function properly. Thus, for whipping basic functions such as mixing, chopping cream, for instance, you should use at and steaming. -
Page 53: Insert Blender Jug
2. Press the unlocking lever 34 10.3 Insert blender jug on the underside of the blender 1. Place the blender jug 5 into the holder jug 5 so that it points to the for the blender jug 9. open lock symbol. 2. -
Page 54: Put On The Lid Of The Blender Jug
10.5 Put on the lid of the 10.6 Use the lid for the filler blender jug opening The lid for the blender jug 32 can only be Simultaneously, the measuring beaker 33 is placed on if the blender jug 5 was inserted used to close the lid of the blender jug 5 and correctly. -
Page 55: Using The Spatula
5. Use the main switch 6 to switch on the 10.8 Using the spatula device. The spatula 30 is used to stir the ingredients 6. Use the timer 24 to set the desired and to remove the cooking pot 28. time. -
Page 56: Steaming
11. Steaming DANGER! Risk of injury through scalding! When opening the lid 1 or 32 during operation, hot steam may escape. NOTE: these user instructions describe the basic functions such as mixing, chopping and steaming. For information on the prepa- ration of special dishes, refer to the recipe 3. -
Page 57: Starting The Steaming Process
• In order to facilitate the attaching of the steamer attachment 3 somewhat, put a NOTE: in order to start the programme before few drops of oil on a cloth and rub it on the 10 minutes elapsed, press the flashing but- the seal 4. -
Page 58: Steaming With The Cooking Pot
3. Check the condition of the food to be 11.6 Overheating protection cooked with a longer stick or a fork: The device has an overheating protection - Once the food to be cooked is done, system. As soon as there is no water left in press button START/STOP 17 and the blender jug 5 thus causing the device to then the main switch 6 to switch off... -
Page 59: Kneading
13. Kneading 6. After the time set elapsed, a short signal sounds, the buttons START/STOP 17 The appliance can be used to process up to and KNEAD 22 go off and the dis- max. 500 g of flour. The programme is only play 25 shows all values with 0 (except operated with the blade assembly 27. -
Page 60: Browning
14. Browning 6. Press the flashing button START/ STOP 17. With this programme, you can slightly The programme is started. The time set is brown up to 200 g meat, fish, vegetables, counted down on the display 25. The e.g. to release roasting flavours. Large piec- button ROAST 20 lights up. -
Page 61: Cleaning The Base Unit
CAUTION: 15.3 Cleaning the accessories Never use any abrasive, corrosive or 1. Rinse the blender jug 5 with warm wa- scratching cleaning agents. These might ter and dump the water. damage the device. 2. Remove the blade assembly 27 (see NOTE: “Using and removing the blade assem- •... -
Page 62: Descaling
3. Insert the cleaned seal or a new one. Major limescale deposits 4. Before using the device again, reinsert the blade assembly 27. CAUTION: Do not use commercially available des- Deep steamer basket caling agent, not even glacial acetic 1. Pull seal 4 off the underside of the deep acid or vinegar essence. -
Page 63: Malfunctions, Cause, Remedy
16. Malfunctions, Cause, Remedy 16.1 Malfunctions during operation Malfunction Cause Remedy Blender jug 5 is not posi- Insert blender jug 5 correctly (see tioned correctly “Insert blender jug” on page 51). Lid 32 or deep steamer bas- ket 3 have not been placed Place lid 32 or deep steamer bas- Device does not start. -
Page 64: Error Messages On The Display
16.2 Error messages on the display Display Cause Remedy • The appliance can be used to pro- The device is overloaded. cess up to max. 500 g of flour. Odour / smoke may devel- • Let the device cool down completely. Afterwards, it is ready for use again. -
Page 65: Disposal
When disposing of the packaging, make sure you comply with the environmental reg- ulations applicable in your country. 18. Technical specifications Model: SKMK 1200 A1 Mains voltage: 230 V ~ 50/60 Hz Protection class: Power rating: 1,200 watt Blender: 800 watt... -
Page 66: Warranty Of The Hoyer Handel Gmbh
20. Warranty of the Excluded from the warranty are wear parts subject to normal wear HOYER Handel GmbH and damages to fragile parts, e.g. Dear Customer, switches, batteries, lamps or other your device is provided with a 3 year war- parts manufactured from glass. - Page 67 Service Centre Service Romania Tel.: 0800896637 E-Mail: hoyer@lidl.ro IAN: 277740 Supplier Please note that the following address is no service address. First contact the afore- mentioned Service Centre. HOYER Handel GmbH Tasköprüstraße 3 DE-22761 Hamburg GERMANY...
- Page 70 HOYER HANDEL GMBH Tasköprüstraße 3 22761 Hamburg Germany Data reviziei · Status of information: 05/2016 · Ident.-Nr.: SKMK 1200 A1 IAN 277740...
Need help?
Do you have a question about the SKMK 1200 A1 and is the answer not in the manual?
Questions and answers