
Related Manuals for Silvercrest MONSIEUR CUISINEÉDITION PLUS


Summary of Contents for Silvercrest MONSIEUR CUISINEÉDITION PLUS
- Page 1 MONSIEUR CUISINE ÉDITION PLUS SKMK 1200 A1 MONSIEUR CUISINE MONSIEUR CUISINE ÉDITION PLUS ÉDITION PLUS Istruzioni per l’uso Operating instructions IAN 277740...
- Page 2 Italiano ..................2 English ................... 36...
- Page 3 Panoramica / Overview TEMPO TEMP. VEL. REVERSE BILANCIA / TARA PROGR. AUTO. IMPAST. COTT. VAP. ROSOLARE REVERSE TURBO START STOP...
-
Page 4: Table Of Contents
Indice 1. Panoramica ..................4 2. Indicazioni del display ..............5 3. Panoramica delle funzioni ............... 6 4. Uso conforme .................. 7 5. Istruzioni per la sicurezza ..............8 6. Materiale in dotazione ..............11 7. Disimballaggio e posizionamento ..........12 8. - Page 5 14. Rosolatura ..................26 14.1 Informazioni generali sul programma ............26 14.2 Avvio del programma ................26 15. Pulizia e manutenzione dell'apparecchio ........27 15.1 Pulizia dell’apparecchio base ...............27 15.2 Pulizia in lavastoviglie ................27 15.3 Pulizia degli accessori .................28 15.4 Pulizia, controllo e sostituzione delle guarnizioni ........28 15.5 Decalcificazione .................29 15.6 Conservazione ..................29 16.
-
Page 6: Panoramica
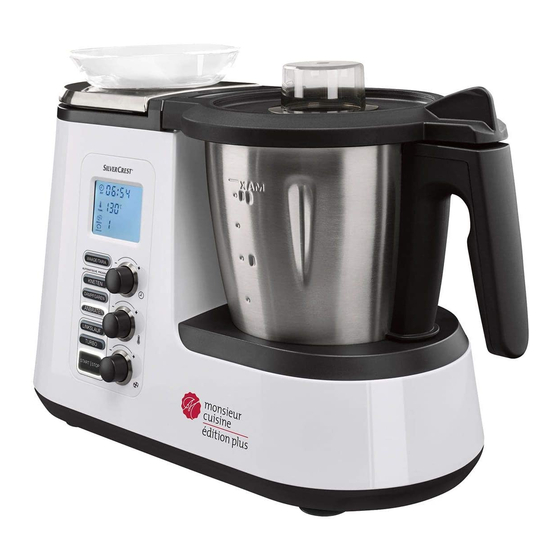
1. Panoramica Coperchio dei cestelli vapore Cestello vapore, piano Cestello vapore, fondo Guarnizione del cestello vapore fondo (assicurarsi che la posizione sia corretta) Caraffa Interruttore principale Cavo di collegamento con spina Presa di rete Sede per la caraffa (con corona dentata) Sfioratore Dispositivo di bloccaggio Base... -
Page 7: Indicazioni Del Display
2. Indicazioni del display TEMPO TEMP. VEL. REVERSE Indicazione del tempo (da 1 secondo a 90 minuti) La caraffa non è collocata o non è chiusa correttamente La velocità selezionata (1 - 4) è adatta per l’accessorio mixer Temperatura degli alimenti nella caraffa Indicazione del peso in grammi, fino a 5.000 g Indicazione della velocità... -
Page 8: Panoramica Delle Funzioni
3. Panoramica delle funzioni Tasto/strumento di Funzione Note lavoro Pesatura con precisione al gram- Fino a 5 kg BILANCIA/TARA 23 / mo e funzione di tara (mettere su Bilancia 14 0 per pesare ulteriori ingredien- Mescolatura delicata di alimenti REVERSE 19 che non vanno triturati La funzione è... -
Page 9: Uso Conforme
Vi ringraziamo per la 4. Uso conforme vostra fiducia! Il Monsieur Cuisine serve a mescolare, frullare, sbattere, montare, triturare, passare, emulsio- Congratulazioni per l’acquisto del vostro nare, cuocere (delicatamente) al vapore, impa- nuovo robot da cucina con funzione di cot- stare, rosolare e pesare alimenti e nutrimenti. -
Page 10: Istruzioni Per La Sicurezza
5. Istruzioni per la sicurezza Avvertenze di sicurezza Laddove necessario, nel presente manuale d'uso vengono utilizzate le seguenti avvertenze di sicurezza: PERICOLO! Rischio elevato: la mancata osservanza di questa avvertenza può es- sere causa di danni a persone. AVVERTENZA! Rischio medio: la mancata osservanza di questa avvertenza può essere causa di lesioni o gravi danni materiali. - Page 11 Quando si utilizza la funzione turbo, nella caraffa non devono tro- varsi ingredienti caldi. Potrebbero infatti venire espulsi causando scottature. Dopo lo spegnimento, l'inserto lame e l'accessorio mixer continua- no a girare per inerzia. Attendere che si arrestino prima di sblocca- re la caraffa e aprire il coperchio.
- Page 12 facilmente accessibile anche dopo il la fornita è tale che, quando mescola in collegamento. senso orario, non può entrare in contatto Assicurarsi che il cavo di collegamento con l’inserto lame in funzione. Non usare non possa essere danneggiato da bordi la spatola con l’accessorio mixer.
-
Page 13: Materiale In Dotazione
AVVERTENZA: rischio di danni L'apparecchio è dotato di piedini anti- scivolo con ventose di plastica. Dato materiali che i mobili sono rivestiti con un gran Collocare l'apparecchio solo su una su- numero di vernici e materie plastiche e perficie piana, asciutta, non scivolosa e vengono trattati con prodotti diversi, resistente all’acqua, in modo che non non è... -
Page 14: Disimballaggio E Posizionamento
7. Disimballaggio e 8. Bilancia posizionamento La bilancia da cucina incorporata consente di pesare fino a 5 kg con precisione al Durante la produzione molti pezzi vengono grammo. dotati di una sottile pellicola d’olio a scopo La bilancia 14 è facile da usare ed è pronta di protezione. -
Page 15: Uso Dell'apparecchio
9.2 Accensione e spegni- 5. Aggiungere i nuovi oggetti da pesare all’oggetto presente. mento dell'apparecchio Sul display 25 compare il peso dei nuo- • Portare l'interruttore principale 6 sul vi oggetti da pesare in grammi. lato posteriore su I: 6. Ripetere l'operazione con nuovi oggetti - Tutti i tasti si accendono brevemente. -
Page 16: Uso Dei Tasti
9.4 Uso dei tasti Accensione/lampeggia- mento del tasto o dei Situazione Funzione del tasto tasti Sono state effettuate le impo- Premere il tasto per avviare START/STOP 17 lampeg- stazioni e può iniziare un'operazione. gia. un'operazione. START/STOP 17 lampeg- È in corso un’operazione. Premere il tasto per arrestare gia. -
Page 17: Impostazione Del Tempo
9.5 Impostazione del tempo 9.6 Impostazione della tem- peratura Girando il selettore del tempo 24 è pos- sibile impostare la durata della cottura o del- La temperatura di cottura si imposta girando la preparazione: il termostato • Girare il selettore del tempo 24 in dire- È... -
Page 18: Impostazione Della Velocità
9.7 Impostazione della velo- Avviamento dolce Per evitare che un'accelerazione improvvisa cità causi l’espulsione di alimenti caldi dalla ca- La velocità si imposta girando il selettore di raffa 5 o che l’apparecchio inizi a traballa- velocità re, per tutte le impostazioni, esclusa la Si possono impostare 10 livelli di veloci- funzione turbo, esiste un avviamento dolce: tà:... -
Page 19: Funzione Turbo
9.9 Funzione turbo 9.10 Sfioratore Nella sede della caraffa 9 si trova uno sfio- ratore 10. ATTENZIONE: Quando si mescolano liquidi, nella ca- raffa 5 può trovarsi massimo 1 litro, al- trimenti il liquido può venire espulso. Non usare in nessun caso questa funzio- ne quando si utilizza l’accessorio mixer 29. -
Page 20: Utilizzo Della Caraffa
10. Utilizzo della caraffa zionare correttamente. Ad es., quando si monta panna è meglio utilizzare 200 ml e quando si sbattono gli albumi è meglio uti- NOTA: il presente manuale di istruzioni per lizzare almeno due. l'uso spiega le funzioni di base come la misce- lazione, la triturazione e la cottura al vapore. -
Page 21: Collocazione Della Caraffa
3. Premere con attenzione l'inserto la- • Se la caraffa 5 non è collocata corretta- me 27 verso l'alto. mente, il meccanismo di sicurezza impe- disce il funzionamento dell’apparecchio. Per inserire l’inserto lame 27, procedere come segue: 4. Collocare la caraffa 5 in posizione 10.4 Collocazione e smontag- orizzontale. -
Page 22: Collocazione Del Coperchio Della Caraffa
10.5 Collocazione del coper- • Se il coperchio 32 non è col- locato correttamente, sul di- chio della caraffa splay 25 compare il simbolo Il coperchio della caraffa 32 può essere col- illustrato a destra. locato solo se la caraffa 5 è stata posiziona- ta correttamente. -
Page 23: Utilizzo Della Spatola
10.8 Utilizzo della spatola - Se gli alimenti non sono completa- mente coperti dall’acqua, vengono La spatola 30 serve a mescolare gli ingre- cotti al vapore. dienti e a togliere il cestello di cottura 28. 2. Introdurre gli alimenti nel cestello di cot- tura 28. -
Page 24: Cottura Al Vapore
11. Cottura al vapore PERICOLO di lesioni da scotta- tura! Quando si apre il coperchio 1 o 32 du- rante il funzionamento, può fuoriuscire del vapore caldo. NOTA: il presente manuale di istruzioni per l'uso spiega le funzioni di base come la mi- scelazione, la triturazione e la cottura al va- 3. -
Page 25: Avvio Della Cottura Al Vapore
• Per rendere più semplice l’applicazione dell’accessorio vapore 3, inserire alcu- NOTA: per avviare il programma prima che ne gocce d’olio su un panno e sfregare siano trascorsi i 10 minuti, premere una volta la guarnizione 4 con queste. il tasto lampeggiante COTT. VAP. 21. 6. -
Page 26: Controllo Del Punto Di Cottura
11.4 Controllo del punto di 11.5 Cottura al vapore con il cottura cestello di cottura Bisognerebbe fare attenzione a non cuocere gli alimenti troppo a lungo, altrimenti le ver- NOTA: è possibile utilizzare il programma dure possono ammorbidirsi troppo e la car- di cottura al vapore anche con il cestello di ne e il pesce possono diventare troppo cottura 28. -
Page 27: Suggerimenti Per La Cottura Al Vapore
12. Suggerimenti per la Temperatura preimpostata: 0 °C (fissa) Velocità preimpostata: 4 (fissa) cottura al vapore Rotazione destrorsa/sinistrorsa: viene La cottura al vapore è una delle possibilità gestita dal programma più sane di cuocere lentamente gli alimenti. Oltre al mantenimento di gran parte delle 13.2 Avvio del programma sostanze nutrienti e del colore degli alimen- ti, per la gioia dei buongustai anche il sapo-... -
Page 28: Rosolatura
14. Rosolatura 5. Premere il tasto ROSOLARE 20. Il ta- sto ROSOLARE 20 si accende e i valo- Questo programma consente di rosolare ri del programma vengono indicati sul leggermente fino a 200 g di carne, pesce, display 25. verdura e spezie, ad esempio per liberare gli aromi. -
Page 29: Pulizia E Manutenzione Dell'apparecchio
15. Pulizia e manutenzio- 15.1 Pulizia dell’apparecchio ne dell'apparecchio base 1. Pulire l'apparecchio base 12 con uno straccio umido. Si può usare anche un PERICOLO di scossa elettrica! poco di detergente. Prima di qualsiasi intervento di pulizia, 2. Quindi passarvi uno straccio pulito con staccare la spina 7 dalla presa di cor- acqua senza detergente. -
Page 30: Pulizia Degli Accessori
15.3 Pulizia degli accessori Inserto lame 1. Togliere l'inserto lame 27 dalla caraf- 1. Sciacquare la caraffa 5 con acqua cal- fa 5 (vedere “Inserimento e smontaggio da e ribaltarla per farne scolare l’ac- dell'inserto lame” a pagina 18). qua. 2. -
Page 31: Decalcificazione
15.5 Decalcificazione 15.6 Conservazione Quando si cucina al vapore con acqua con- • Conservare l’apparecchio al riparo da polvere e sporcizia e fuori della portata tenente calcare, può accumularsi del calca- dei bambini. re sui pezzi, in particolare sulla caraffa 5. Pulizia normale Nella maggior parte dei casi è... -
Page 32: Guasti, Causa, Eliminazione
16. Guasti, causa, eliminazione 16.1 Guasti durante il funzionamento Guasto Causa Eliminazione Inserire correttamente la caraffa 5 Caraffa 5 non inserita corret- (vedere “Collocazione della caraf- tamente fa” a pagina 19). Il coperchio 32 o il cestello Collocare correttamente il coper- L'apparecchio non si vapore fondo 3 non sono col- chio 32 o il cestello vapore fon-... -
Page 33: Segnalazioni D'errore Sul Display
Guasto Causa Eliminazione Alcuni alimenti o alcune spe- Il colore di alcune parti zie (ad es. il curry) possono Non è necessario alcun rimedio dell'apparecchio è al- causare alterazioni del colore poiché il fenomeno è innocuo. terato. della plastica. Non si tratta di un errore dell'apparecchio Non è... -
Page 34: Smaltimento
17. Smaltimento 19. Ordinazione di accessori Questo prodotto è soggetto alla Direttiva europea Sul nostro sito web si possono ottenere infor- 2012/19/UE. Il simbolo del mazioni sugli accessori che è possibile ordi- bidone della spazzatura su nare. ruote barrato significa che all’interno dell’Unione Euro- pea il prodotto deve essere smaltito separata- Ordinazione online... -
Page 35: Garanzia Della Hoyer Handel Gmbh
20. Garanzia della La garanzia si applica agli errori di materia- le o produzione. HOYER Handel GmbH Sono escluse dalla garanzia i pezzi Gentile cliente, soggetti a normale usura e i danni a questo apparecchio è dotato di una garan- parti fragili quali interruttori, batte- zia di 3 anni a decorrere dalla data d'acqui- rie, lampadine o altri pezzi realizzati... - Page 36 • Il prodotto registrato come difettoso po- trà poi essere inviato a carico del desti- natario all'indirizzo del centro assistenza che Le verrà comunicato, allegando la prova d'acquisto (scontrino) e indicando in che cosa consiste il difetto e quando si è...
- Page 38 Contents 1. Overview ..................38 2. Display screens ................39 3. Functions in an overview ............... 40 4. Intended purpose ................41 5. Safety instructions ................. 42 6. Items supplied ................45 7. Unpacking und setting up .............. 46 8. Scale ..................... 46 9.
- Page 39 14. Browning ..................60 14.1 General programme information ............60 14.2 Starting the program................60 15. Cleaning and servicing the device ..........60 15.1 Cleaning the base unit ................. 61 15.2 Cleaning in the dishwasher ..............61 15.3 Cleaning the accessories ..............61 15.4 Cleaning, checking and replacing seals ..........
-
Page 40: Overview
1. Overview Lid for the steamer baskets Steamer basket, shallow Steamer basket, deep Seal of the deep steamer basket (ensure the correct position) Blender jug Main switch Power cable with mains plug Mains power socket Holder for blender jug (with gear ring) Overflow hole Locking system Base unit... -
Page 41: Display Screens
2. Display screens TEMPO TEMP. VEL. REVERSE Time display (1 second to 90 minutes) Blender jug has not been positioned or closed correctly Selected speed (1 - 4) is suited for the mixer attachment Temperature of the food in the blender jug Display of the weight in grams up to 5,000 g Display of the speed 1 - 10 Set to anti-clockwise / active... -
Page 42: Functions In An Overview
3. Functions in an overview Button/Component Function Notes Weighing accurately to the gram up to 5 kg BILANCIA/TARA 23 / with tare function (set to 0 to Scale 14 weigh additional ingredients) Gentle mixing of food not to be REVERSE 19 chopped Function is blocked if the Briefly switch to the highest... -
Page 43: Intended Purpose
Thank you for your trust! 4. Intended purpose Monsieur Cuisine is used to mix, whisk, beat, Congratulations on the purchase of your stir, chop, mash, emulsify, steam, stew, knead, new “Monsieur Cuisine Édition Plus” food brown, cook and weigh food. processor with cooking function. -
Page 44: Safety Instructions
5. Safety instructions Warnings If necessary, the following warnings will be used in these user instructions: DANGER! High risk: failure to observe this warning may result in injury to life and limb. WARNING! Moderate risk: failure to observe this warning may result in injury or serious material damage. - Page 45 After being switched off, the blade assembly and the mixer attach- ment will continue to rotate for a while. Please wait until all parts have come to a standstill before unlocking the blender jug and opening the lid. This device is not intended to be operated using an external timer clock or a separate remote control system.
- Page 46 Even after it has been switched off, the device has not been completely discon- FIRE HAZARD nected from the mains. In order to fully Before turning the device on, place it on disconnect it, pull out the mains plug. a level, stable, dry, heat-resistant sur- Ensure that the power cable never de- face.
-
Page 47: Items Supplied
6. Items supplied The button TURBO must not be used when using the mixer attachment. 1 food processor with cooking function Use the blender jug exclusively with the “Monsieur Cuisine Édition Plus“, lid in place, otherwise liquid might be base unit 12 ejected. -
Page 48: Unpacking Und Setting Up
7. Unpacking und 8. Scale setting up The installed kitchen scales allows accurate weighing to the gram up to 5 kg. During production, a thin film of oil is ap- The scale 14 is easy to operate and ready plied to protect many components. Prior to for use unless another cycle is in operation. -
Page 49: Operating The Device
9.2 Switching the device on 5. Add the new object to be weighed to the existing object to be weighed. and off On the display 25 the weight of the • Set the main switch 6 on the rear to I: added object to be weighed is shown in - All buttons light up briefly. -
Page 50: Operating The Buttons
9.4 Operating the buttons Illumination/Flashing of Situation Function of the button the button(s) Settings were performed, Press the button to start a cy- START/STOP 17 flashes. and a cycle can be started. cle. The cycle is in operation. Press the button to stop a cy- START/STOP 17 lights up. -
Page 51: Setting The Time
9.5 Setting the time 9.6 Setting the temperature Turn the timer 24 to set the time of the Turn the temperature controller 15 to set cooking process or the processing: the cooking temperature: • Turn the timer 24 in the direction “-”: The adjustable temperature ranges from reduce time 37 °C to 130 °C. -
Page 52: Setting The Speed
9.7 Setting the speed Soft start In order to avoid that during sudden acceler- Turn the speed controller 16 to set the ation of hot food liquid is ejected from the speed: blender jug 5 or the device starts wobbling, The speed can be adjusted in 10 incre- a soft start is provided for all settings except ments:... -
Page 53: Turbo Function
9.9 Turbo function 9.10 Overflow In the holder of the blender jug 9 there is an overflow hole 10. CAUTION: When mixing liquids, the blender jug 5 must not contain more than 1 litre, since otherwise liquid might be ejected. Never use this function when the mixer attachment 29 is used. -
Page 54: Using The Blender Jug
10. Using the blender NOTE: • For some applications, the blender jug 5 should not contain an insufficient amount of liquid, so that the device can NOTE: these user instructions describe the function properly. Thus, for whipping basic functions such as mixing, chopping cream, for instance, you should use at and steaming. -
Page 55: Insert Blender Jug
10.3 Insert blender jug 2. Press the unlocking lever 34 on the underside of the blender 1. Place the blender jug 5 into the holder jug 5 so that it points to the for the blender jug 9. open lock symbol. 2. -
Page 56: Put On The Lid Of The Blender Jug
10.5 Put on the lid of the 10.6 Use the lid for the filler blender jug opening The lid for the blender jug 32 can only be Simultaneously, the measuring beaker 33 is placed on if the blender jug 5 was inserted used to close the lid of the blender jug 5 and correctly. -
Page 57: Using The Spatula
10.8 Using the spatula 5. Use the main switch 6 to switch on the device. The spatula 30 is used to stir the ingredients 6. Use the timer 24 to set the desired and to remove the cooking pot 28. time. -
Page 58: Steaming
11. Steaming DANGER! Risk of injury through scalding! When opening the lid 1 or 32 during operation, hot steam may escape. NOTE: these user instructions describe the basic functions such as mixing, chopping and steaming. For information on the prepa- ration of special dishes, refer to the recipe 3. -
Page 59: Starting The Steaming Process
• In order to facilitate the attaching of the steamer attachment 3 somewhat, put a NOTE: in order to start the programme before few drops of oil on a cloth and rub it on the 10 minutes elapsed, press the flashing but- the seal 4. -
Page 60: Steaming With The Cooking Pot
11.6 Overheating protection 3. Check the condition of the food to be cooked with a longer stick or a fork: The device has an overheating protection - Once the food to be cooked is done, system. As soon as there is no water left in press button START/STOP 17 and the blender jug 5 thus causing the device to then the main switch 6 to switch off... -
Page 61: Kneading
13. Kneading 6. After the time set elapsed, a short signal sounds, the buttons START/STOP 17 The appliance can be used to process up to and IMPAST. 22 go off and the dis- max. 500 g of flour. The programme is only play 25 shows all values with 0 (except operated with the blade assembly 27. -
Page 62: Browning
14. Browning 6. Press the flashing button START/ STOP 17. With this programme, you can slightly The programme is started. The time set is brown up to 200 g meat, fish, vegetables, counted down on the display 25. The e.g. to release roasting flavours. Large piec- button ROSOLARE 20 lights up. -
Page 63: Cleaning The Base Unit
15.3 Cleaning the accessories CAUTION: Never use any abrasive, corrosive or 1. Rinse the blender jug 5 with warm wa- scratching cleaning agents. These might ter and dump the water. damage the device. 2. Remove the blade assembly 27 (see NOTE: “Using and removing the blade assem- •... -
Page 64: Descaling
Major limescale deposits 3. Insert the cleaned seal or a new one. 4. Before using the device again, reinsert the blade assembly 27. CAUTION: Do not use commercially available des- Deep steamer basket caling agent, not even glacial acetic 1. Pull seal 4 off the underside of the deep acid or vinegar essence. -
Page 65: Malfunctions, Cause, Remedy
16. Malfunctions, Cause, Remedy 16.1 Malfunctions during operation Malfunction Cause Remedy Blender jug 5 is not posi- Insert blender jug 5 correctly (see tioned correctly “Insert blender jug” on page 53). Lid 32 or deep steamer bas- ket 3 have not been placed Place lid 32 or deep steamer bas- Device does not start. -
Page 66: Error Messages On The Display
16.2 Error messages on the display Display Cause Remedy • The appliance can be used to pro- The device is overloaded. cess up to max. 500 g of flour. Odour / smoke may devel- • Let the device cool down completely. Afterwards, it is ready for use again. -
Page 67: Disposal
17. Disposal 19. How to order accessories This product is subject to the provisions of European Direc- On our website you can find information re- tive 2012/19/EC.The sym- garding the accessories that can be reor- bol showing a wheelie bin dered. -
Page 68: Warranty Of The Hoyer Handel Gmbh
20. Warranty of the Excluded from the warranty are wear parts subject to normal wear HOYER Handel GmbH and damages to fragile parts, e.g. Dear Customer, switches, batteries, lamps or other your device is provided with a 3 year war- parts manufactured from glass. - Page 69 Service Centre Service Italy Tel.: 02 36003201 E-Mail: hoyer@lidl.it IAN: 277740 Supplier Please note that the following address is no service address. First contact the afore- mentioned Service Centre. HOYER Handel GmbH Tasköprüstraße 3 DE-22761 Hamburg GERMANY...
- Page 70 HOYER HANDEL GMBH Tasköprüstraße 3 22761 Hamburg Germany Stato attuale delle conoscenze · Status of information: 05/2016 · Ident.-Nr.: SKMK 1200 A1 IAN 277740...
Need help?
Do you have a question about the MONSIEUR CUISINEÉDITION PLUS and is the answer not in the manual?
Questions and answers