Table of Contents
Advertisement
Available languages
Available languages
Advertisement
Chapters
Table of Contents

Related Manuals for Audiovox D1929B


Summary of Contents for Audiovox D1929B
- Page 1 D1929B 9 inch Portable DVD Player Reproductor DVD Portátil de 9 pulgadas...
-
Page 2: Important Safety Instructions
Important Safety Instructions Some of the following information may not apply to your particular product; however, as with any electronic product, precautions should be observed during handling and use. Read these instructions. Keep these instructions. Heed all warnings. Follow all instructions. Do not use this apparatus near water. - Page 3 Wait for about one hour till the moisture evaporates before operating the unit. When using your portable DVD player, do not sit or stand too close to the screen. To use a headset safely, please keep the following in mind: - Do not play your headset at a high volume.
- Page 4 CAUTION WARNING: TO PREVENT FIREOR ELECTRICAL SHOCK HAZARD,DO NOT EXPOSE THIS PRODUCT TO RAIN OR MOISTURE. FCC Information This device complies with part 15 of the FCC rules. Operation is subject to the following two conditions: (1) This device may not cause harmful interference, and (2) This device must accept any interference received, including interference which may cause undesired operation.
- Page 5 Manufacturer/Responsible Party Audiovox Electronics Corp., 150 Marcus Blvd., Hauppauge, NY 11788 This class B digital apparatus complies with Canadian ICES-003. Cet appareil numérique de la classe B est conforme à la norme NMB-003 du Canada.
-
Page 6: Table Of Contents
Content A. Introduction ... 7 B. DVD and Disc Information ... 7 C. Contents ... 8 D. Powering and installation ... 8 E. Vehicle Installation ... 9 F. Controls, Indicators, and Connectors... 10 G. Loading and Playing a Disc ... 11 H. -
Page 7: Introduction
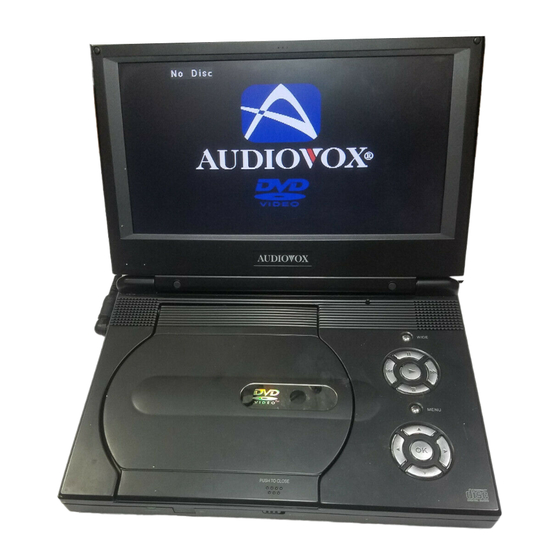
A. Introduction Thank you for choosing the D1929B portable DVD player. The main features include a 9" wide Screen (16:9 Aspect Ratio) Liquid Crystal Display (LCD) monitor and a DVD player. The unit applies the latest state of the art electronics and is designed for use in hotels, offices or your home. -
Page 8: C. Contents
C. Contents 1. 1 x 9’’ Portable DVD Player 2. 1 x Remote Control with battery (CR2025) 3. 1 x Audio/Video Cable 4. 1 x AC to DC Adapter 5. 1 x Automotive Power Adapter 6. 1 x Instruction Manual 7. -
Page 9: Vehicle Installation
E. Vehicle Installation Installing the DVD Player onto the Seat Back in a Car (Refer to Figure 2) Carrying Bag Closed Elastic Straps Vehicle Headrest Vehicle Seat Back 1). Unfold the carrying bag, and place the DVD player on the bag beneath the elastic straps. -
Page 10: Controls, Indicators, And Connectors
F. Controls, Indicators, and Connectors 1. Unit View (Refer to Figure 3) 1) Power LED 2) Remote Control Sensor 3) Cover Open Switch 4) Charge Indicator 5) DC 9-12V Input Jack 6) A/V Out Jack 7) Headphone Jack 2 8) Headphone Jack 1* * Connecting to this headphone jack will disable the internal speakers. -
Page 11: Loading And Playing A Disc
2. Remote Control (Refer to Figure 4) 1) SETUP Button 2) UP Button 3) PREVIOUS Button 4) ENTER Button 5) REVERSE/LEFT Button 6) DOWN Button 7) NUMERIC Buttons 8) DISPLAY Button 9) ZOOM Button 10) SUB Button 11) NEXT Button 12) A-B REPEAT Button 13) FORWARD/RIGHT Button 14) 1/All REPEAT Button... -
Page 12: Basic Operation
H. Basic Operation POWER OPEN PLAY PAUSE STOP NEXT PREVIOUS FORWARD REVERSE LEFT/RIGHT/UP/DOWN ENTER NUMBERS MENU REPEAT DISPLAY ANGLE SUBTITLE AUDIO ZOOM SETUP Turn the unit on/off Remove/load the disc Start Play/Execute item or setting Still Picture (1 time) Stop at the present playing point / (2 times) Stop playback of the DVD/CD Go to the next chapter, track or scene dur- ing playback... -
Page 13: Menu
I. Menu A DVD is divided into sections called titles and chapters. When you play a DVD, a root menu of the disc will appear on the screen of your TV or Monitor. The contents of the menu vary from disc to disc. Press MENU during playback to display the menu. - Page 14 c. Press DISPLAY button a third time to display the Elapsed Time for the chapter. The heading will disappear automatically in 3 seconds. Tt 01 01 Ch 02 17 Chapter Elapsed Time Screen Display d. Press DISPLAY button a fourth time to display the Remaining Time for the chapter.
- Page 15 2. Angle During playback of a disc, press ANGLE button to display the avail- able angles for discs containing multi-angles*, with the current angle number (1) and the total number of angles (2) displaying. Press ANGLE button to select other angles. *NOTE: Not all discs contain this feature.
- Page 16 4. Audio During playback press AUDIO button to select the audio language you desire*, with the current Audio Channel Number (1) and the total number of Audio Channels (2) displayed. Press AUDIO again to select another audio language. The audio display will disappear automatically if the AUDIO button is not pressed within 3 seconds.
- Page 17 6. A-B Repeat a. During playback press A-B button to set the Starting Point A. A-B Repeat Starting Point Screen Display b. Press A-B button a second time to set the Ending Point B and the player will repeatedly play the part between Point A and Point B.
- Page 18 7. Repeat a. During playback press 1/ALL button once to repeatedly play the current chapter. Chapter Repeat ON Screen Display b.During playback press 1/ALL button again to repeatedly play the current title. Title Repeat ON Screen Display c. During playback press 1/ALL button a third time to repeat all chapters and titles.
-
Page 19: Playing Audio Cds
d. Press 1/ALL button a fourth time, to resume normal playback. Repeat Off Screen Display 8. Forward/Reverse Scan a. During playback press uu to scan forward at 2x, 4x, 8x,16x, 32x and normal speed. b. During playback press tt to scan backward at 2x, 4x, 8x,16x, 32x and normal speed. -
Page 20: Playing Jpeg Files
1. Using the Repeat Feature The default mode for the Repeat feature is OFF. Pressing 1/ALL button consecutively changes the repeat options: • Repeat Track- repeats the track that is playing. • Repeat All - repeats the disc that is playing. •... -
Page 21: Connecting To Other Equipment
M. Connecting to Other Equipment 1. AV Out Connecting to a TV or Another Monitor ( Refer to Figure 5) Connect the black end (1/8” plug) of the audio/video cable into the unit’s DVD’s A/V OUT jack, and connect the other end to the AUDIO INPUT jacks on your TV or Monitor using an additional set of AV cable (not included) (white = left audio channel, red = right audio channel, yellow = video). -
Page 22: Setup
N. Setup Press SETUP button to display the Main screen of the SETUP Menu on the screen. Press SETUP button again to exit the SETUP Menu. 1) Press SETUP, the ‘GENERAL SETUP PAGE’ will display on the screen. Main SETUP Menu Screen Display a) Select ‘TV DISPLAY’... - Page 23 b) Select ‘ANGLE MARK’ using the DOWN buttton, and then press the RIGHT button to enter the submenu. Choose Angle Mark on or off using the UP/DOWN button and then press ENTER button to confirm the setting. Press the LEFT button to return. G eneral S et up Page TV Display Angle Mar k...
- Page 24 d)Select ‘SCREEN SAVER’ using the DOWN button. and then press the RIGHT button to enter the submenu. Choose Screen saver on or off using the UP/DOWN buttons and then press ENTER button to confirm the setting. Press the LEFT button to return.
- Page 25 2) Select ‘VIDEO QUALITY SETUP’ by using the LEFT/RIGHT buttons, press ENTER button to enter the VIDEO QUALITY SETUP PAGE. Br ight ness C ont rast H ue Satur ation G o To Video Setup P age Video Quality Setup Screen Display a) Select ‘BRIGHTNESS’...
- Page 26 3) Select ‘PASSWORD’ using the LEFT or RIGHT buttons, then press the ENTER button to enter the submenu. Password Setup Page Screen Display Press ENTER button twice to enter the PASSWORD CHANGE PAGE. Input the Old Password or the Default Password, the New Password, and the Confirmed New Password.
- Page 27 4) With no disc inside the player select ‘PREFERENCE’ using the LEFT or RIGHT button, then press ENTER button to enter the ‘PREFERENCE PAGE’. Audio Subtitle D isc M enu Par ental D ef ault G o To P reference P age Preference Page Screen Display a) Select ‘AUDIO’...
-
Page 28: Preferred Subtitle Language
b) Select ‘SUBTITLE’ using the DOWN button, then press ENTER button to enter the submenu. Select the desired subtitle language or OFF using the UP or DOWN buttons, then press ENTER to confirm the setting. Press LEFT to return. Pr eference Page Audio Subtitle D isc M enu... - Page 29 d) Select ‘PARENTAL’ using the DOWN button, then press ENTER button to enter the submenu. Pr eference Page Audio Subtitle D isc M enu Par ental D ef ault Set Parental Control Parental Preference Screen Display Select the parental level you desire using the UP or DOWN button for discs with lock-out function or multiple rating levels.
-
Page 30: Specifications
O. Specifications Compatible DISC: DVD, CD, CD-R, CD-RW, DVD+/-R, DVD+/-RW Signal system: NTSC Panel size: 9 inch Frequency response: 20 Hz to 20 kHz Video output: 1 Vp-p/75 Ohm, unbalanced Audio output: 1.4Vrms/10kOhm Audio S/N: Better than 60 dB Dynamic range : Better than 85 dB Laser: Semiconductor Laser, Wave Length: 650 nm/795 nm Power source: DC 9-12V Power consumption: 7W... - Page 31 Each full recharge takes approximately five hours and one full charge can provide power to the player for approximately 2 hours. During recharge, the red indicator will stay on. Once fully recharged, the red light will turn off. At this point you may remove the wall plug and stop charging.
-
Page 32: Troubleshooting
Q. Troubleshooting PROBLEM No sound or distorted sound Can’t advance through a movie The icon ( appears on screen Picture is distorted No forward or reverse scan SOLUTION • Make sure the DVD player is connected properly. Make sure all cables are securely inserted into the appropriate jacks. - Page 33 Troubleshooting (Cont) PROBLEM IR sensor inoperative Disc won’t play Play starts, but then stops immediately The descriptions and characteristics in this owner’s manual are for the purpose of general reference only and not as a guarantee. In order to provide you with the highest quality product, we may make changes or modifications without prior notice.
- Page 34 12 MONTHS LIMITED WARRANTY Applies to Audiovox Consumer Goods Video Products AUDIOVOX ELECTRONICS CORP. (the Company) warrants to the original retail purchaser of this product that should this product (excluding game controllers) under normal use and conditions, be proven defective in material or workmanship within 12 months from the date of original purchase, such defect(s) will be repaired or replaced with reconditioned product (at the Company's option) without charge for parts and repair labor.
- Page 35 IMPORTANTE INSTRUCCIONES DE SEGURIDAD Alguna de la siguiente información quizá no se aplique a su producto en particular. Sin embargo, como con cualquier producto electrónico, se deben tomar precauciones durante su manejo y uso. • Lea estas instrucciones. • Conserve estas instrucciones. •...
- Page 36 INFORMACION ADICIONAL DE SEGURIDAD • El aparato no debe quedar expuesto a goteos o salpicaduras de líquidos, y, por lo tanto, no se deben colocar sobre el aparato objetos que contengan líquidos, como por ejemplo vasos. • Siempre deje suficiente espacio para ventilación alreadedor del producto. No ponga el producto en la cama, alfombra, librero o gabinete que pueda obstruir la corriente de aire a través de apeturas de ventilación.
- Page 37 CAUTION RIESGO DE CHOQUE ELÉCTRICO E l s í m b o l o d e l Precaución: para reducir el relámpago terminado riesgo de choque eléctrico, en flecha dentro de un no retire la cubierta (o la triángulo equilátero parte posterior).
- Page 38 Fabricante / Parte responsable Audiovox Electronics Corp., 150 Marcus Blvd., Hauppauge, NY 11788 This Class B digital apparatus complies with Canadian ICES-003. Cet appareil numérique de la classe B est conforme à la norme NMB-003 du Canada.
- Page 39 Contenido A. Introducción ...7 B. Información sobre DVD y Disco... 7 C. Contenido ...8 D. Suministro de energía e instalación ... 8 E. Instalación en vehículo ..9 F. Controles, Indicadores y Conectores ..10 G. Carga y reproducción de un isco...11 H.
-
Page 40: Introducción
A. Introducción Gracias por seleccionar el reproductor DVD D1929B portátil. Las principales características incluyen una pantalla de 9" (16:9 Relación de Aspecto), monitor con pantalla de cristal líquido (LCD) y un reproductor DVD. La unidad aplica la más avanzada electrónica y está diseñada para usarse en hoteles, oficinas, en el hogar o en vehículos. -
Page 41: Suministro De Energía E Instalación
C. Contenido 1. 1 Reproductor DVD Portátil de 9 pulgadas 2. 1 adaptador CA a CD 3. 1 control remoto con batería (CR2025) 4. 1 manual de instrucciones 5. 1 cable de audio/vídeo 6. 1 Adaptador de corriente para automóvil 7. -
Page 42: Instalación En Vehículo
E. Instalación en vehículo Instalación del reproductor DVD en el respaldo del asiento en un automóvil (Refiérase a la Figura 2) Bolsa de transporte abierta bandas elásticas cabecera del asiento en el vehículo respaldo del asiento en el vehículo 1). Desdoble la bolsa de transporte y coloque el reproductor DVD debajo de las bandas elásticas. -
Page 43: Controles, Indicadores Y Conectores
F. Controles, Indicadores, y Conectores 1. Vista de la unidad (Refiérase a la Figura 3) 1) LED de Encendido 2) Sensor IR 3) Interruptor de Apertura de Puerta 4) Indicador de Carga 5) Receptáculo DC 9-12V Entrada 6) Receptáculo AV Salida 7) Audífono 2 8) Audífono 1* * Usar el receptáculo de audífono 1 deshabilitará... -
Page 44: Carga Y Reproducción De Un Isco
2. Vista del control remoto (Refiérase a la Figura 4) 1) Botón de Configuración 2) Botón Arriba 3) Botón Anterior 4) Botón Aceptar 5) Botón Exploración Reversa /Izquierda 6) Botón Abajo 7) Teclado Numérico 8) Botón Visualizar 9) Botón Zoom 10) Botón Subtítulo 11) Botón Siguiente 12) Botón Repetir A-B... -
Page 45: Operación Básica
H. Operación básica ENCENDIDO ABRIR REPRODUCIR PAUSA DETENER SIGUIENTE PREVIO ADELANTE REVERSA I ZQUIERDA/ DERECHA/ ARRIBA/ABAJO ACEPTAR NÚMEROS MENÚ REPETIR VISUALIZAR ÁNGULO SUBTÍTULO AUDIO ZOOM CONFIGURACIÓN Enciende/apaga la unidad Retira/carga el disco Inicia Reproducción/Ejecuta el elemento o configuración Imagen congelada (1 vez) se detiene en el punto de reproducción presente /(2 veces) detiene la reproducción del DVD... -
Page 46: Visualización
I. Menú Un DVD está dividido en secciones llamados títulos y capítulos. Cuando usted reproduce un DVD, un menú raíz del disco aparece en la pantalla de su TV o monitor. Los contenidos del menú varían de disco. Presione ‘MENU’ durante la reproducción para mostrar el menú. - Page 47 c. Presione ‘DISPLAY’ una tercera vez para visualizar el Tiempo Transcurrido para el capítulo. El encabezado desaparecerá automáticamente en tres segundos. Tt 01 01 Ch 02 17 Visualización en Pantalla Tiempo Transcurrido de Capítulo d. Presione ‘DISPLAY’ una cuarta vez para visualizar el Tiempo Remanente para el capítulo.
- Page 48 2. ÁNGULO Durante la reproducción de un disco, presione ‘ANGLE’ para visualizar los ángulos disponibles para discos que contengan multi- ángulos*, con el número de ángulo actual (1) y el número total de ángulos (2) a desplegar. Presione el botón ANGLE para seleccionar otros ángulos.
- Page 49 4. AUDIO Durante la reproducción presione ‘AUDIO’ para seleccionar el idioma de audio que desee*, con el Número de Canal de Audio actual (1) y el total de Números de Canales de Audio (2) desplegados. Presione 'AUDIO' otra vez para seleccionar otro idioma de audio.
- Page 50 6. REPETIR A-B a. Durante la reproducción presione ‘A-B’ para establecer el Punto de Inicio A. Visualización en Pantalla Repetir A-B Punto de Inicio b. Presione ‘A-B’ una segunda vez para establecer el Punto Final B y el reproductor reproducirá repetidamente la parte entre el Punto A y el Punto B.
- Page 51 7. REPETIR a. Durante la reproducción presione ‘1/ALL’ una vez para reproducir repetidamente el capítulo actual. Visualización en Pantalla Repetir Capítulo b. Durante la reproducción presione ‘1/ALL’ otra vez para reproducir repetidamente el título actual. Visualización en Pantalla Repetir Título c.
-
Page 52: Reproducción De Cds De Audio
d. Presione ‘1/ALL’ una cuarta vez, para reanudar la reproducción normal. Visualización en Pantalla Repetir Apagado 8. EXPLORACIÓN HACIA ADELANTE / REVERSA a. Durante la reproducción presione uu Para explorar hacia adelante a 2x, 4x, 8x,16x, 32x y velocidad normal. b. -
Page 53: Reproducción De Archivos Jpeg
1. USO DE LA CARACTERÍSTICA REPETIR El modo predeterminado para la caracter ística Repetir es OFF. Presionar ‘1/ALL’ consecutivamente cambia las opciones de repetición: • Repeat Track- repite la pista que est á en reproducción. • Repeat All - repite el disco que está en reproducción. •... -
Page 54: Conexión A Otro Equipo
navegación y el botón ENTER para seleccionar la imagen con la cual usted prefiere comenzar la presentación. 8) Presione el botón PLAY/PAUSE y la presentación hará una pausa. Presione el botón otra vez para reanudar la reproducción de la presentación. M. -
Page 55: Configuración
N. Configuración Presione ‘SETUP’ para mostrar la pantalla principal del menú CONFIGURACIÓN en la pantalla. Presione ‘SETUP’ otra vez para salir del menú CONFIGURACIÓN y la unidad reanudará el último modo de reproducción en que se quedó. 1) Presione SETUP, la ‘PÁGINA DE CONFIGURACIÓN GENERAL’... - Page 56 b) Seleccione ‘ANGLE MARK’ usando el botón de flecha ABAJO, y luego presione el botón DERECHA para entrar al submenú. Elija activar o desactivar Marcar Angulo usando los botones ARRIBA/ABAJO y luego presione ‘ENTER’ para confirmar la selección. Presione el botón IZQUIERDA para regresar. Visualización en Pantalla Marcar Ángulo * ON: la pantalla mostrará...
- Page 57 d) Seleccione ‘SCREEN SAVER’ usando el botón ABAJO, y luego presione el botón DERECHA para entrar al submenú. Elija activar o desactivar Protector de pantalla usando los botones ARRIBA/ ABAJO y luego presione ENTER para confirmar la selección. Presione el botón IZQUIERDA para regresar. G eneral S et up Page TV Display Angle Mar k...
-
Page 58: Configuración De Video
2)Seleccione ‘CONFIGURACIÓN DE CALIDAD DE VIDEO’ usando los botones IZQUIERDA/DERECHA, presione el botón ACEPTAR para entrar a la PÁGINA CONFIGURACIÓN DE CALIDAD DE VIDEO. Visualización en Pantalla Configuración de Calidad de Video a) Seleccione ‘BRIGHTNESS’ usando los botones ARRIBA o ABAJO, luego presione ‘ENTER’. - Page 59 3) Seleccione ‘PASSWORD’ usando los botones IZQUIERDA o DERECHA, luego presione el botón ‘ENTER’ para entrar al submenú. Visualización en Pantalla Página de Configuración de Clave de Acceso Presione ‘ENTER’ dos veces para entrar a la PÁGINA DE CAMBIO DE CLAVE DE ACCESO (PASSWORD CHANGE PAGE). Ingrese la Clave de Acceso Antigua o la Clave de Acceso Predeterminada, la Nueva Clave de Acceso, y la Nueva Clave de Acceso Confirmada.
- Page 60 4) Sin un disco dentro del reproductor seleccione ‘PREFERENCIA’ usando el botón IZQUIERDA o DERECHA, luego presione el botón ACEPTAR para entrar a ‘PÁGINA DE PREFERENCIA’. Visualización en Pantalla Preferencias a) Seleccione ‘AUDIO’ usando el botón ABAJO, luego presione ‘ENTER’ para entrar al submenú. Seleccione el idioma de audio que usted desea usando los botones ARRIBA o ABAJO, luego presione ‘ENTER’...
- Page 61 b) Seleccione ‘SUBTITLE’ usando el botón ABAJO, luego presione ‘ENTER’ para entrar al submenú. Seleccione el idioma de subtítulo deseado o SUBTITLE OFF usando los botones ARRIBA o ABAJO, luego presione ‘ENTER’ para confirmar la selección. Presione IZQUIERDA para regresar. Pr eference Page Audio Subtitle...
- Page 62 d) Seleccione ‘PARENTAL’ usando el botón ABAJO, luego presione ‘ENTER’ para entrar al submenú. Visualización en Pantalla Preferencia Paterna Seleccione el nivel paterno que desee usando los botones ARRIBA o ABAJO para discos con función de bloqueo o múltiples niveles de clasificación. Estos son listados desde el nivel más bajo (1 KID SAFE) al nivel más alto (8 ADULT).
-
Page 63: Especificaciones
O. Especificaciones Discos compatibles: Sistema de señal: NTSC Tamaño de panel: 9 pulgadas Respuesta de frecuencia: 20 Hz a 20 kHz Salida de video: 1 Vp-p/75 Ohm, no balanceada Salida de audio: 1.4Vrms/10kOhm Audio S/N: mejor que 60 dB Rango dinámico: mejor que 85 dB Láser: Semiconductor Láser, longitud de onda: 650 nm/795 nm Fuente de alimentación: DC 9-12 V Consumo de energía: 7 W... - Page 64 Cada recarga completa se lleva aproximadamente 5 horas y una carga completa puede proveer energía al reproductor por aproximadamente 2 horas. Durante la recarga, el indicador rojo permanecerá encendido. Una vez completamente cargada, la luz roja se apagará. En este punto usted puede retirar la clavija de la pared y detener la carga.
- Page 65 Q. Solución de Problemas PROBLEMA • Asegúrese de que el reproductor DVD está No hay sonido o conectado correctamente. Asegúrese que todos el sonido es los cables estén bien insertados en los distorsionado receptáculos apropiados. No se puede • Usted no puede avanzar durante la presentación avanzar a lo de los créditos de apertura y la informaón de largo de una...
-
Page 66: Solución De Problemas
Solución de Problemas (Cont.) PROBLEMA El sensor IR no funciona El disco no se reproduce La reproducción inicia pero luego se detiene inmediatamente Las descripciones y características en este manual del propietario son con el objetivo de una referencia general solamente y no como una garantía. -
Page 67: Garantía Limitada De 12 Meses
GARANTÍA LIMITADA DE 12 MESES Aplica a los Productos de Video de Bienes al Consumidor de Audiovox AUDIOVOX ELECTRONICS CORP. (la Compañía) garantiza al comprador al detalle original de este producto que, en el caso de que se encuentre que el... - Page 68 Audiovox Electronics Corporation 150 Marcus Boulevard Hauppauge, NY 11788 www.audiovox.com 128-8589 (V 2.0) © 2009 Audiovox Electronics Corporation Printed in China...
Need help?
Do you have a question about the D1929B and is the answer not in the manual?
Questions and answers